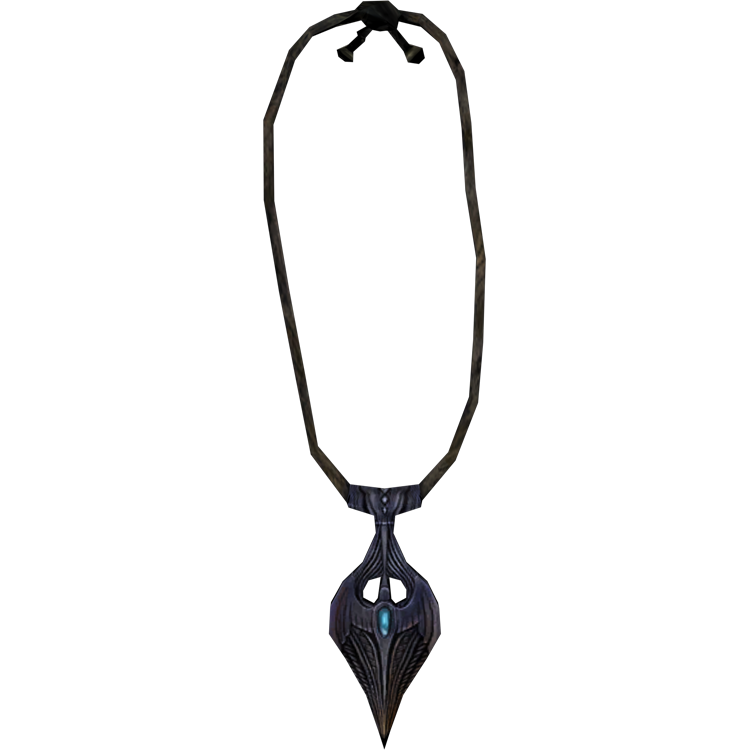
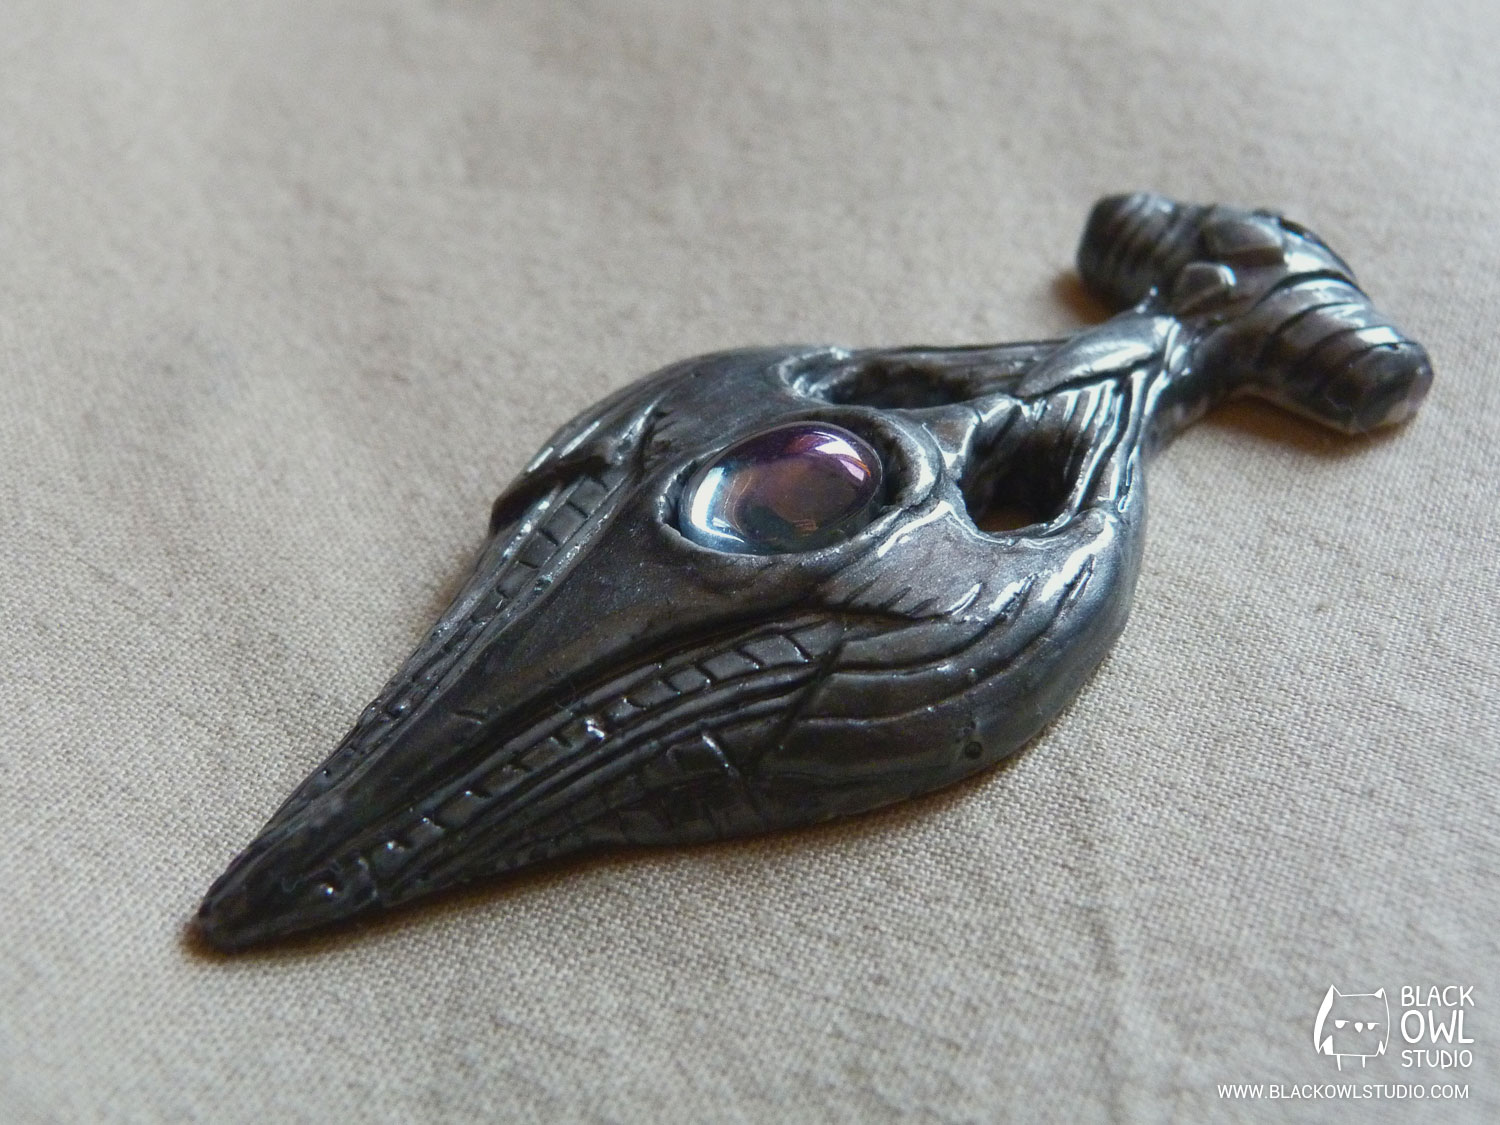
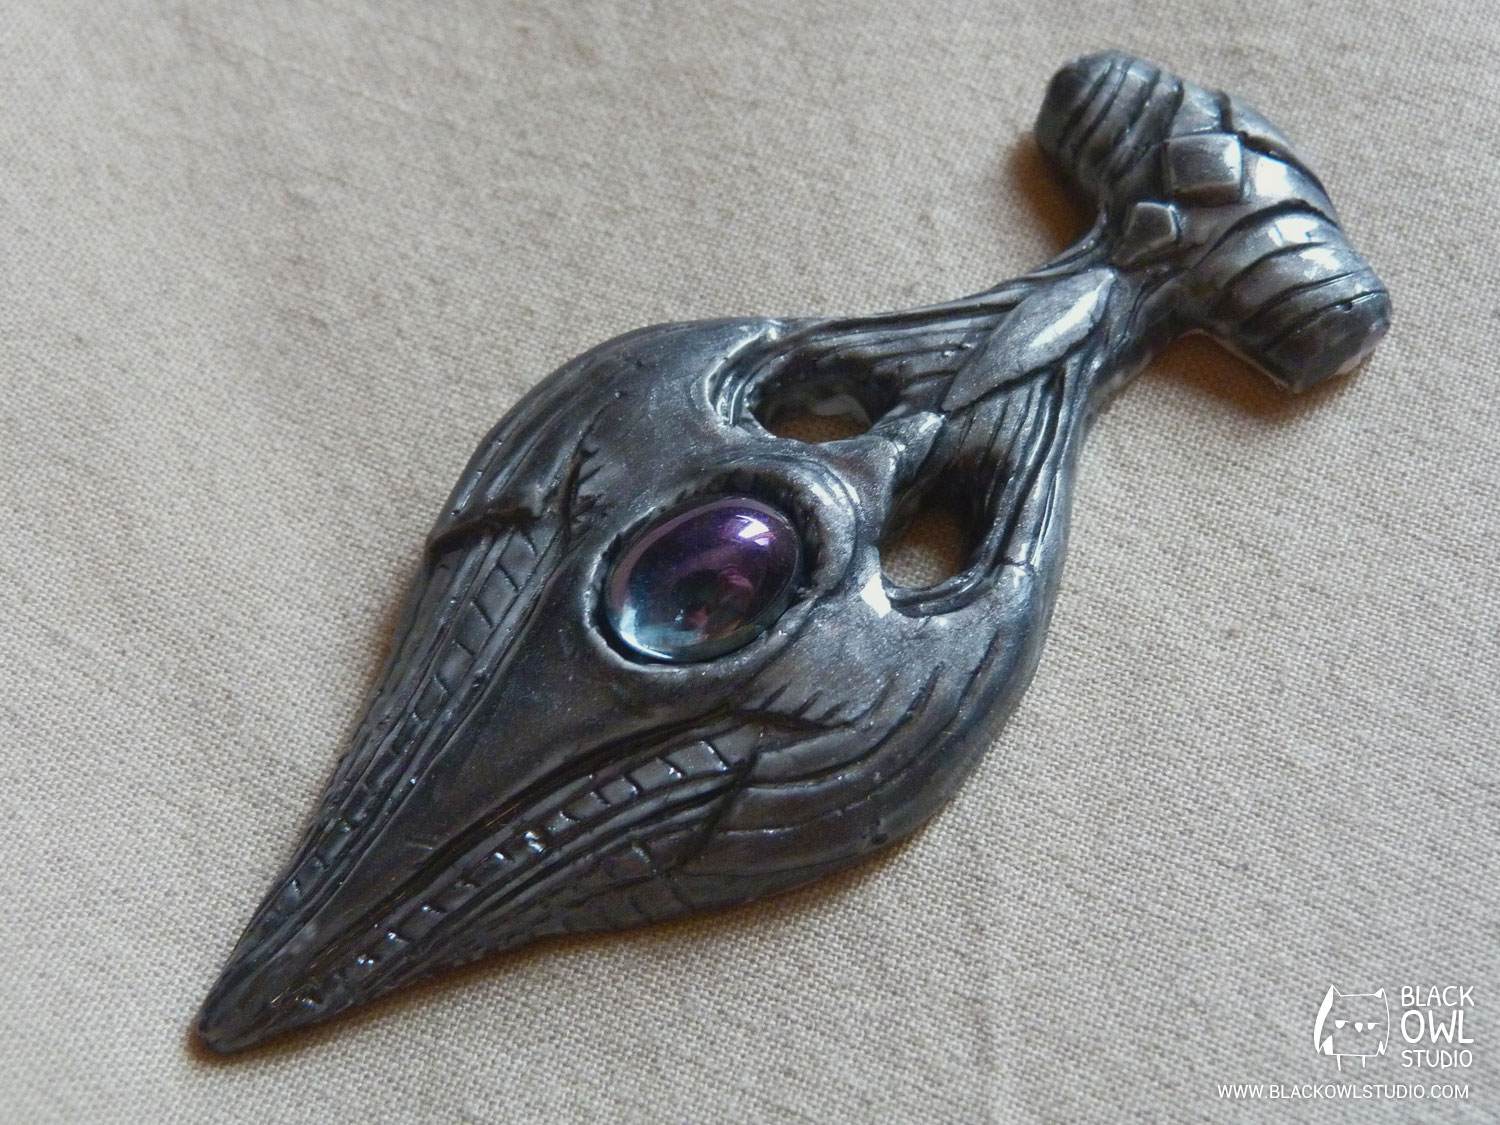
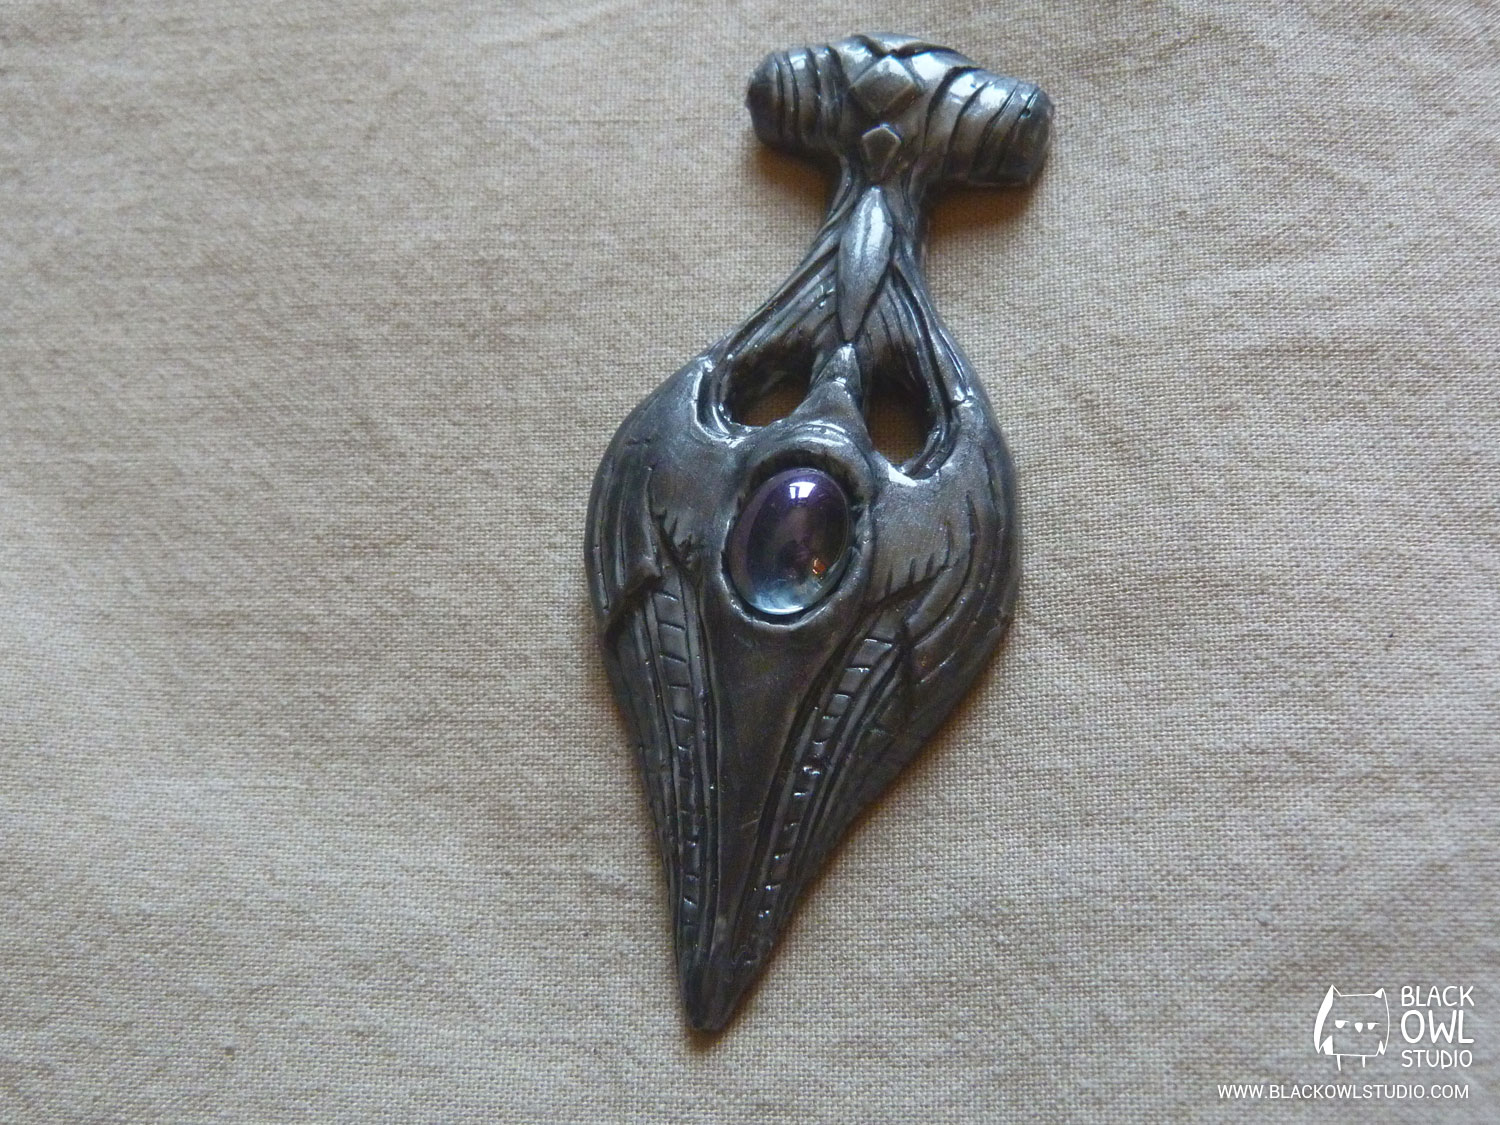
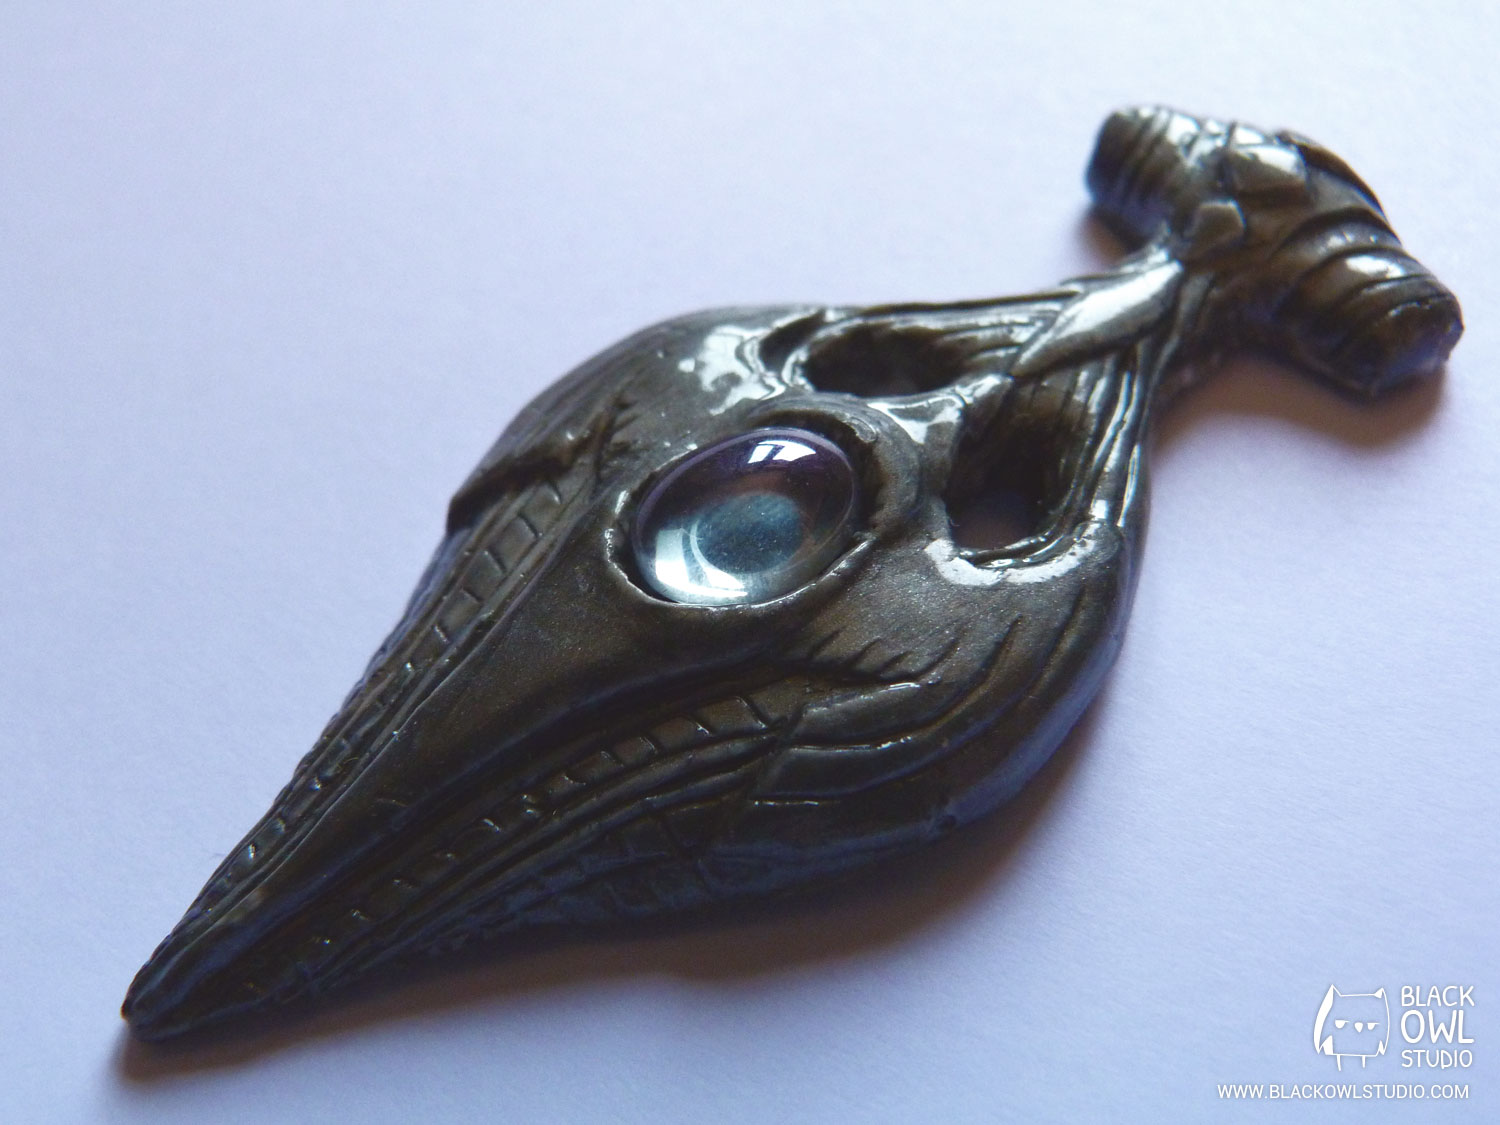
Amulet of Kynareth
[02/27/20 EDIT:] This amulet was made in 2013, when we started with the molding / resin casting methods. Even if the overall method remains valid, certain techniques have been improved over time, practice and the appearance of new materials.
As for The Gauldur Amulet before, I am going to explain to you the different steps to make the Amulet of Kynareth.
Modeling the amulet
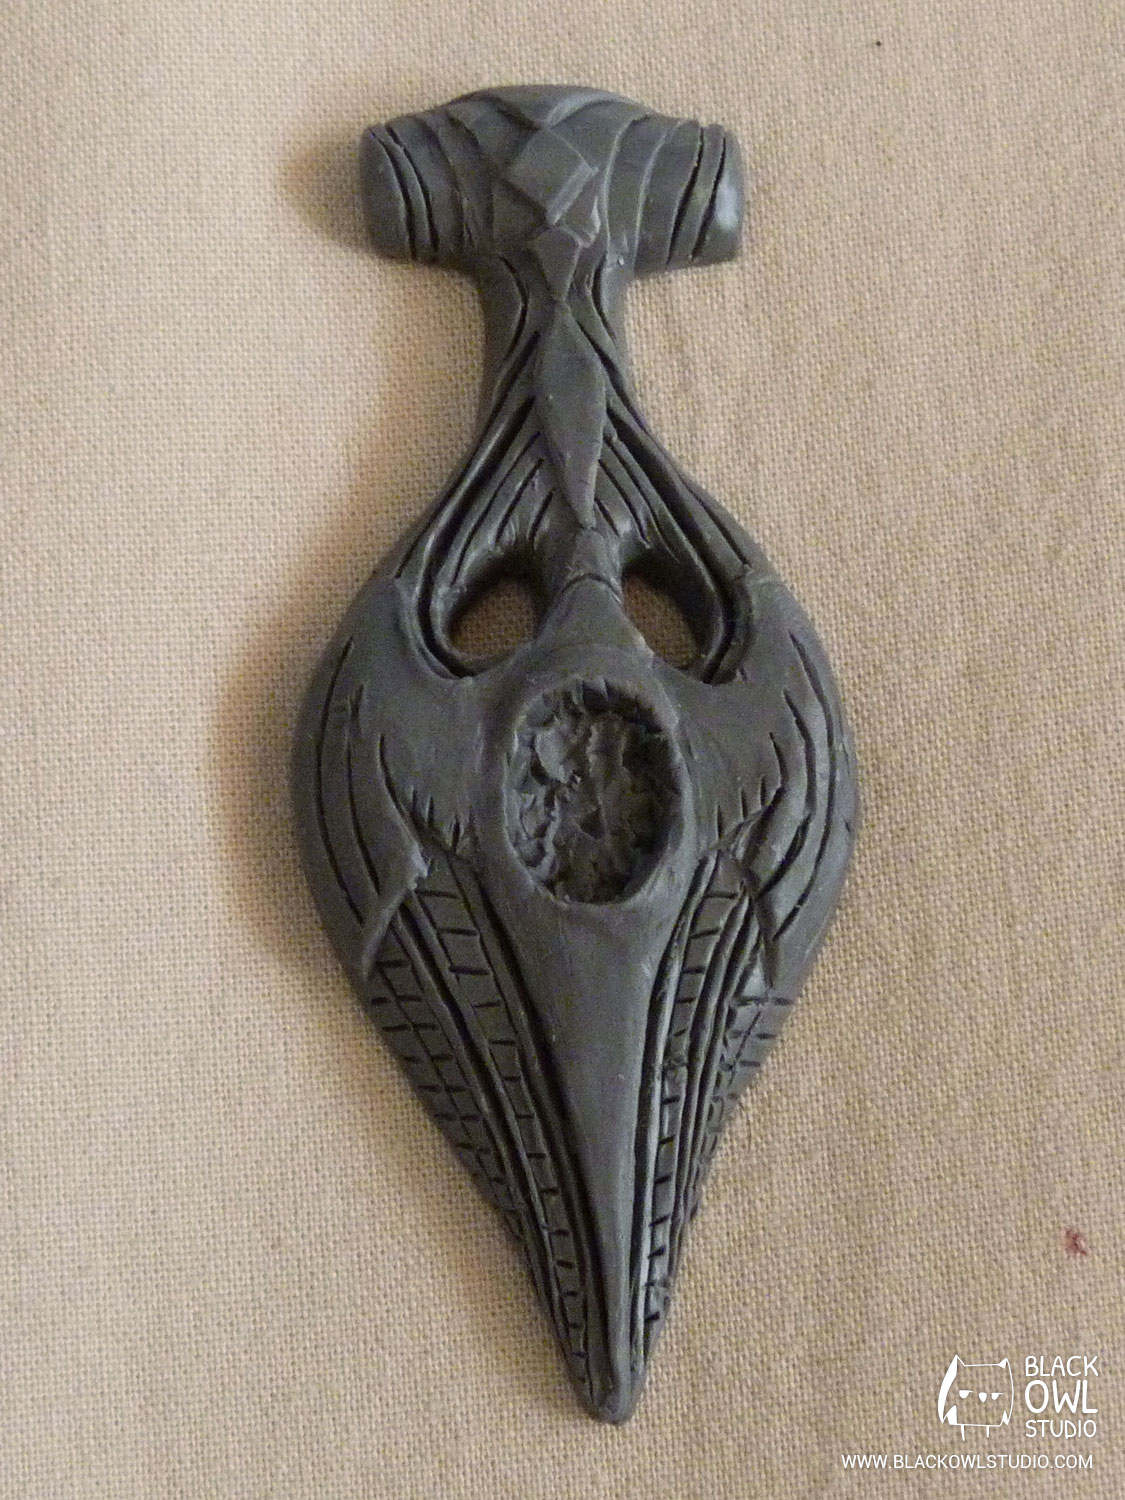
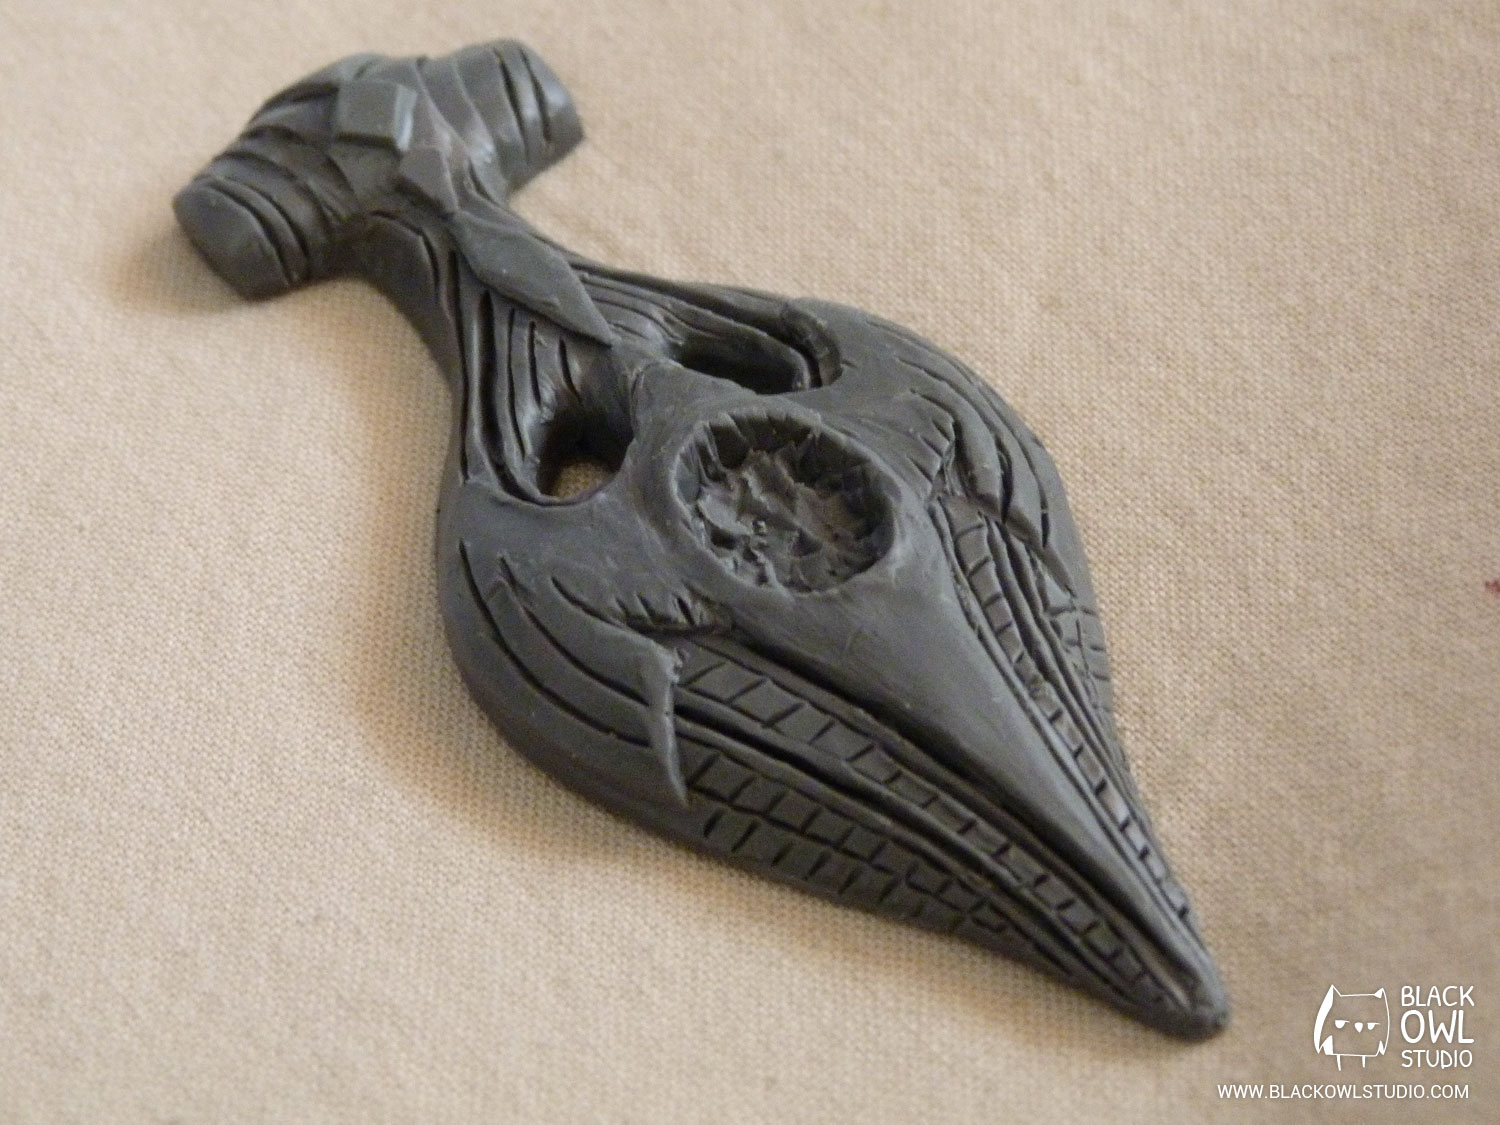
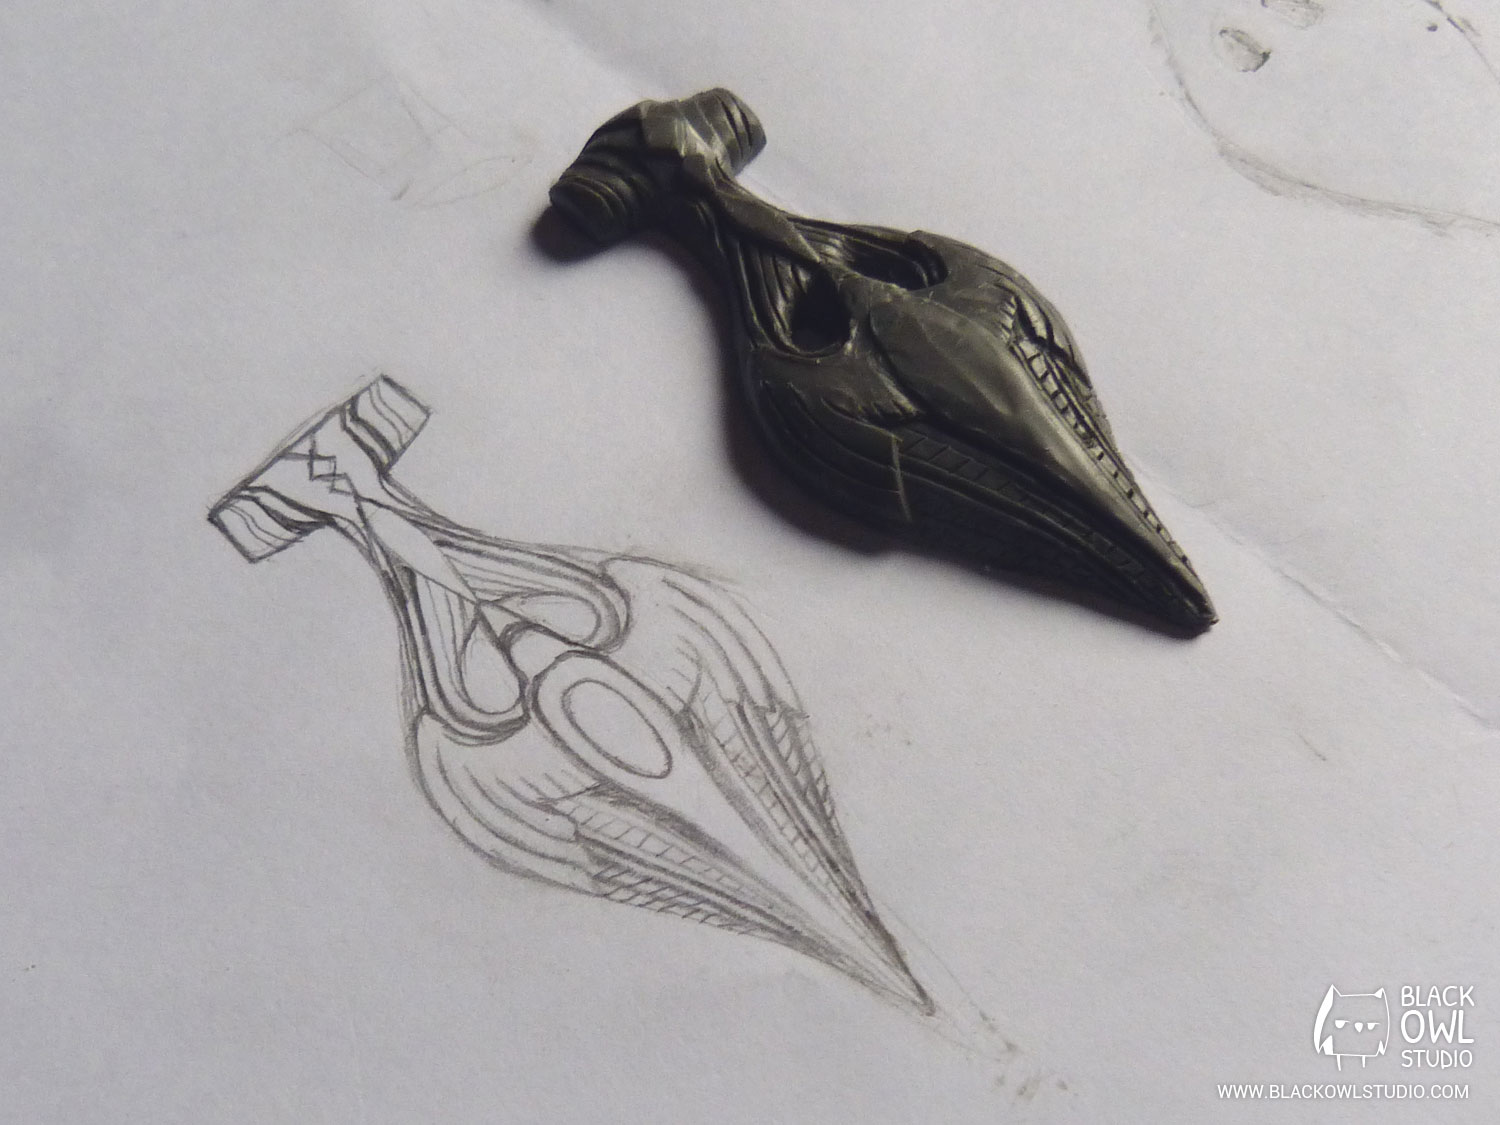
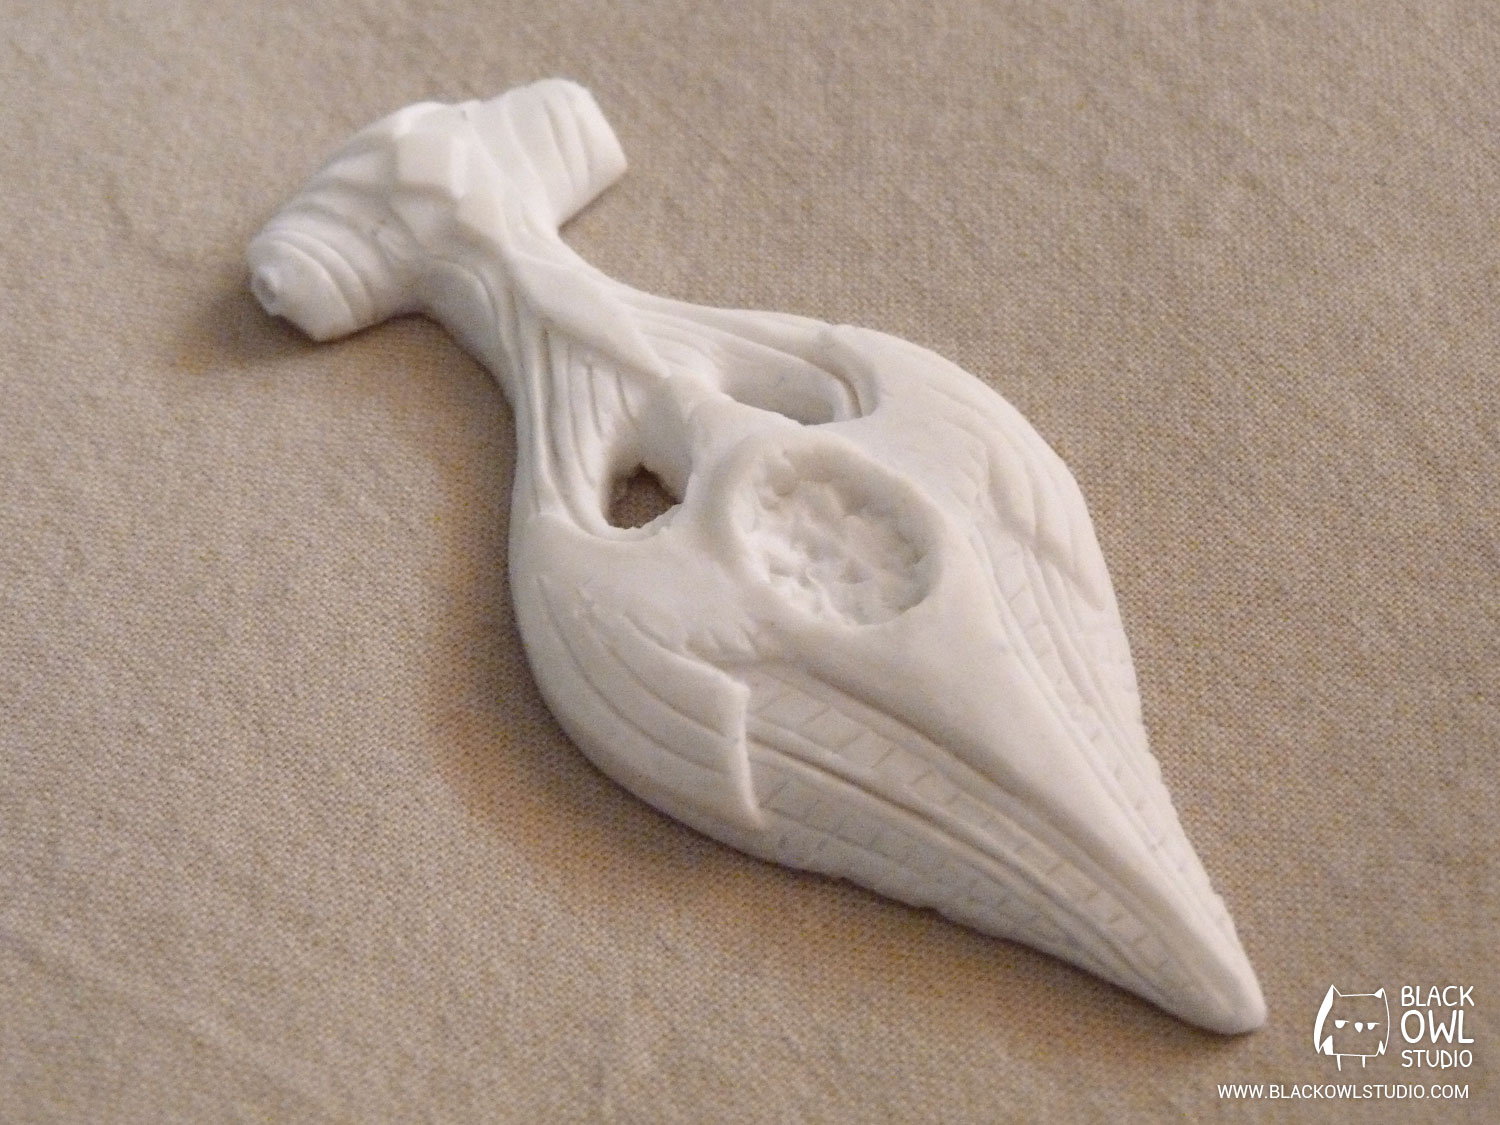
Even though it looks small, the amulet of Kynareth carries a lot of details. I chose to redraw it on a paper with all its grooves and patterns. This drawn model also allows me to check if the proportions are correct. I could have printed the in-game model, but the color is a bit too dark and the details not so noticeable.
The model we have here is made of grey Plastiline, hardness 55. You can heat the Plastiline by hand or with a hair dryer (you better use your hands for this one because of the small details).
Be careful if you’re using Plastiline on a smooth surface (varnished wood, glass, oilcloth, etc.). Plastiline tends to stick when you press on it. Once stuck, it is very hard to remove
the piece without breaking it.
To avoid this problem, you can either:
- Work Plastiline on a paper sheet (you can twist and fold it even if it is stuck), or on a cardboard (beware of varnished cardboard, Plastiline tends to stick to it too!).
I use this method, but it can be more difficult for you to work on the sculpture as your piece of Plastiline may also move across the surface of the sheet/cardboard.
OR you can:
- Shift your piece regularly to prevent it to stick too much (this method seems a bit impractical but at least the piece of Plastiline won’t move when you work on it).
Mold and resin cast
We create the mold following the block mold method, with RTV 127 silicone.
Block mold:
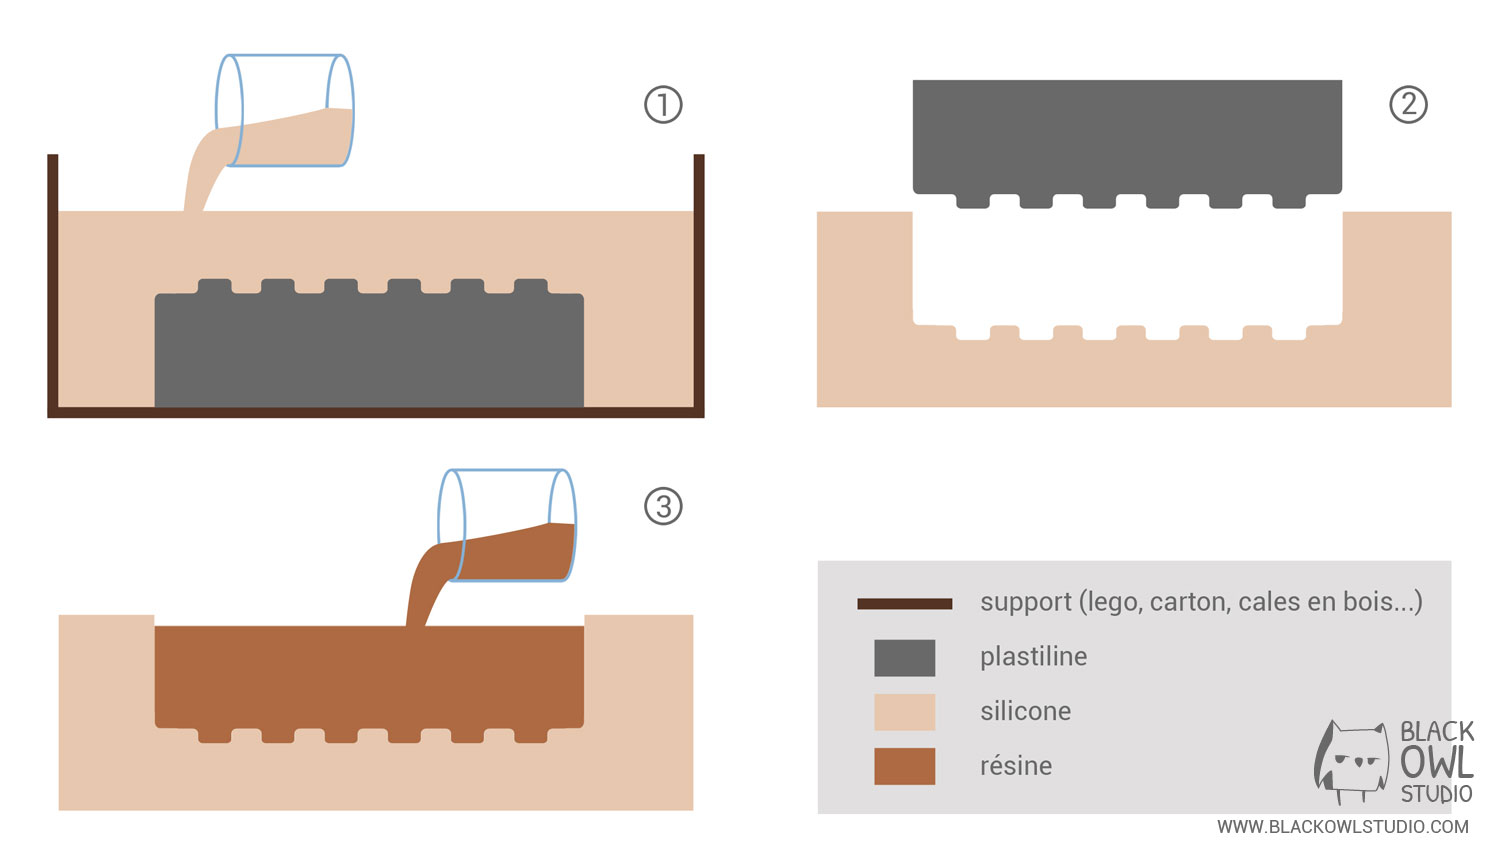
1) Applying silicone
Place your plastiline model on a rigid support of the same size (or slightly bigger). Be careful not to create bubbles when applying the silicone. To avoid flaws on the finished mold, apply a first layer of silicone on the plastiline model using a soft brush, before pouring the rest on it.
Warning: Silicone has kind of a Nutella texture (except it is not edible and does not smell as good)… It sticks to everything, is not totally liquid, and easily drips everywhere (it makes filaments between the cup and the spoon). Sooo, protect your workbench, don’t put silicone on yourself (if it happens, wash with tempered water and soap) and get some paper towels (to put your tools on them after use).
NB: Silicone is easy to wash on a smooth surface: wait until it dries and simply remove it.
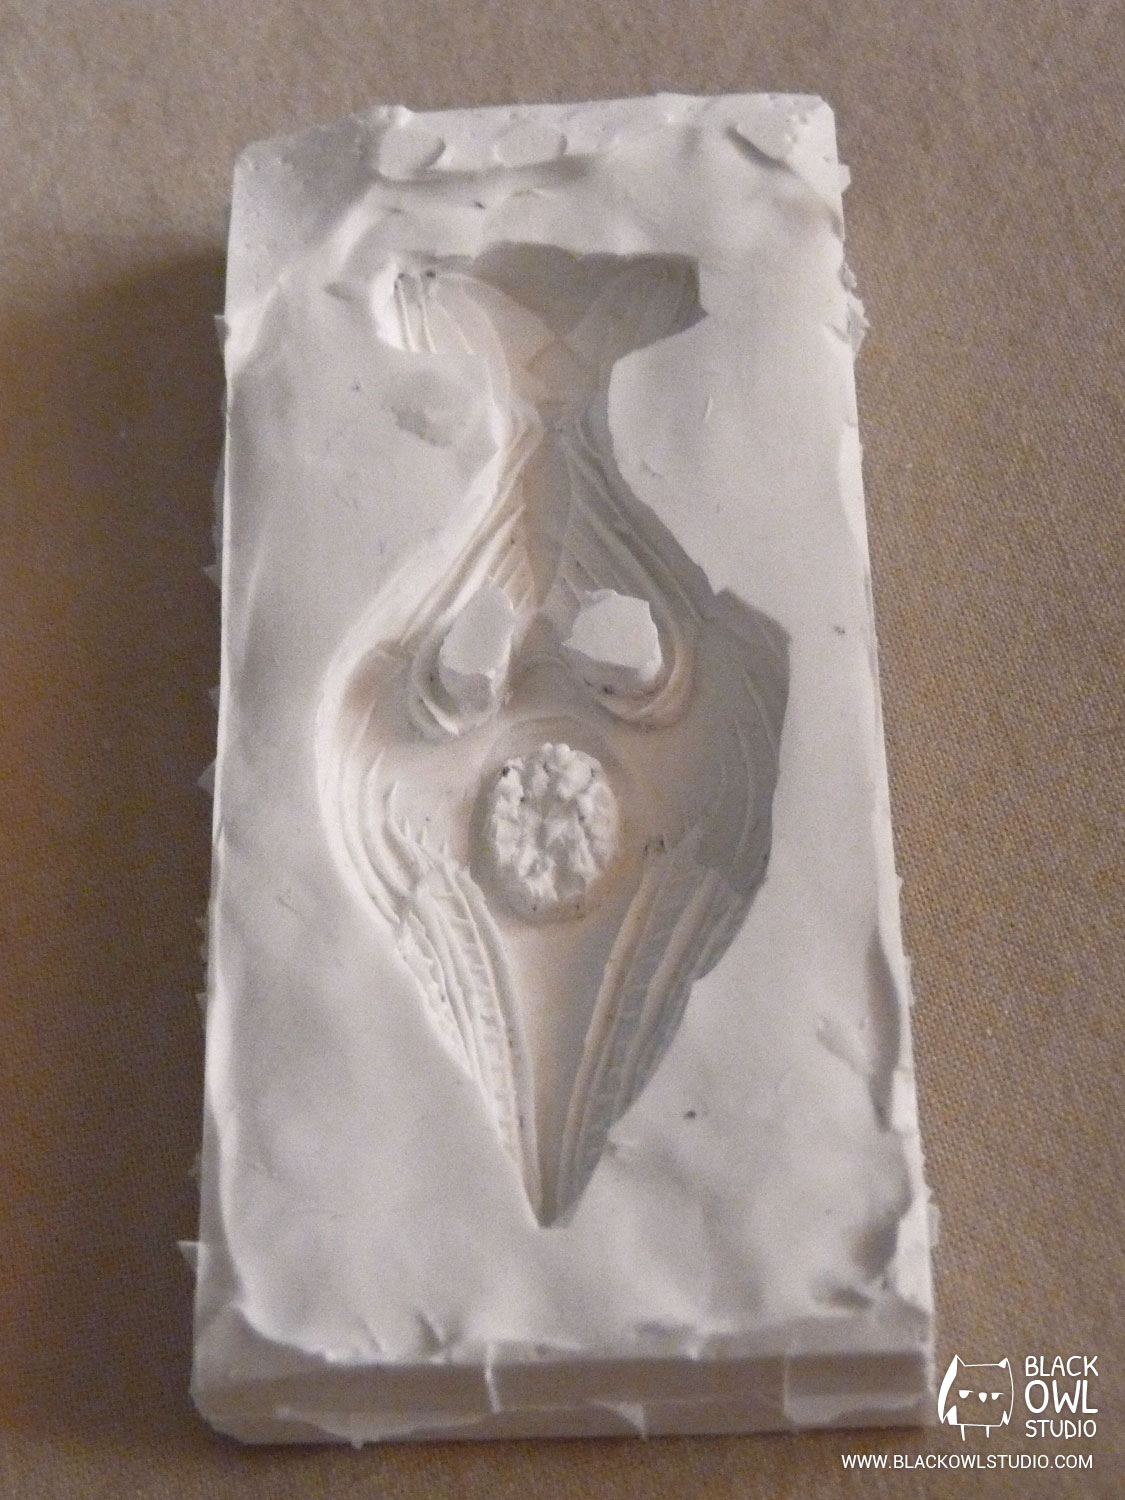
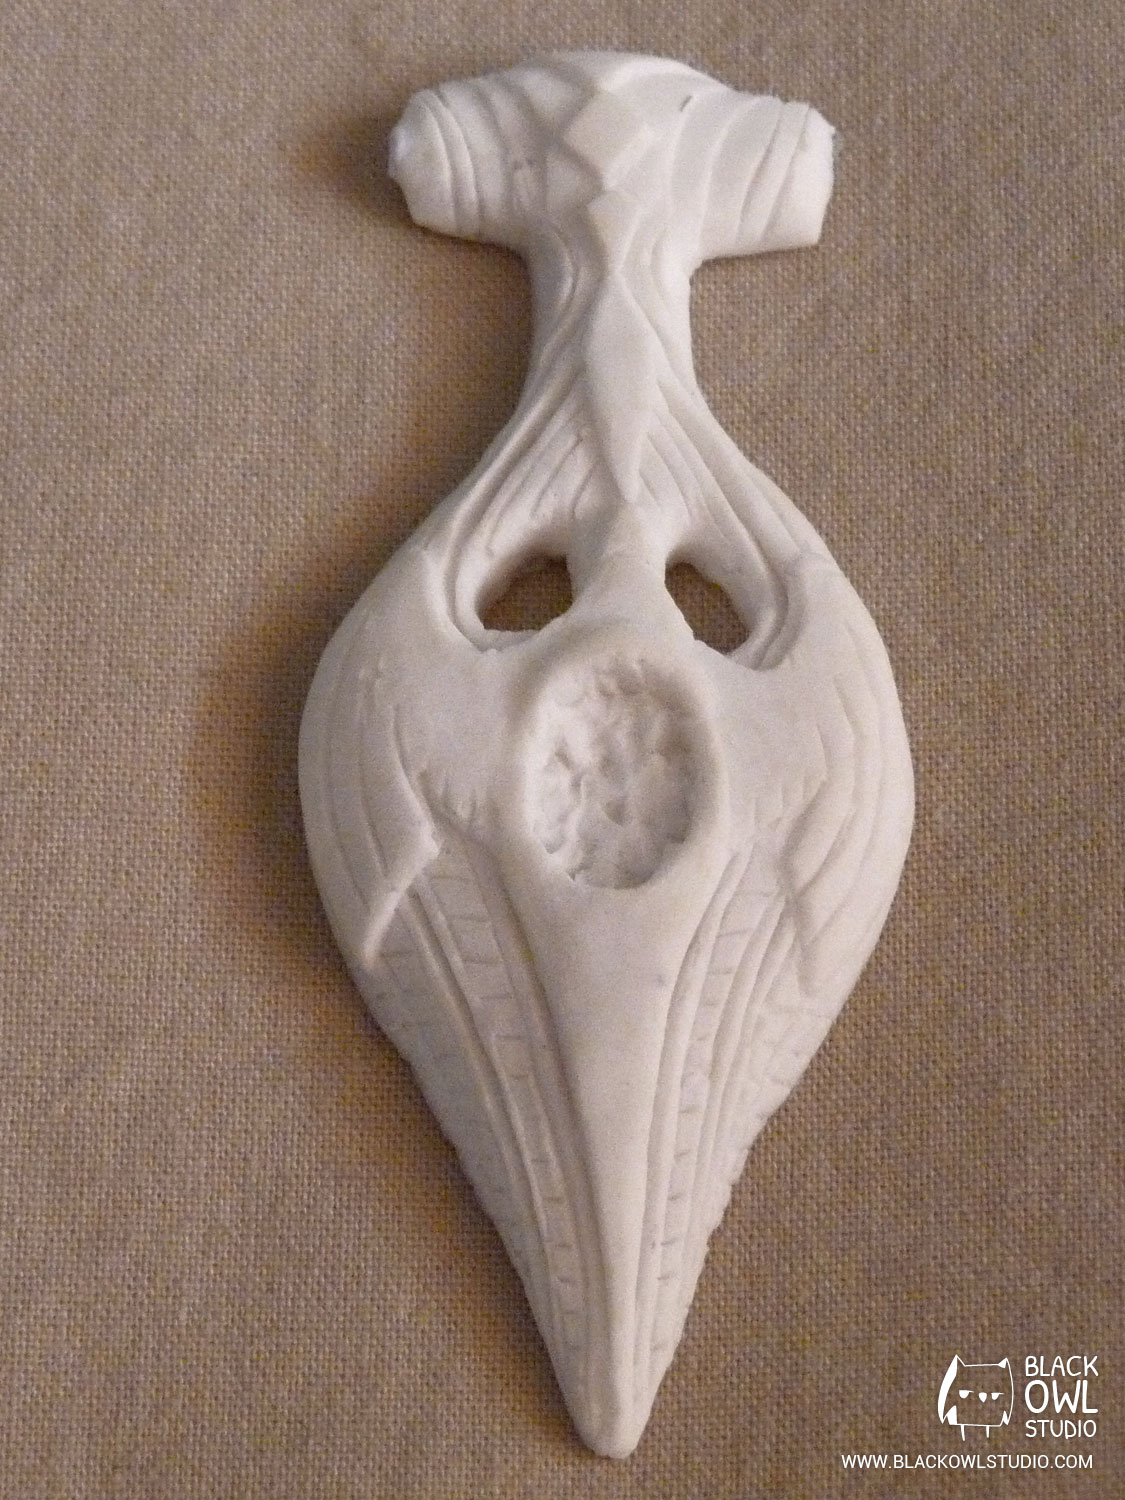
2) Removing Plastiline
When the silicone is dry, remove the Plastiline model from the mold. Take care not to damage it! Who knows, if the silicone mold contains a defect (a bubble or a crack for example), you will be happy to be able to re-use your Plastiline model in order to create a new mold instead of starting all over again. Plan a drying time of approx. 24h.
3) Applying resin
The cast is made of acrylic resin, which has the advantage of being non-toxic and odourless.
To capture all the details of the amulet, apply a first layer of resin with a brush (you may have bubbles otherwise).
Warning: NEVER pour the resin leftovers in your sink, not even the brushes’ rinse water. An effective method is to wash your brush in a glass of acetone. Acetone will evaporate, leaving only solid residues that you can simply throw away.
Resin drying time is not really long; count 2 to 3 hours for a completely dried piece.
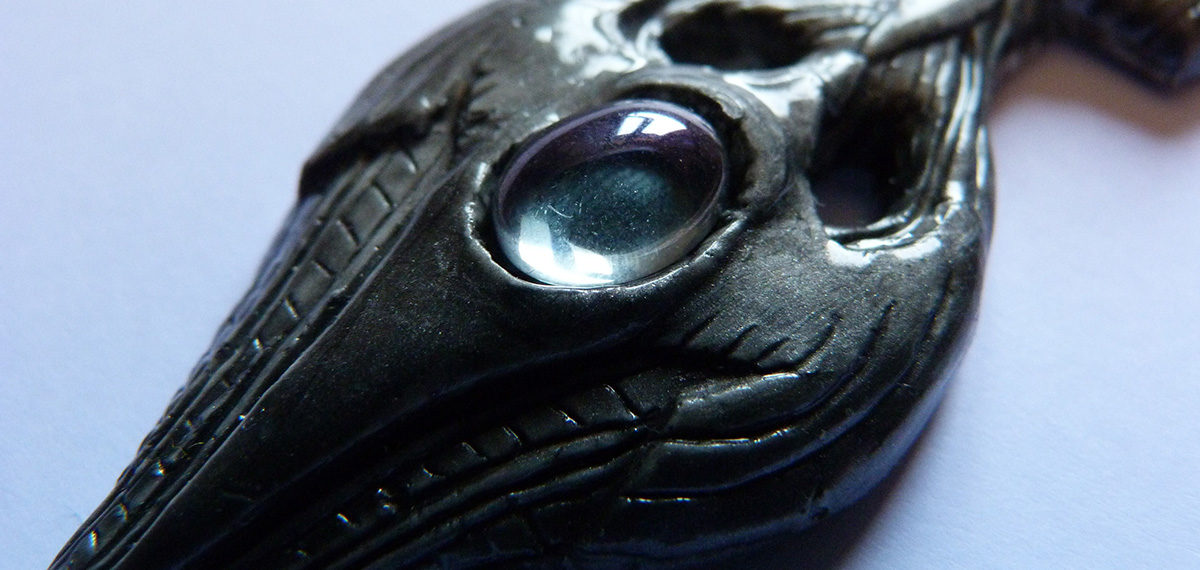
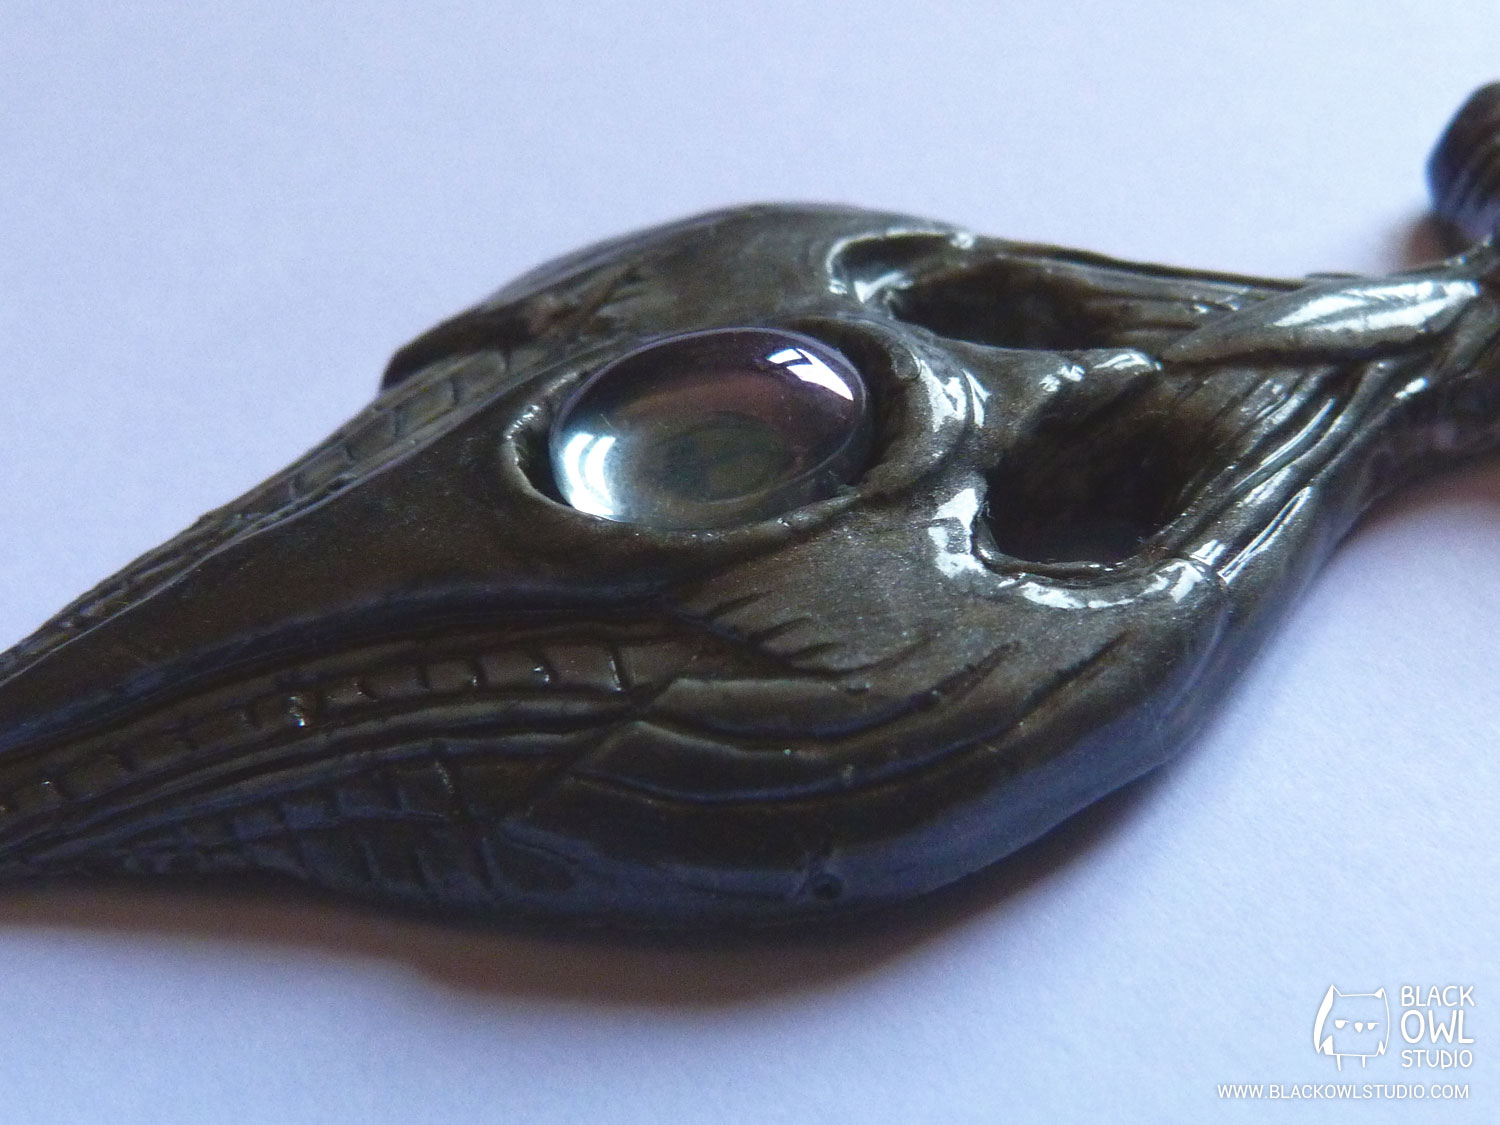
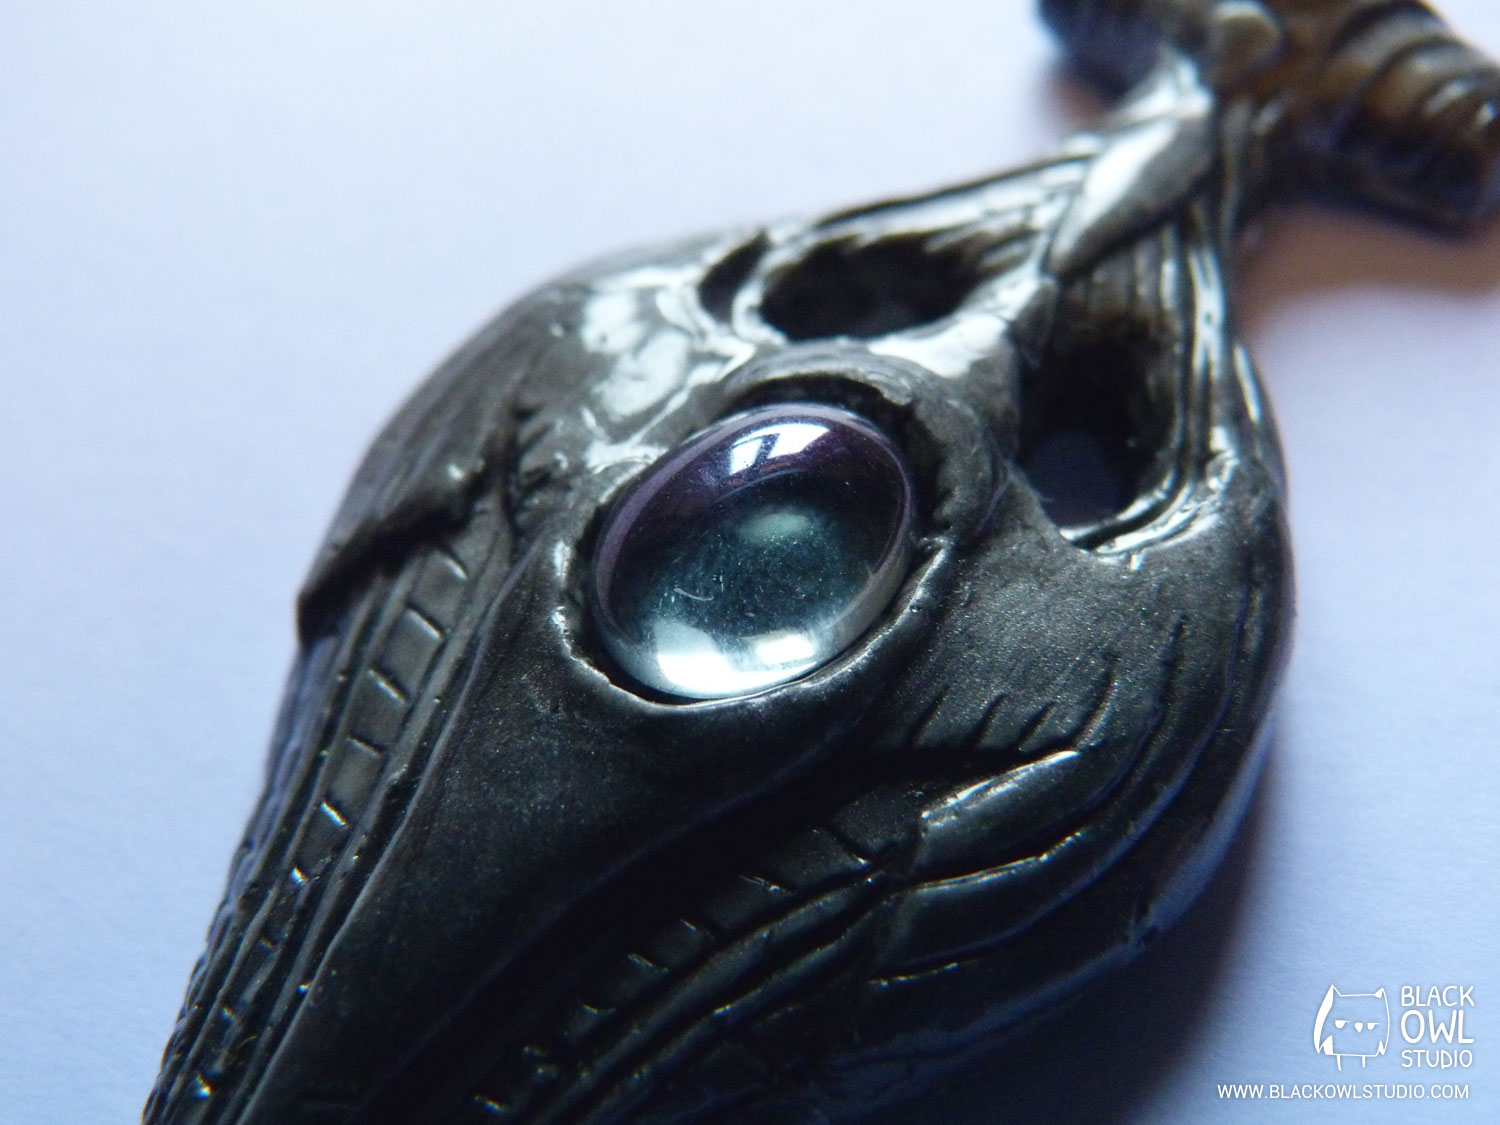
Painting and finishing touches
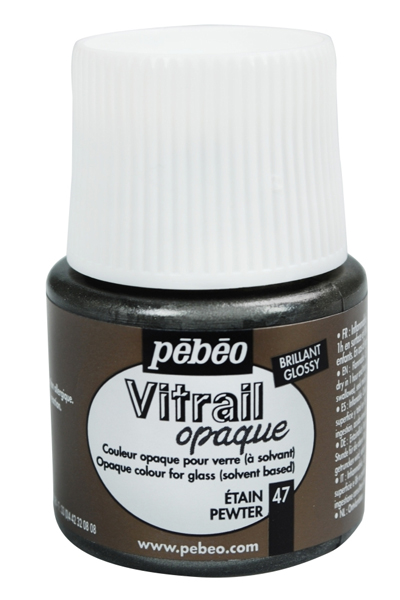
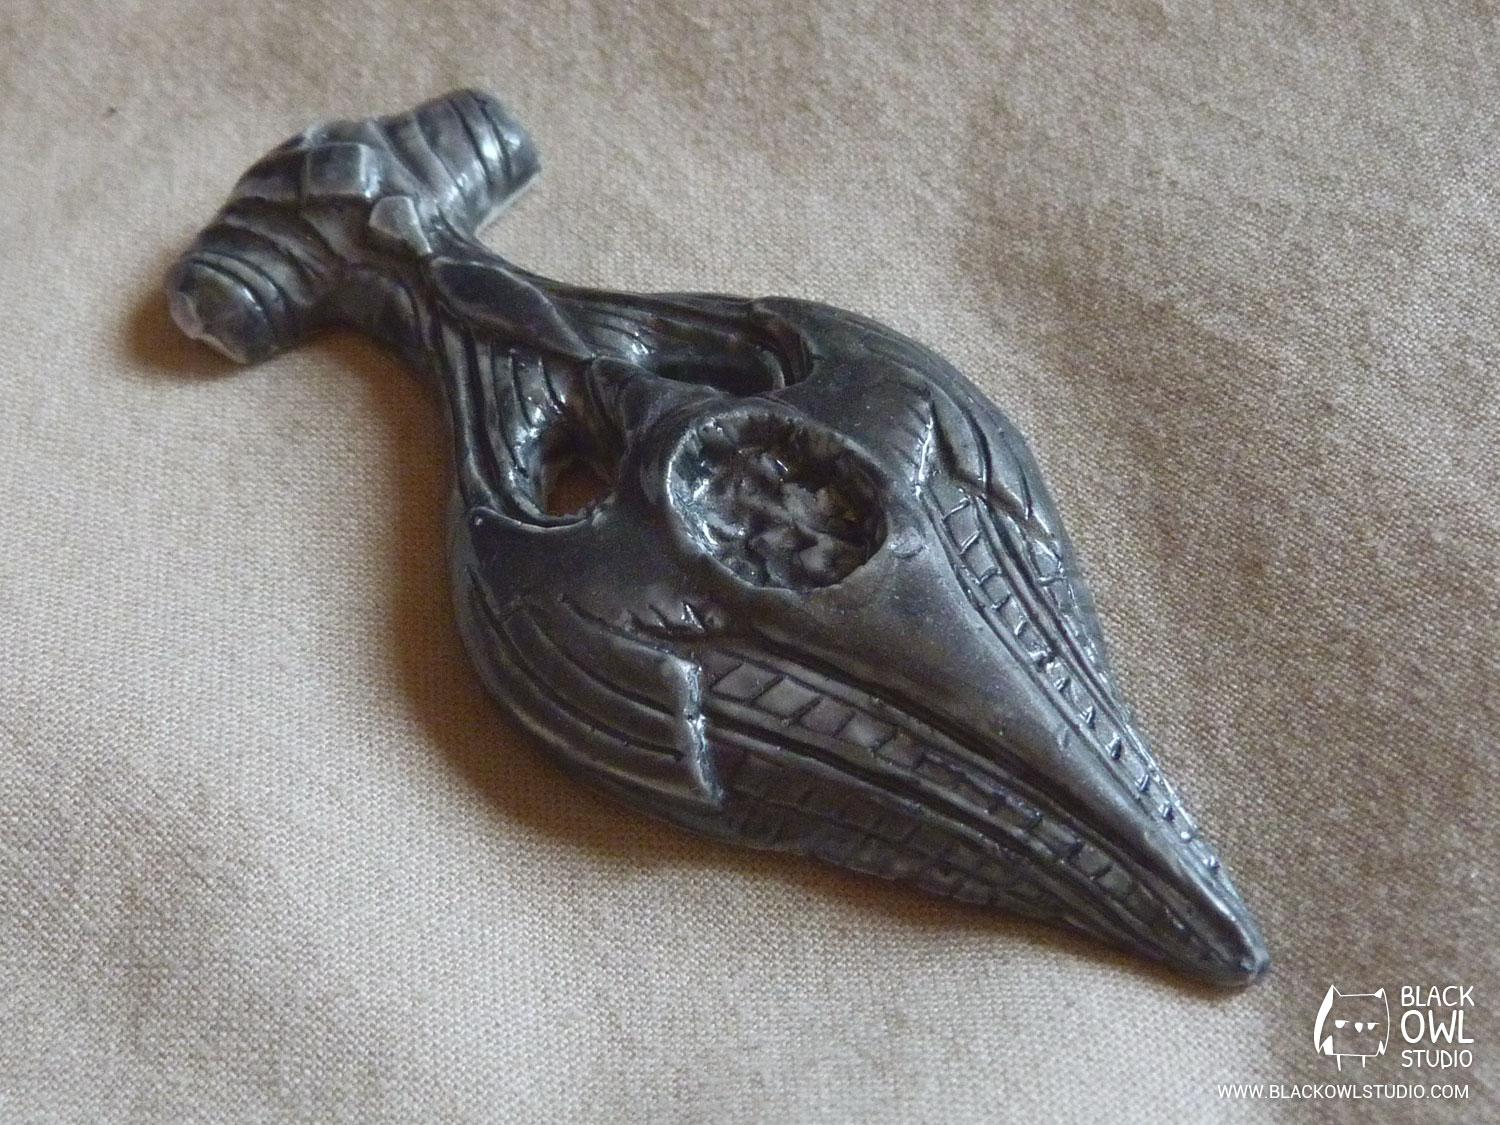
I used a tin-colored, opaque stained-glass paint to give the amulet a metallic, varnished aspect. If you prefer, you can use a silver acrylic paint to make it less shiny.
Stained-glass paint is a bit slow to dry and smells a lot. Ventilate the room and wait at least 24 hours for a complete drying.
To wash your brush, a simple glass of water should be enough. However, if the paint begins to dry on your brush, wash it with a bit of turpentine.
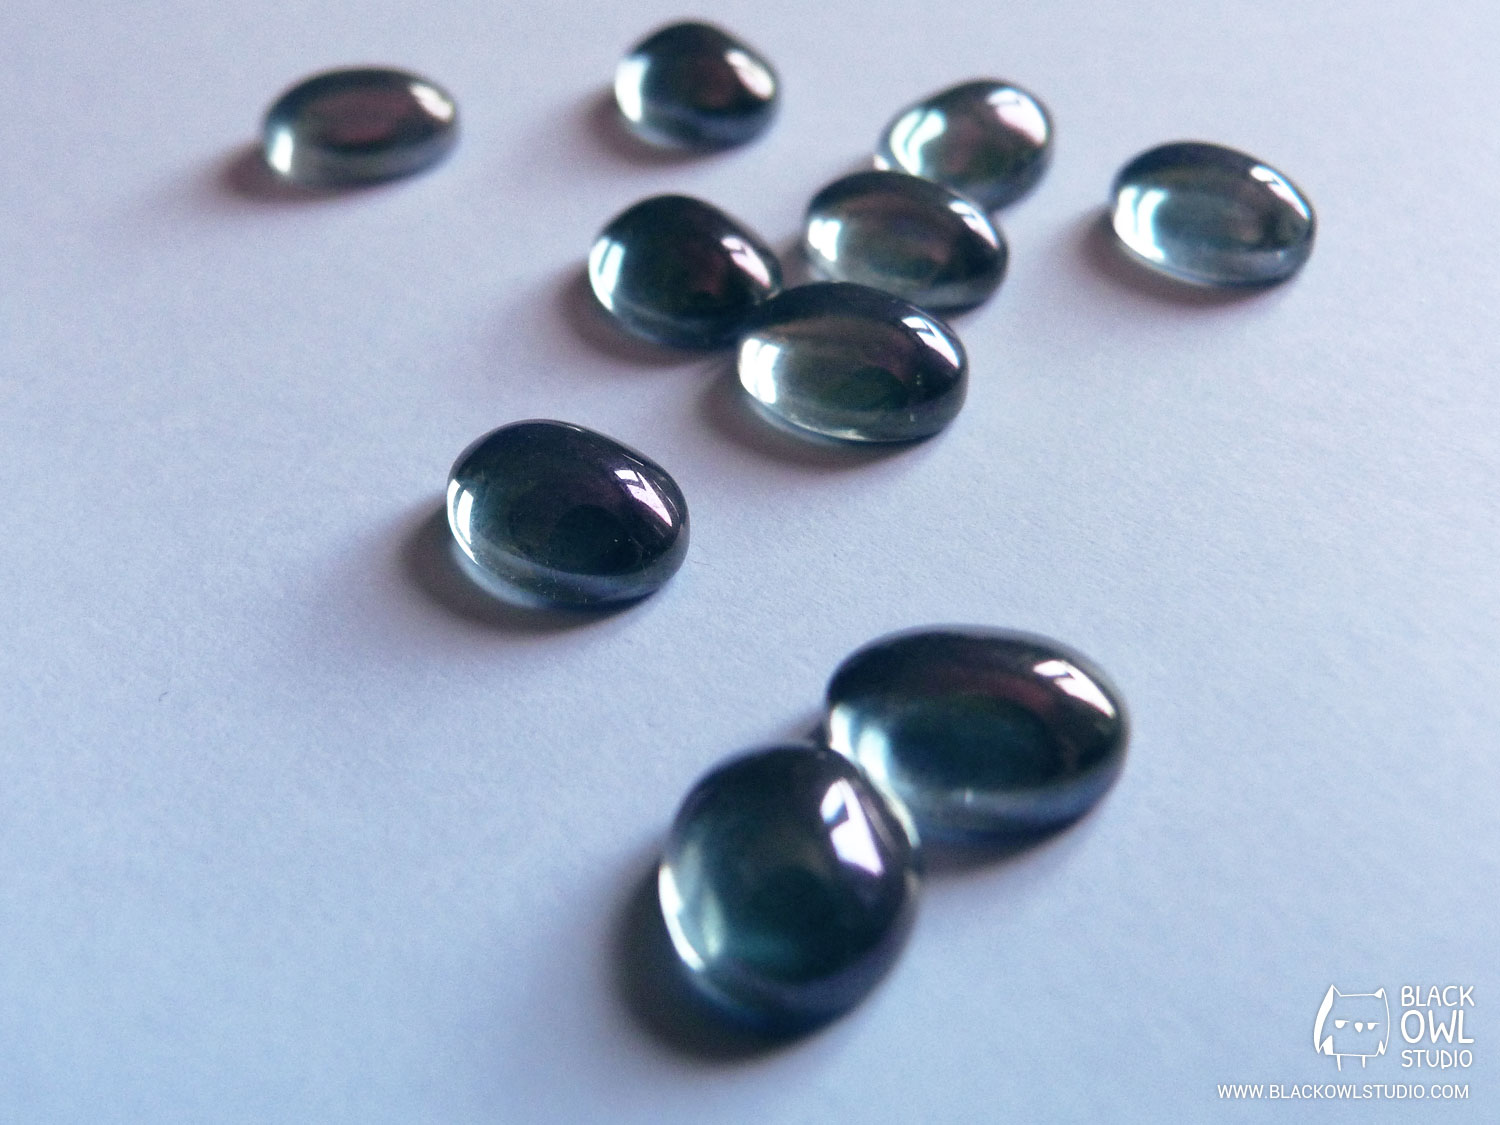
We stick a bead in the middle of the amulet. It’s better to have the pearl before sculpting the Plastiline model: it allows you to make the slot fit properly.
Finished amulet:
Comments (0)