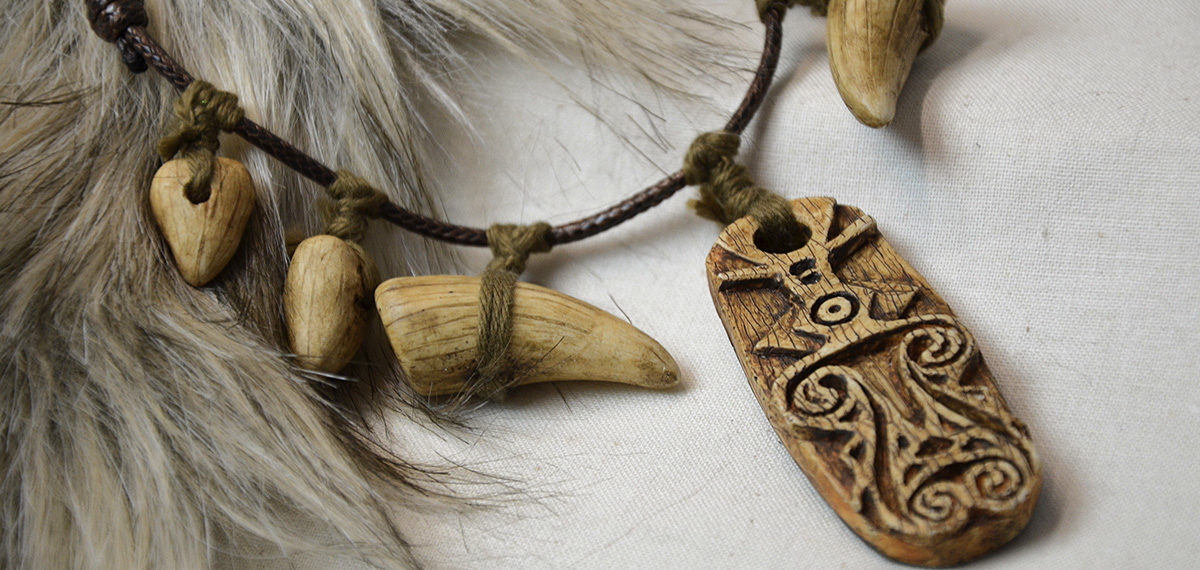
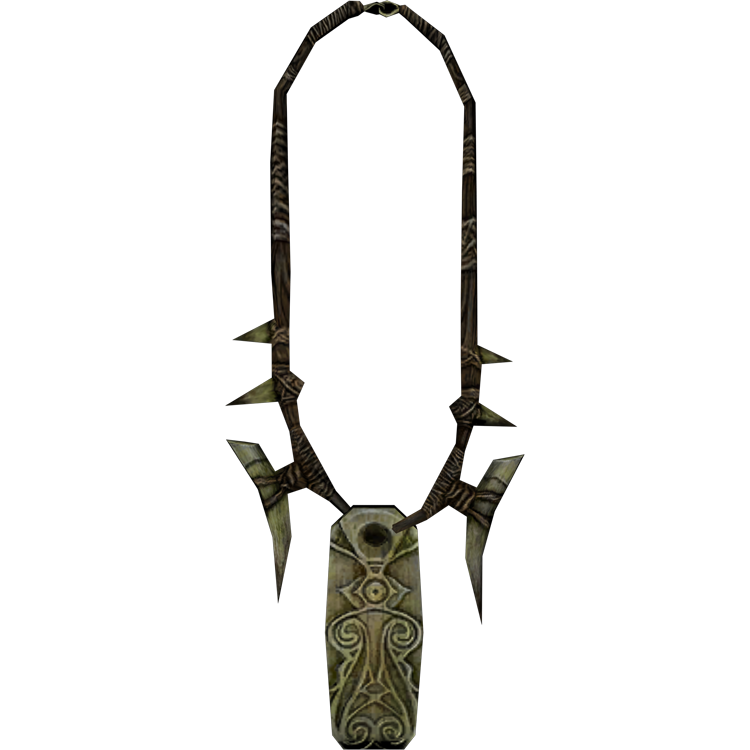
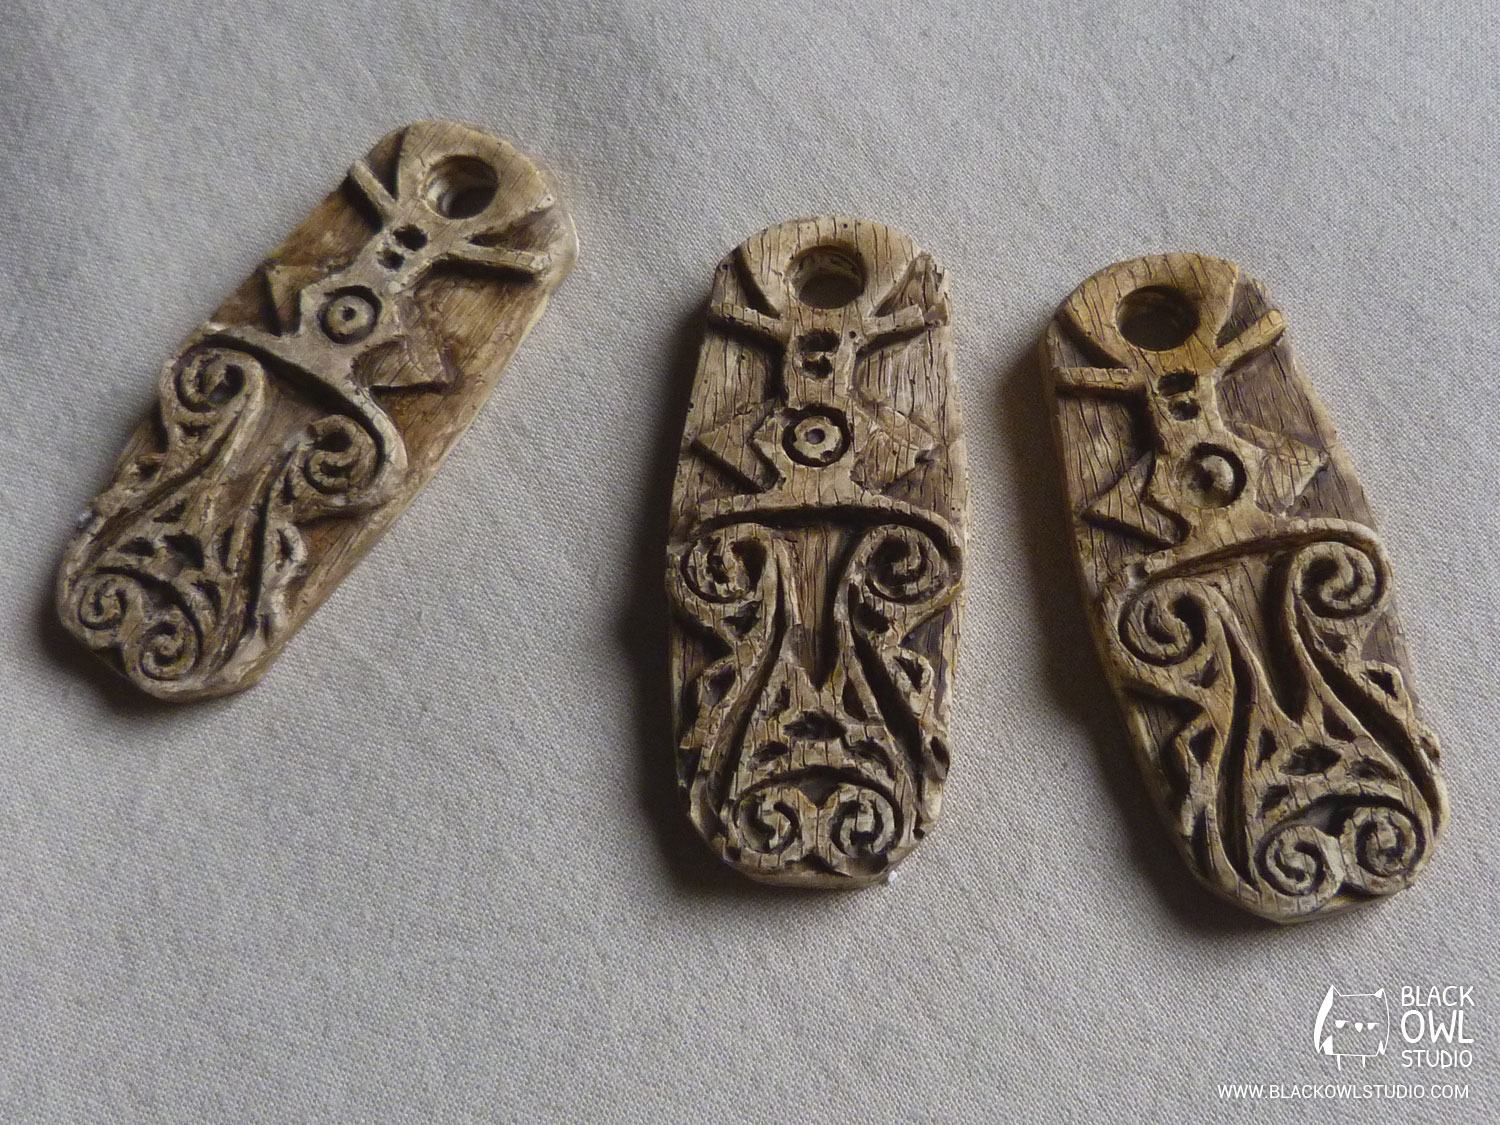
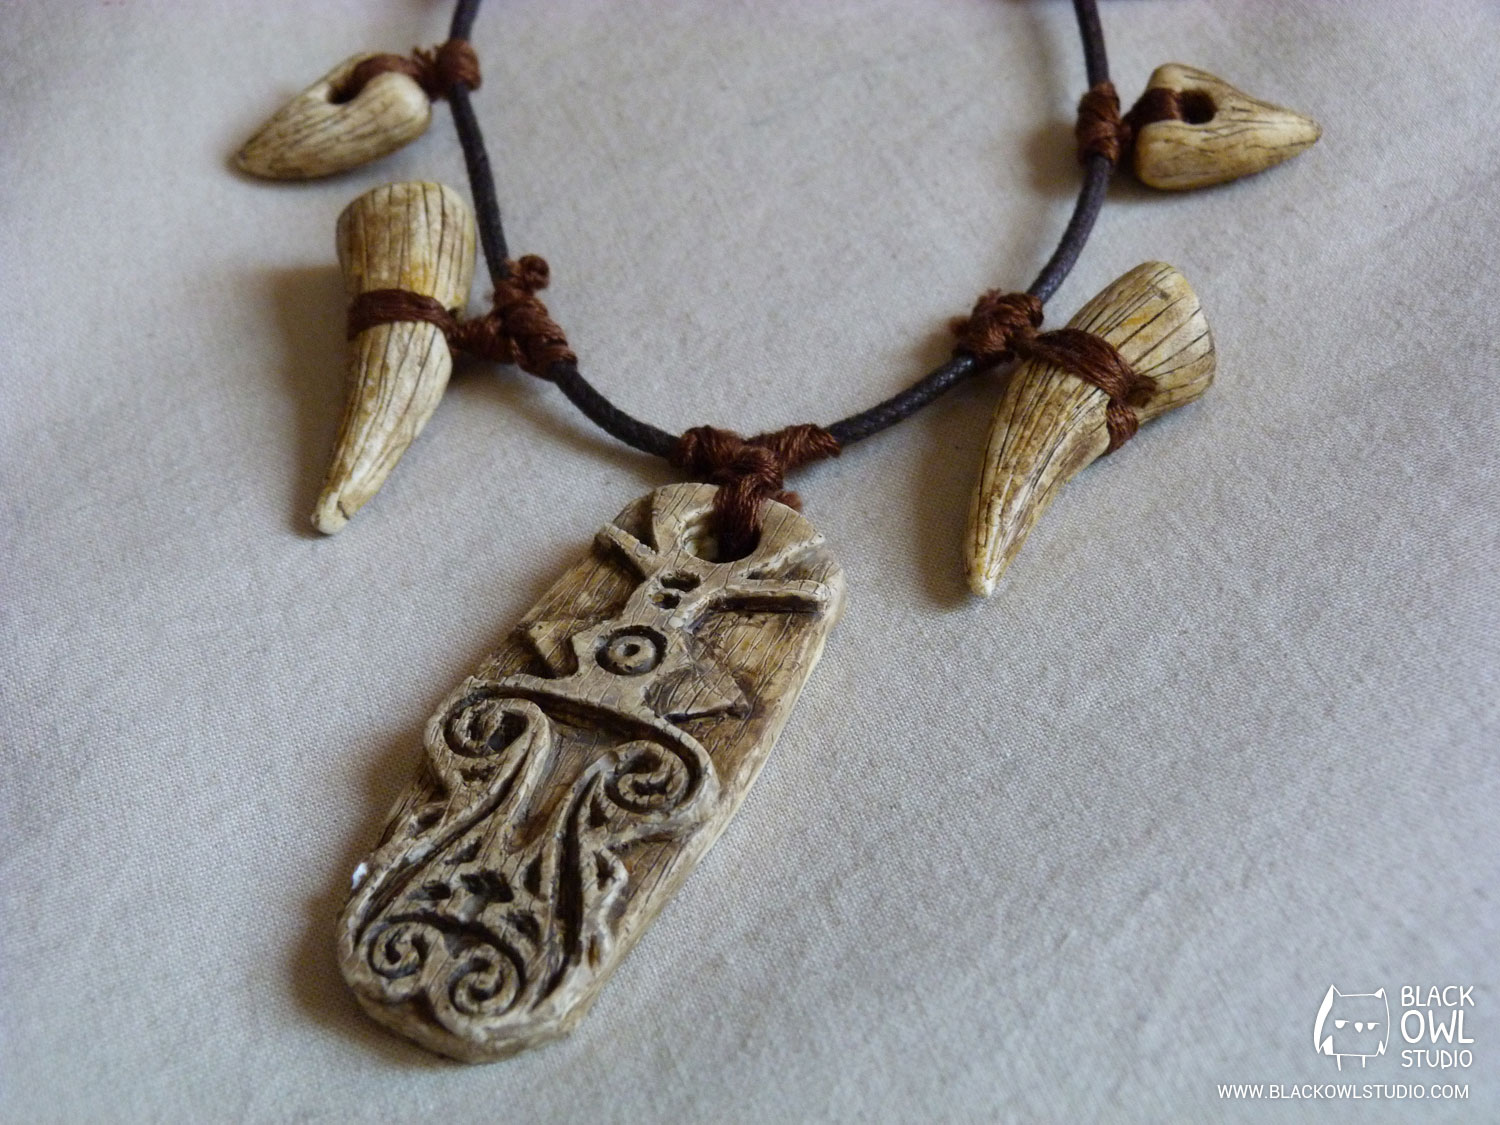
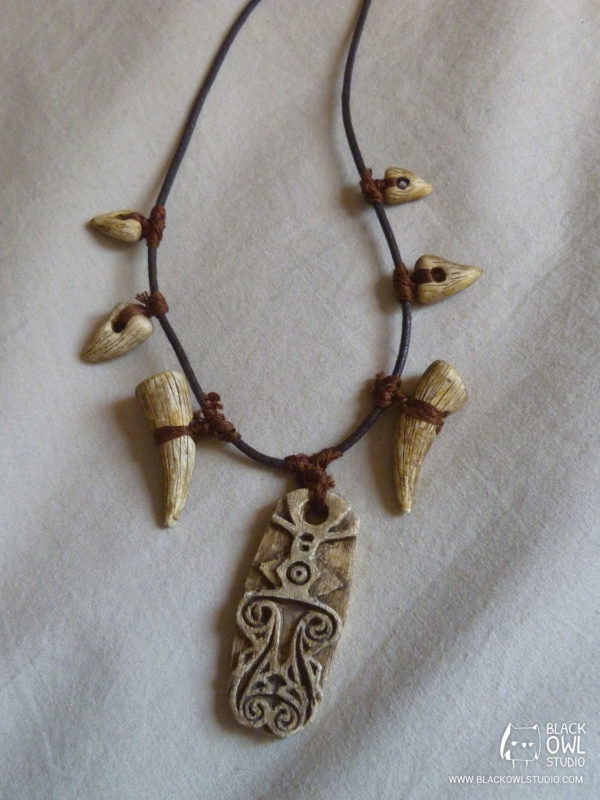
The Gauldur Amulet
[02/27/20 EDIT:] This amulet was made in 2013, when we started with the molding / resin casting methods. Even if the overall method remains valid, certain techniques have been improved over time, practice and the appearance of new materials.
In this post, you will see each step that led to the creation of the Gauldur Amulet (also known as the Saarthal Amulet) from the video game Skyrim.
Modeling the amulet
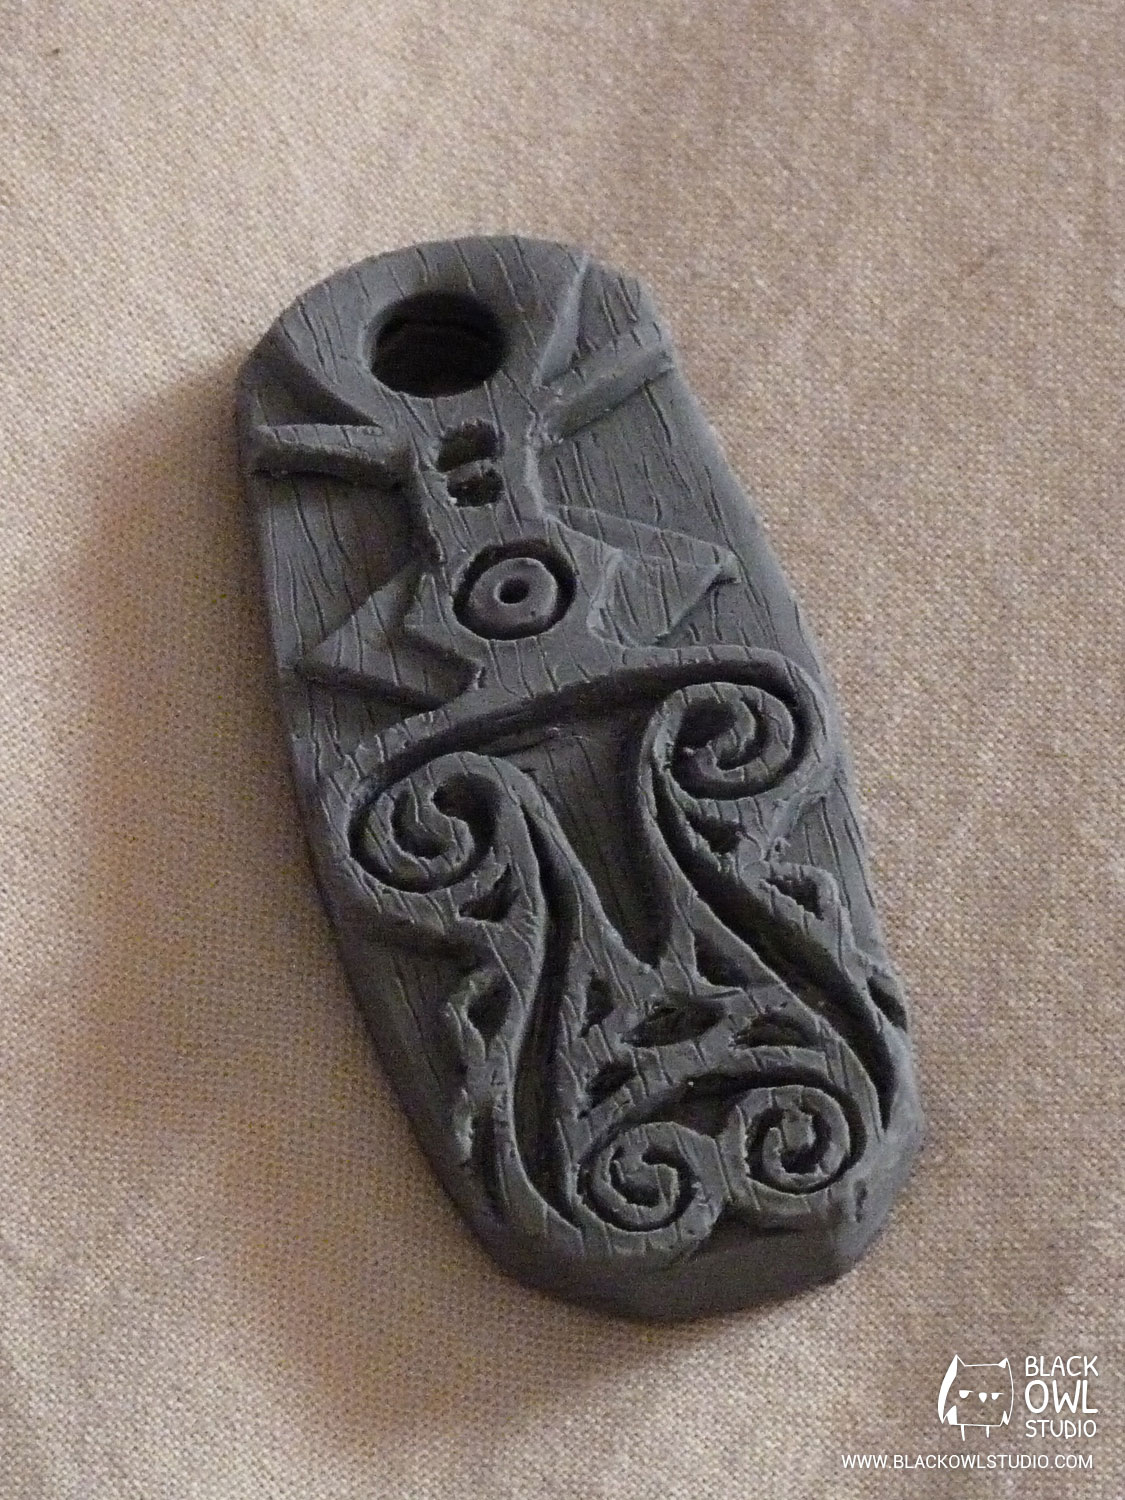
I chose to model my amulet with Plastiline (grey, hardness 55).
Plastiline is a wax-based, reusable modeling material that can be heated by hand. I personally use a hair dryer to go faster.
Be careful if you’re using Plastiline on a smooth surface (varnished wood, glass, oilcloth, etc.). Plastiline tends to stick when you press on it. Once stuck, it is very hard to remove the piece without breaking it.
To avoid this problem, you can either:
- Work Plastiline on a paper sheet (you can twist and fold it even if it is stuck), or on a cardboard (beware of varnished cardboard, Plastiline tends to stick to it too!).
I use this method, but it can be more difficult for you to work on the sculpture as your piece of Plastiline may also move across the surface of the sheet/cardboard.
OR you can:
- Shift your piece regularly to prevent it to stick too much (this method seems a bit impractical but at least the piece of Plastiline won’t move when you work on it).
Mold and resin cast
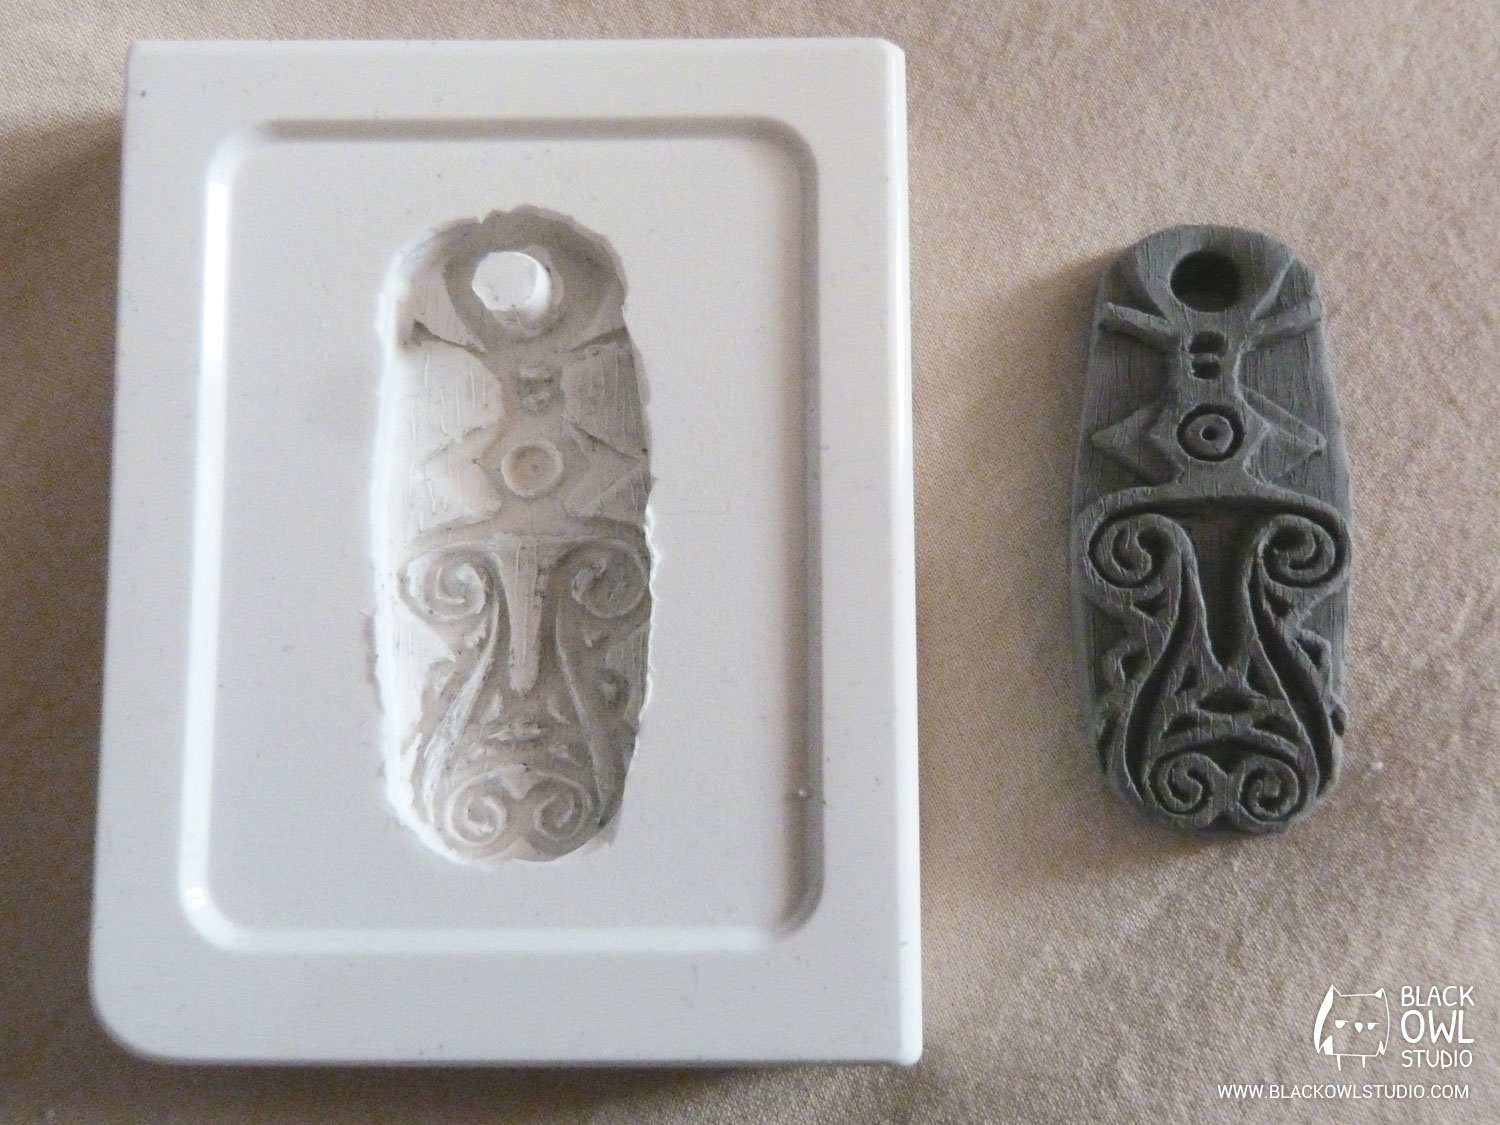
For this small-sized piece with a flat back, I opted for a silicone block mold (RTV 127).
Block mold:
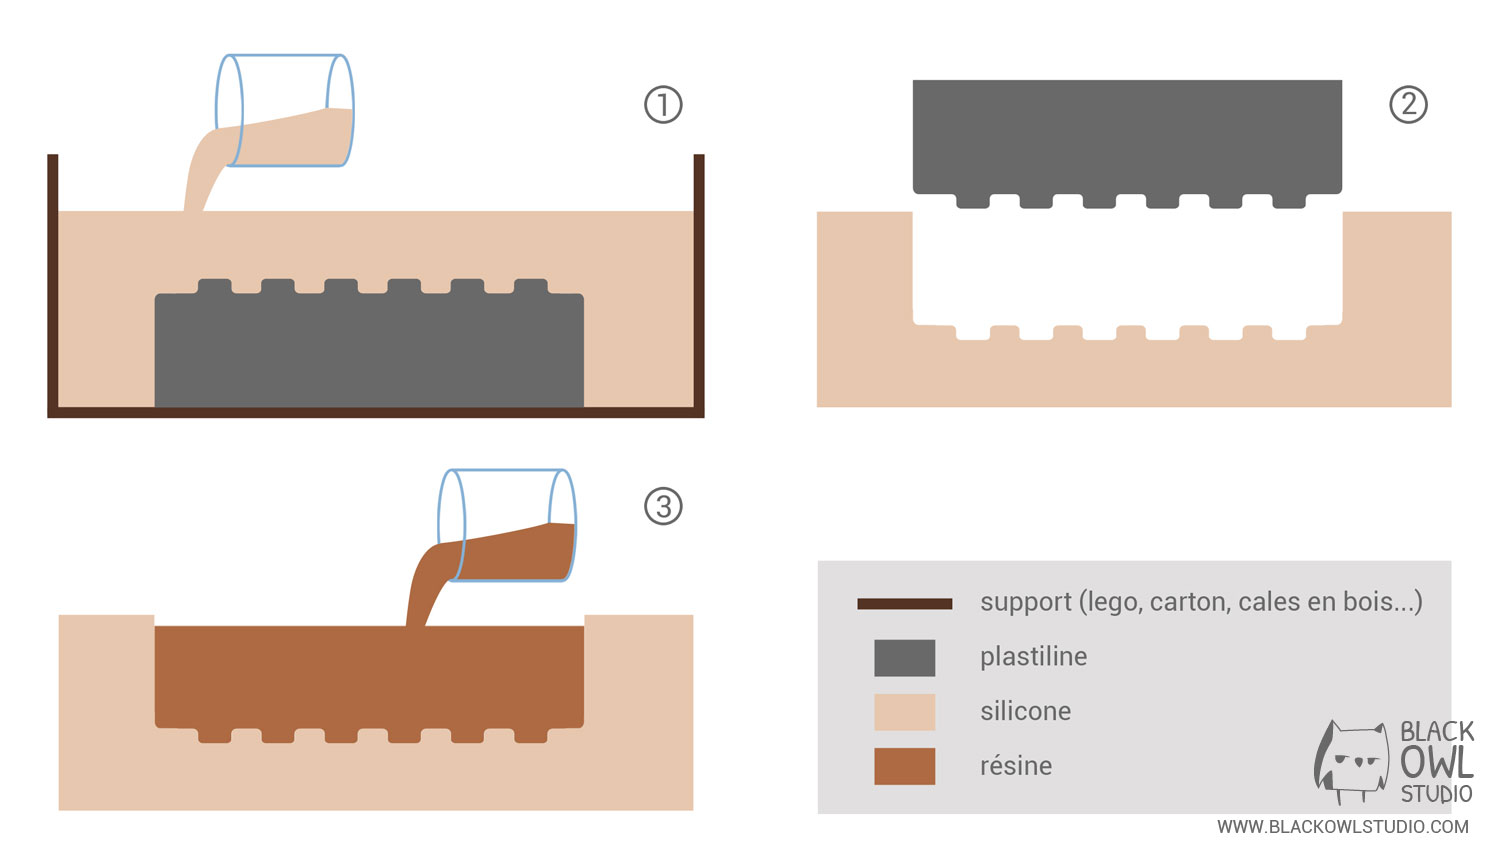
1) Applying silicone
Place your Plastiline model on a rigid support of the same size (or slightly bigger). Be careful not to create bubbles when applying the silicone. To avoid flaws on the mold, apply a first layer of silicone on the Plastiline model using a soft brush, before pouring the rest on it.
Warning: Silicone has kind of a Nutella texture (except it is not edible and does not smell as good)… It sticks to everything, is not totally liquid, and easily drips everywhere (it makes filaments between the cup and the spoon). Sooo, protect your workbench, don’t put silicone on yourself (if it happens, wash with tempered water and soap) and get some paper towels (to put your tools on them after use).
NB: Silicone is easy to clean on a smooth surface: wait until it dries and simply remove it. It is however harder to remove it from your brushes, as it sticks to the hair. I advise you to wash the brushes by plunging them in a glass of acetone immediately after use.
2) Removing Plastiline
When the silicone is dry, remove the Plastiline model from the mold. Take care not to damage it! Who knows, if the silicone mold contains a defect (a bubble or a crack for example), you will be happy to be able to re-use your Plastiline model in order to create a new mold instead of starting all over again.
Drying time depends on the thickness of the mold, the percentage of catalyst added to the mixture, the room temperature, etc.
Count 12 hours minimum, and up to 24 hours (just to be sure).
My tip: keep your spoon in the container with the leftovers of silicone. If the texture is pasty and tacky, it’s not dry… If you can take off the whole silicone block when pulling the spoon, it’s ready!
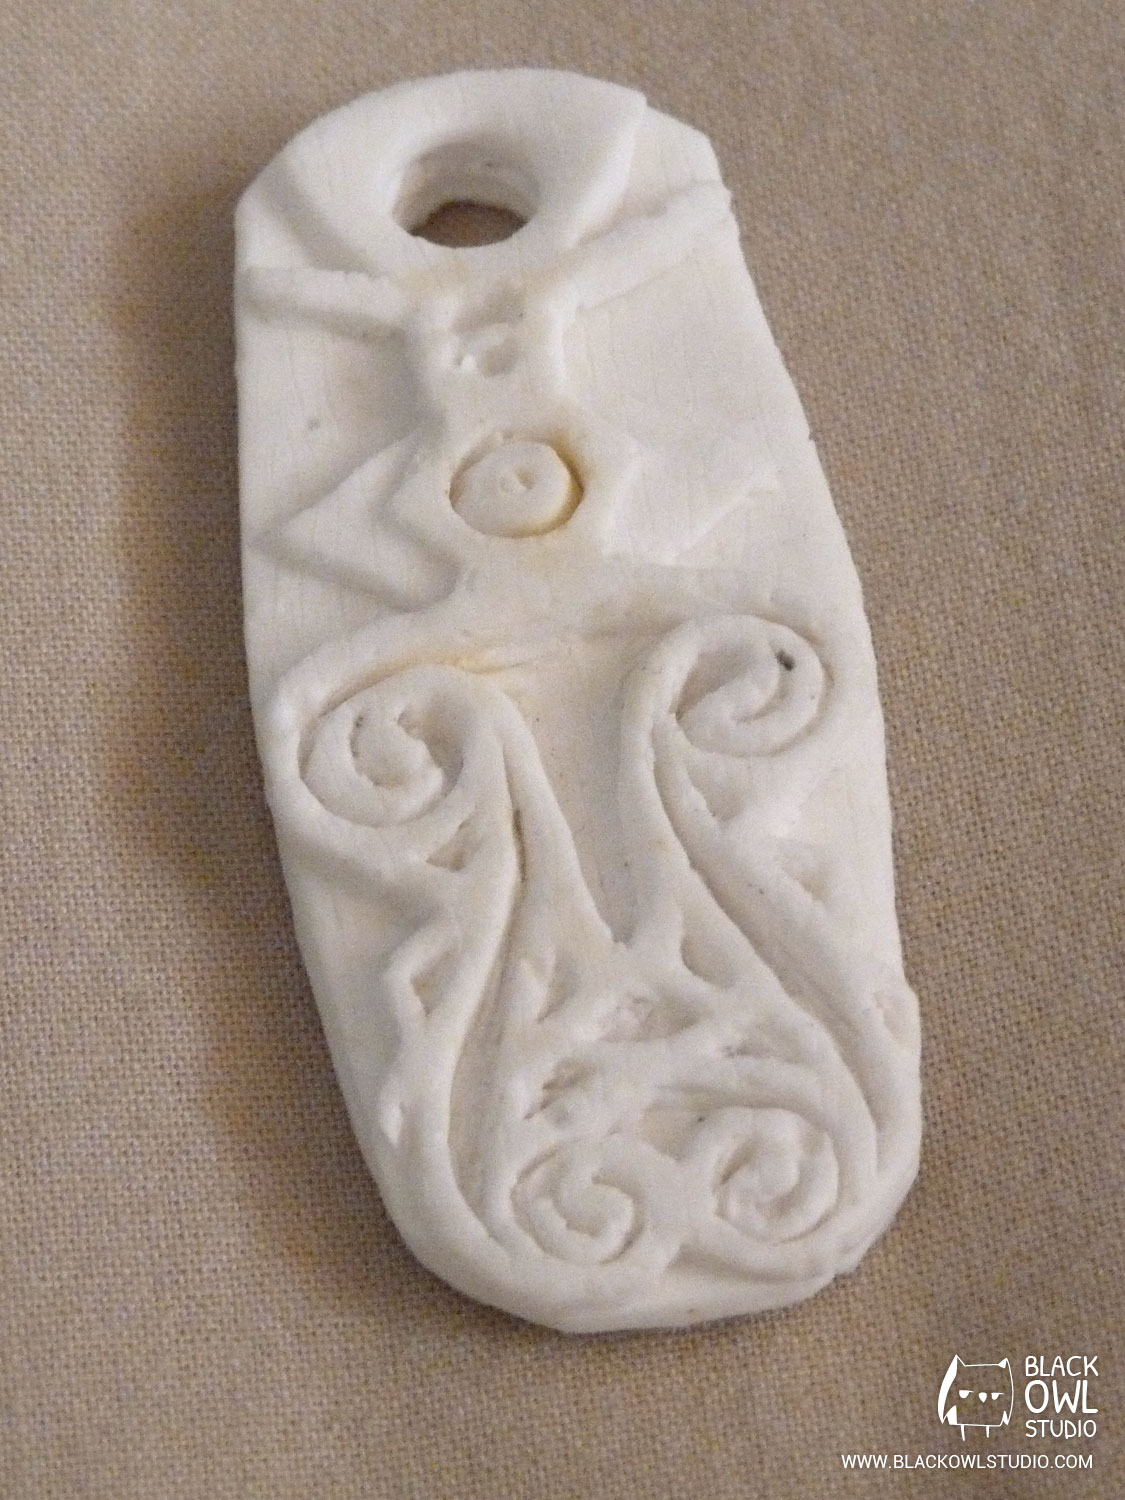
3) Resin cast
The cast is made with acrylic resin. Acrylic resin is not the strongest, nor the lightest of all existing resins, but it is still quite resistant (not salt dough!), non-toxic and odourless!
To prevent any flaw on the piece and capture all its details, apply a first layer of resin in the silicone mold with a brush. Then pour the rest of the resin in.
NB: Put your brush in a glass of water immediately after use, then wash it quickly before the resin dries, or else, no more brush!
Warning: Don’t pour the resin leftovers in your sink, not even the brushes’ rinse water. You might clog the sink with resin and it will be impossible to remove or dissolve it. Keep everything in the goblets you used. Once the resin is dry, throw the big chunks away. You can (only with acrylic resin) empty your rinse water outside, in the garden, in a soil pot, an empty flowerpot, etc. (don’t throw it in granny’s orchids, she might not appreciate).
Other method: Plunge your brush in a glass of acetone to wash it. Acetone is a volatile material that will evaporate, leaving only solid residues you can simply throw away.
Drying time is not too long. Count 2 to 3 hours for a completely dry piece.
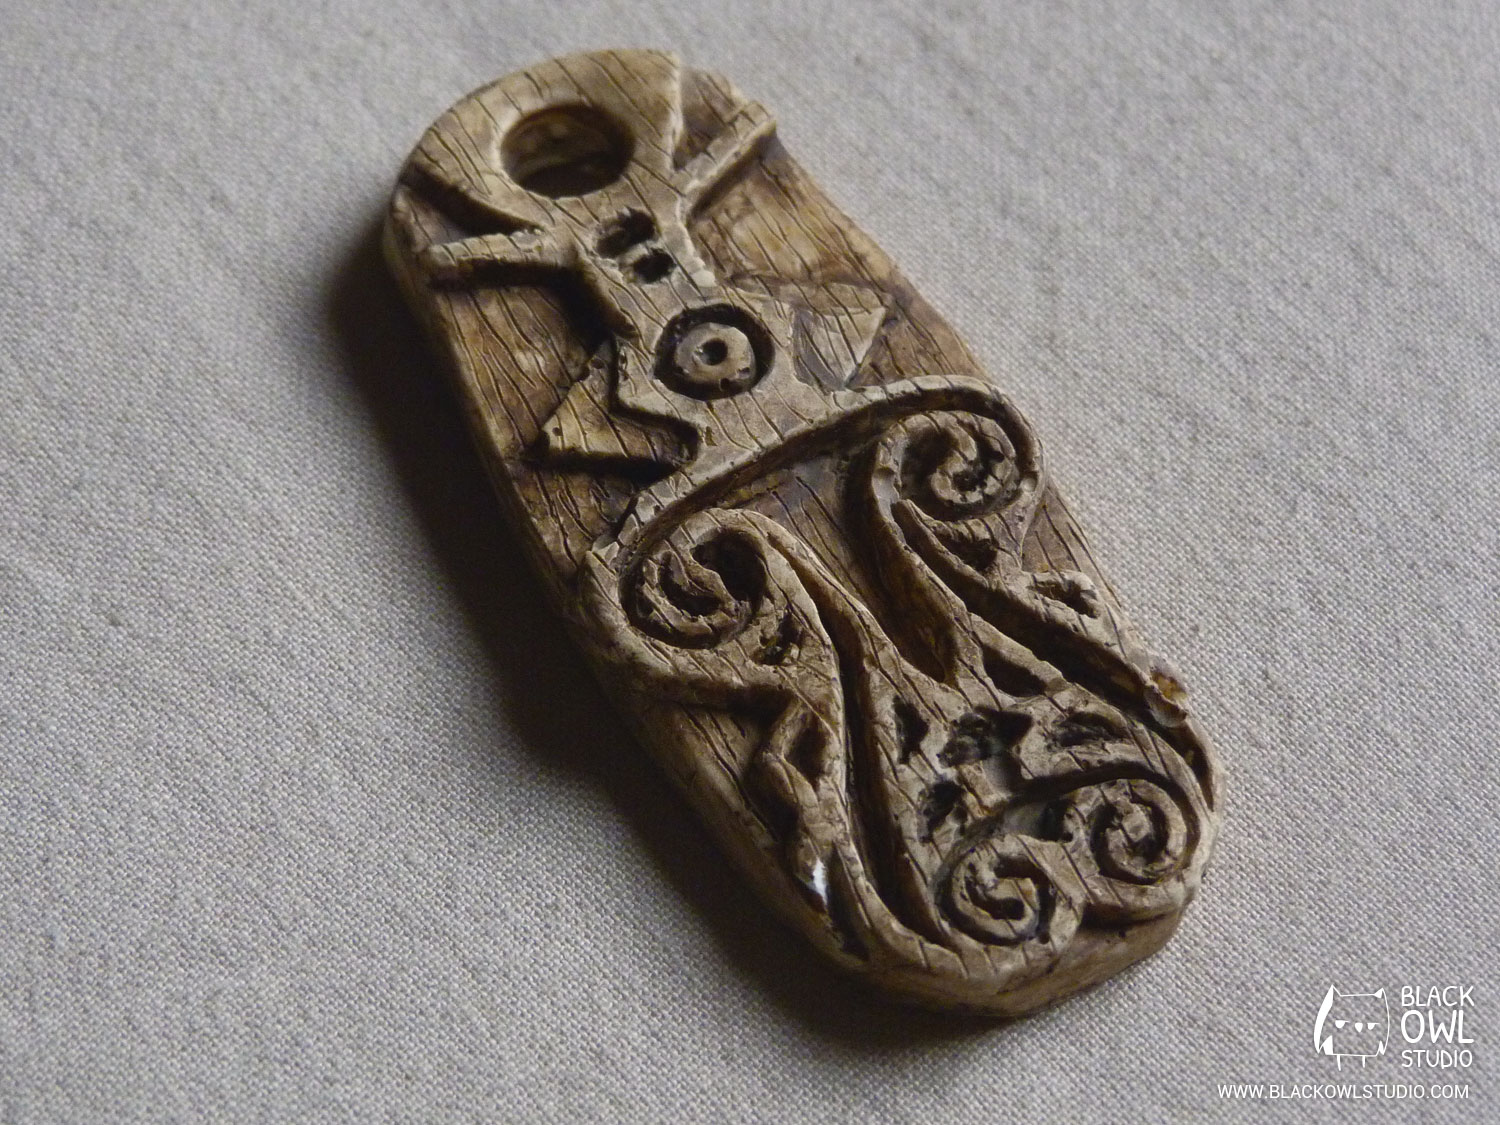
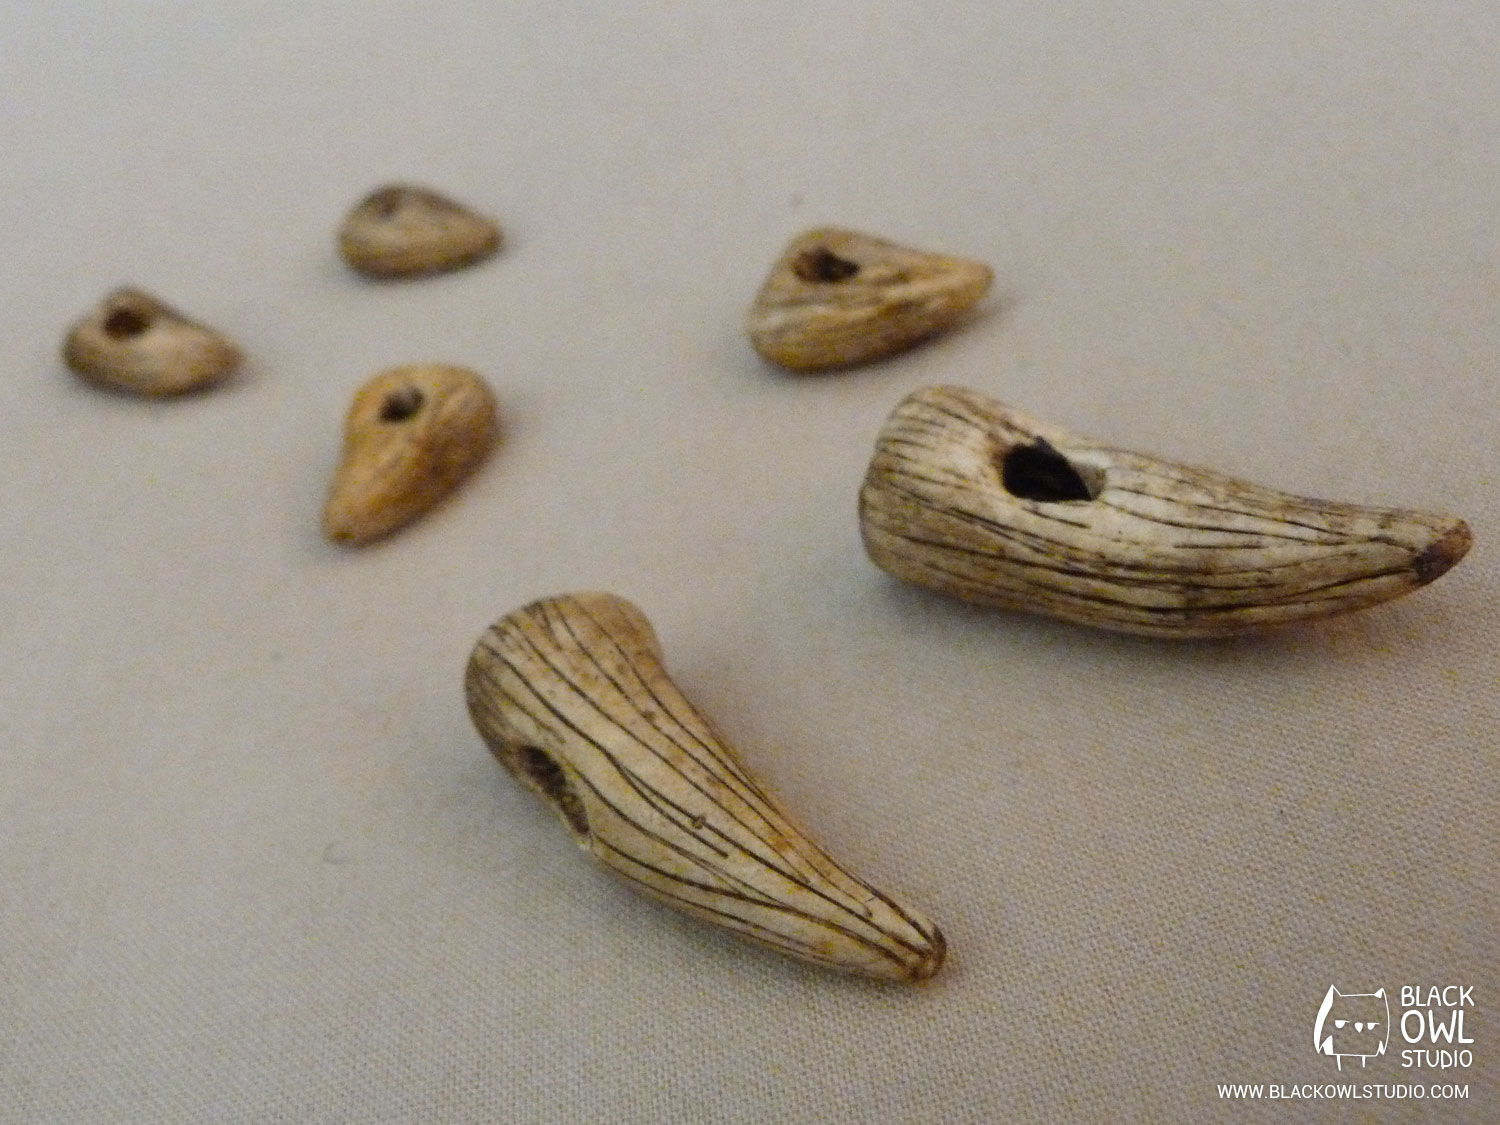
Painting
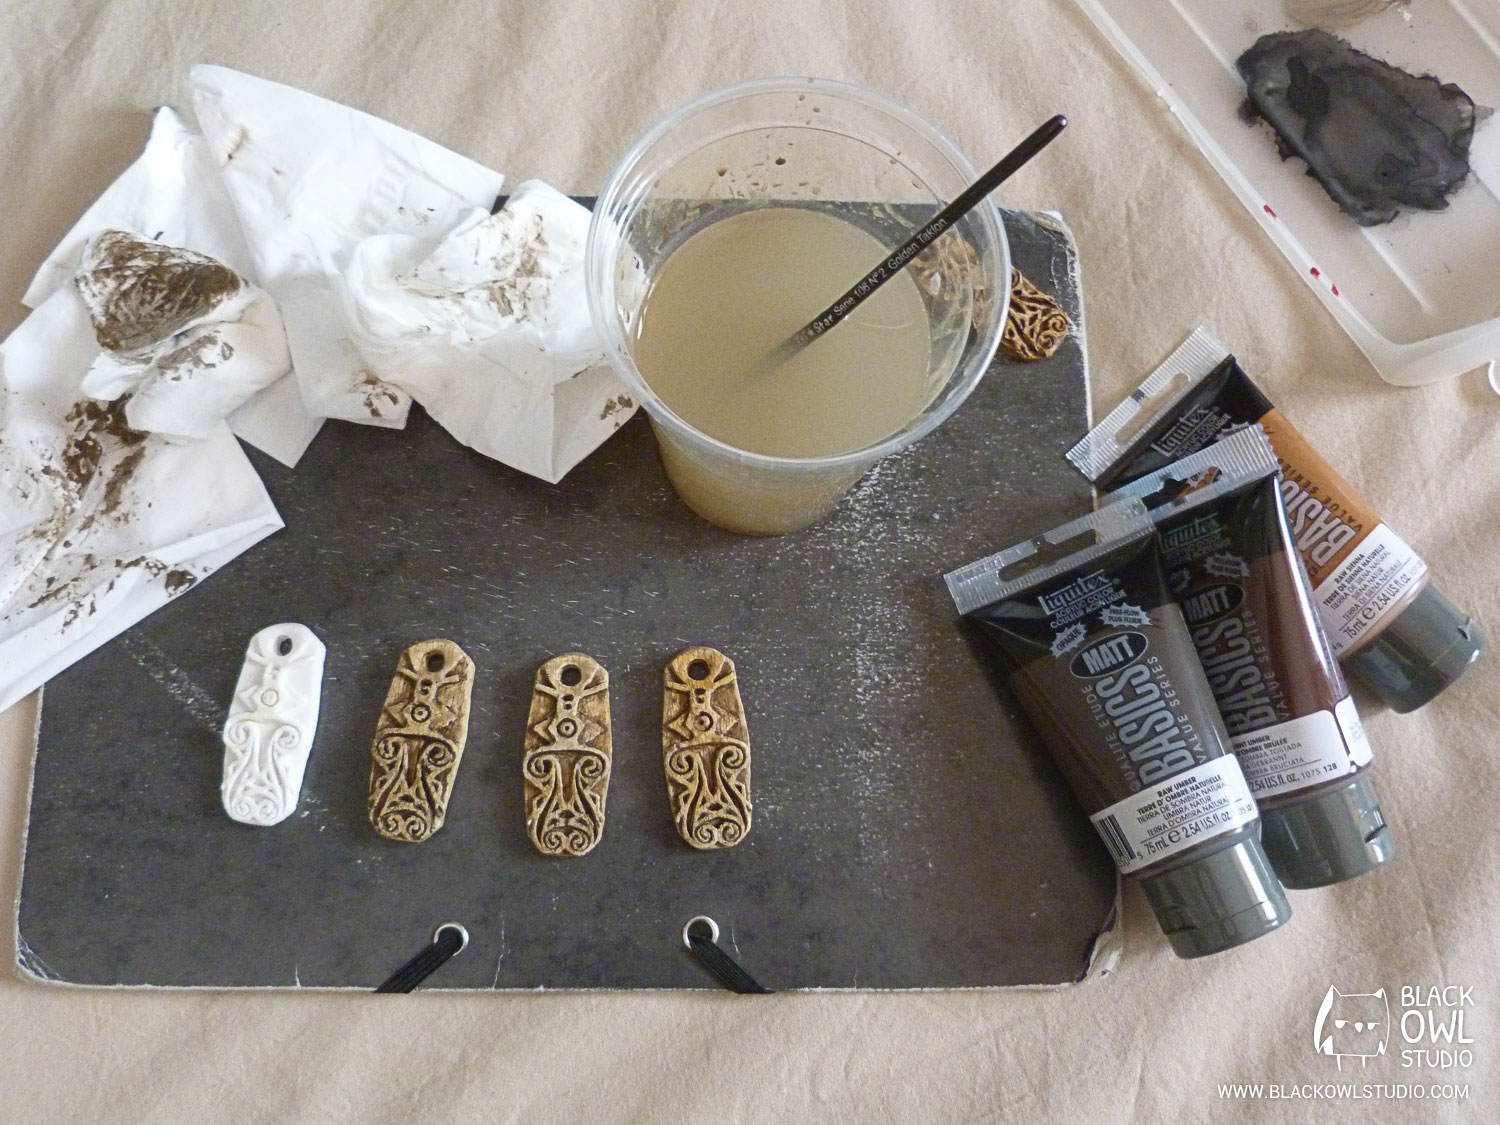
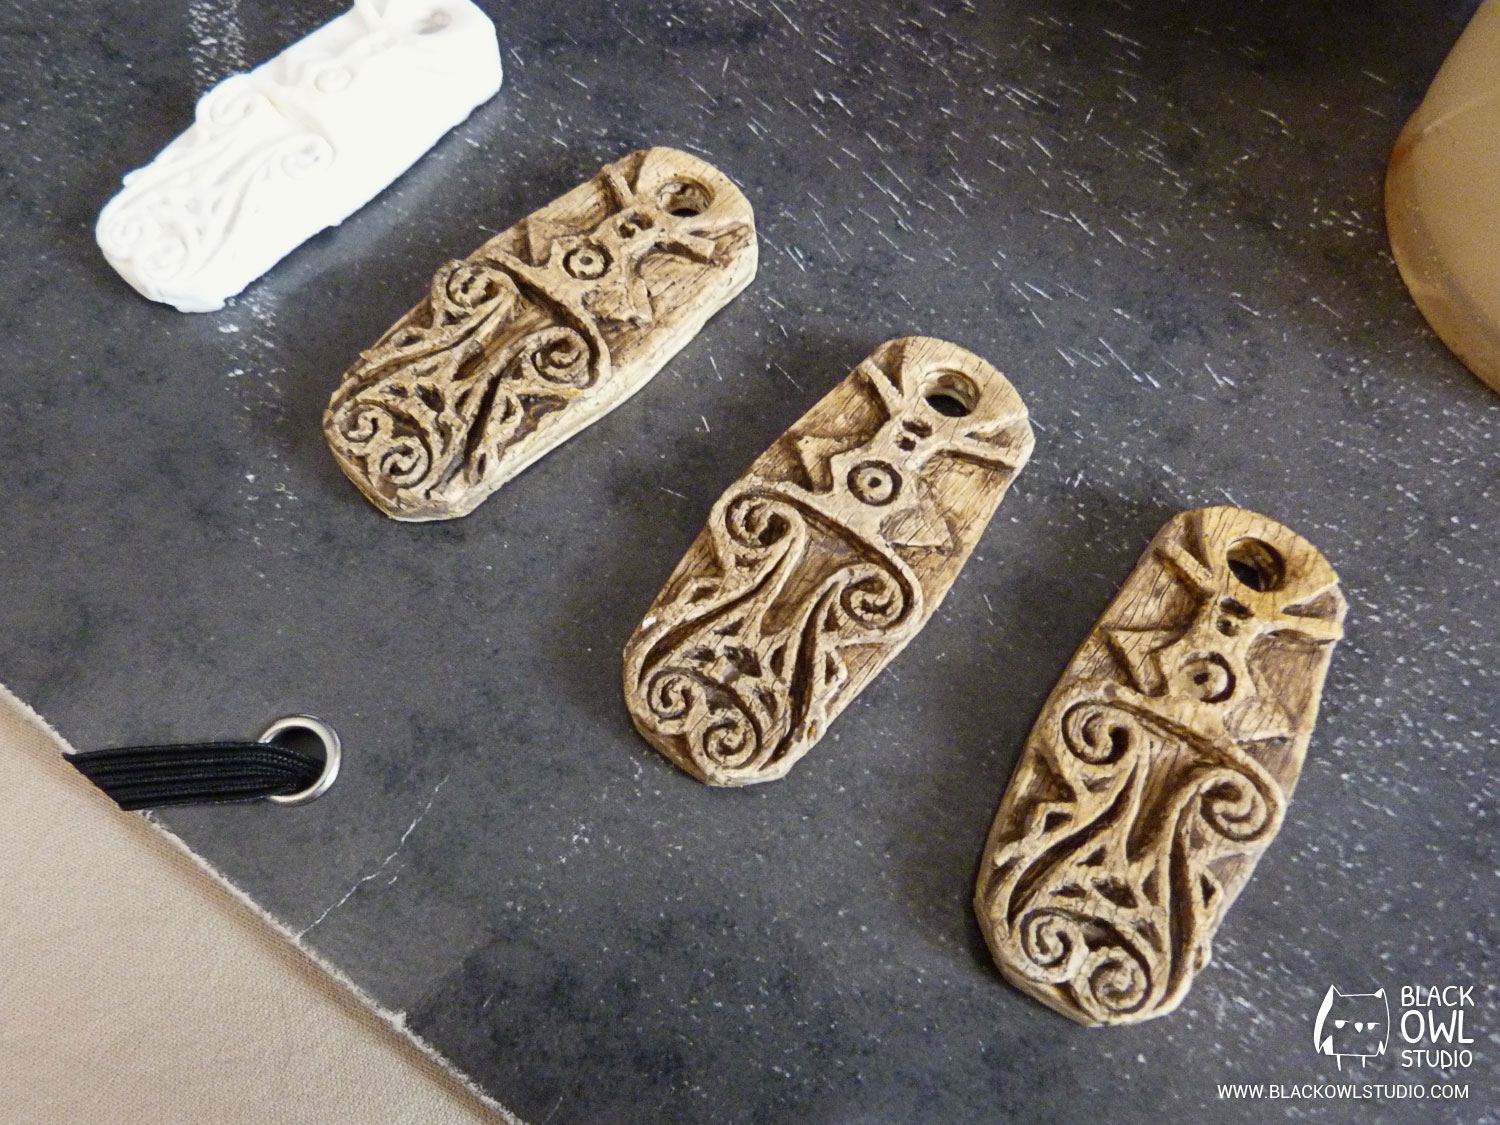
I chose to paint my amulet with acrylics (colors: ochre, Sienna, umber, burnt umber).
Acrylic paint has the benefit of resisting to water and being flexible once it is dry. You need very little water to dilute it, and you can mix acrylic paints with each other to create new colors.
To wash your brush, just use a glass of water.
Here is the result once the amulets are painted:
Modeling the teeth with Fimo clay
Modeling teeth happens to be more difficult than expected. At first, we thought about using our usual process: Plastiline sculptures, then silicon molds and to finish resin casts. However, two problems rose while working through our established method: the size of the object we wanted to create (teeth are a bit small), and the hole we needed to drill to pull the cord.
Here is the thing: we would have had to made a two-part silicon mold with thixo agent for a vertical application on the teeth curve, make a super small hole in the mold to pour the resin through it, sand down the overflow… such a pain !
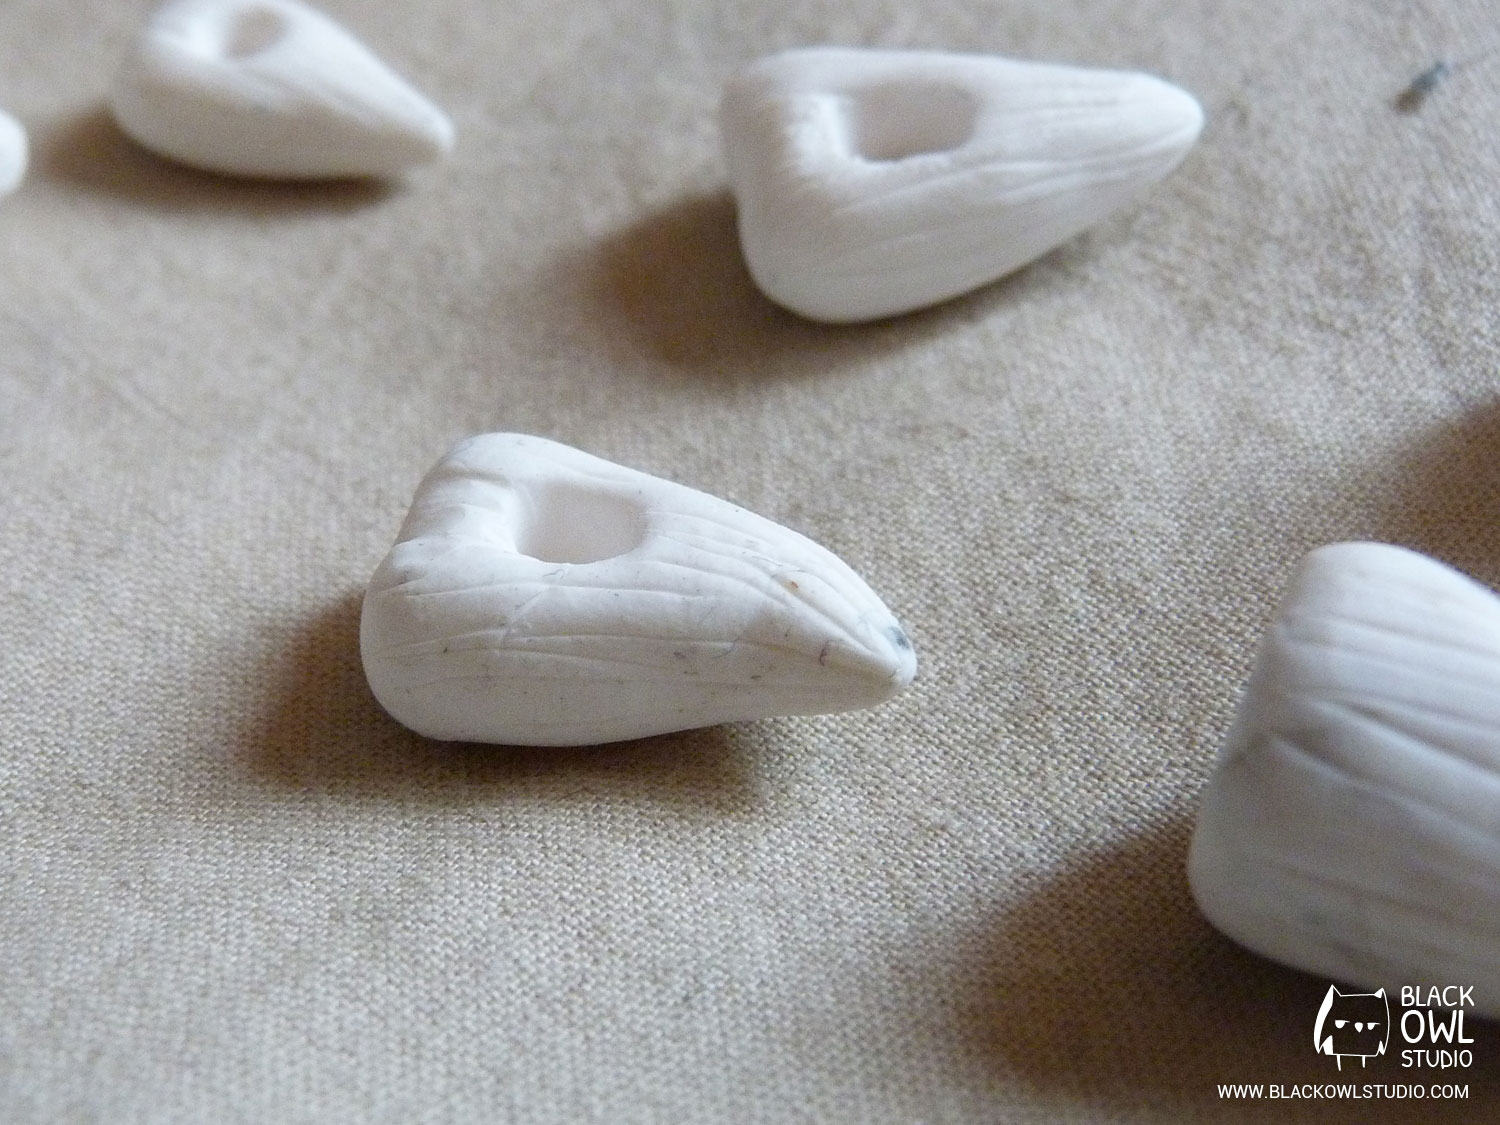
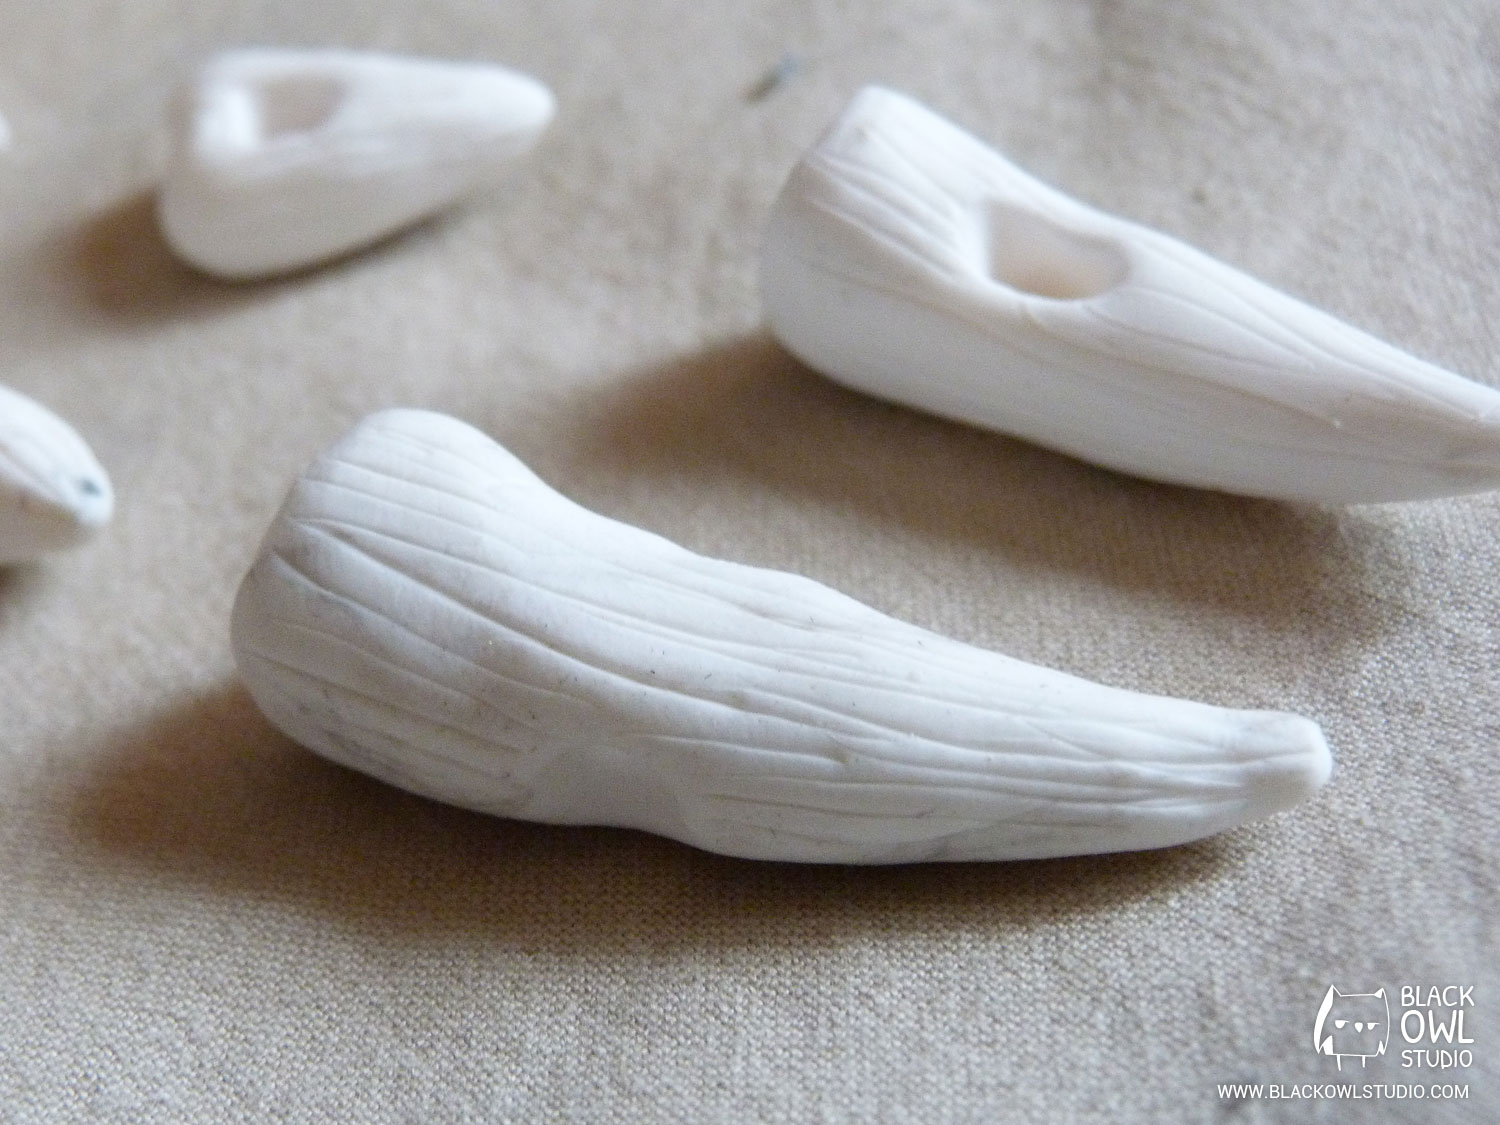
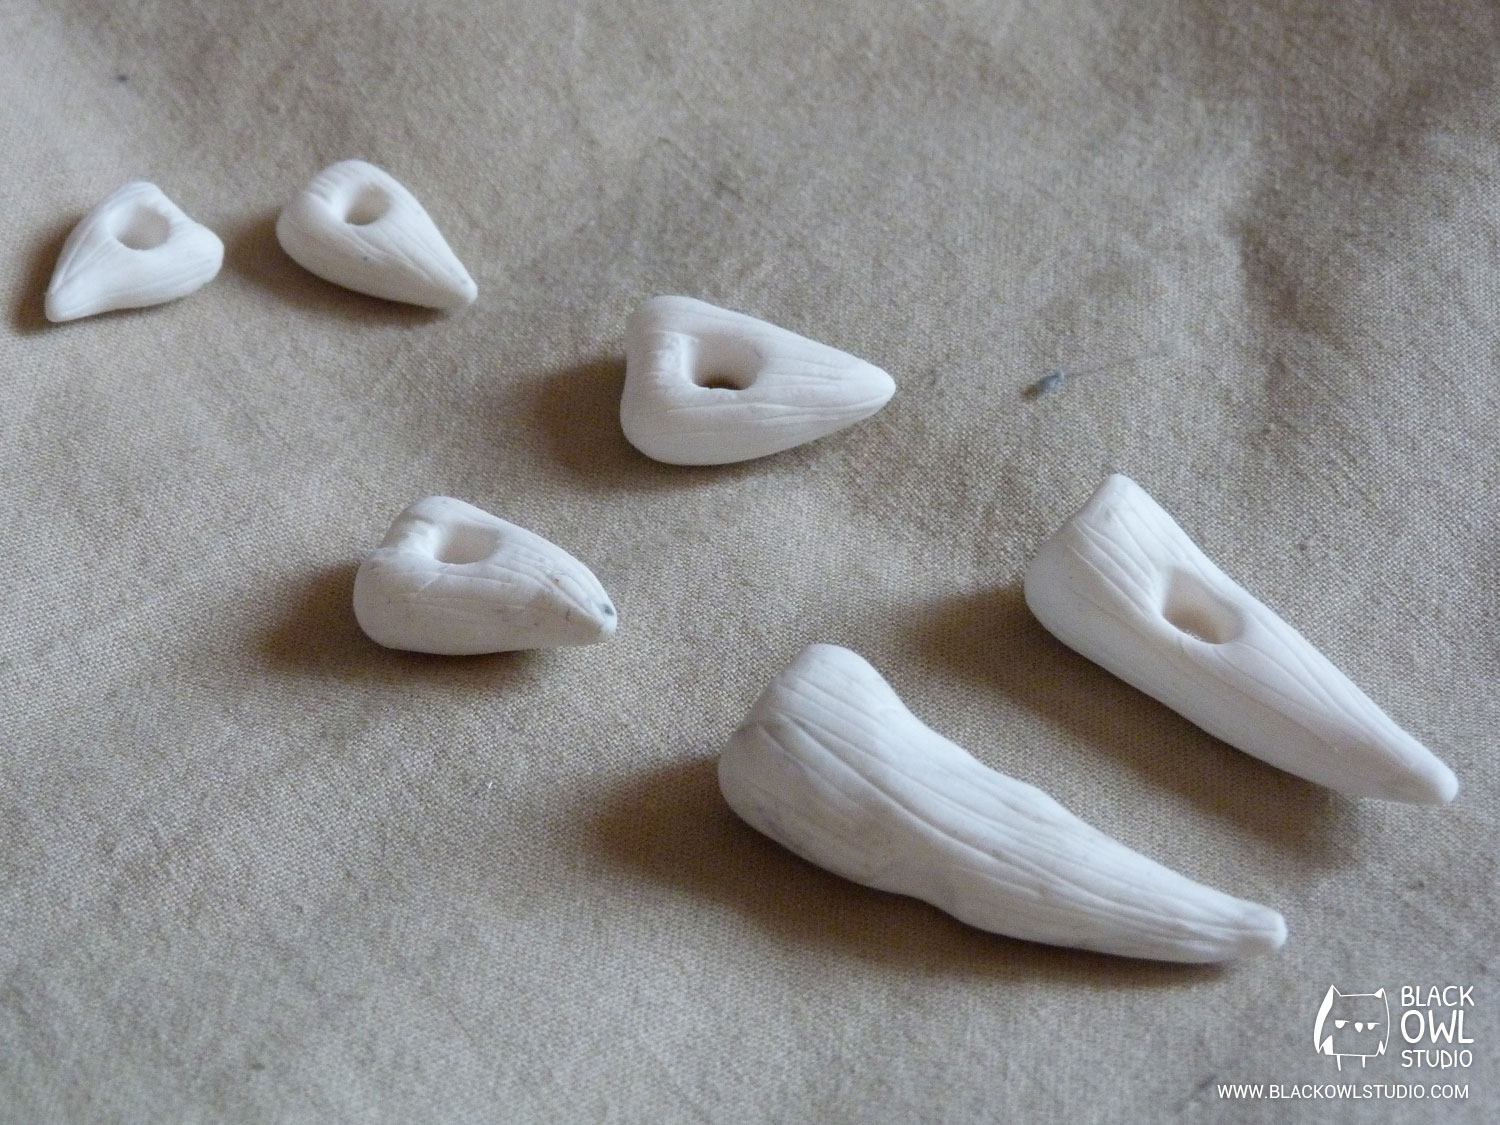
We finally made these teeth with Fimo clay. Compared to Plastiline, it is far more boring to sculpt, and it sticks to your fingers… But once it is baked, it is quite robust, and thus, we can safely say this B plan was a success! 😉
Acrylic paint works well with Fimo, as well as with resin.

Final result

Comments (0)