Hi!
Thanks a lot!
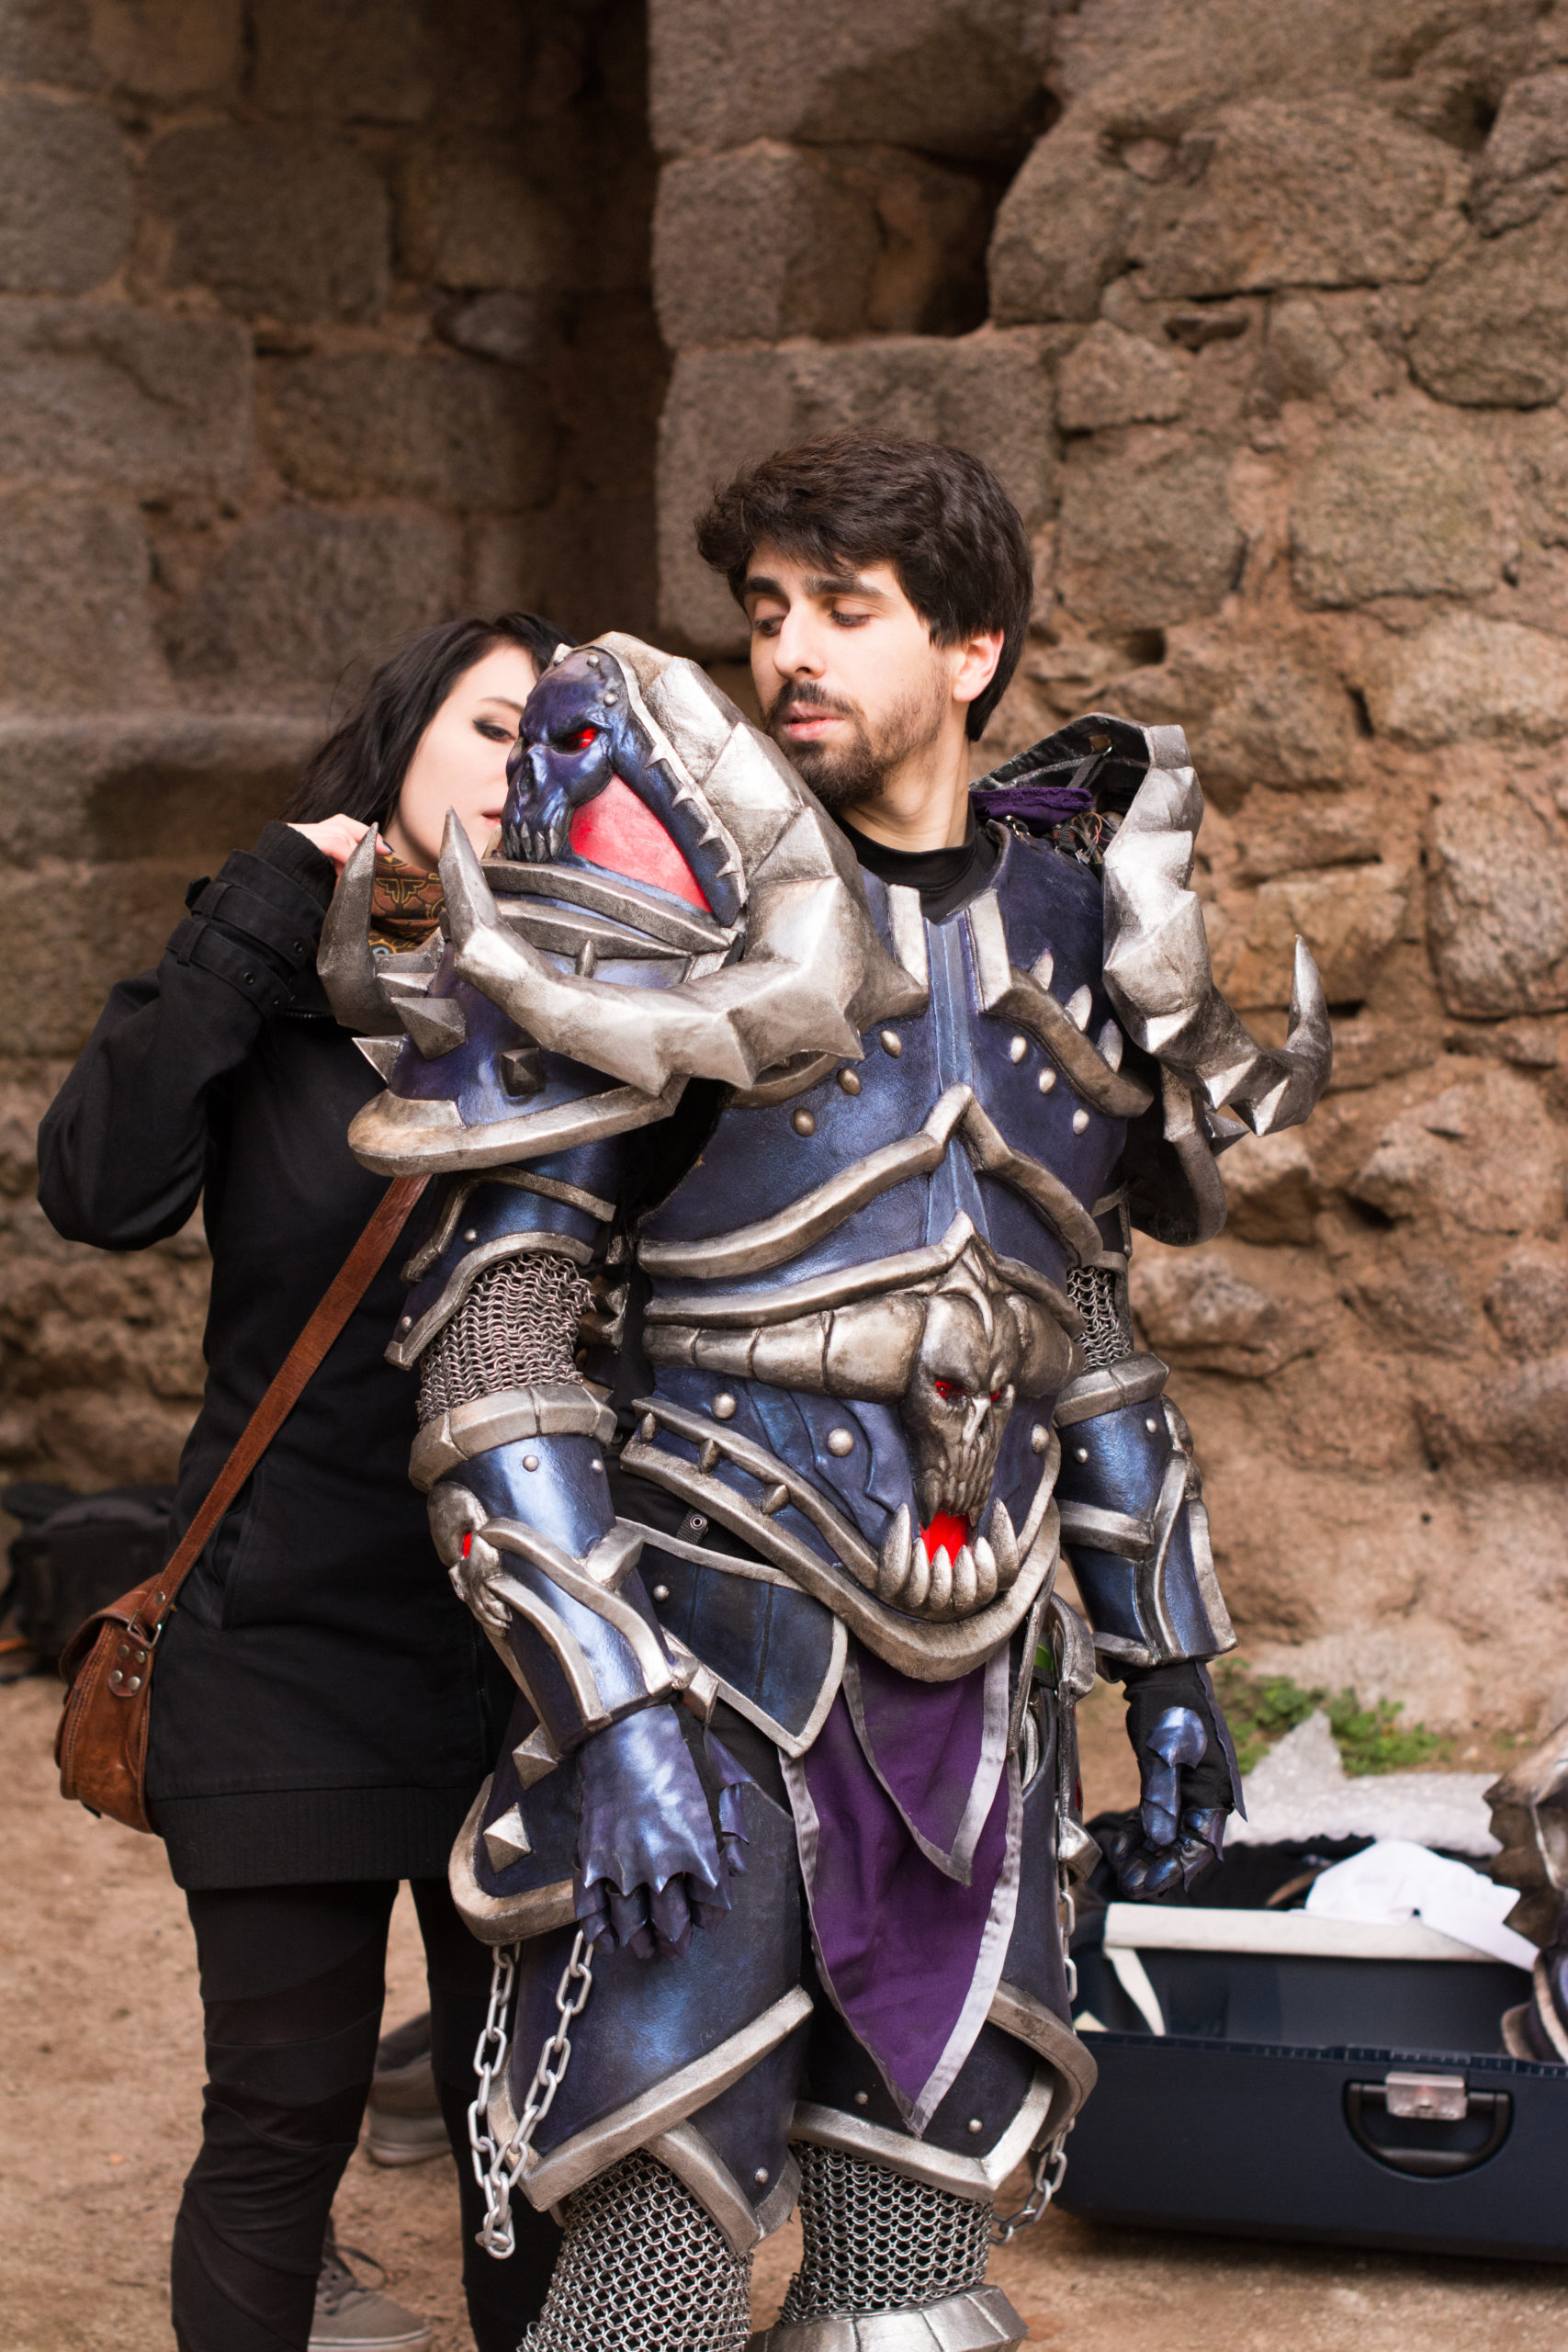
Yes, the chest and back plates are connected. We used straps with snaps 😉
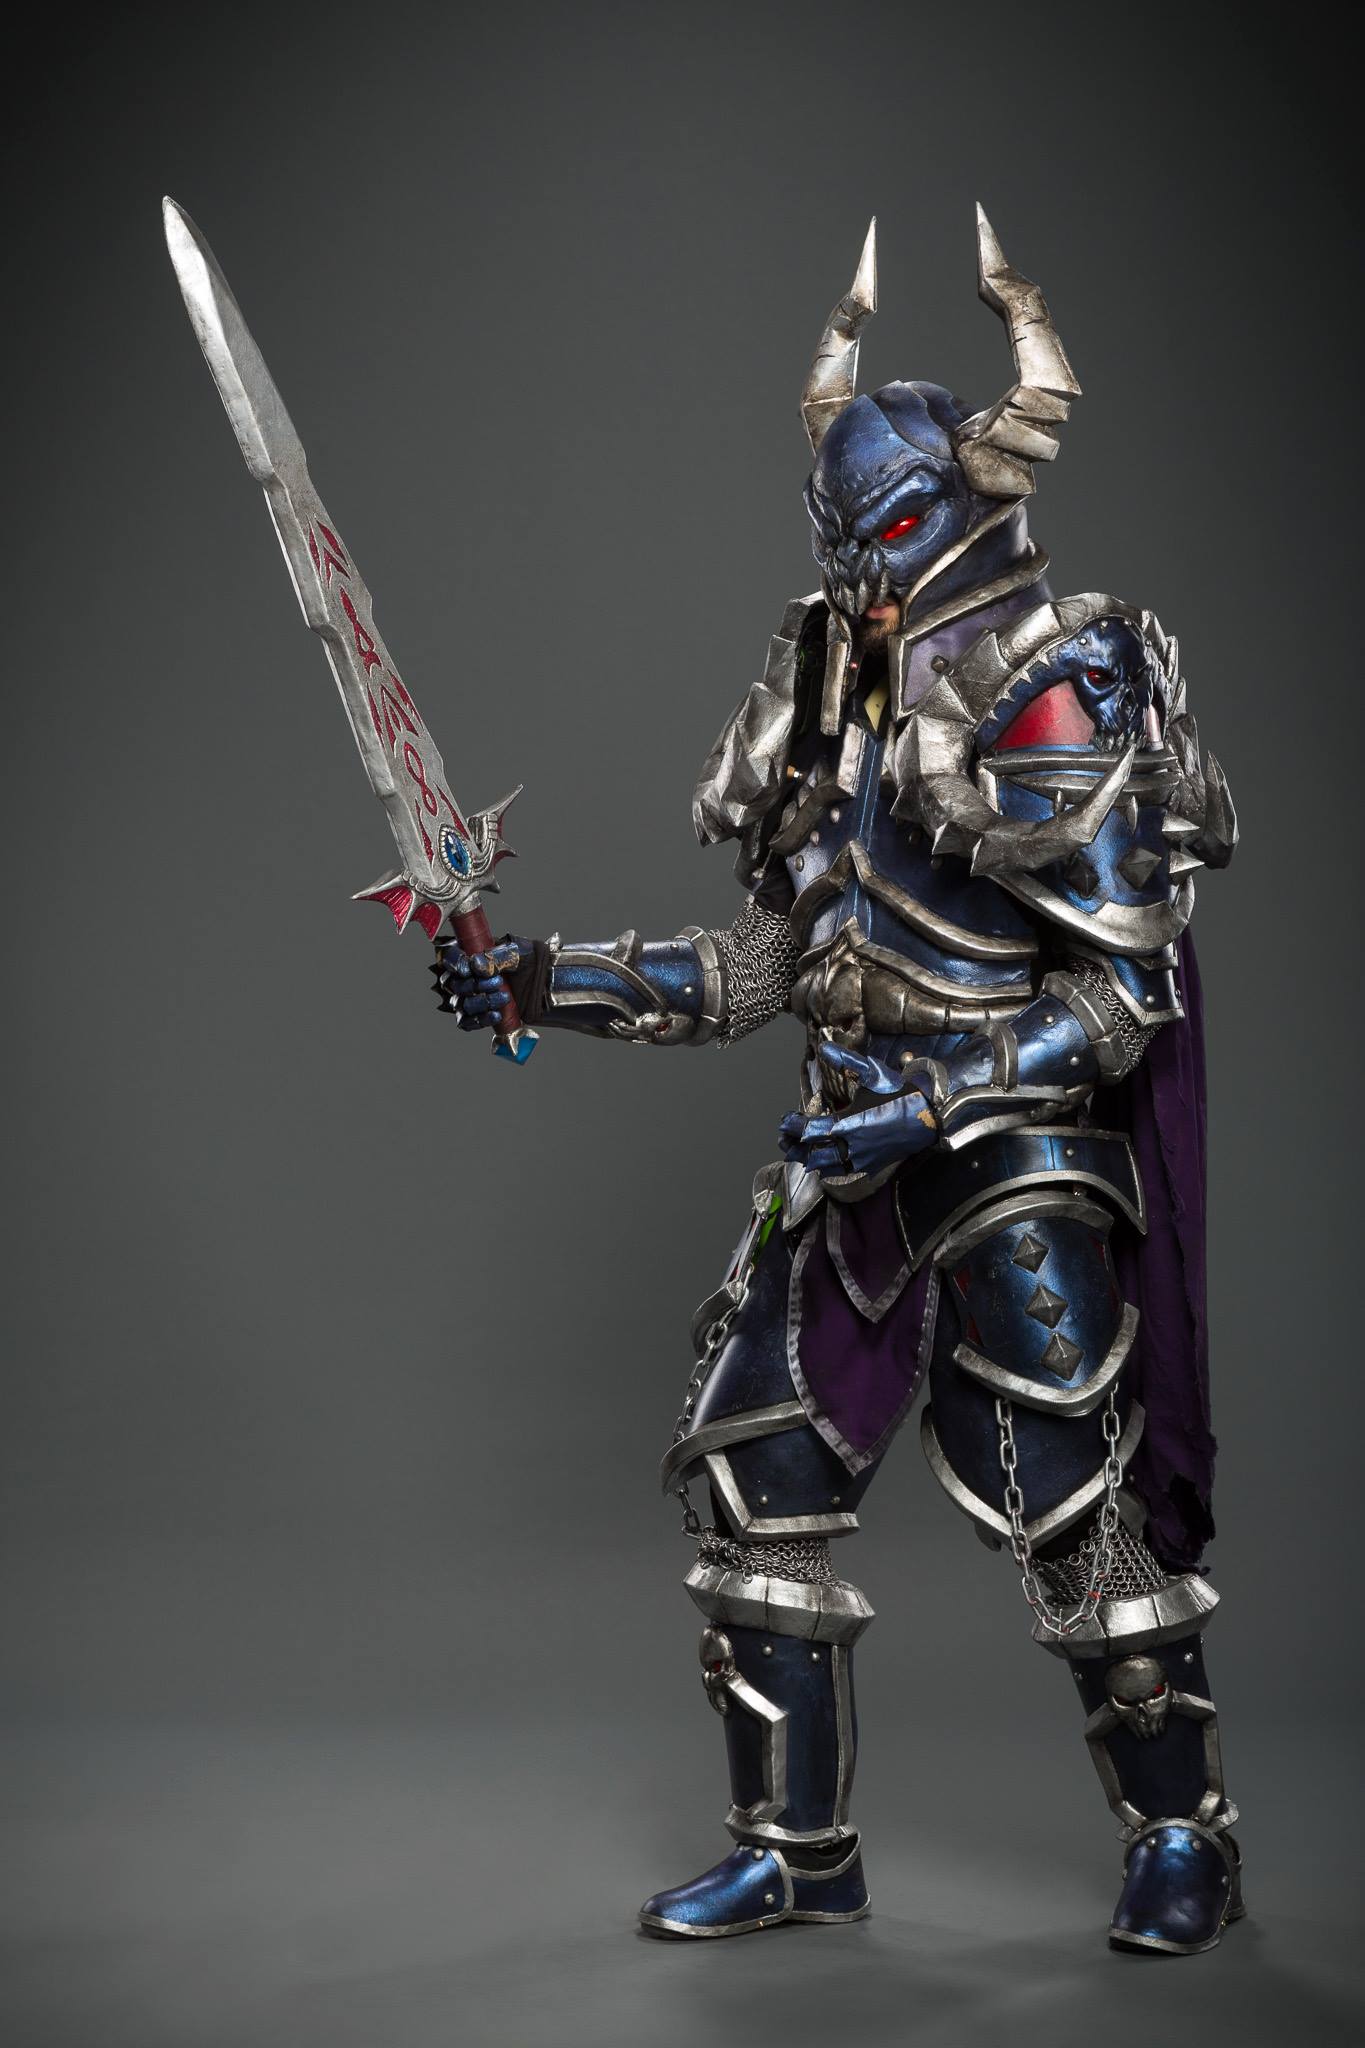
«Crafting a full armor from the ground up in just one month ? Eaaaasy !»
Among the three costumes we wanted to bring with us to Blizzcon in 2015, the Black Knight was the last one we made. One month before our departure to Los Angeles, the costume was barely started (a small piece of chainmail here, a small piece of Pepakura there)… and the stress began to build up slowly !
A huge amount of work awaited us : helmet, sword, full armor, chainmails, lights… The days felt long, but we took the challenge on, and after one month, the Knight came to life (one day before taking off, but still).
More than a year after its inception, here is (at last) the making of our Black Knight 😉
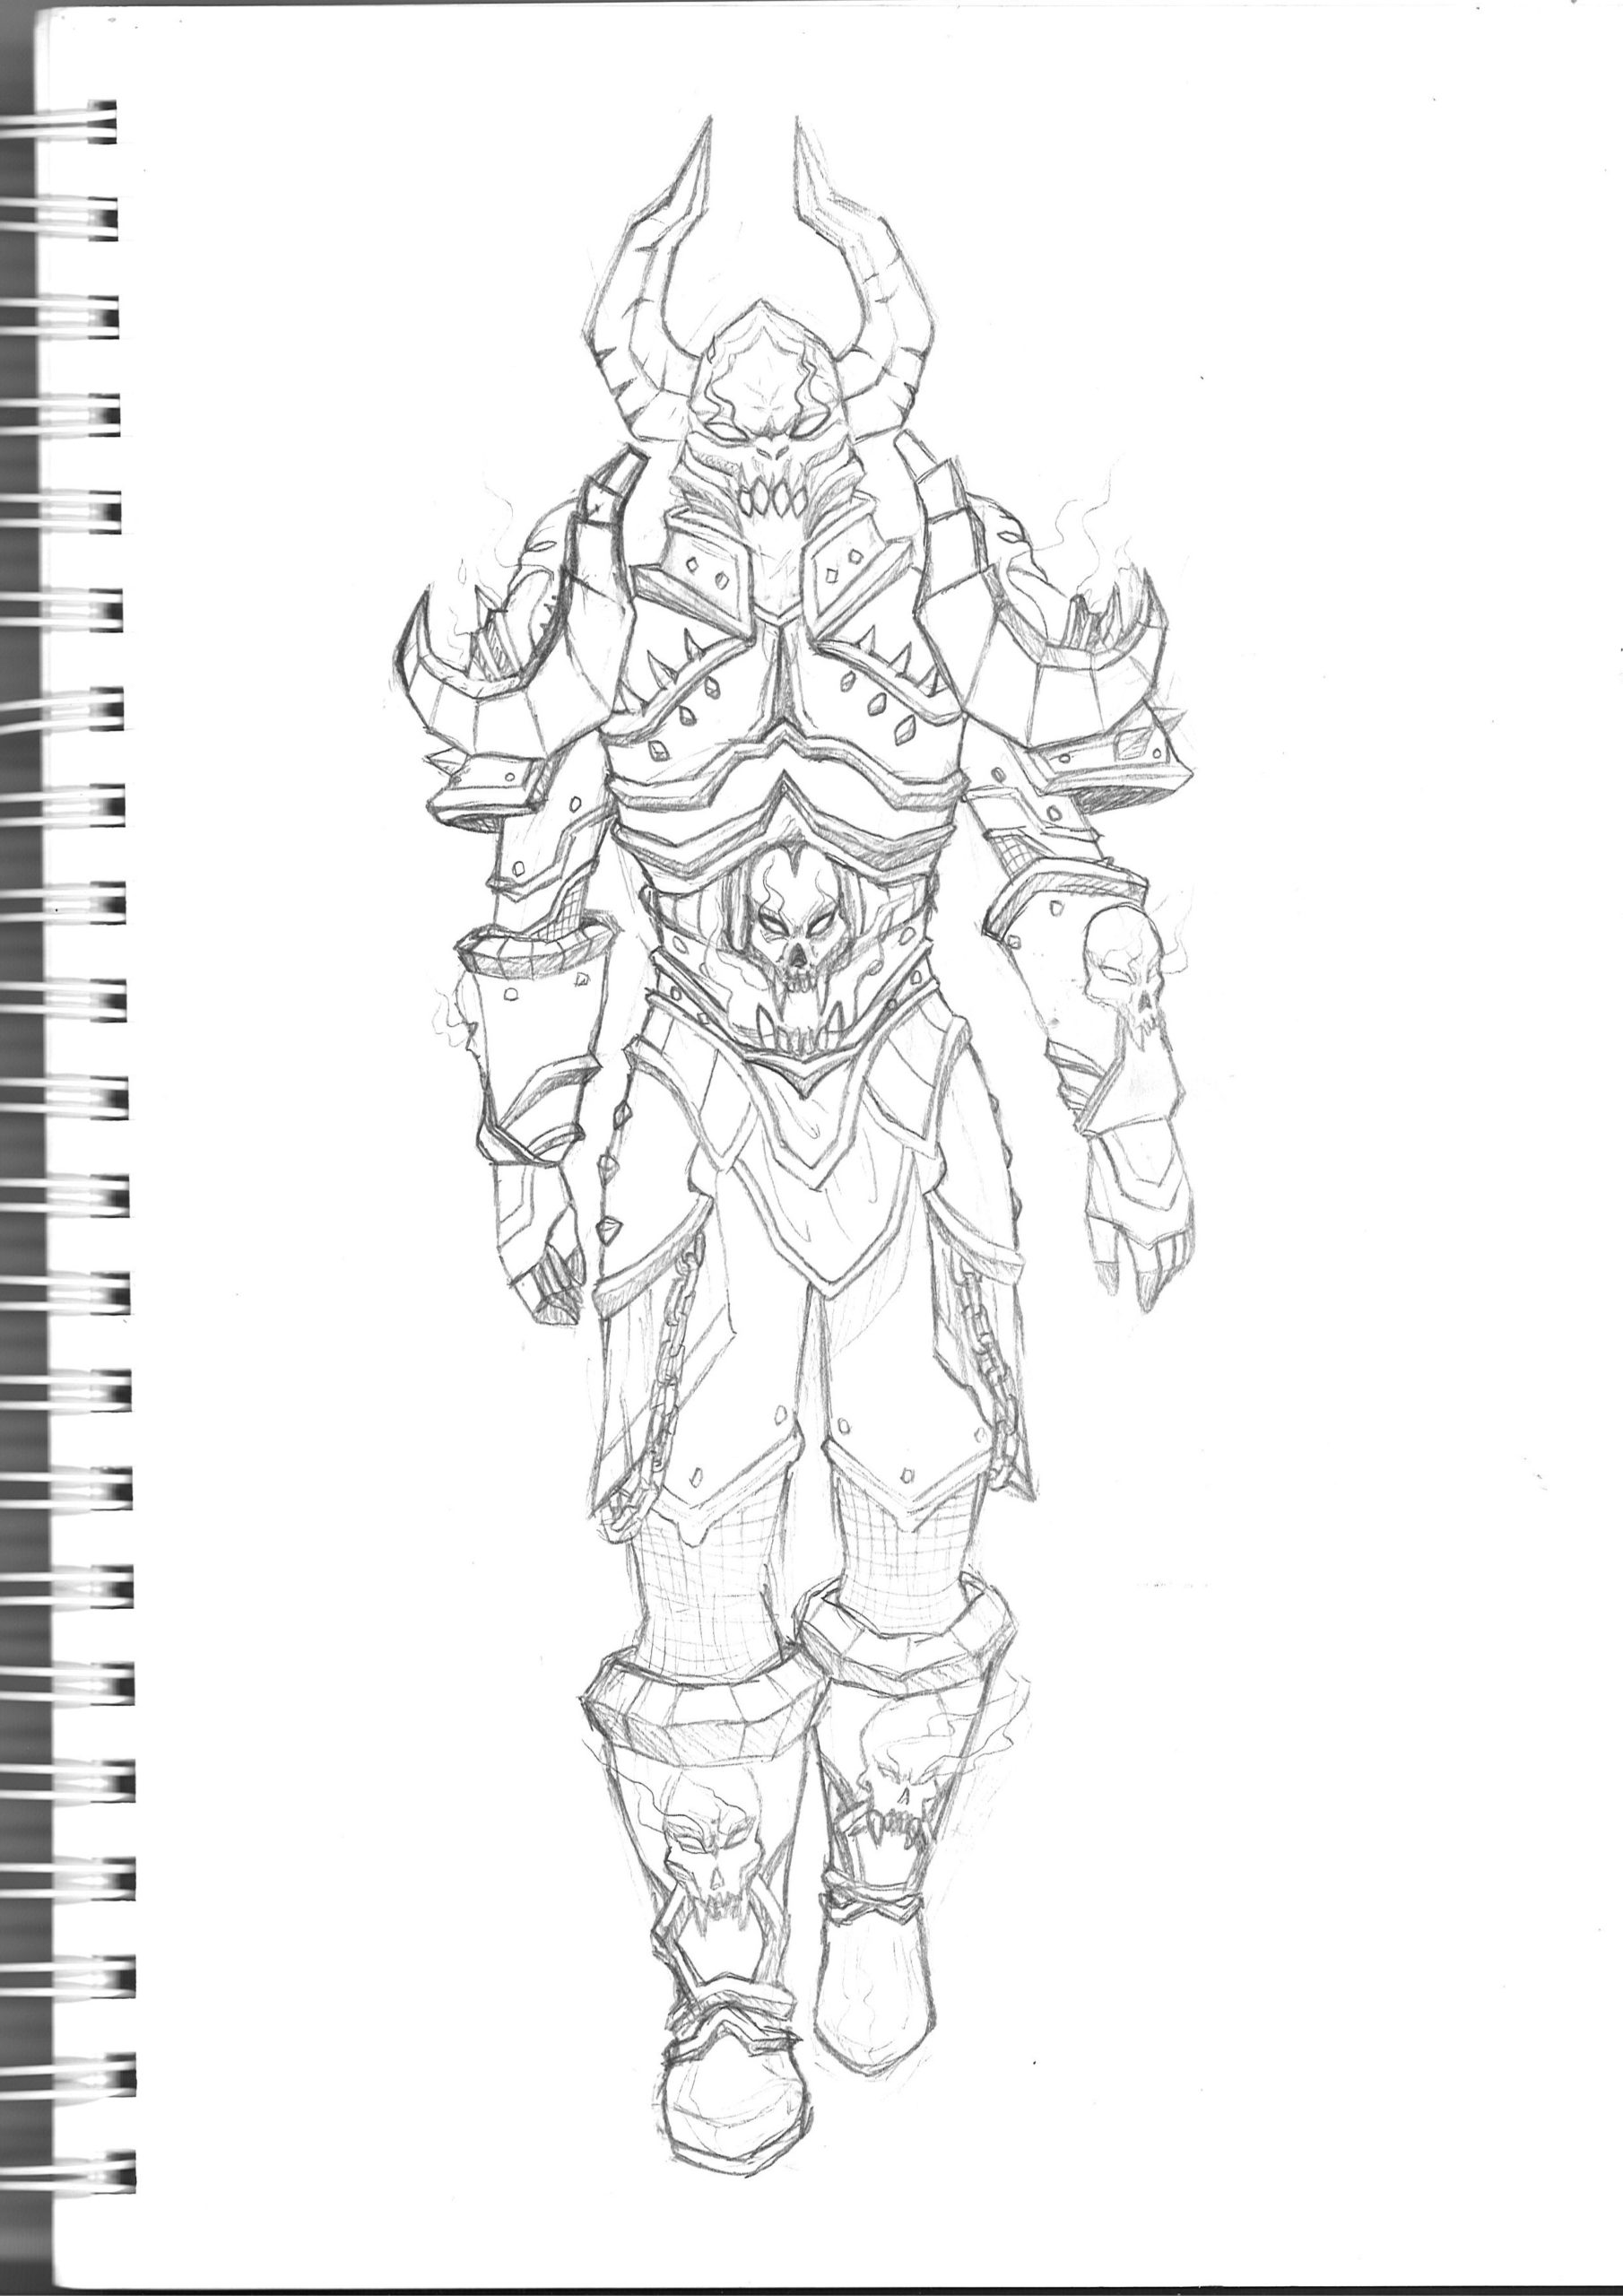
It all begins with some research work, to find good reference pictures.
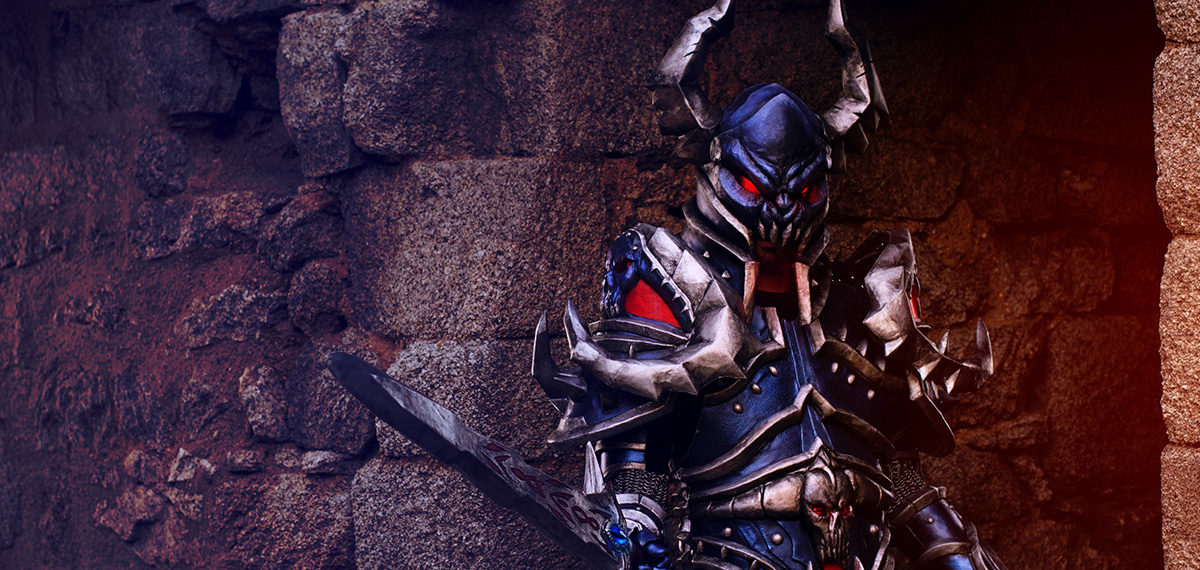
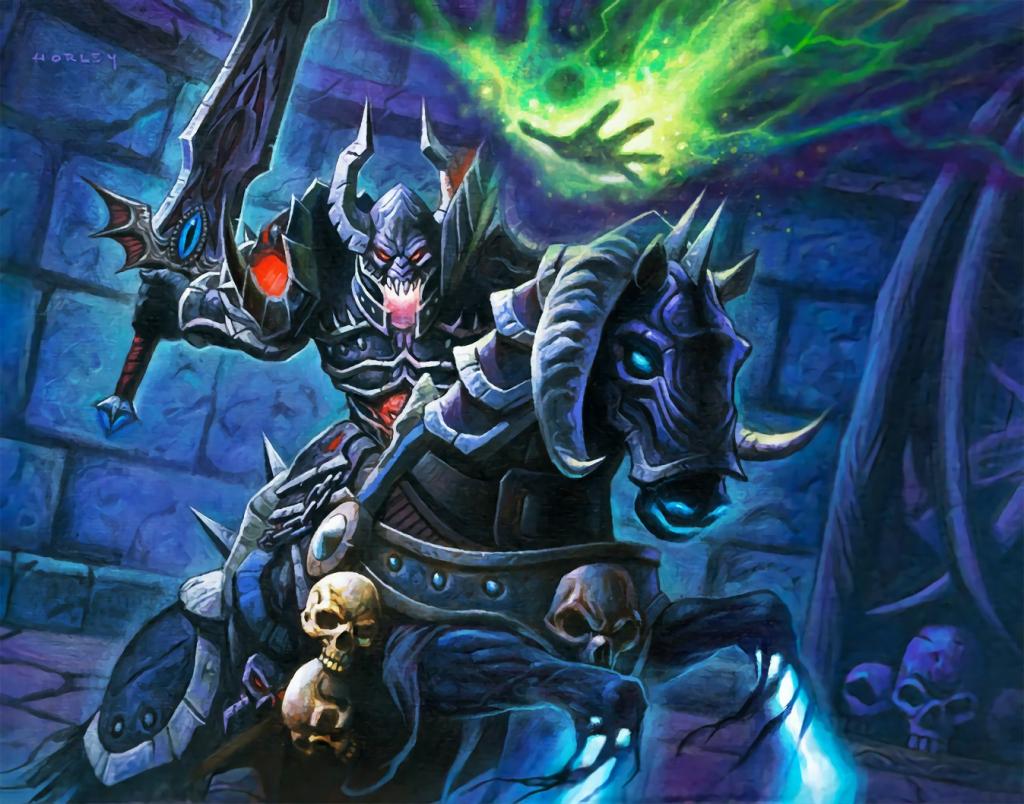
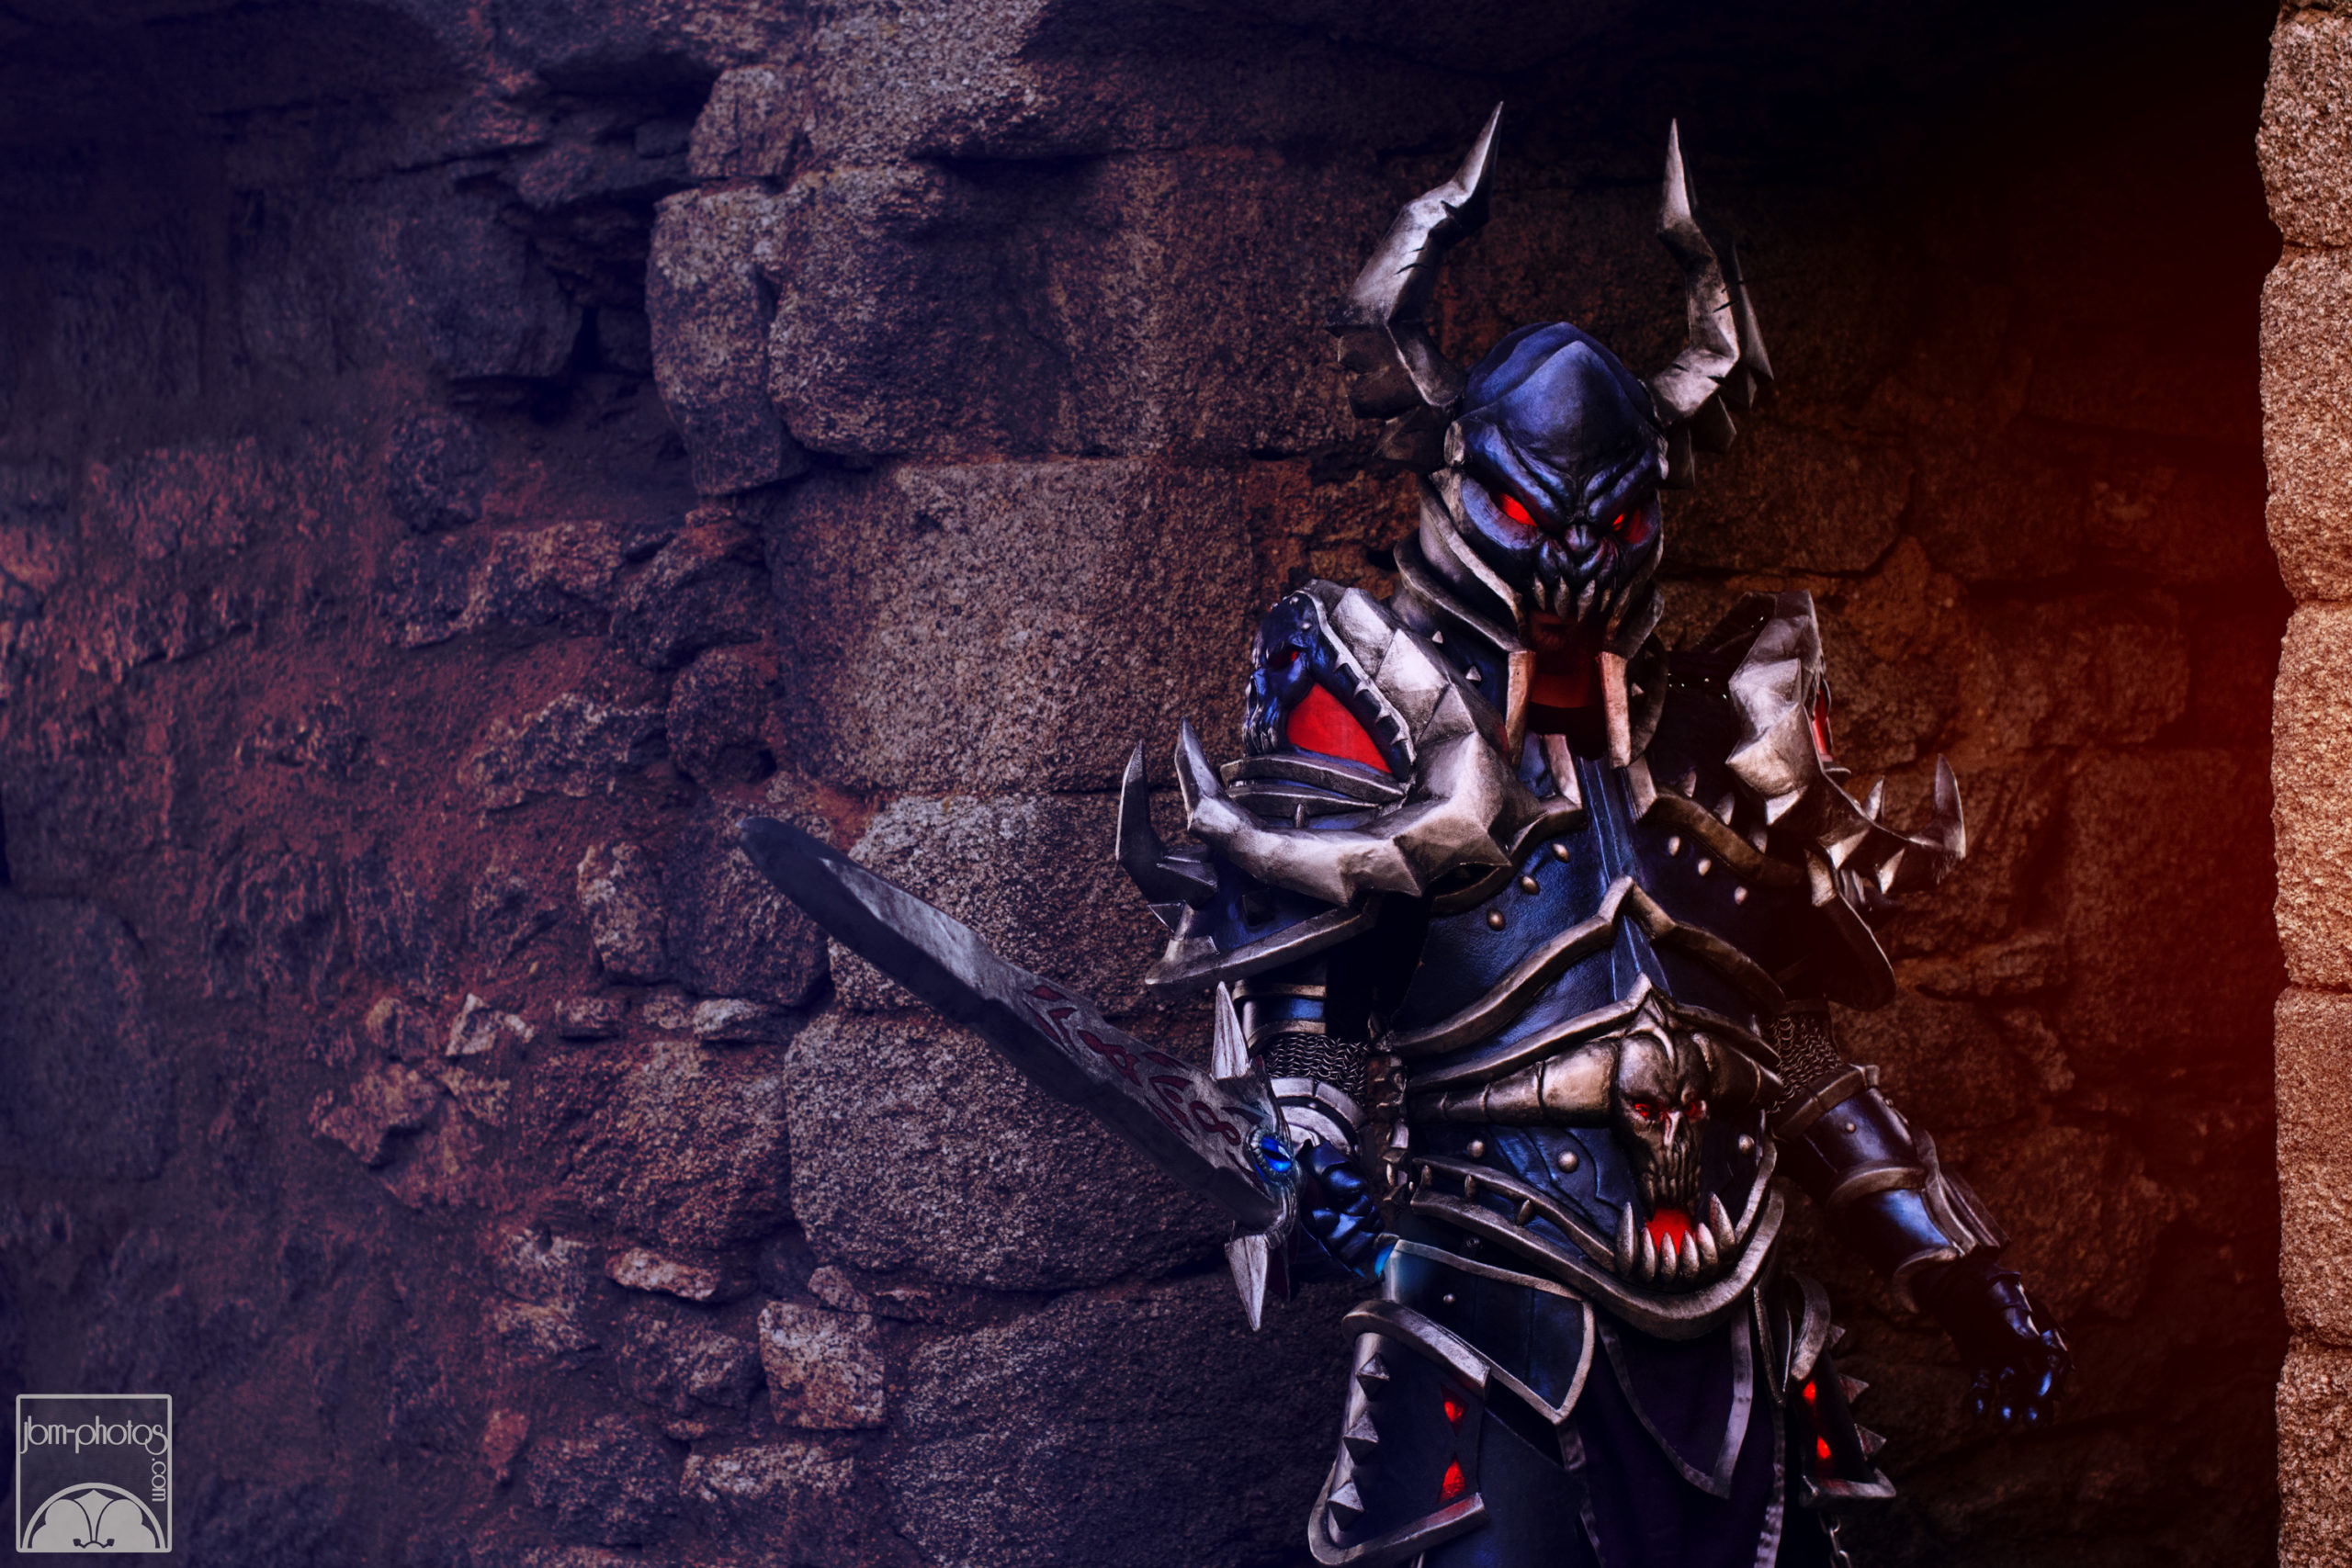
Our starting point was the illustration made by Alex Horley for the Black Knight card in the video game Hearthstone : Heroes of Warcraft.
Since parts of the character were hidden, Marie re-drew him entirely based on this picture, while adding the missing parts from the World of Warcraft in-game 3D models.


Some pieces were first crafted in Pepakura (see tutorial) by using a 3D model extracted from World of Warcraft.
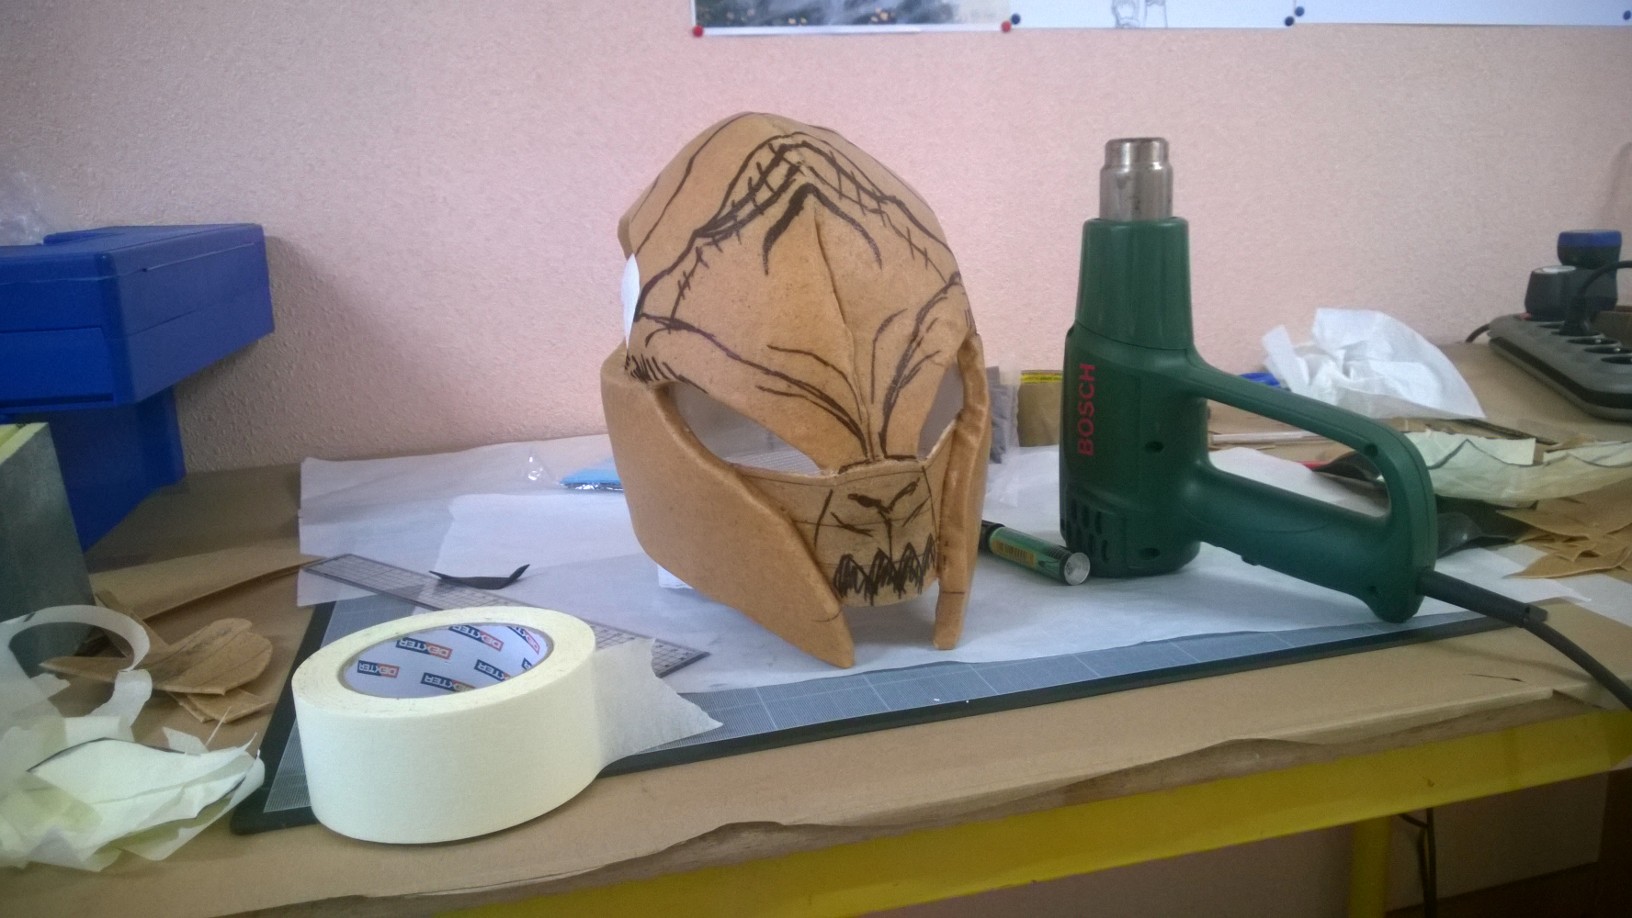
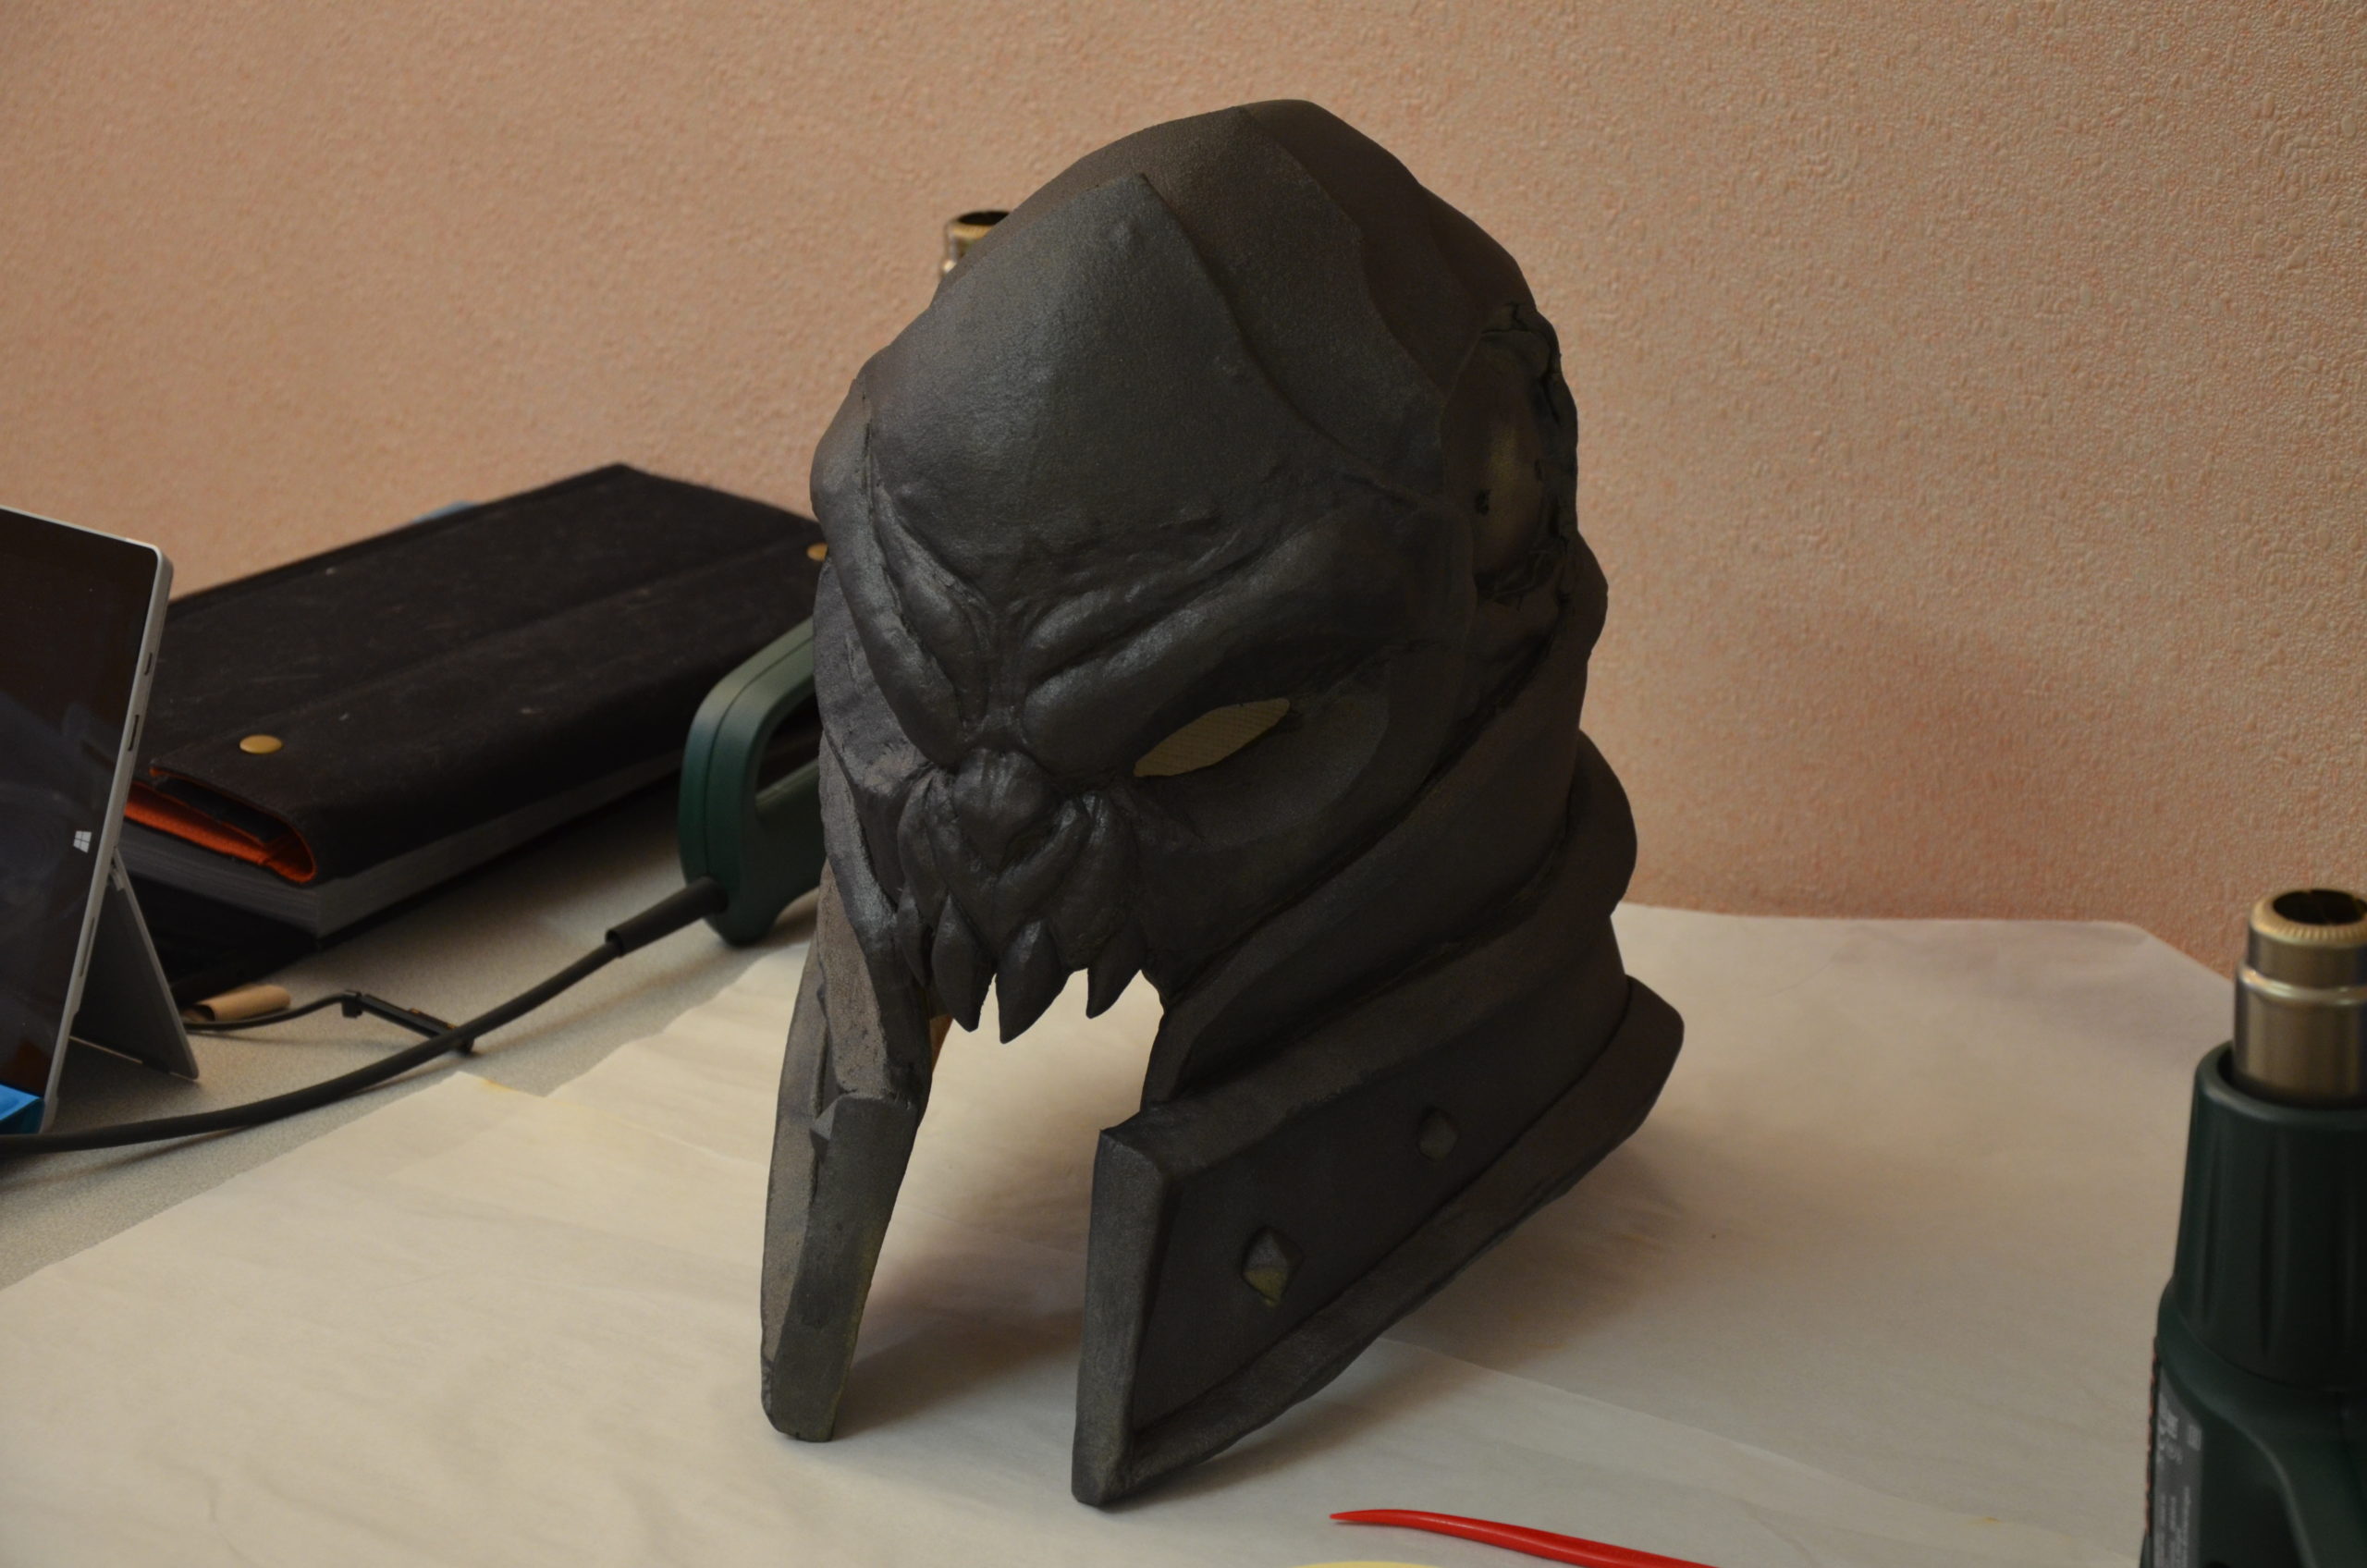
First, the helmet. Despite this step being optional, it gave us a life-size reference so we could sculpt with Worbla afterwards.
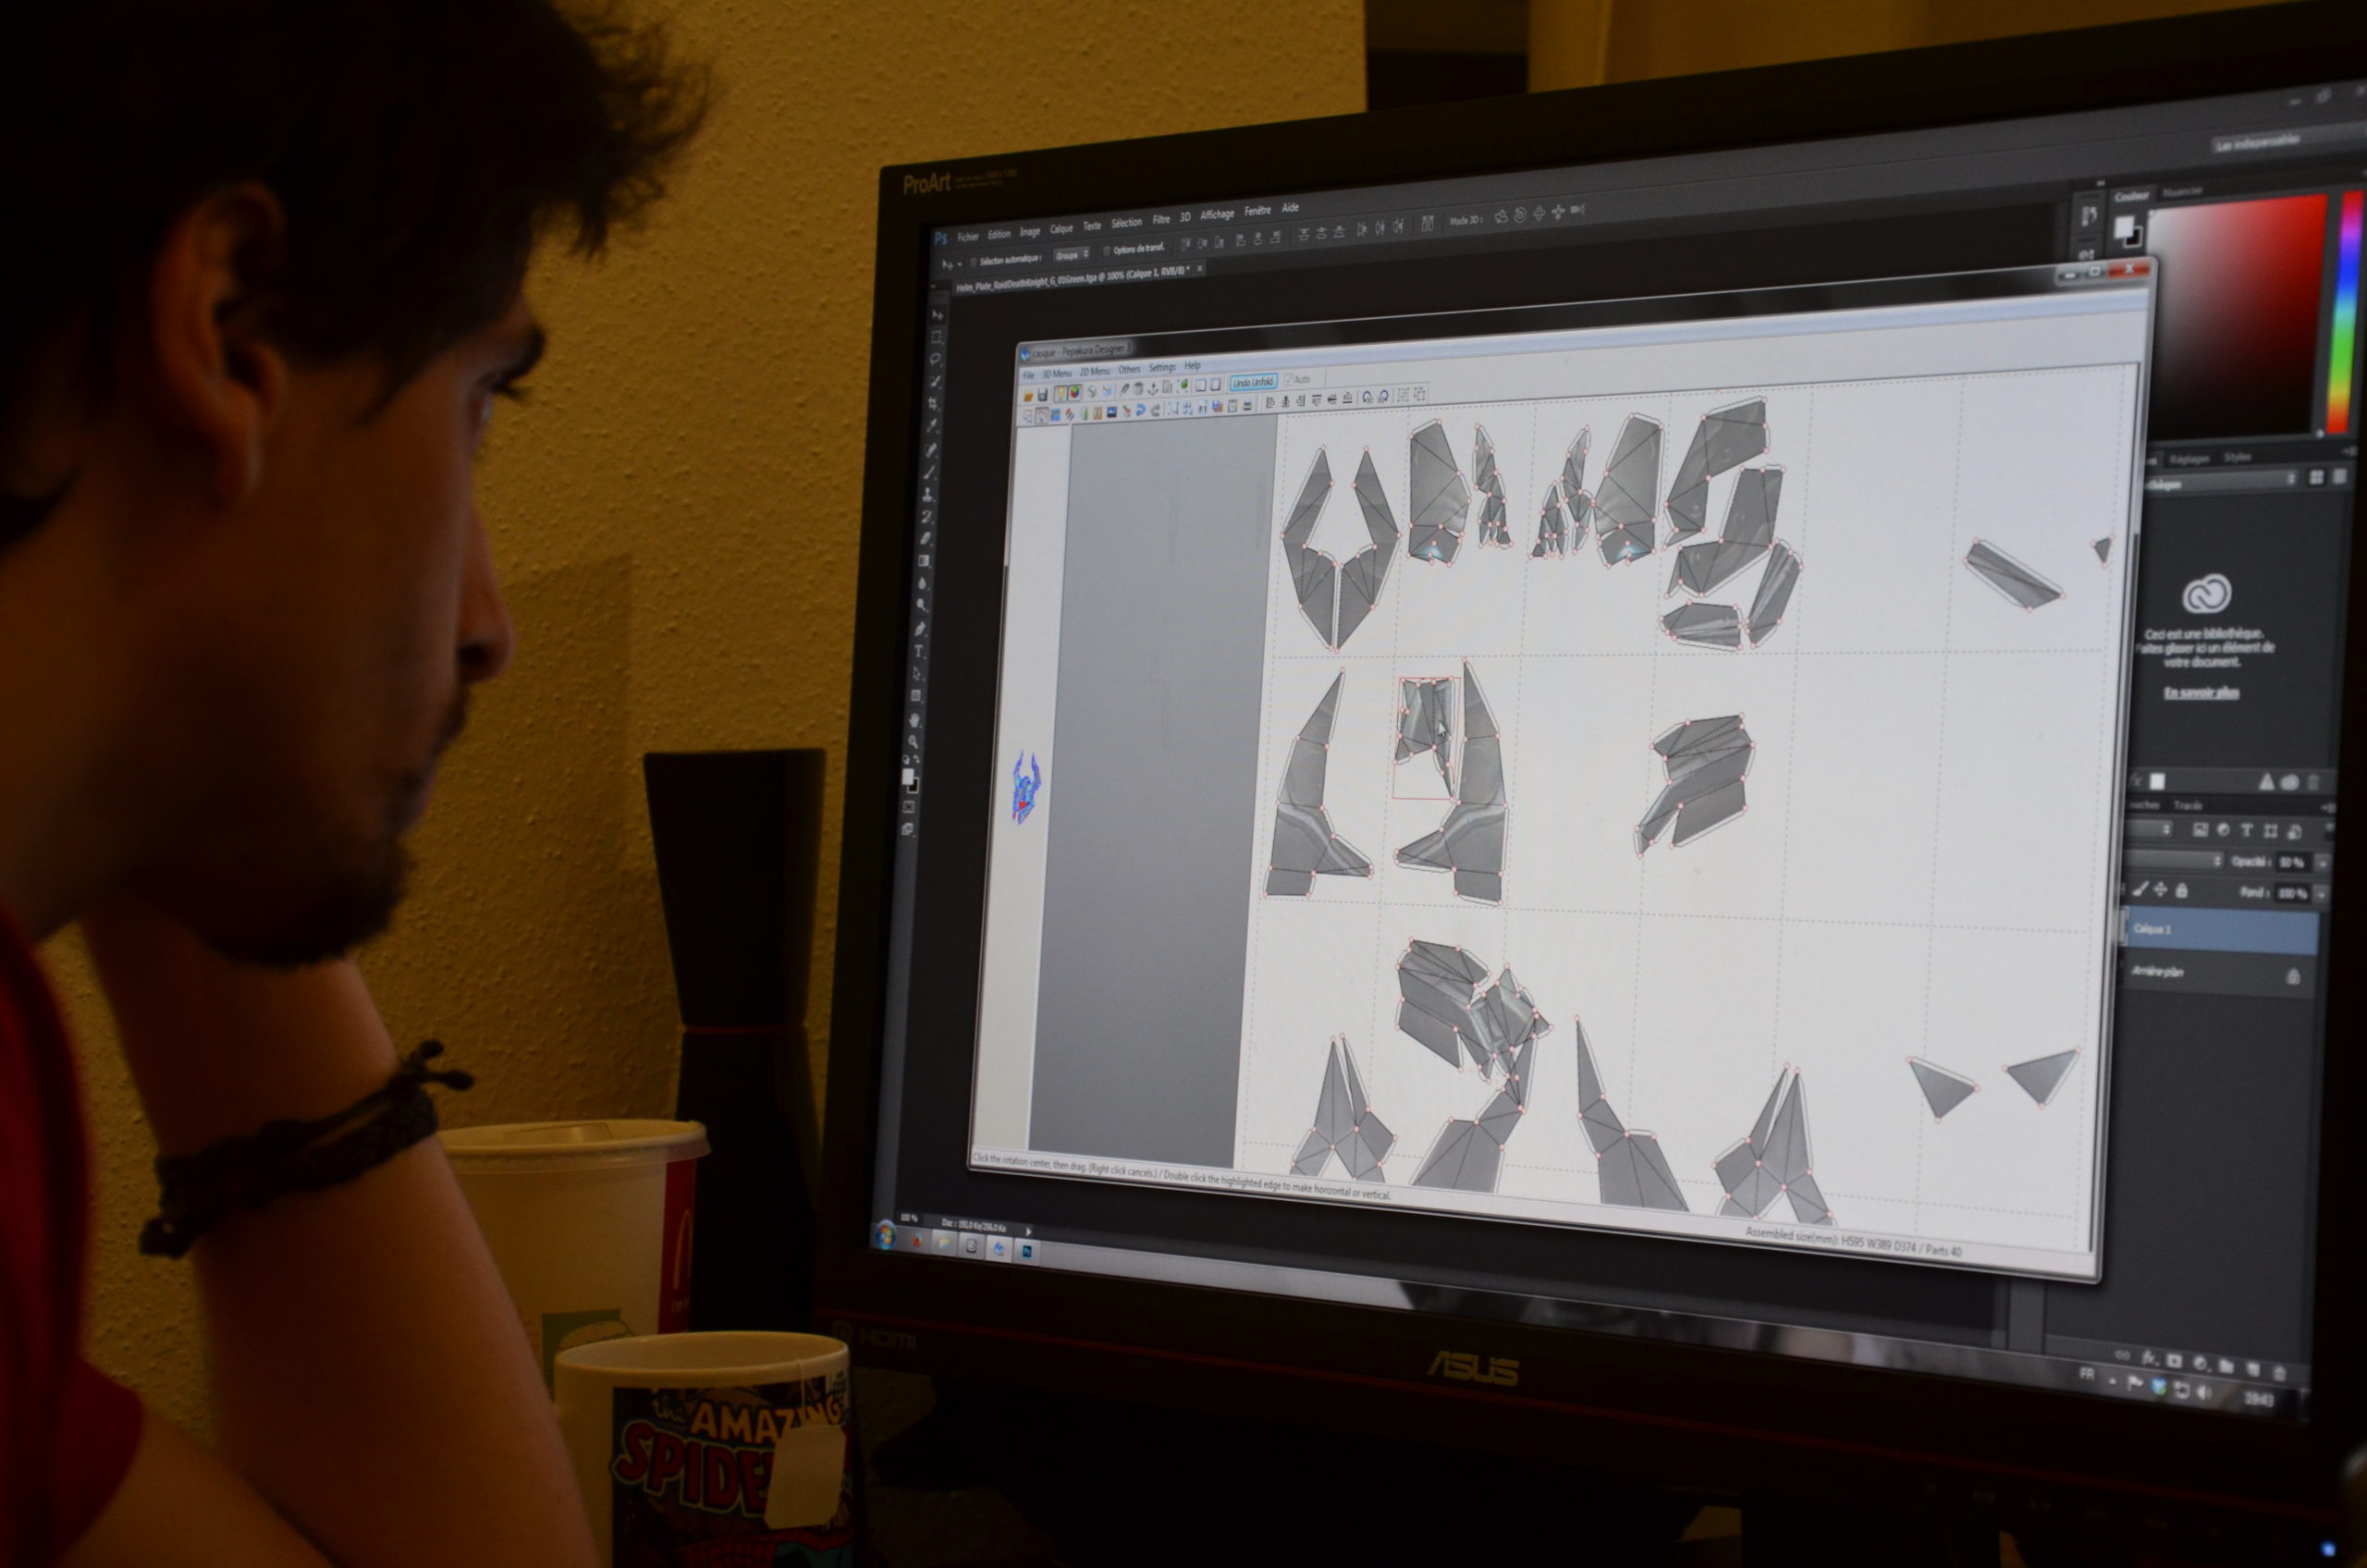
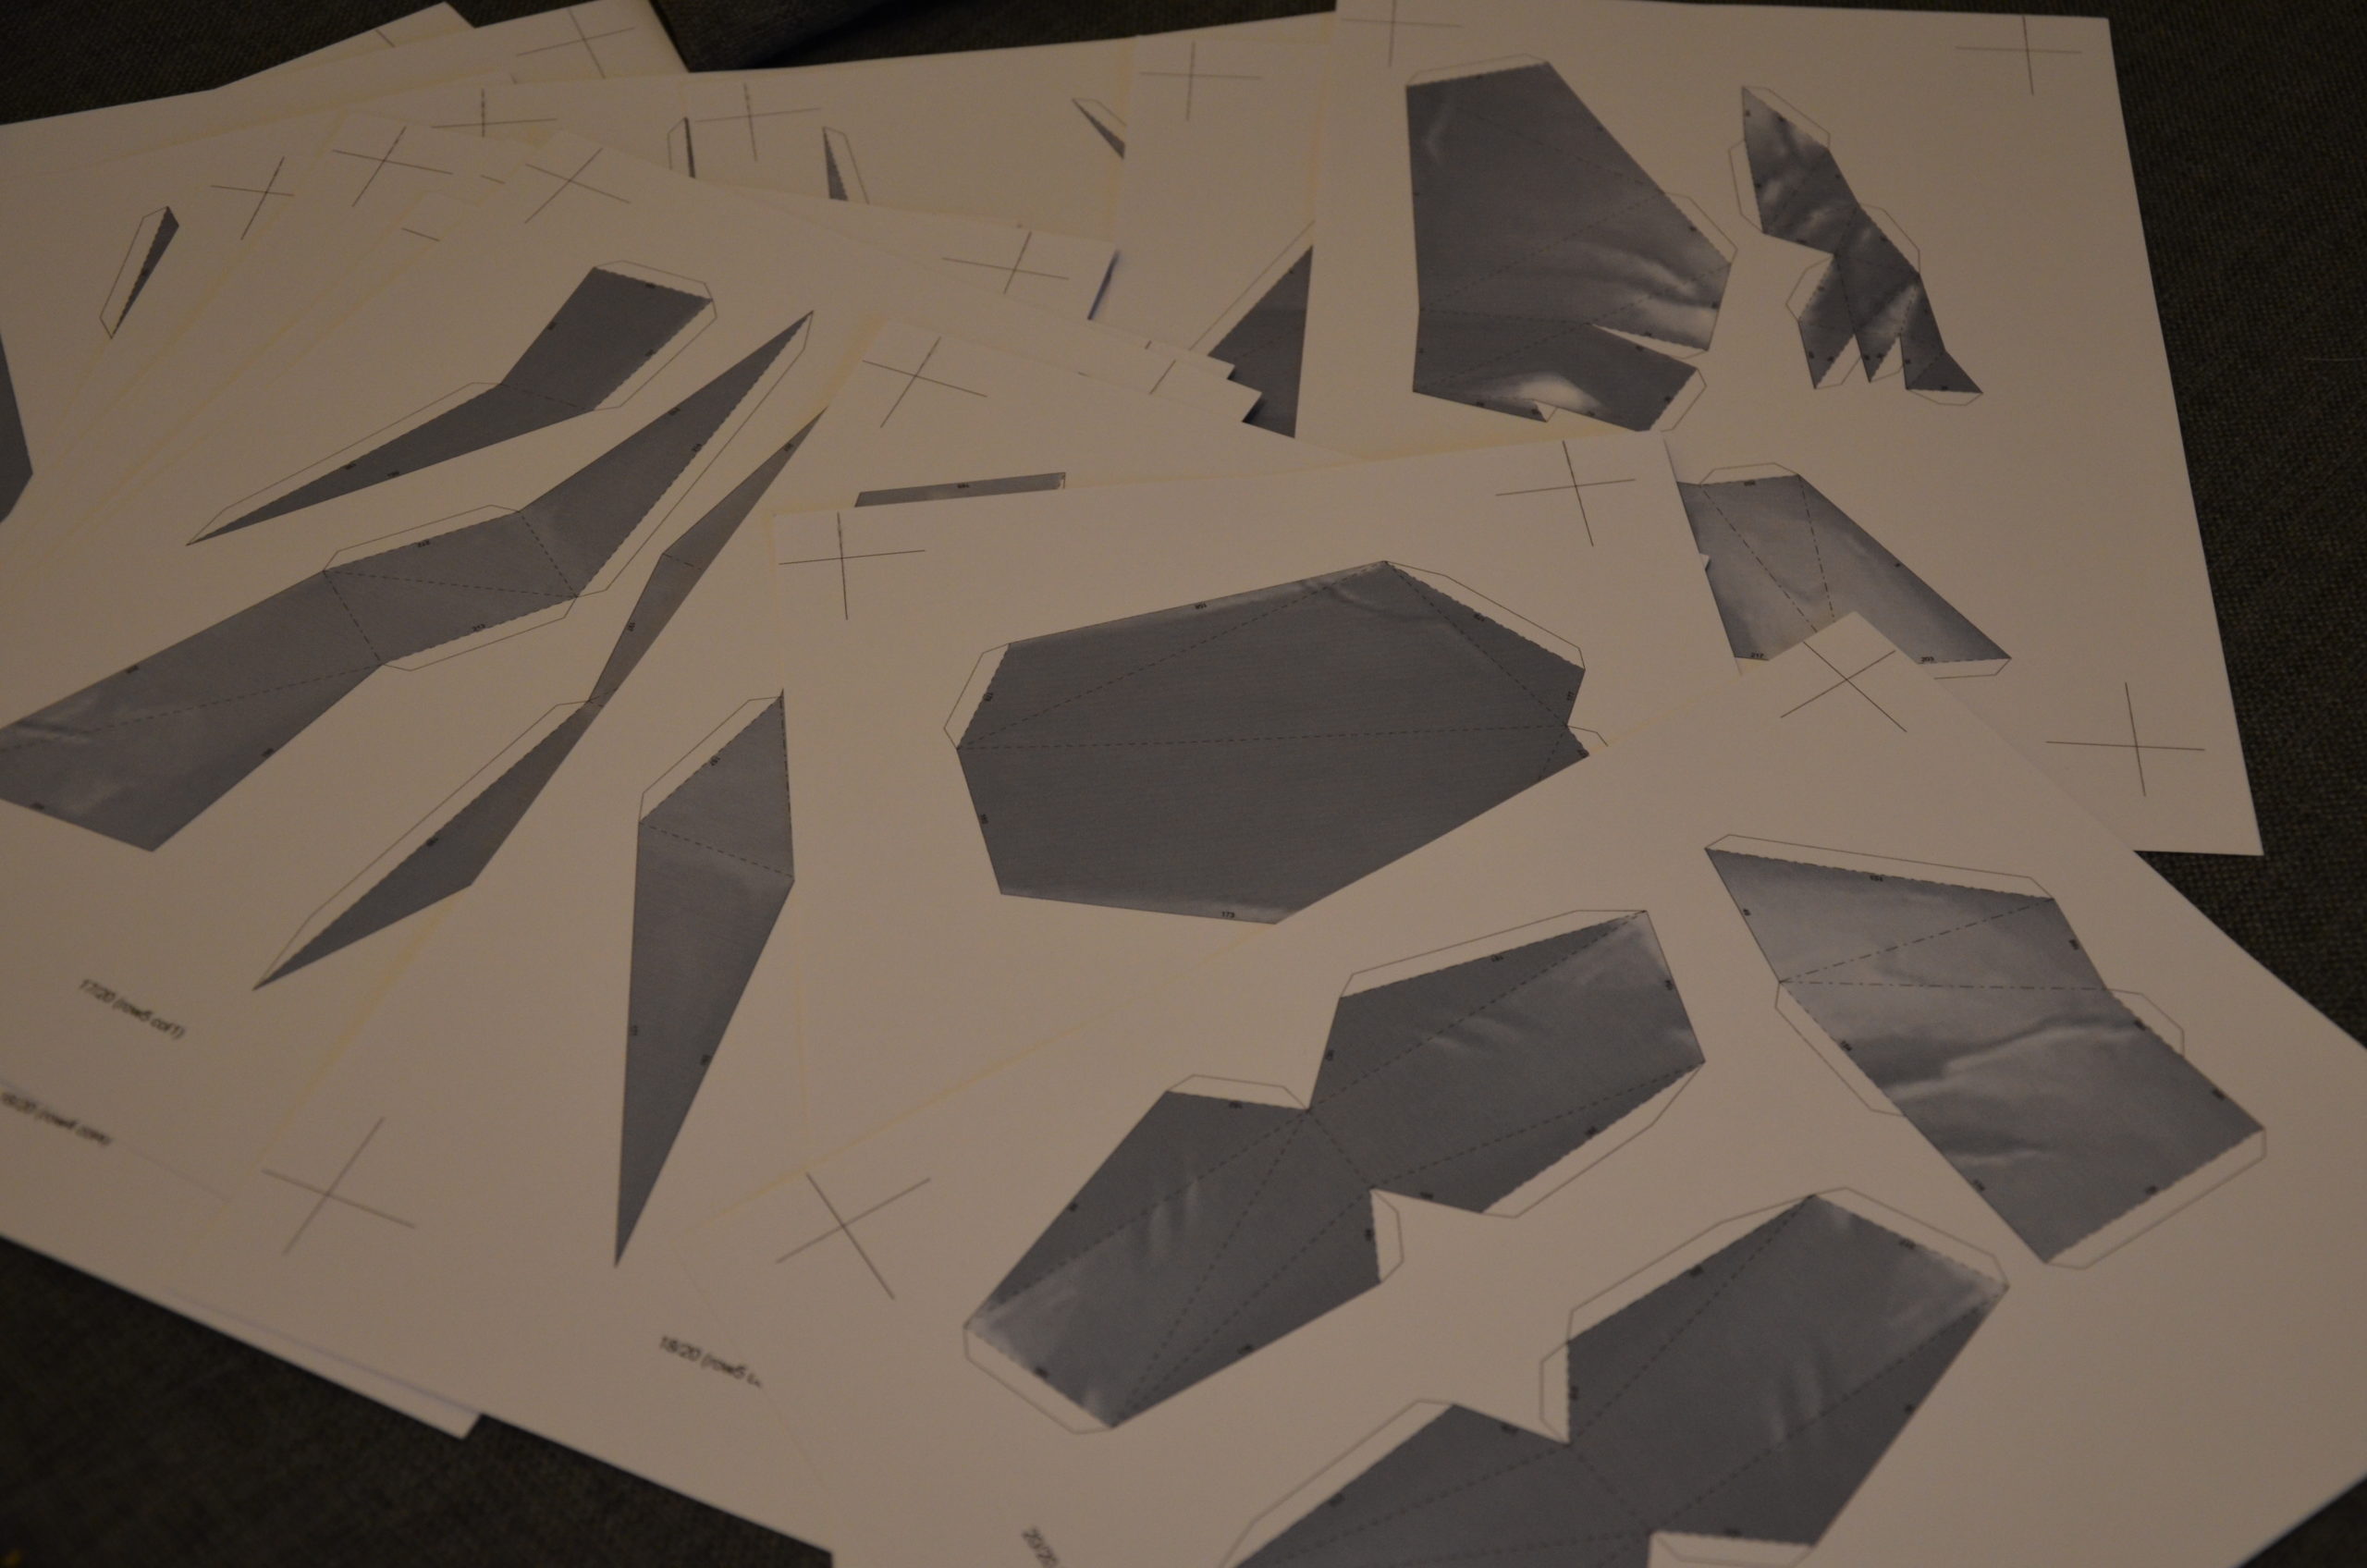
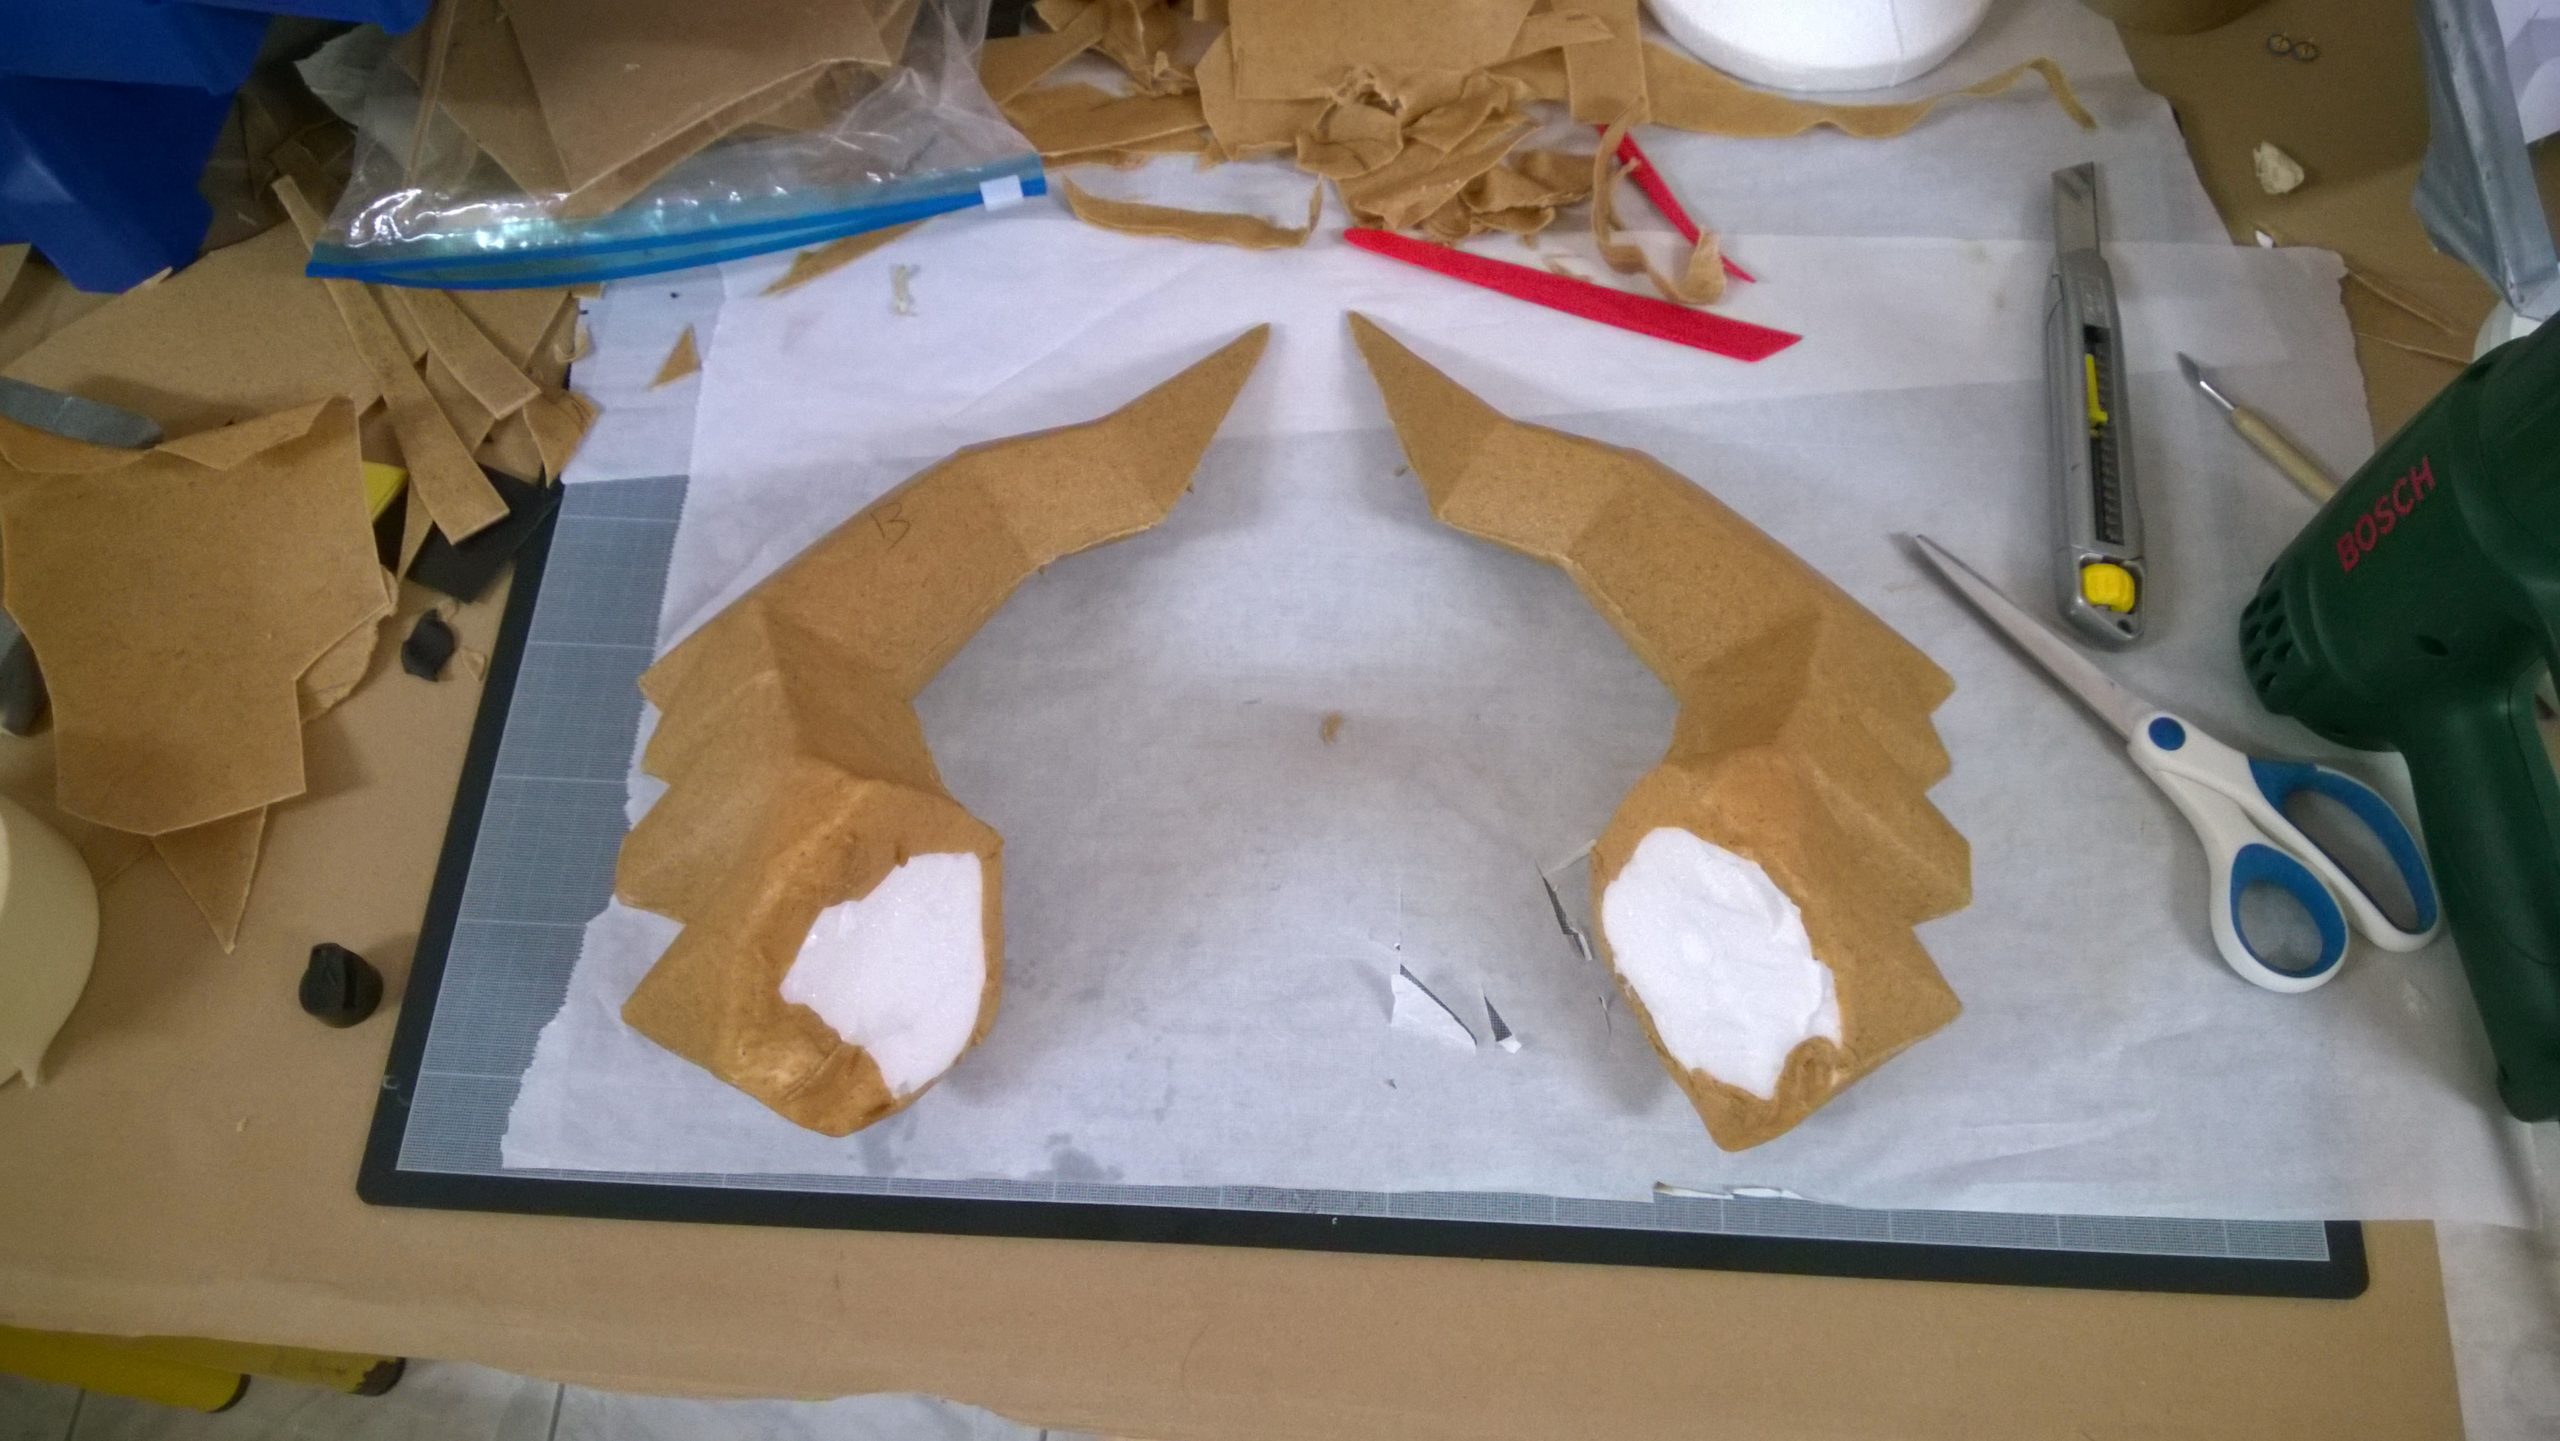
The helmet’s horns were cut from this Pepakura, and the shoulder horns were also made using the same method.
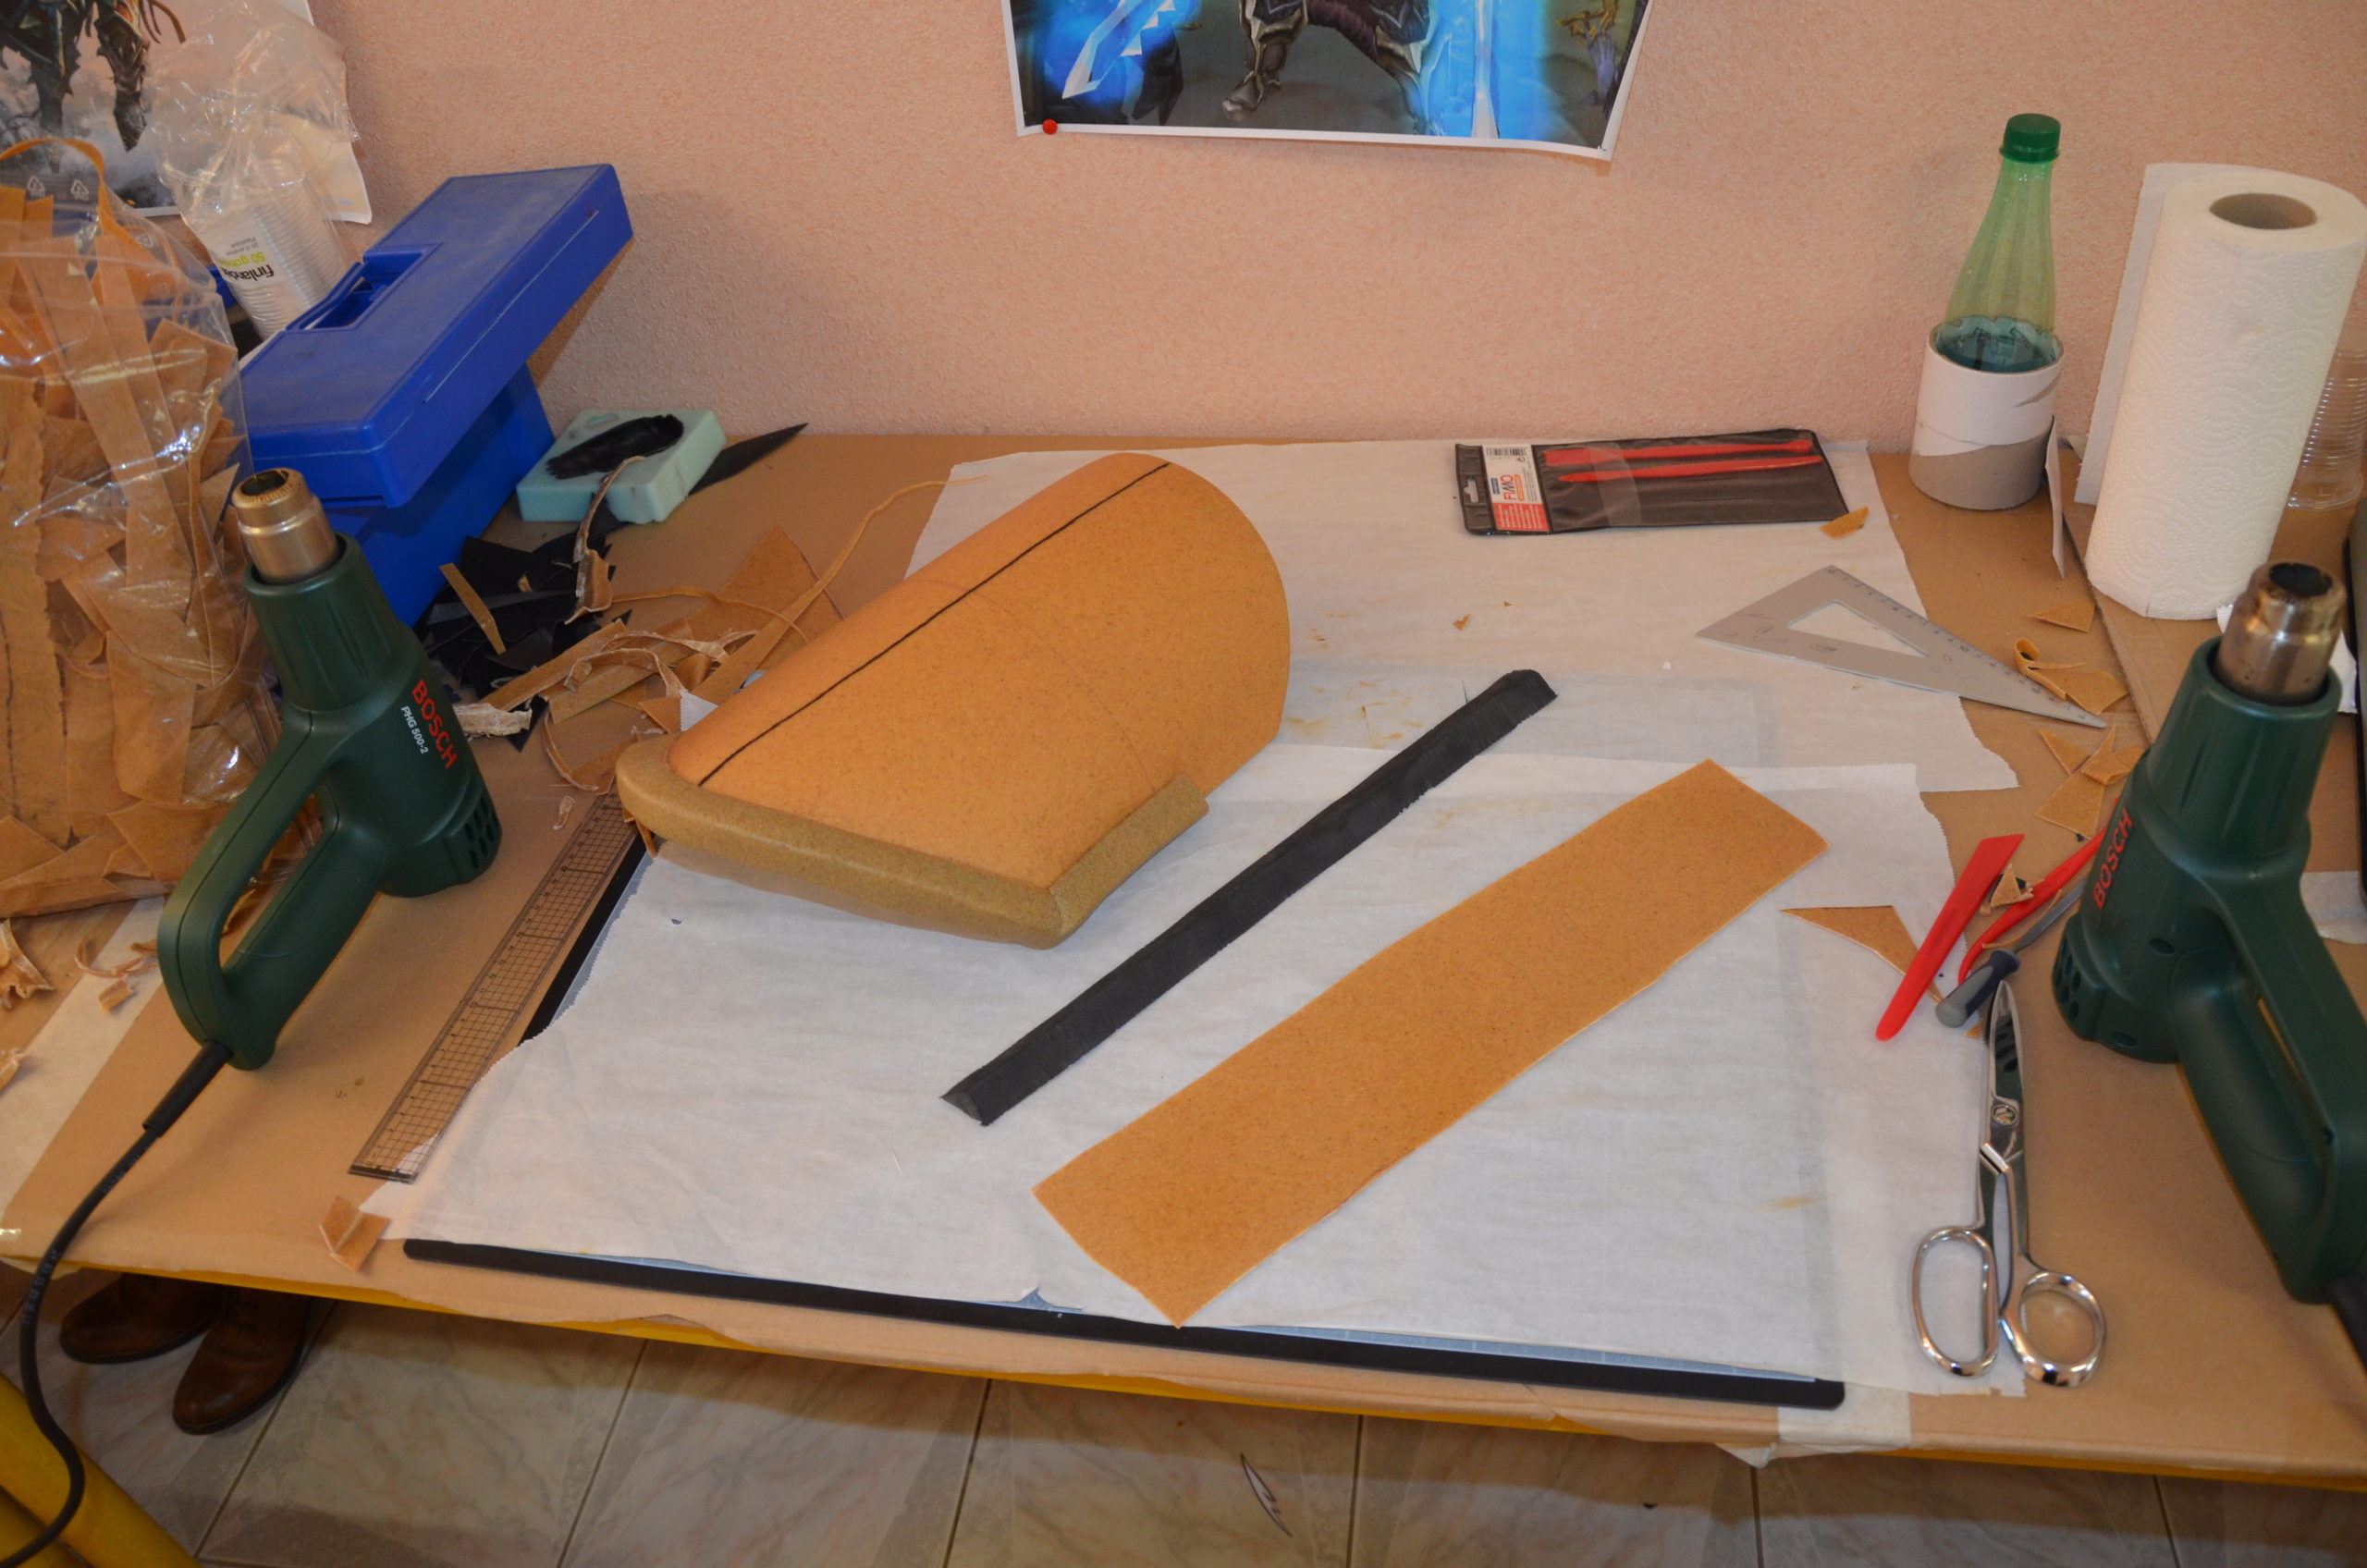
We tried a new technique to in the hope of saving some time : filling the Pepakura pieces with insulating foam.
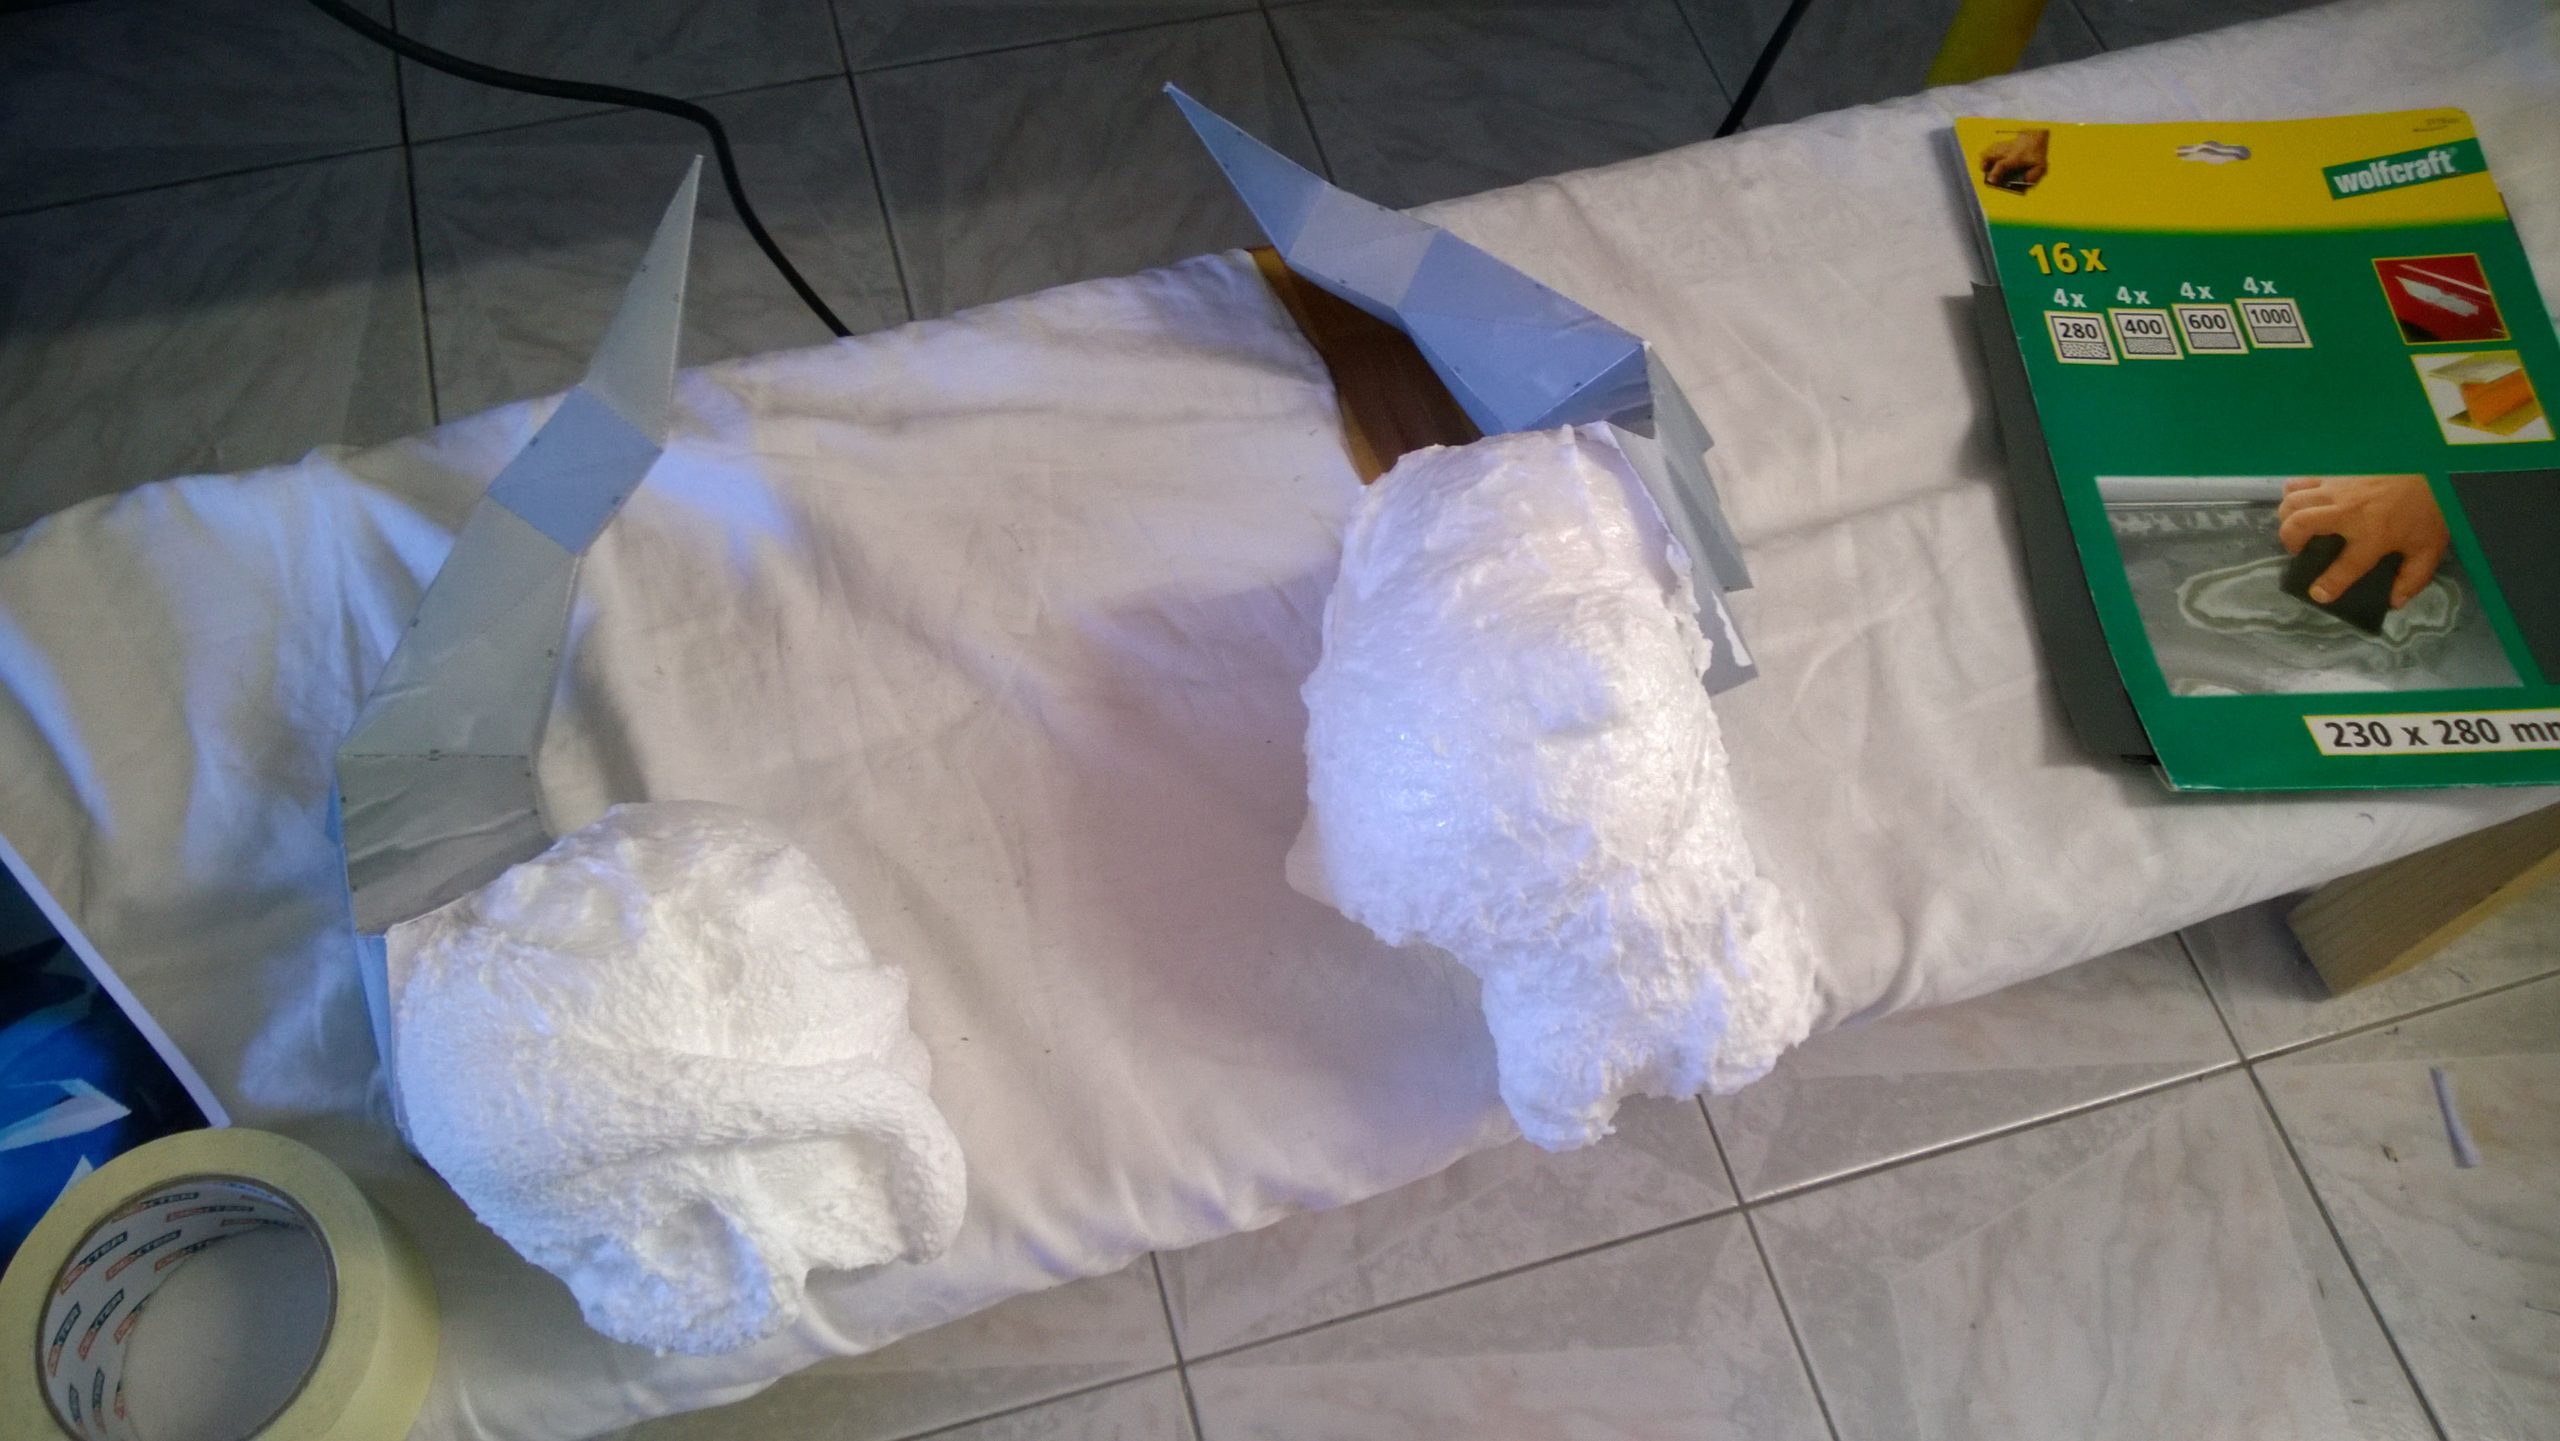
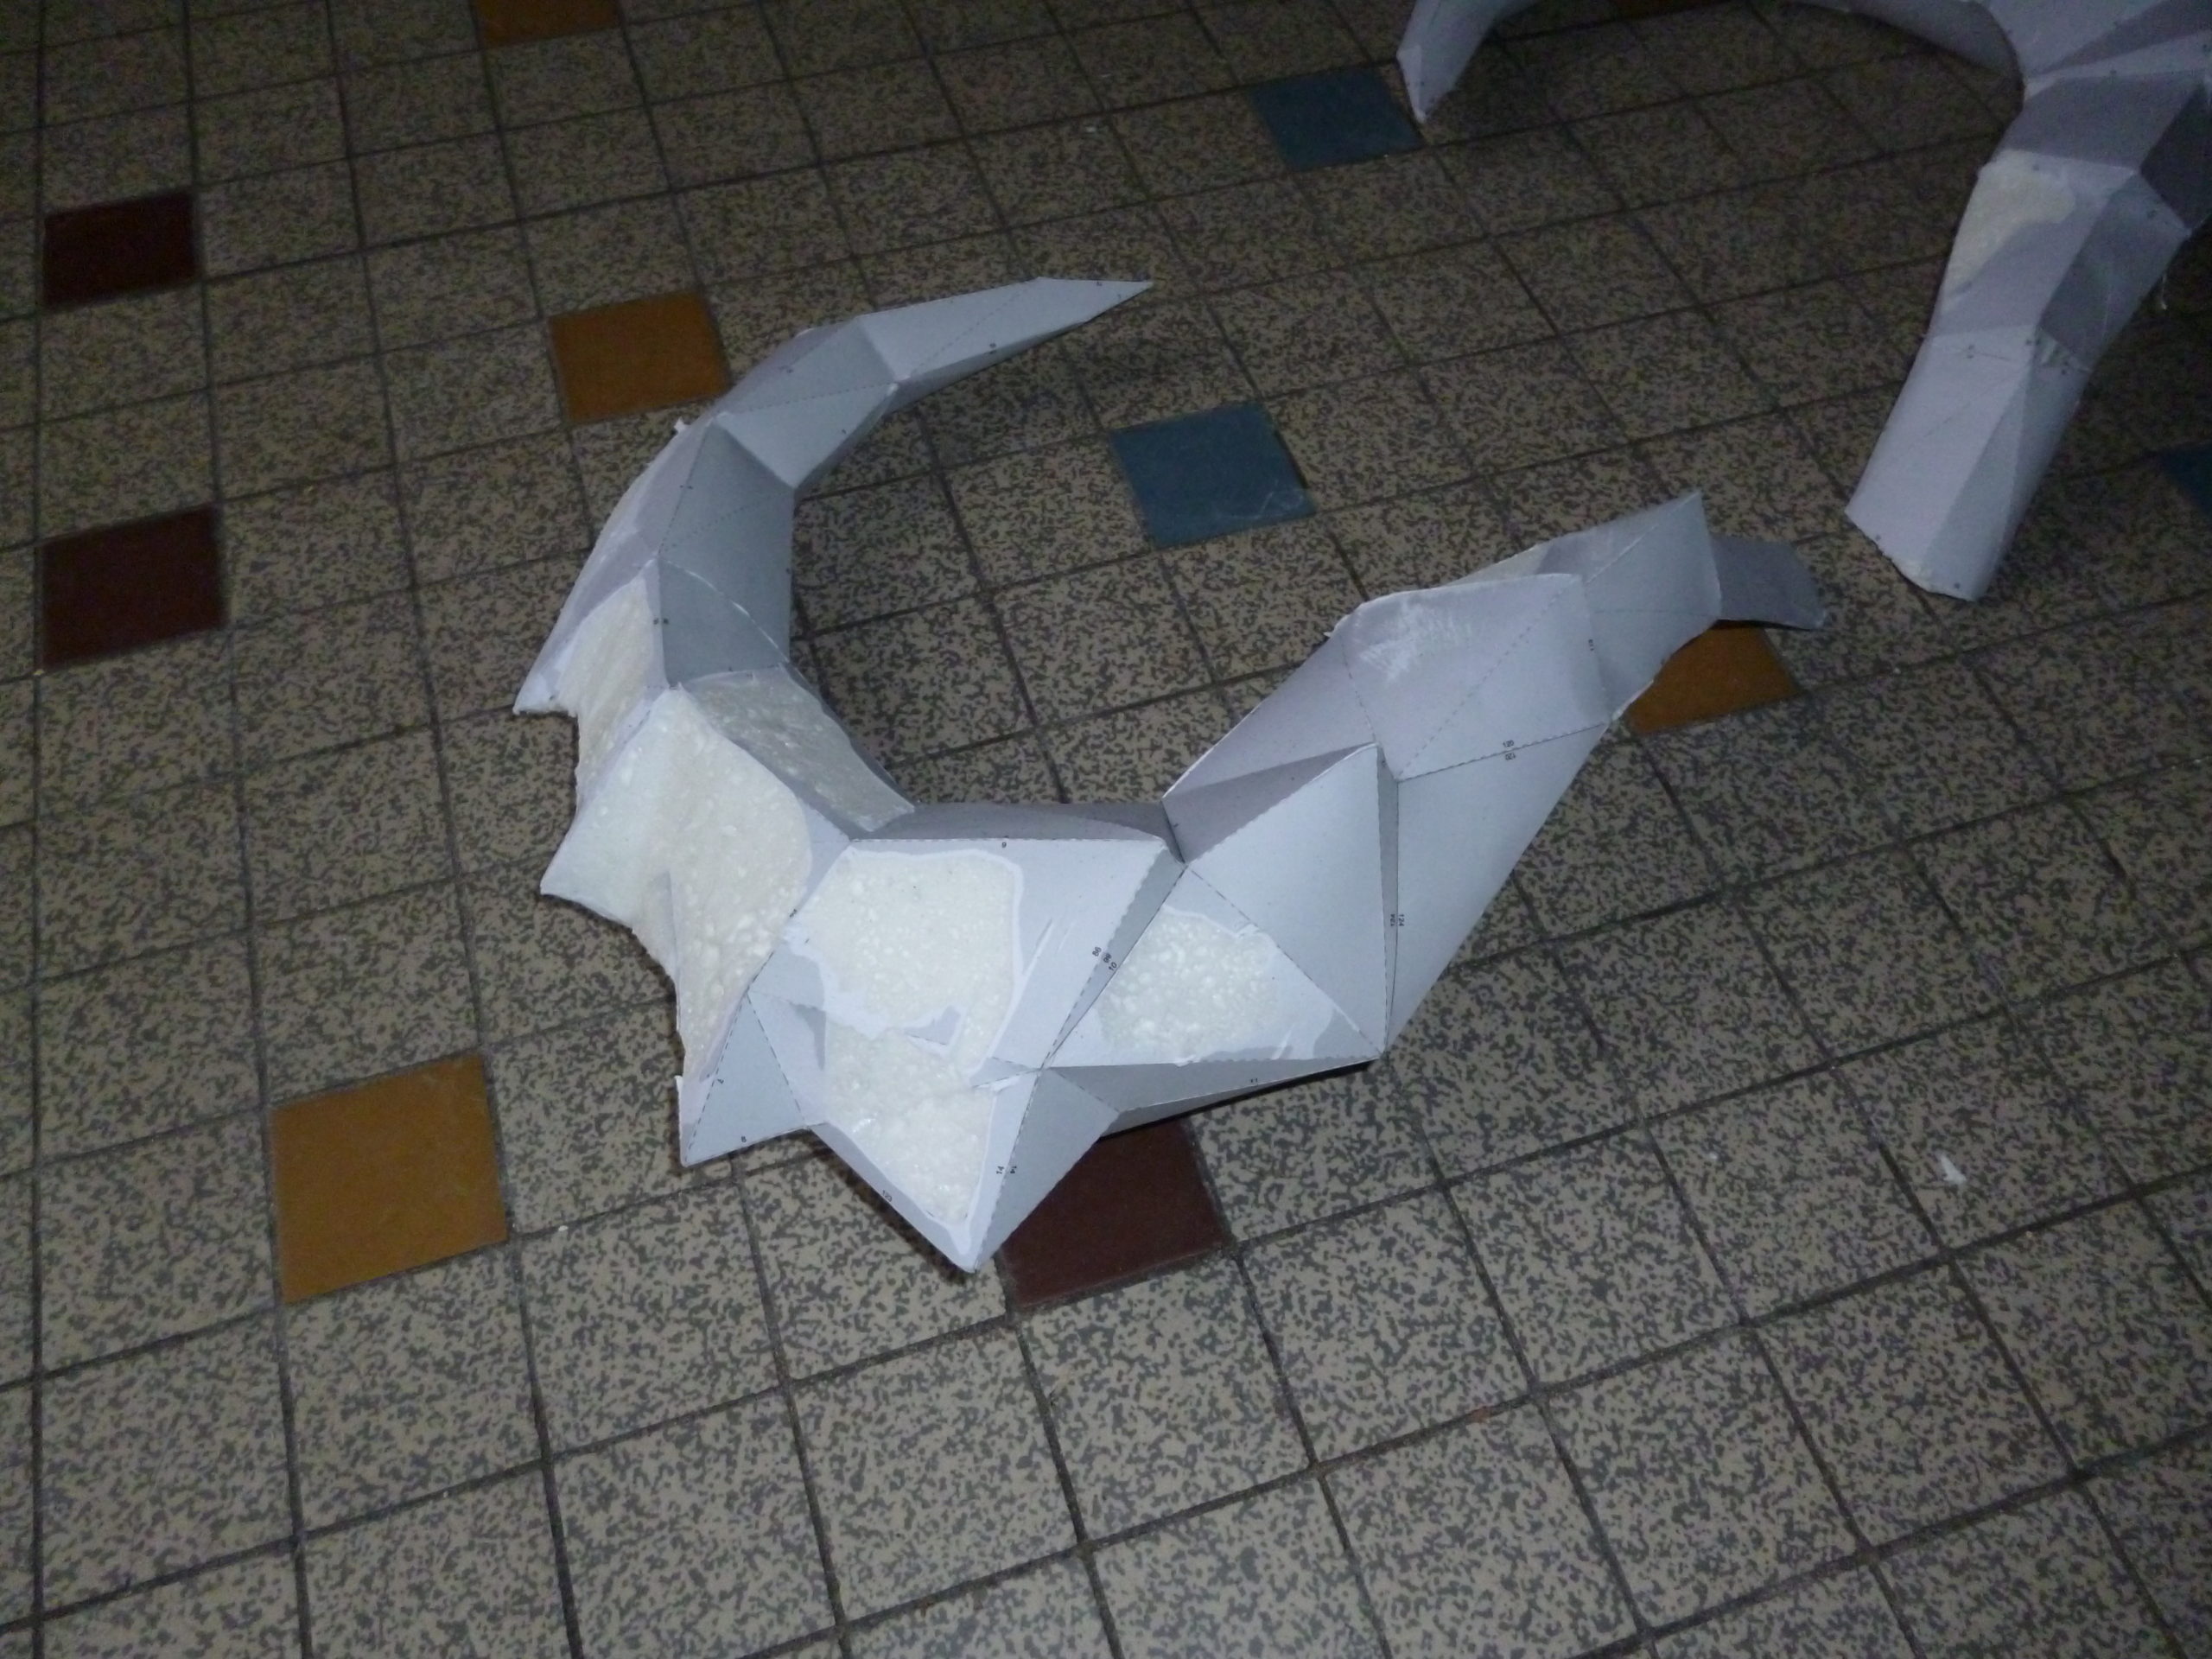
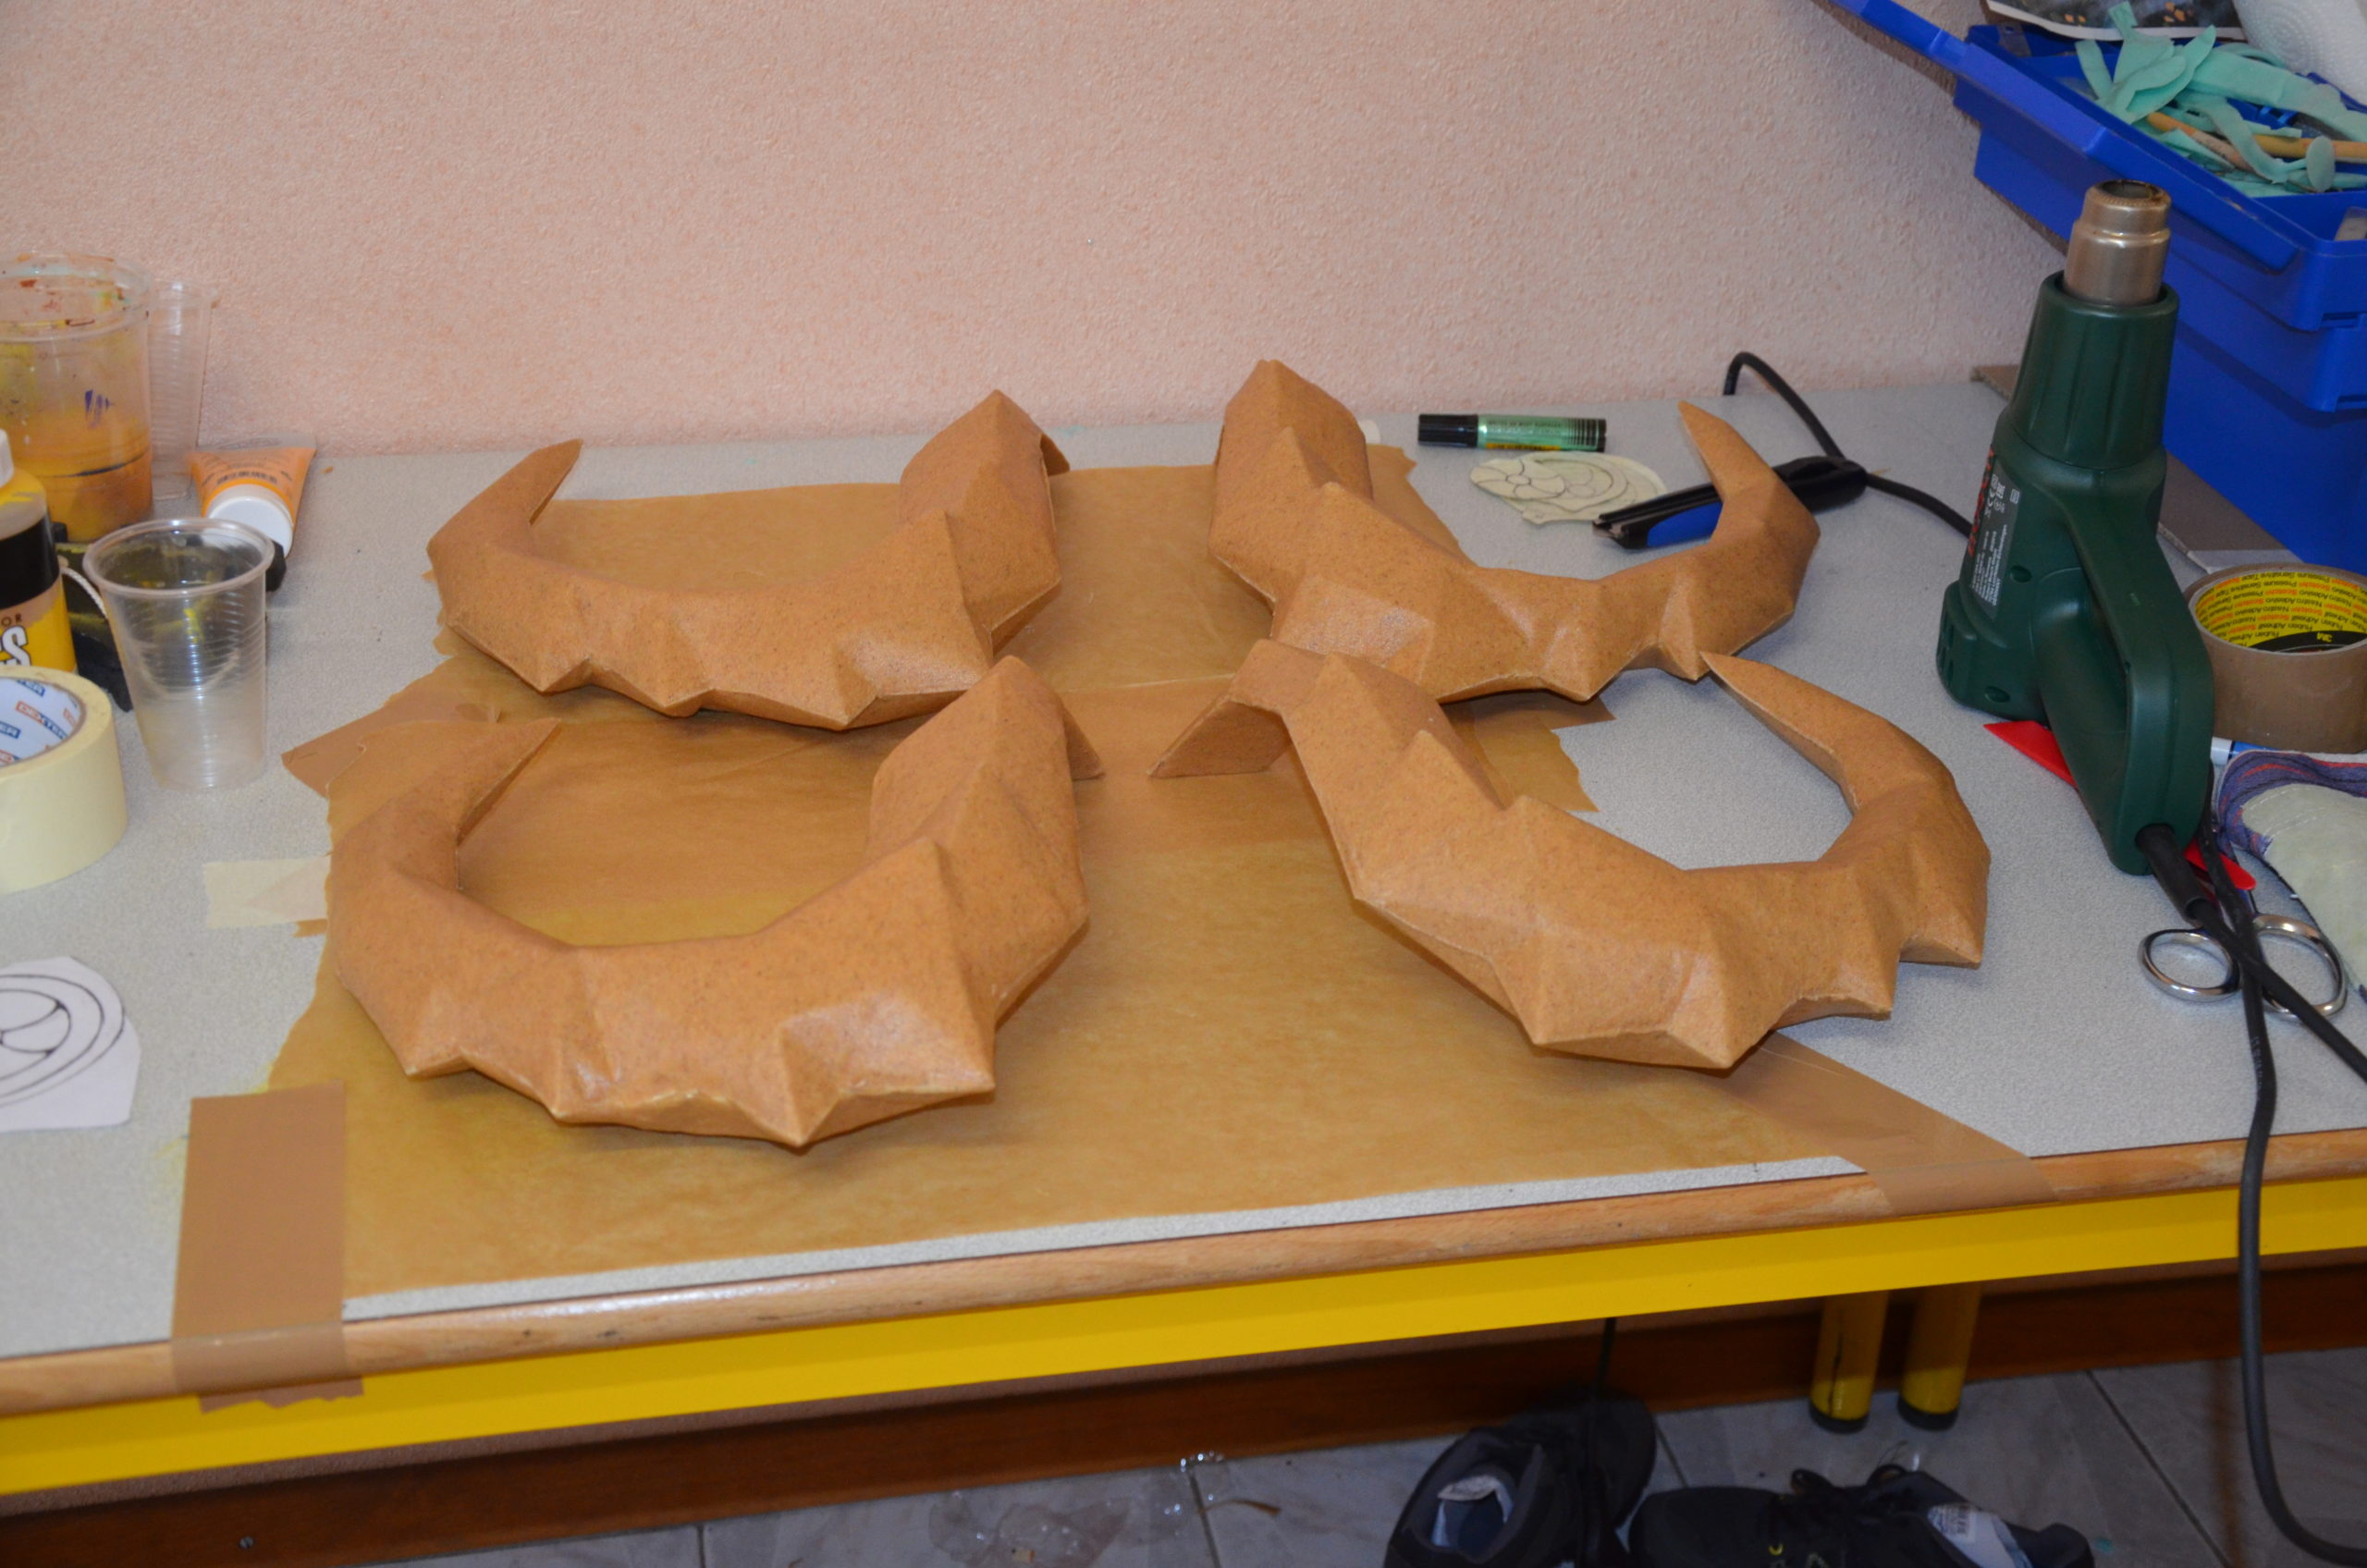
Once the pieces were full, we worked on the shape by cutting sharp edges. We then covered everything with Worbla.
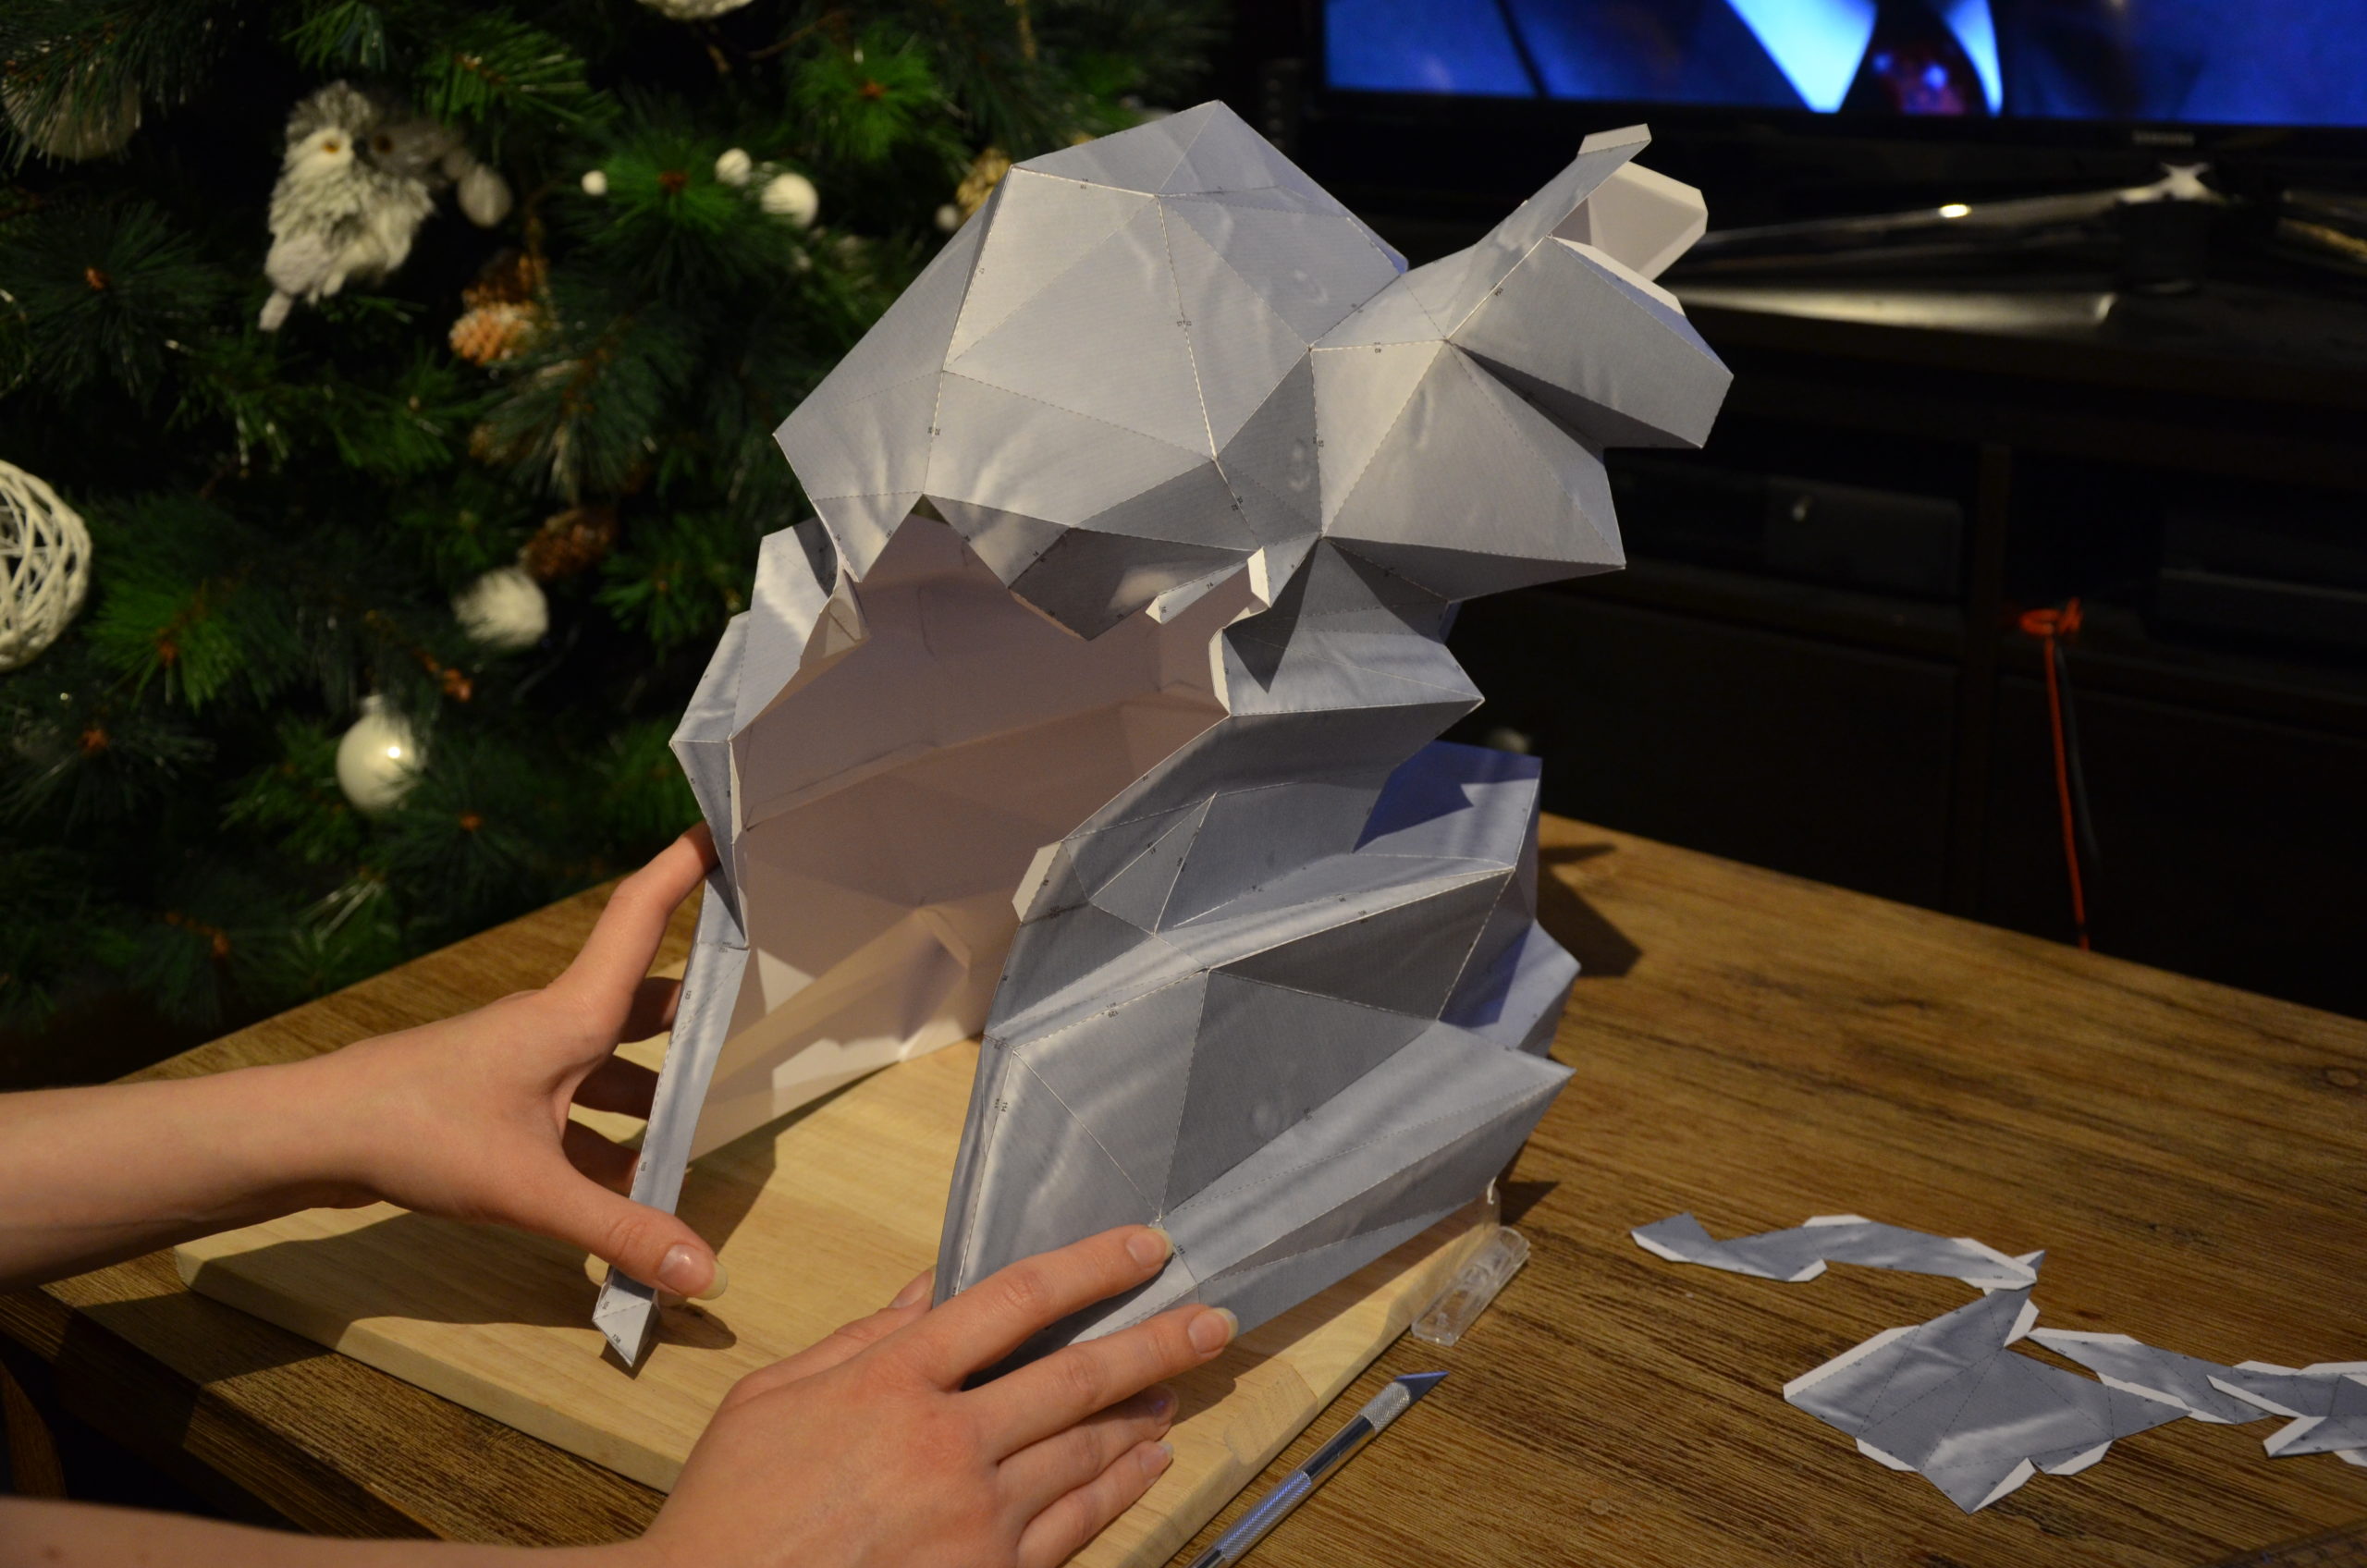
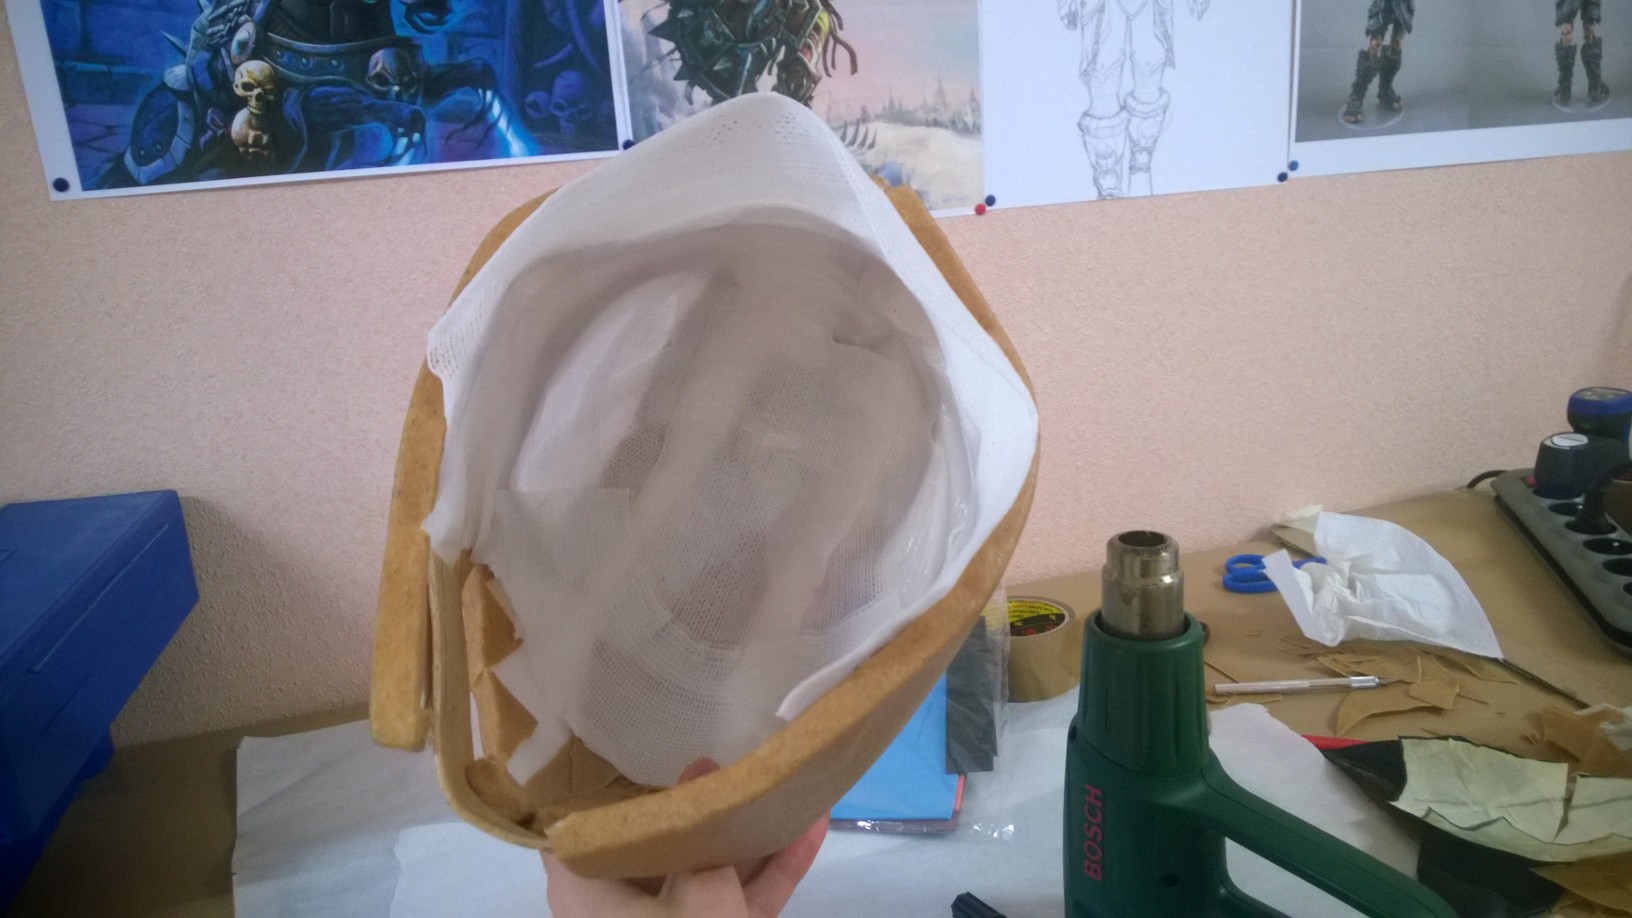
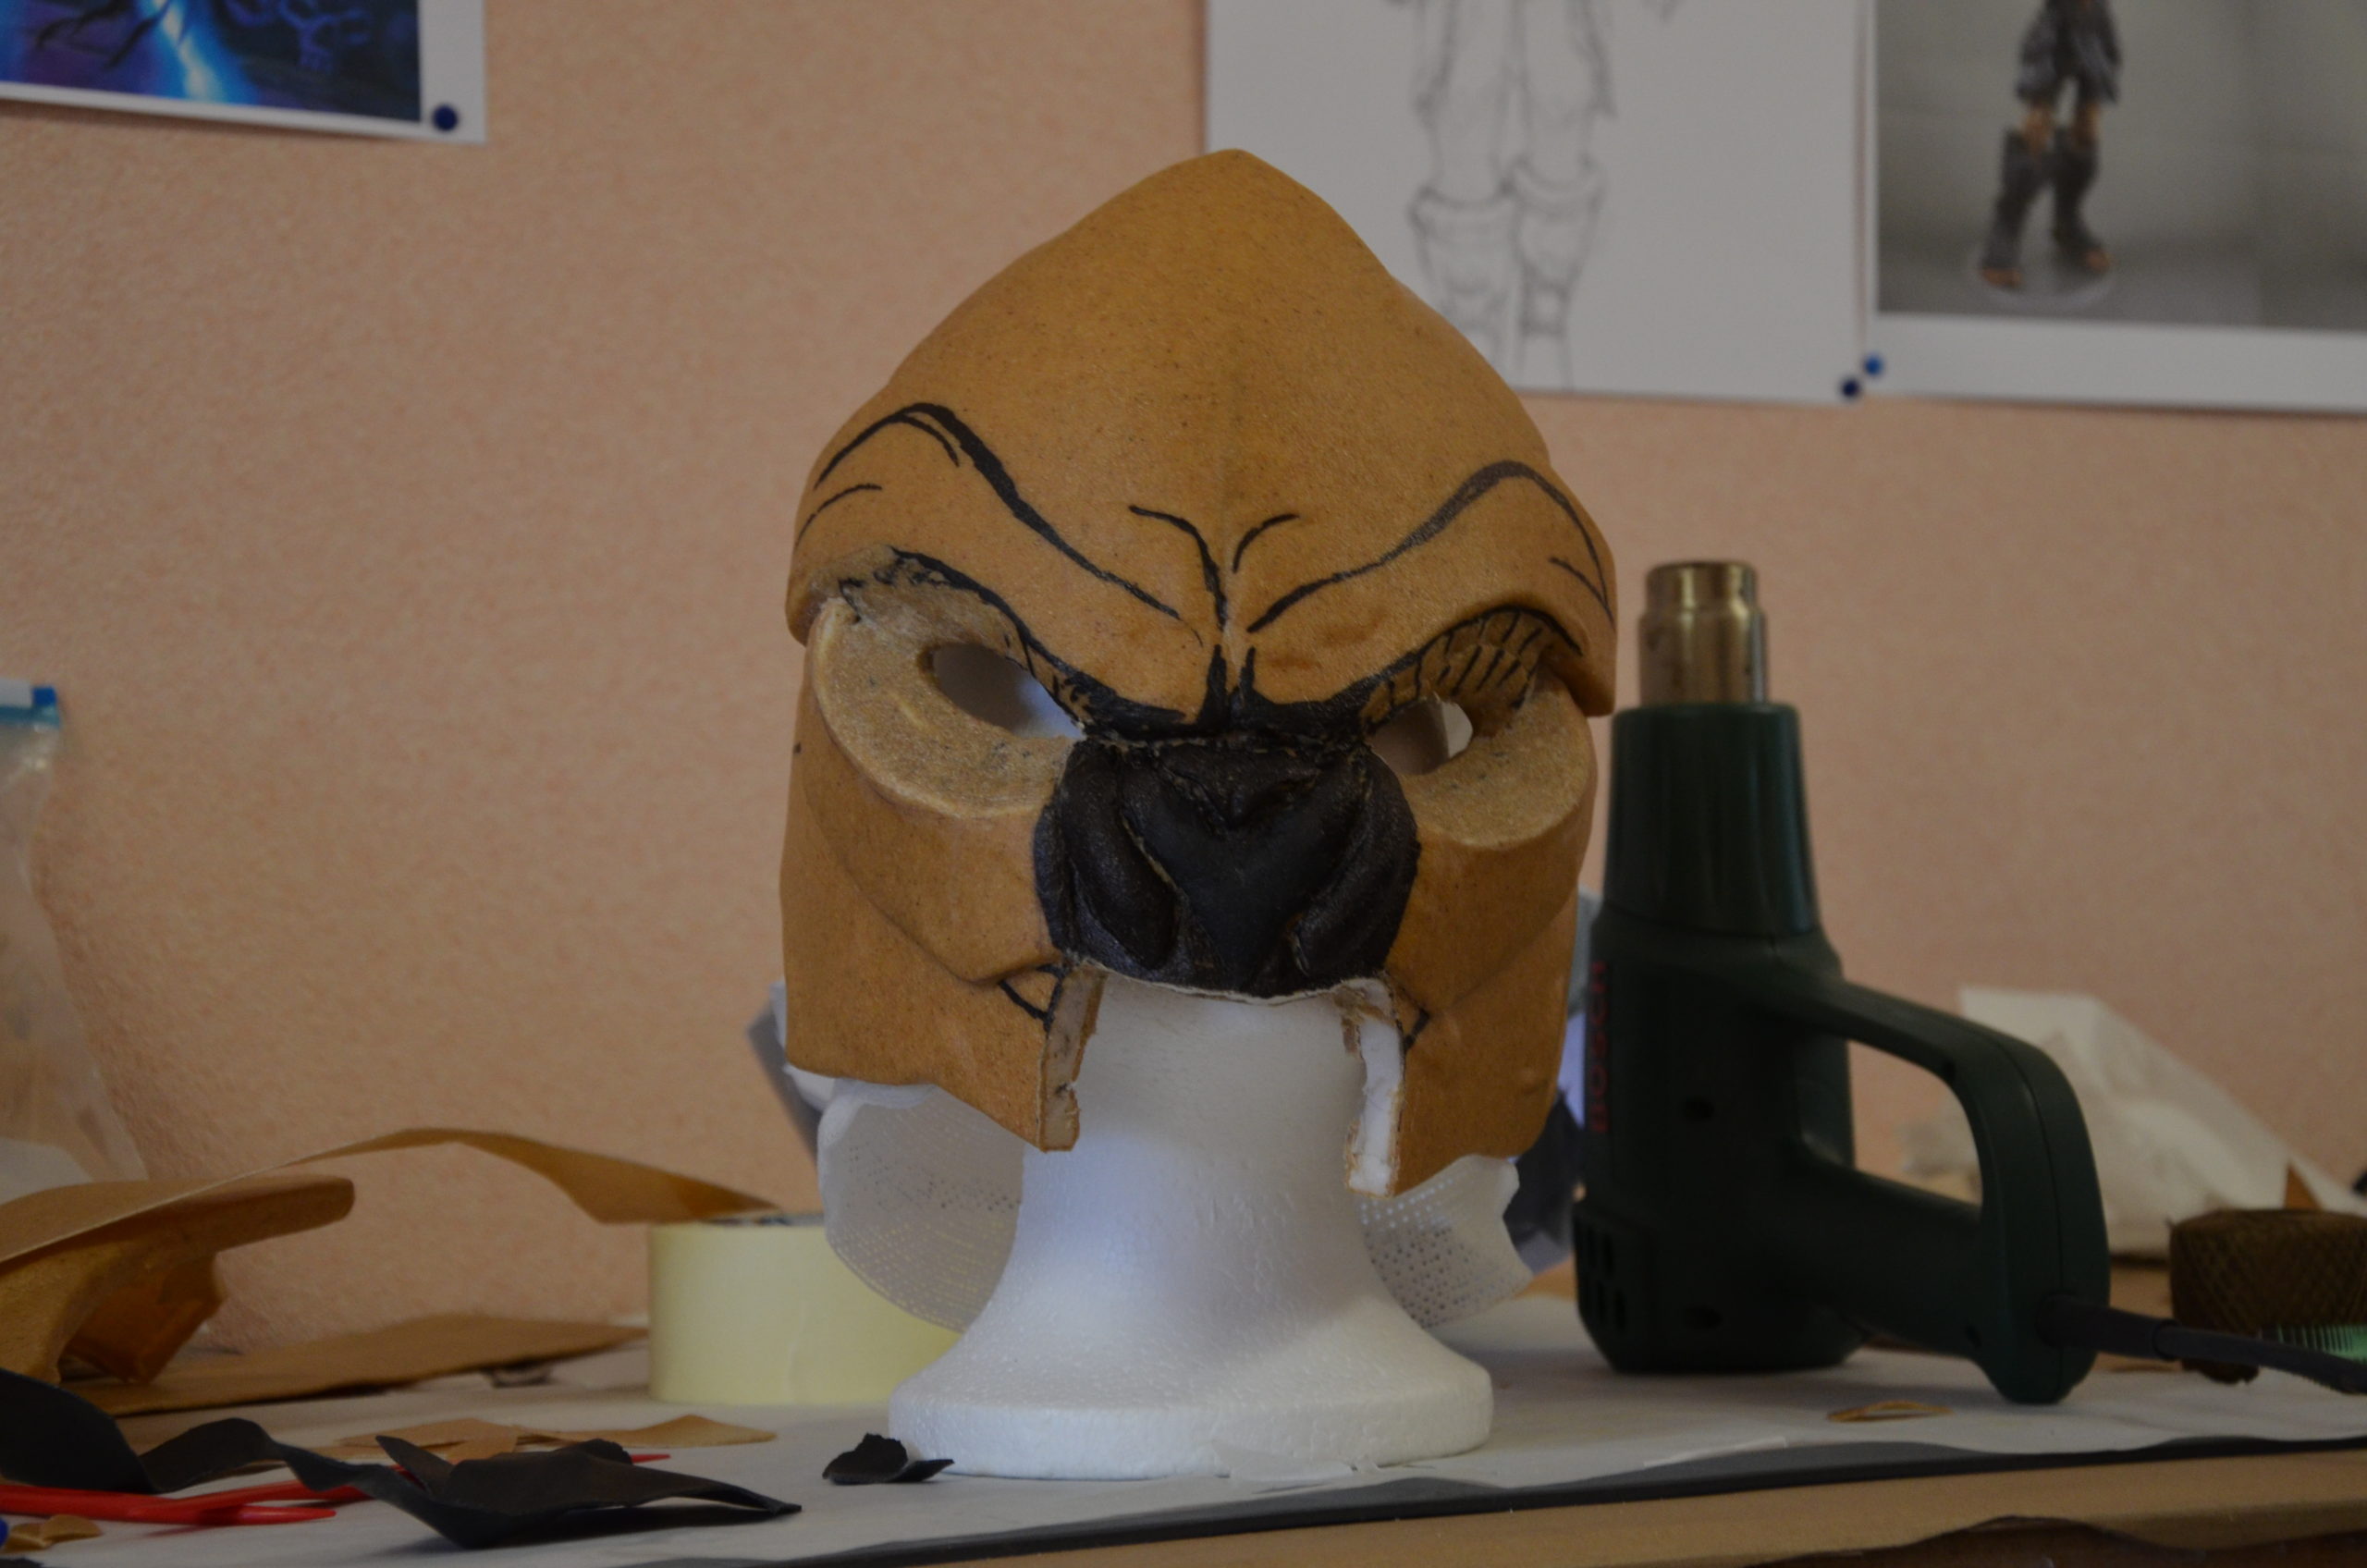
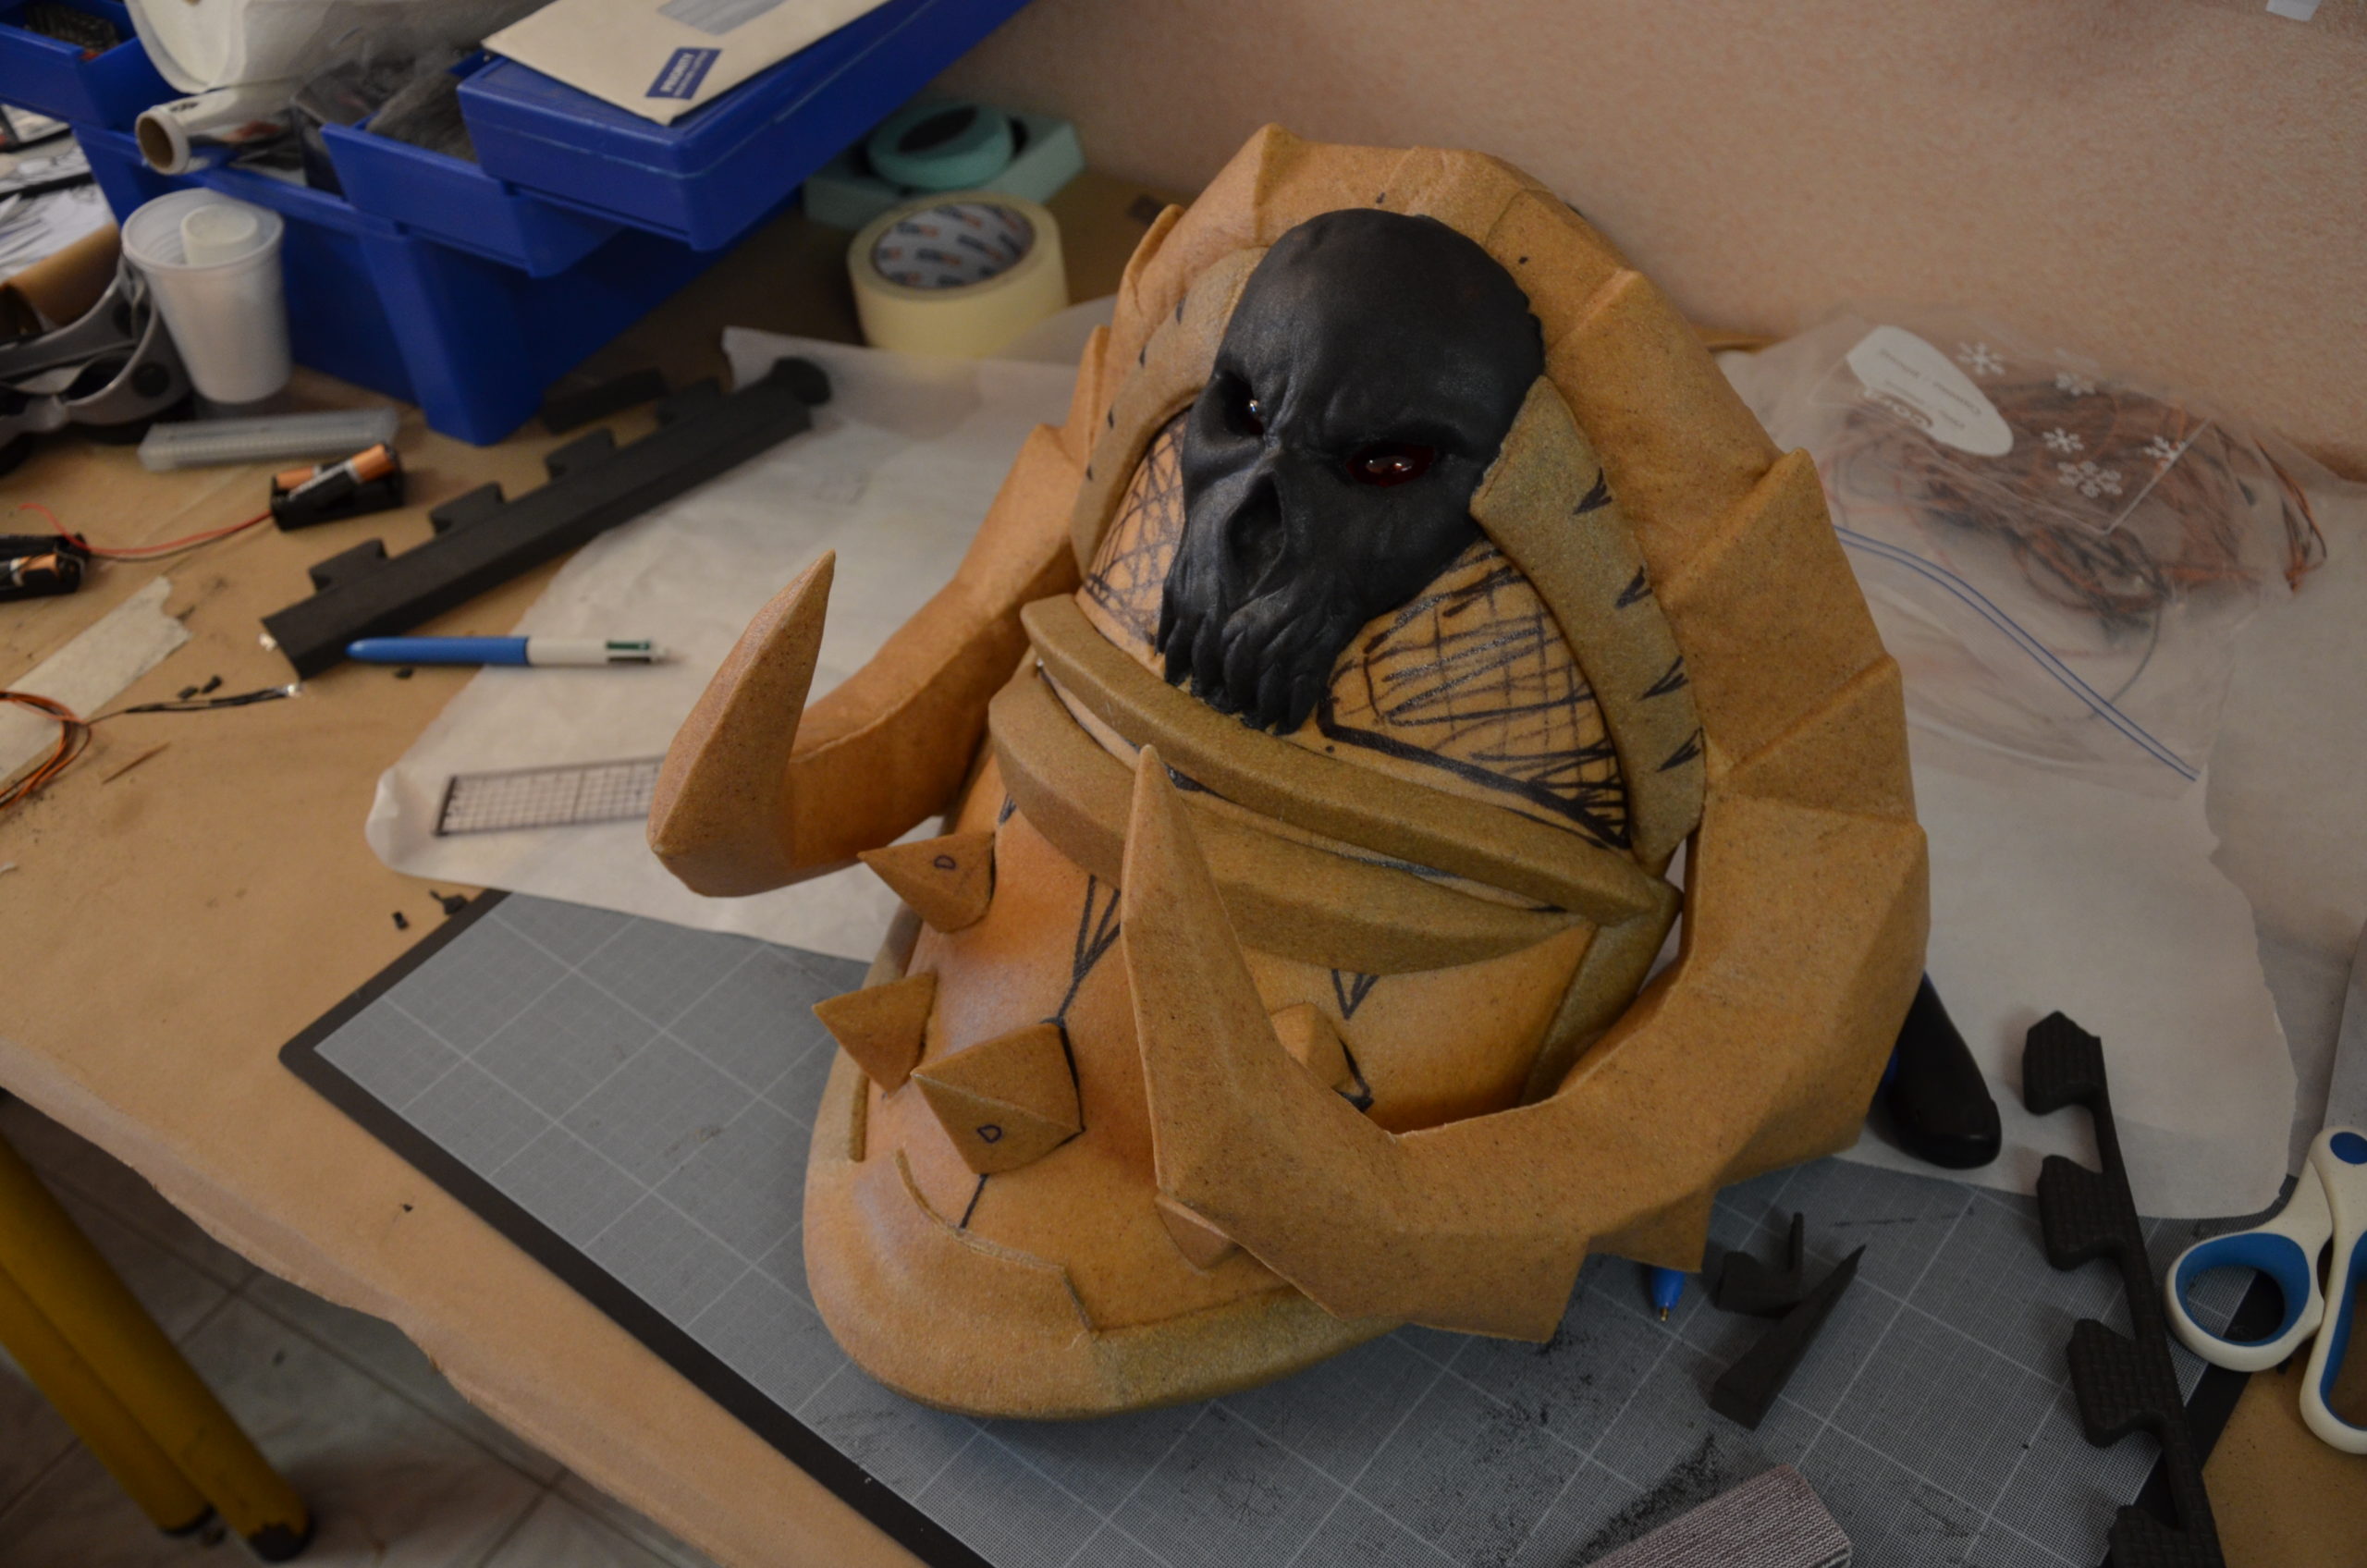
For the helmet, we first made a Kobracast base from the shape of my head. This shape was then covered with foam plates encased into Worbla.
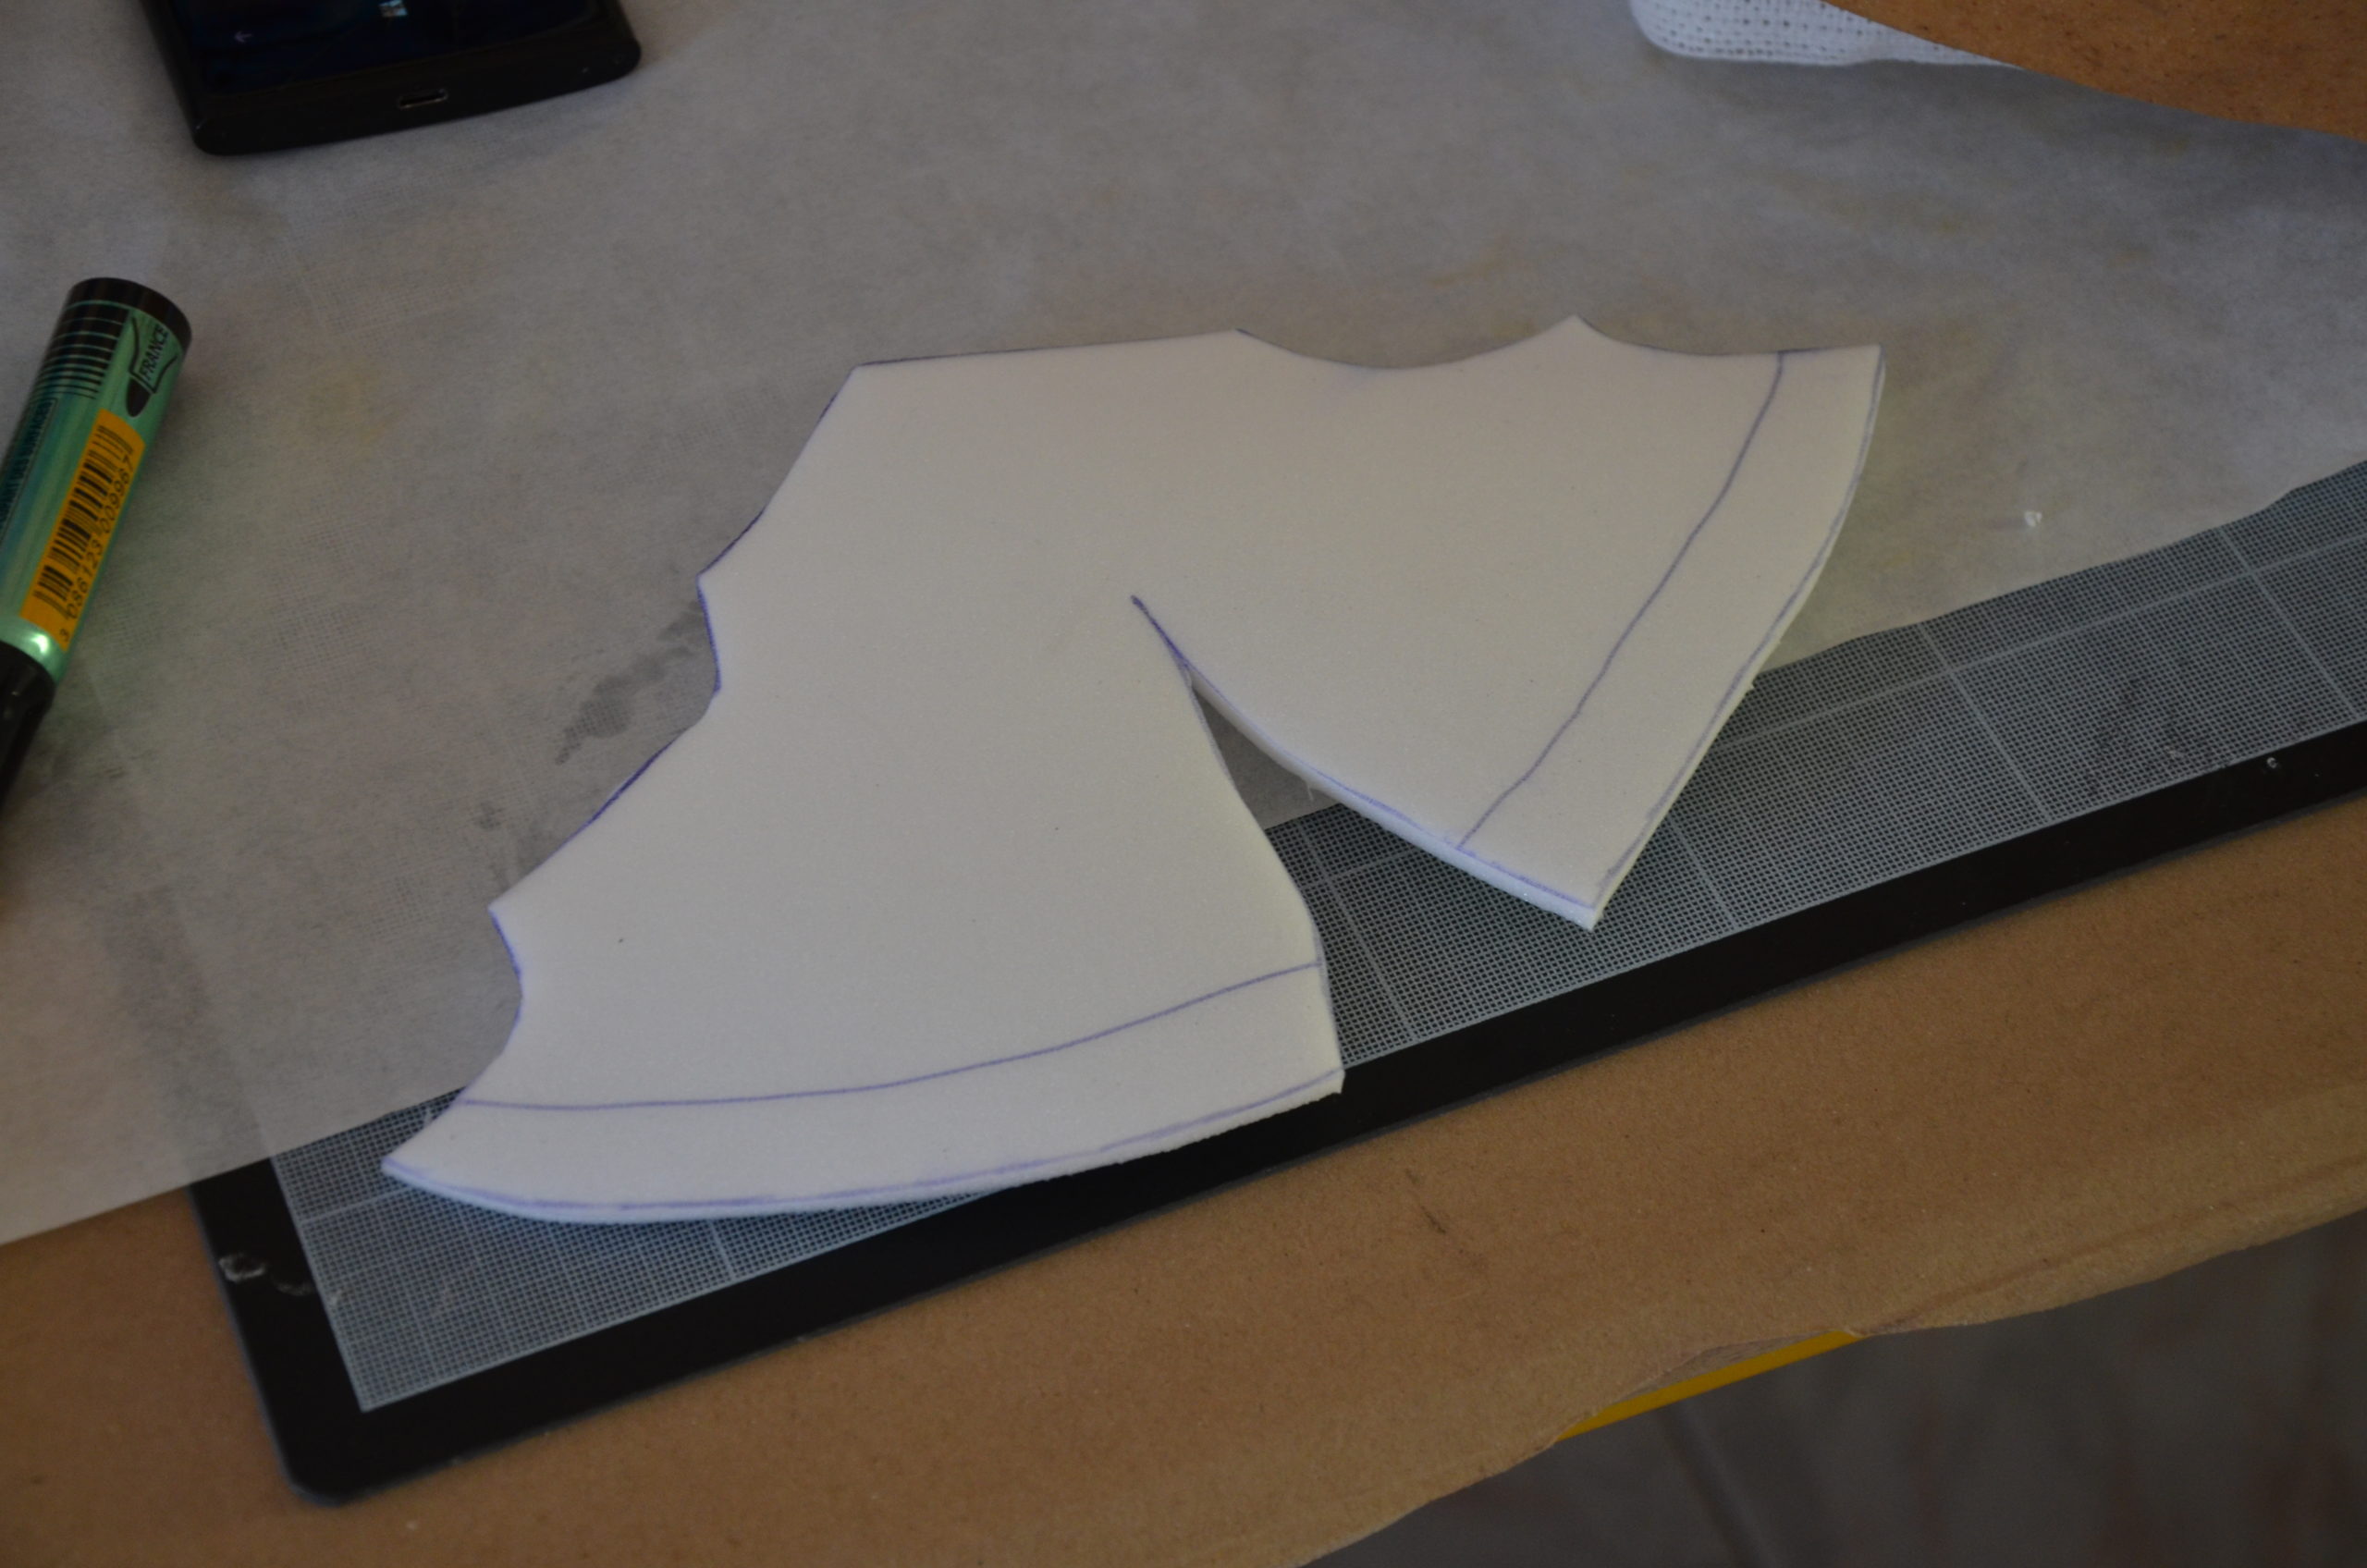
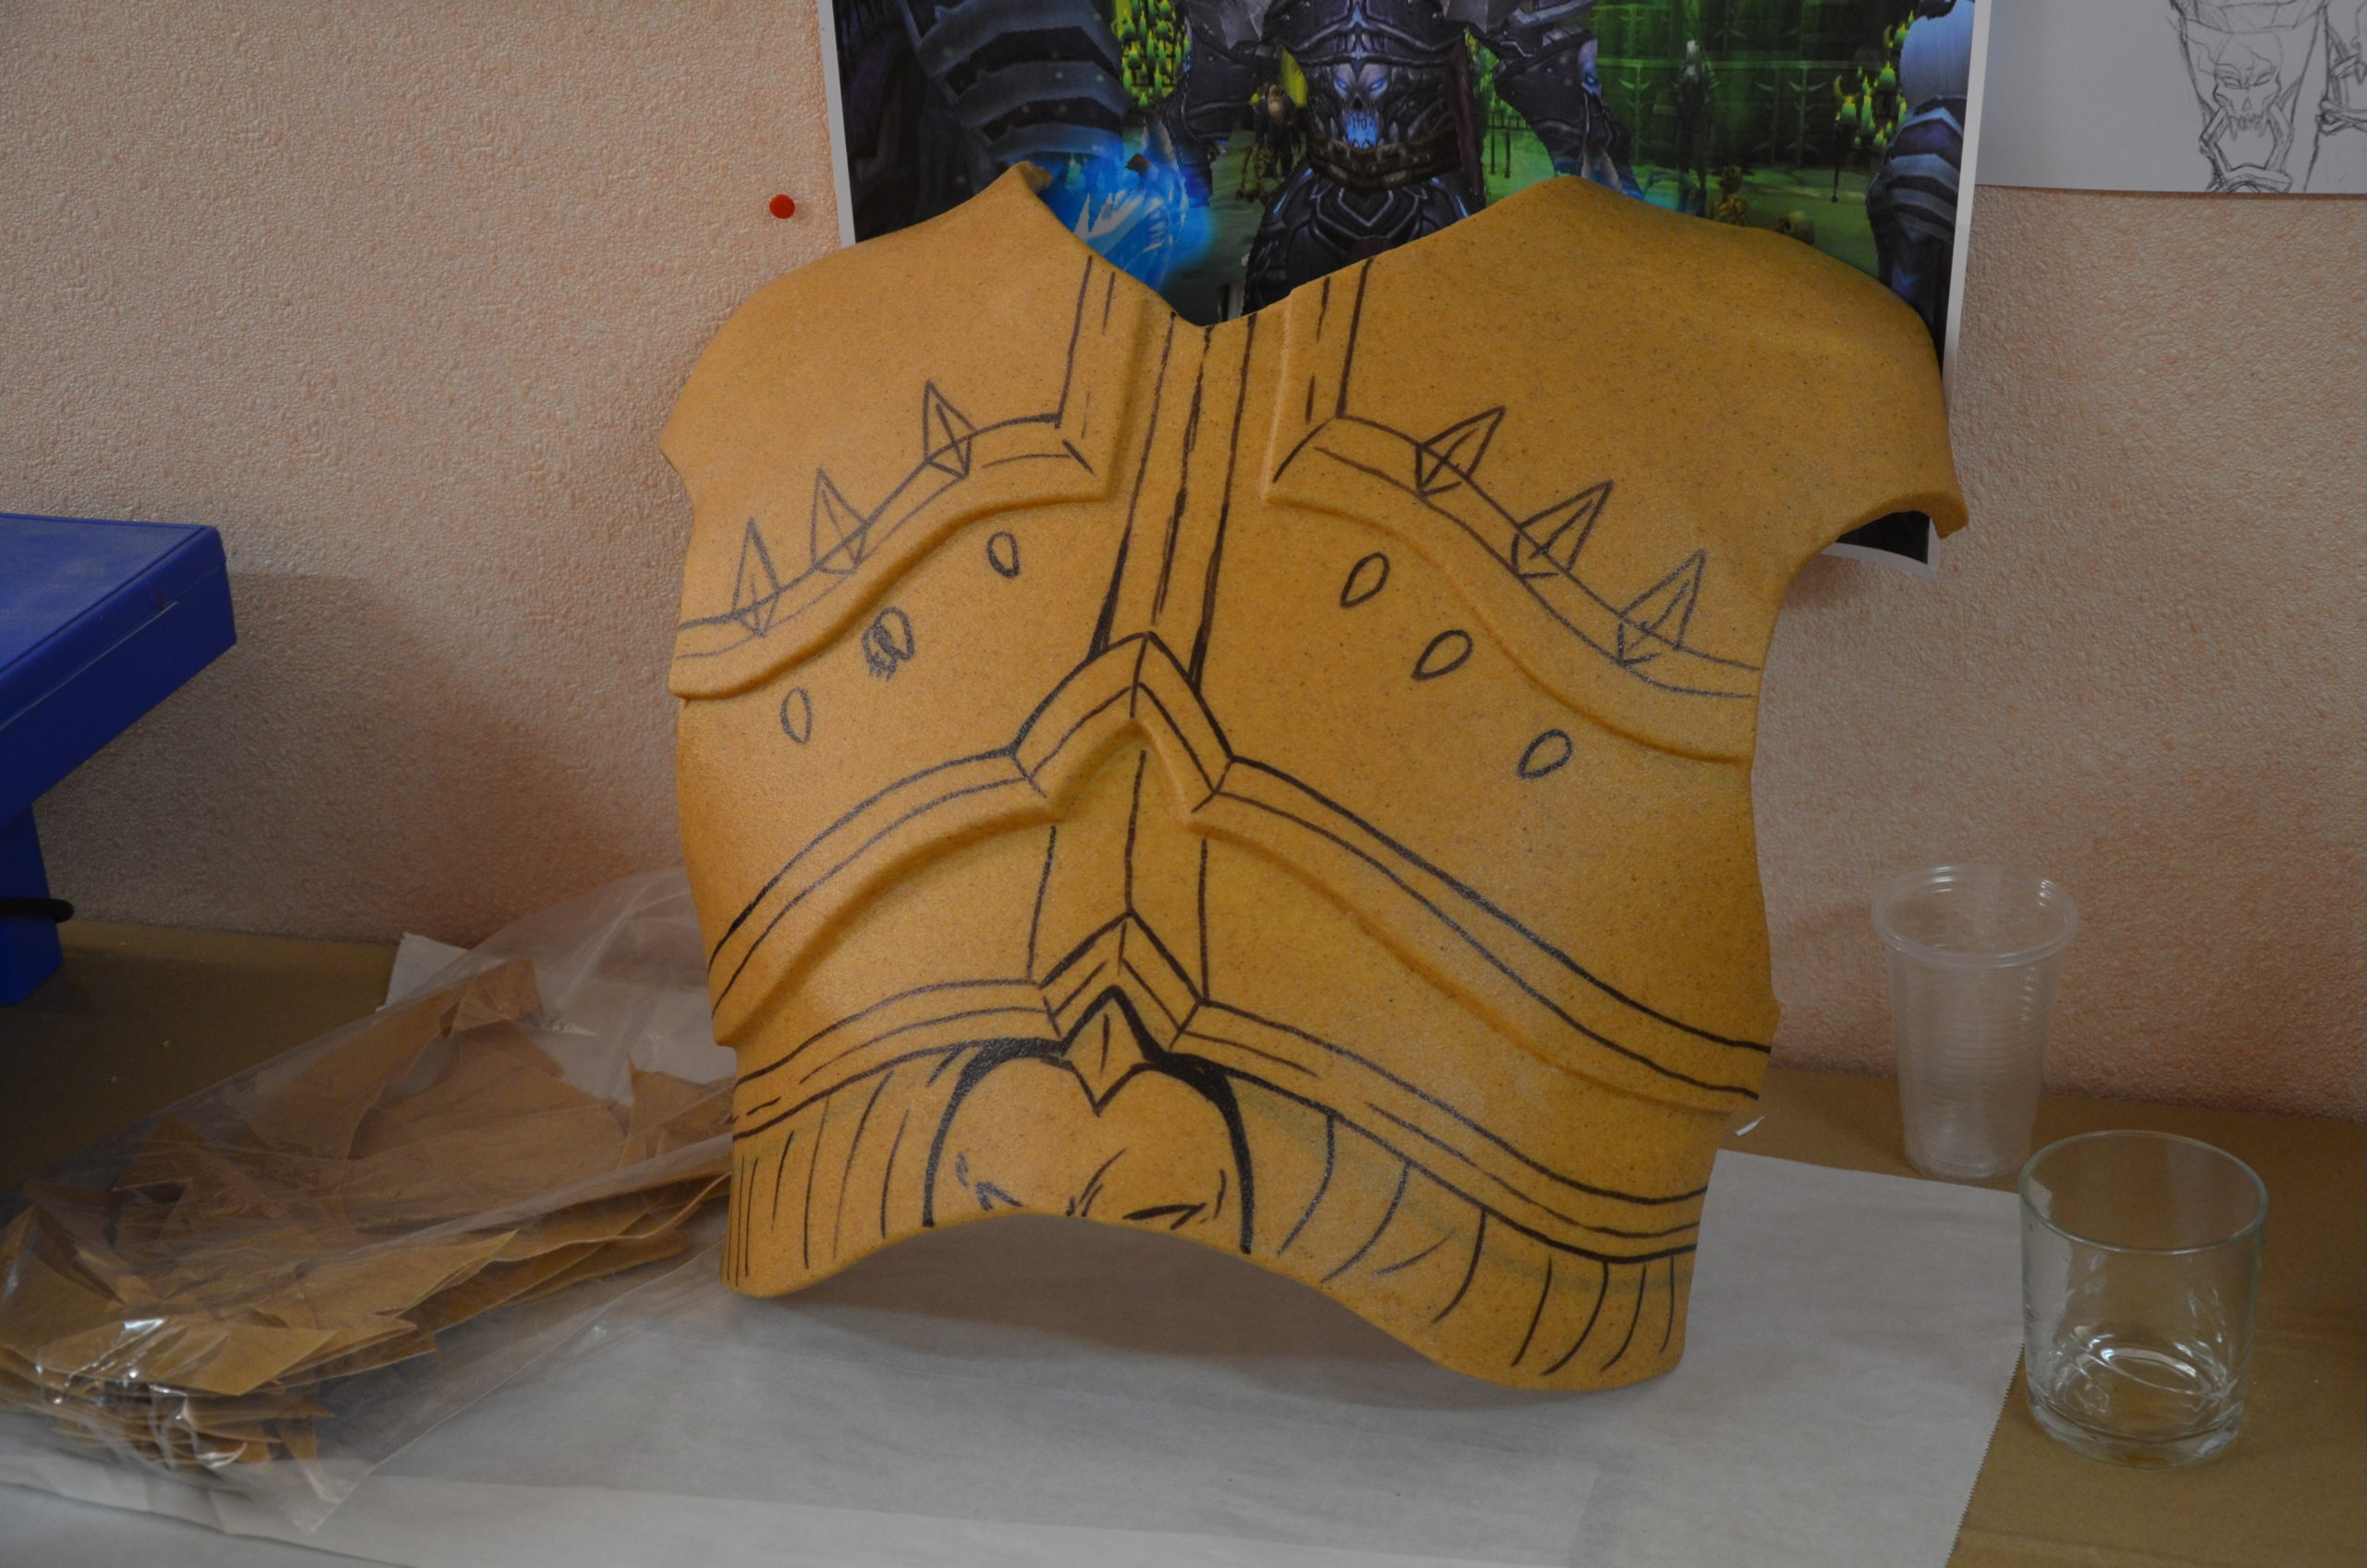
Once the base was rigid, the sculpting began. We started with the simpler parts : the scales on the top of the head. As done previously, we cut foam plates with the right shape (thanks to tape patterns), covered them with Worbla on both sides and sticked them to the helmet.
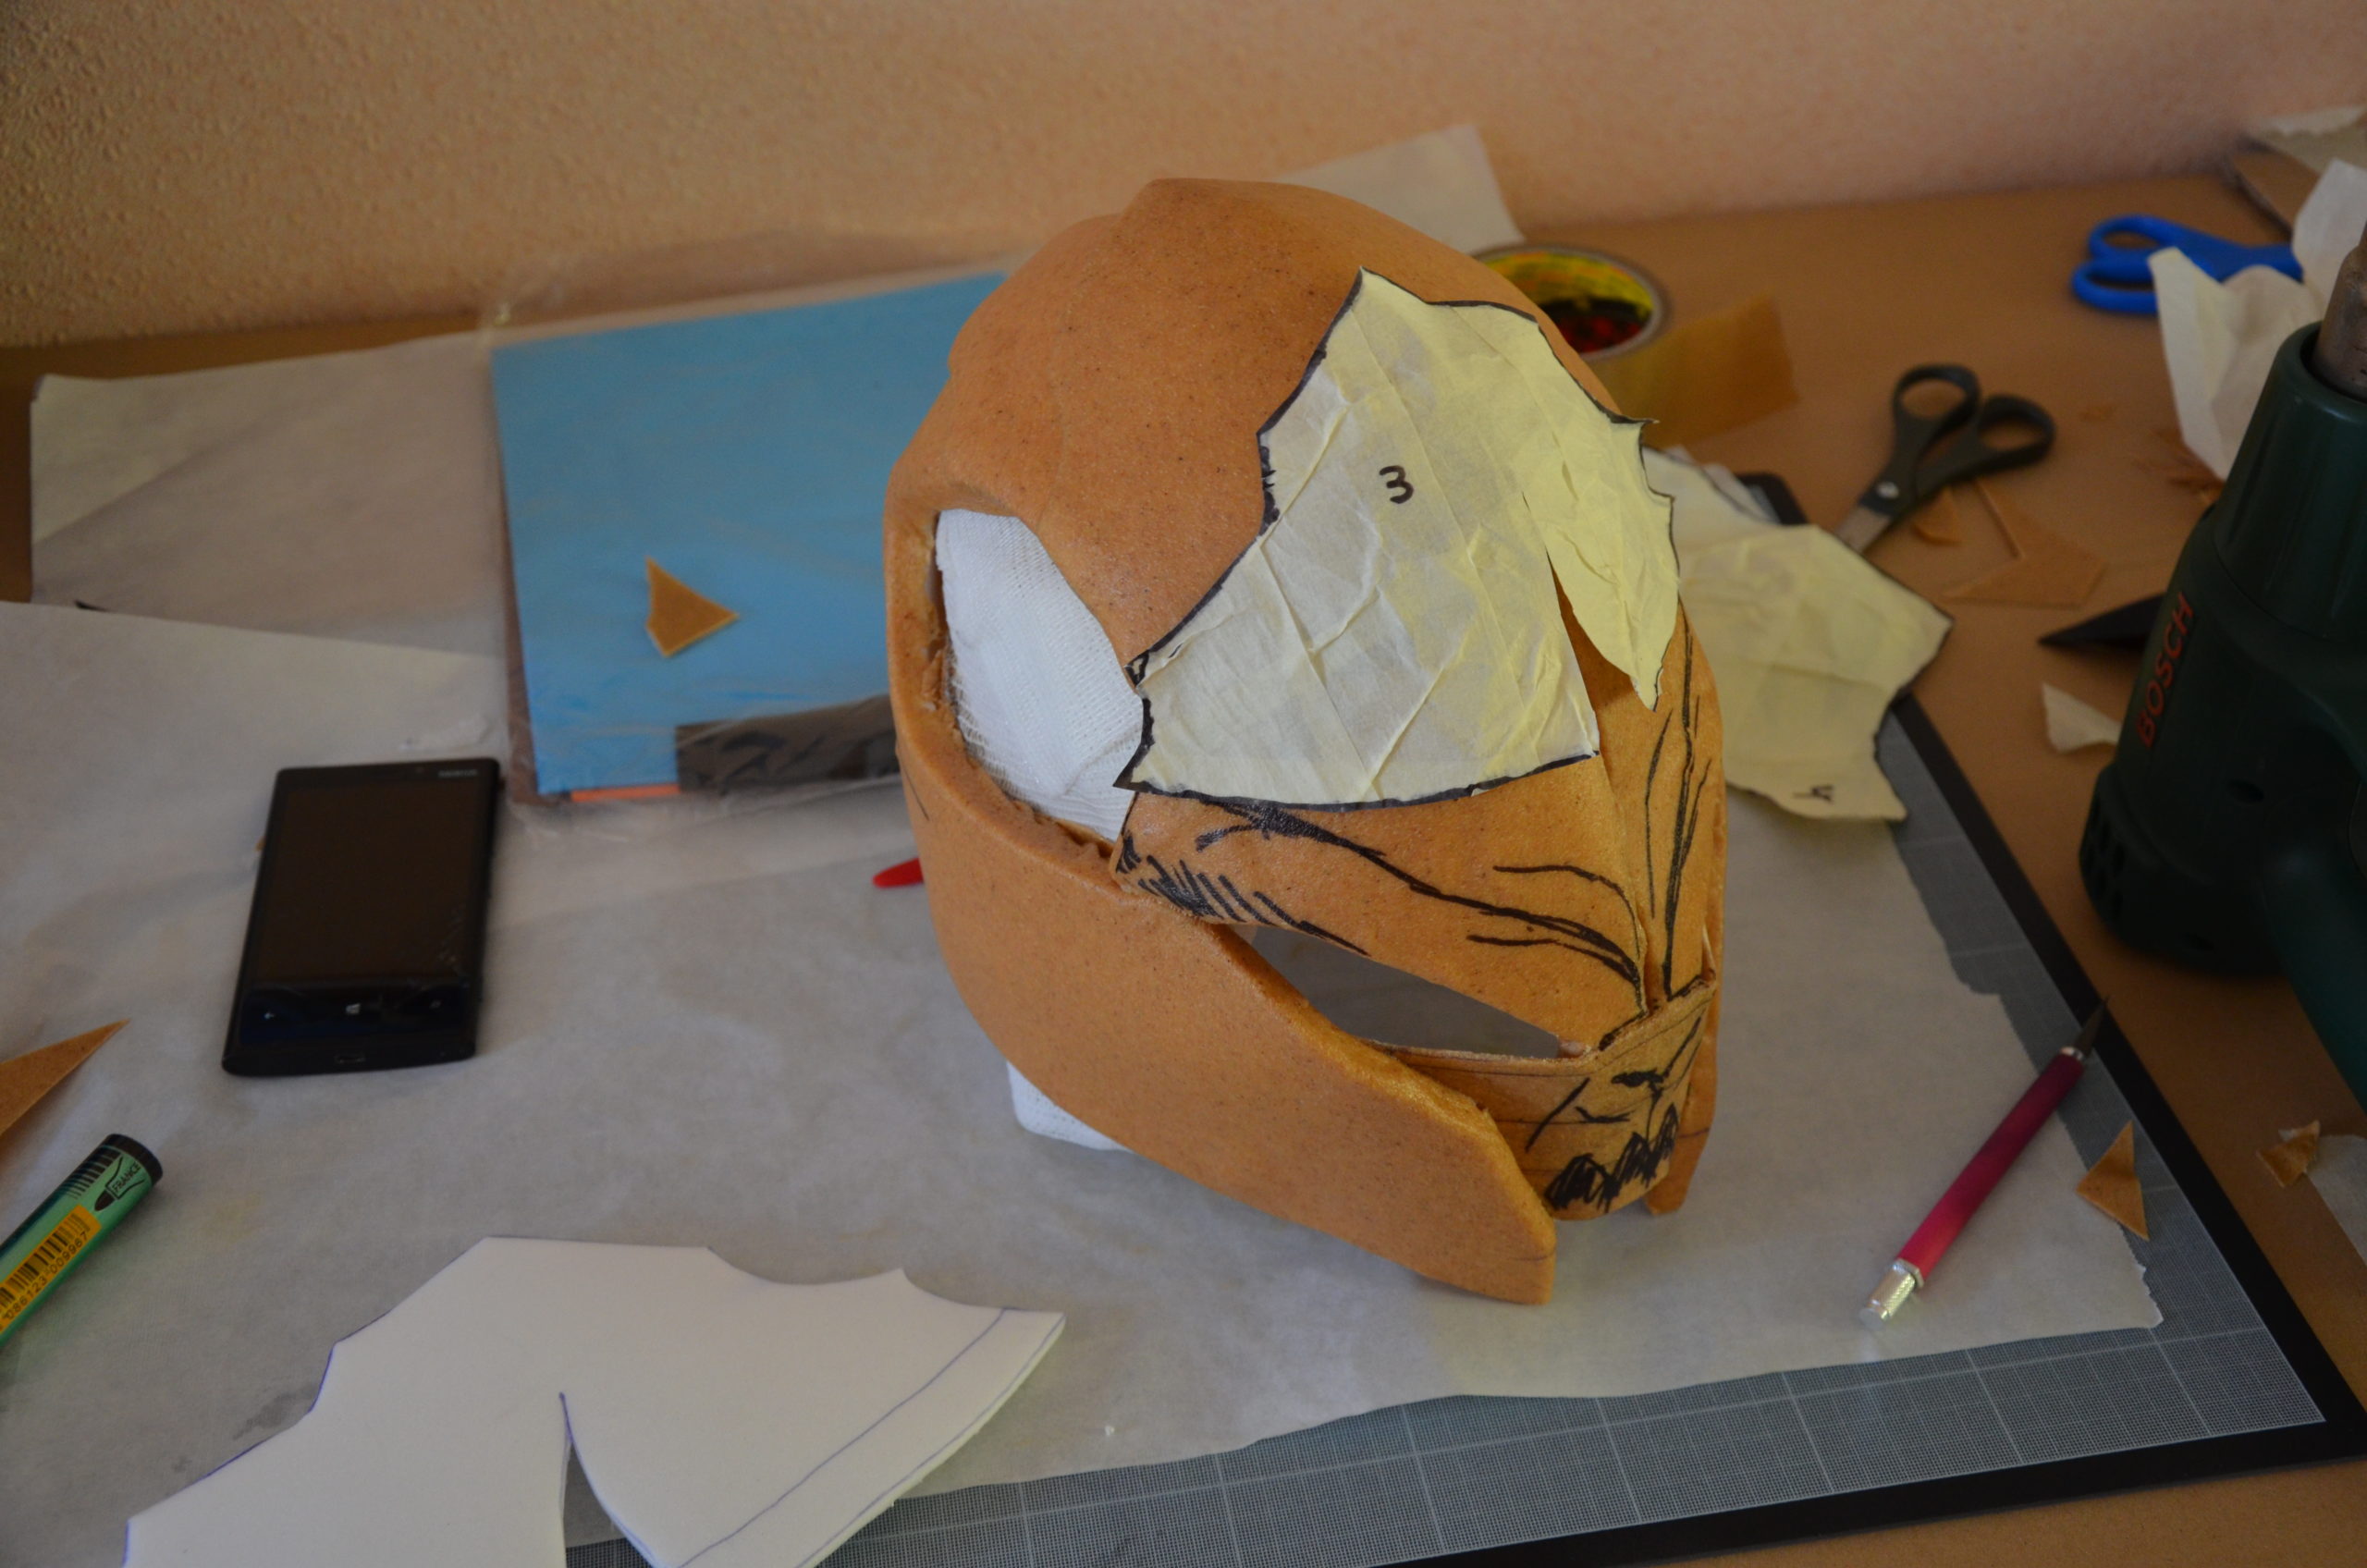
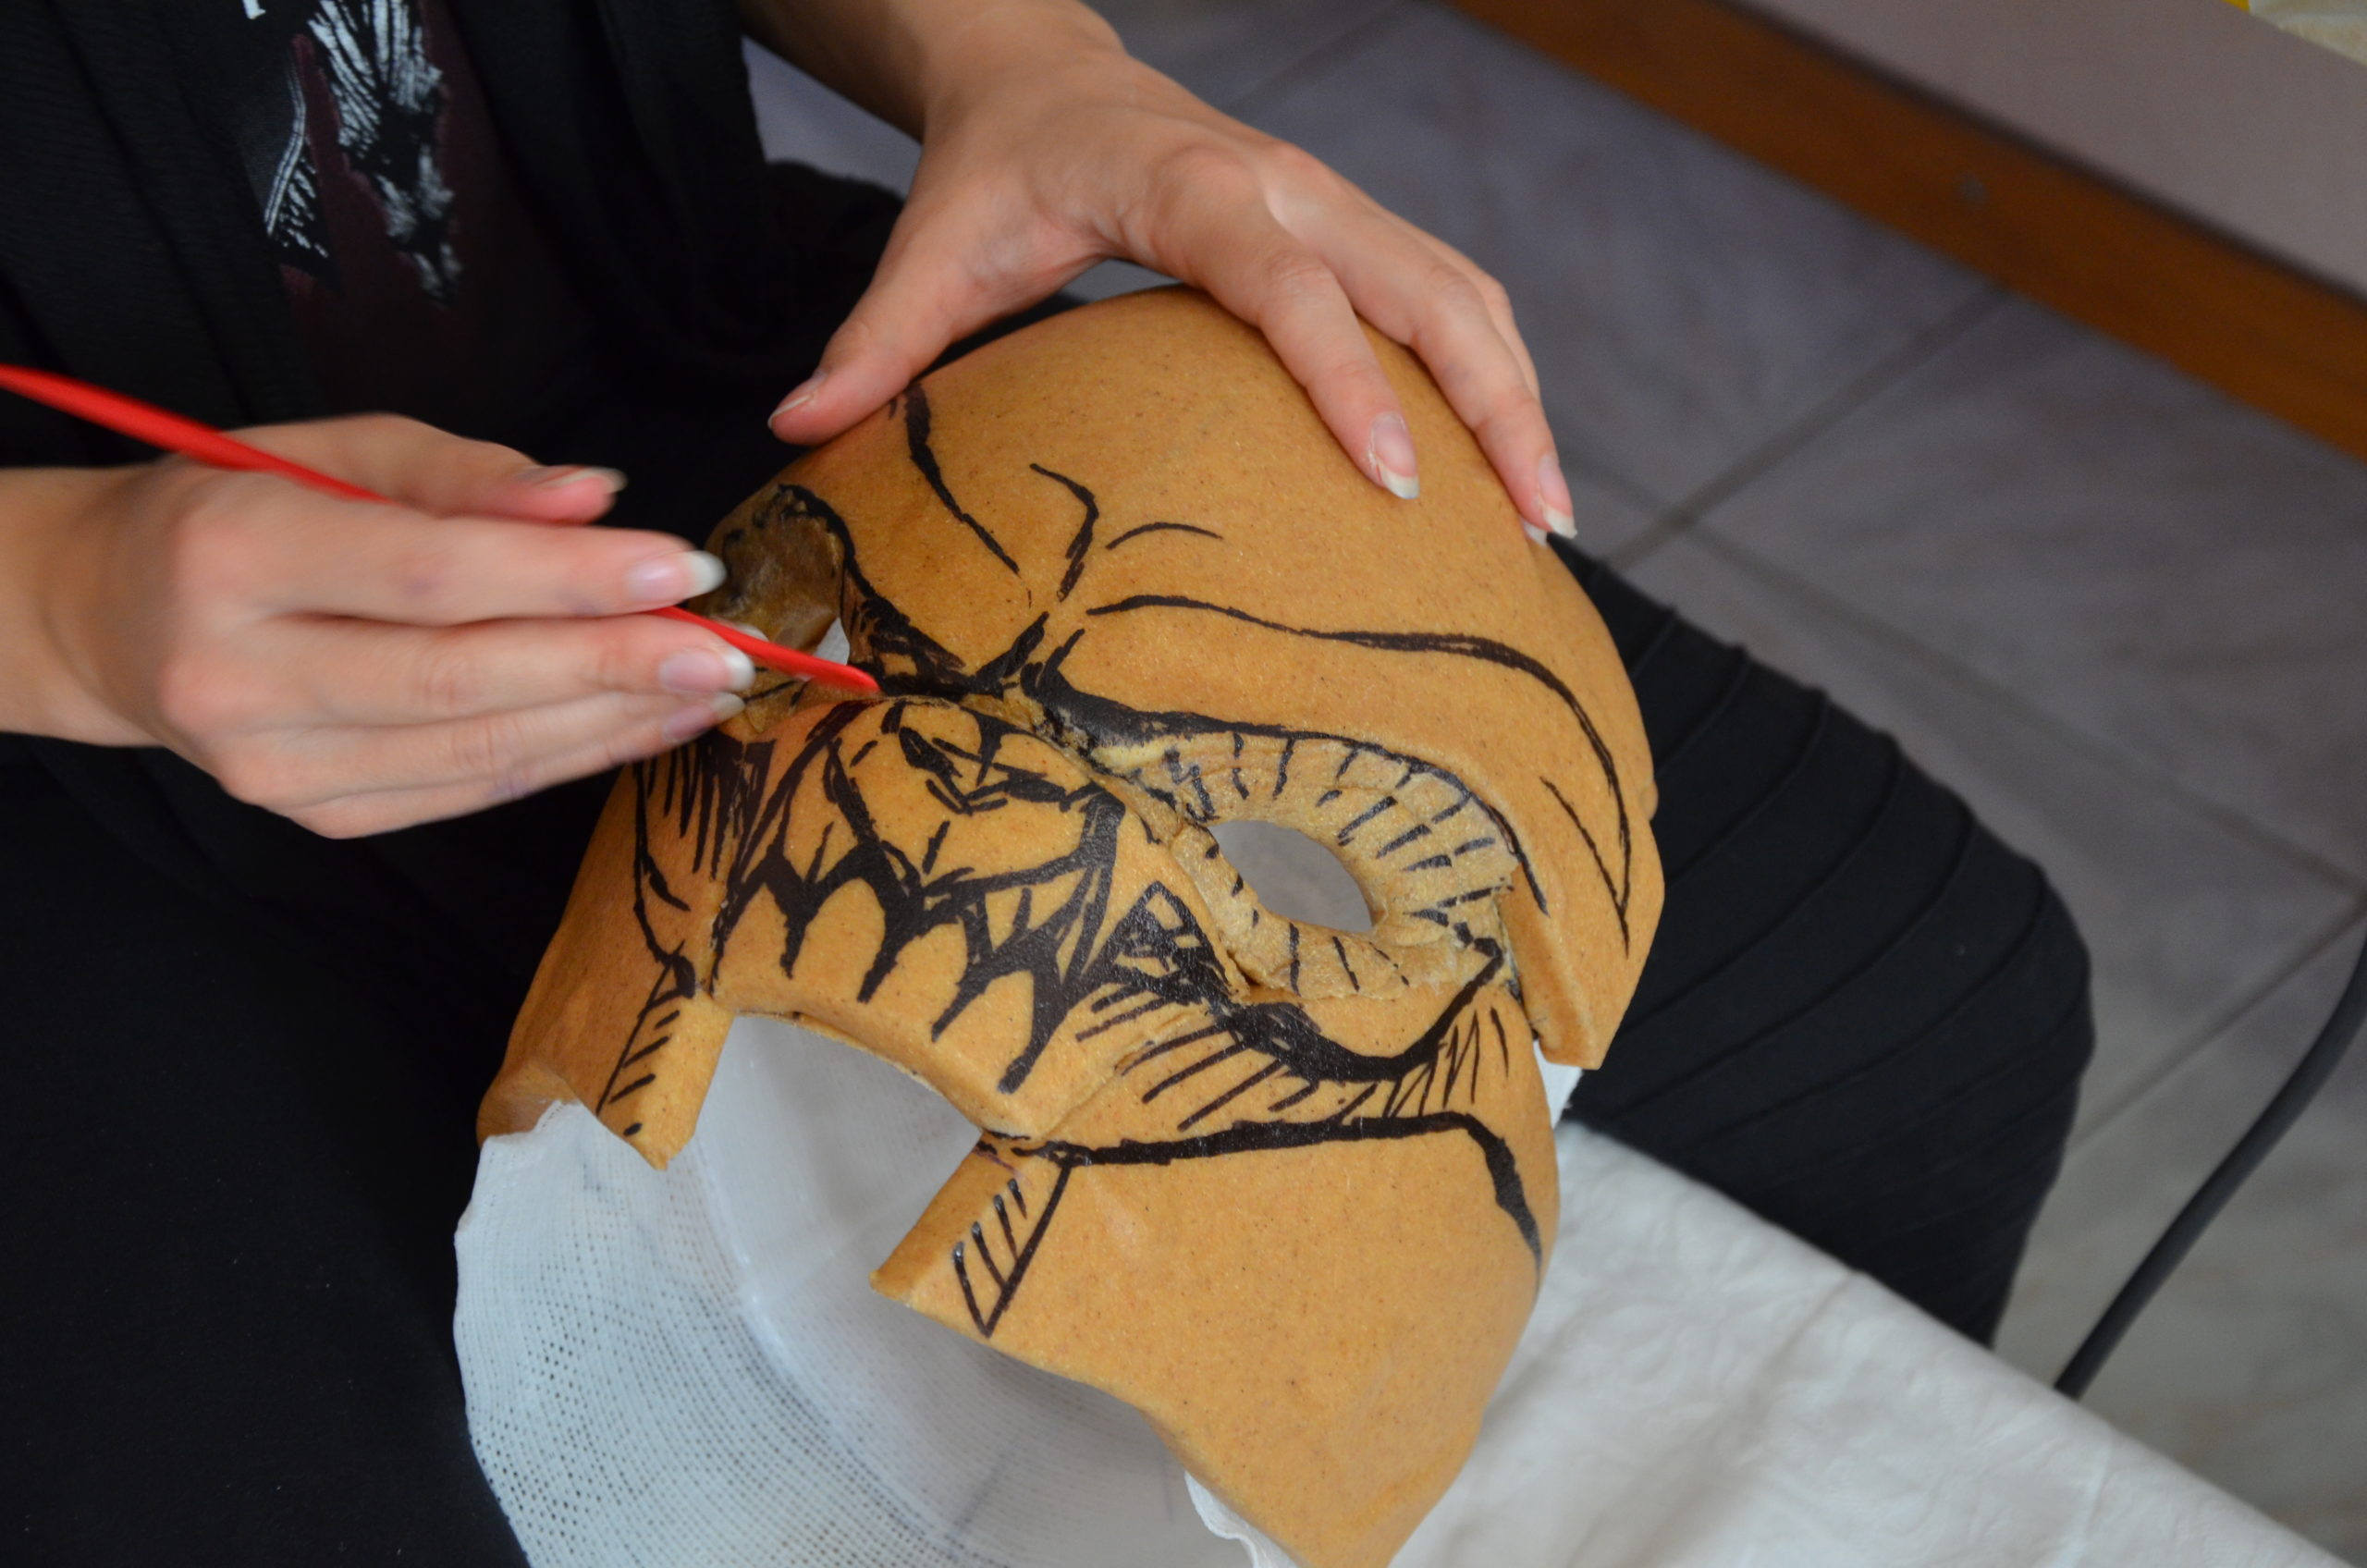
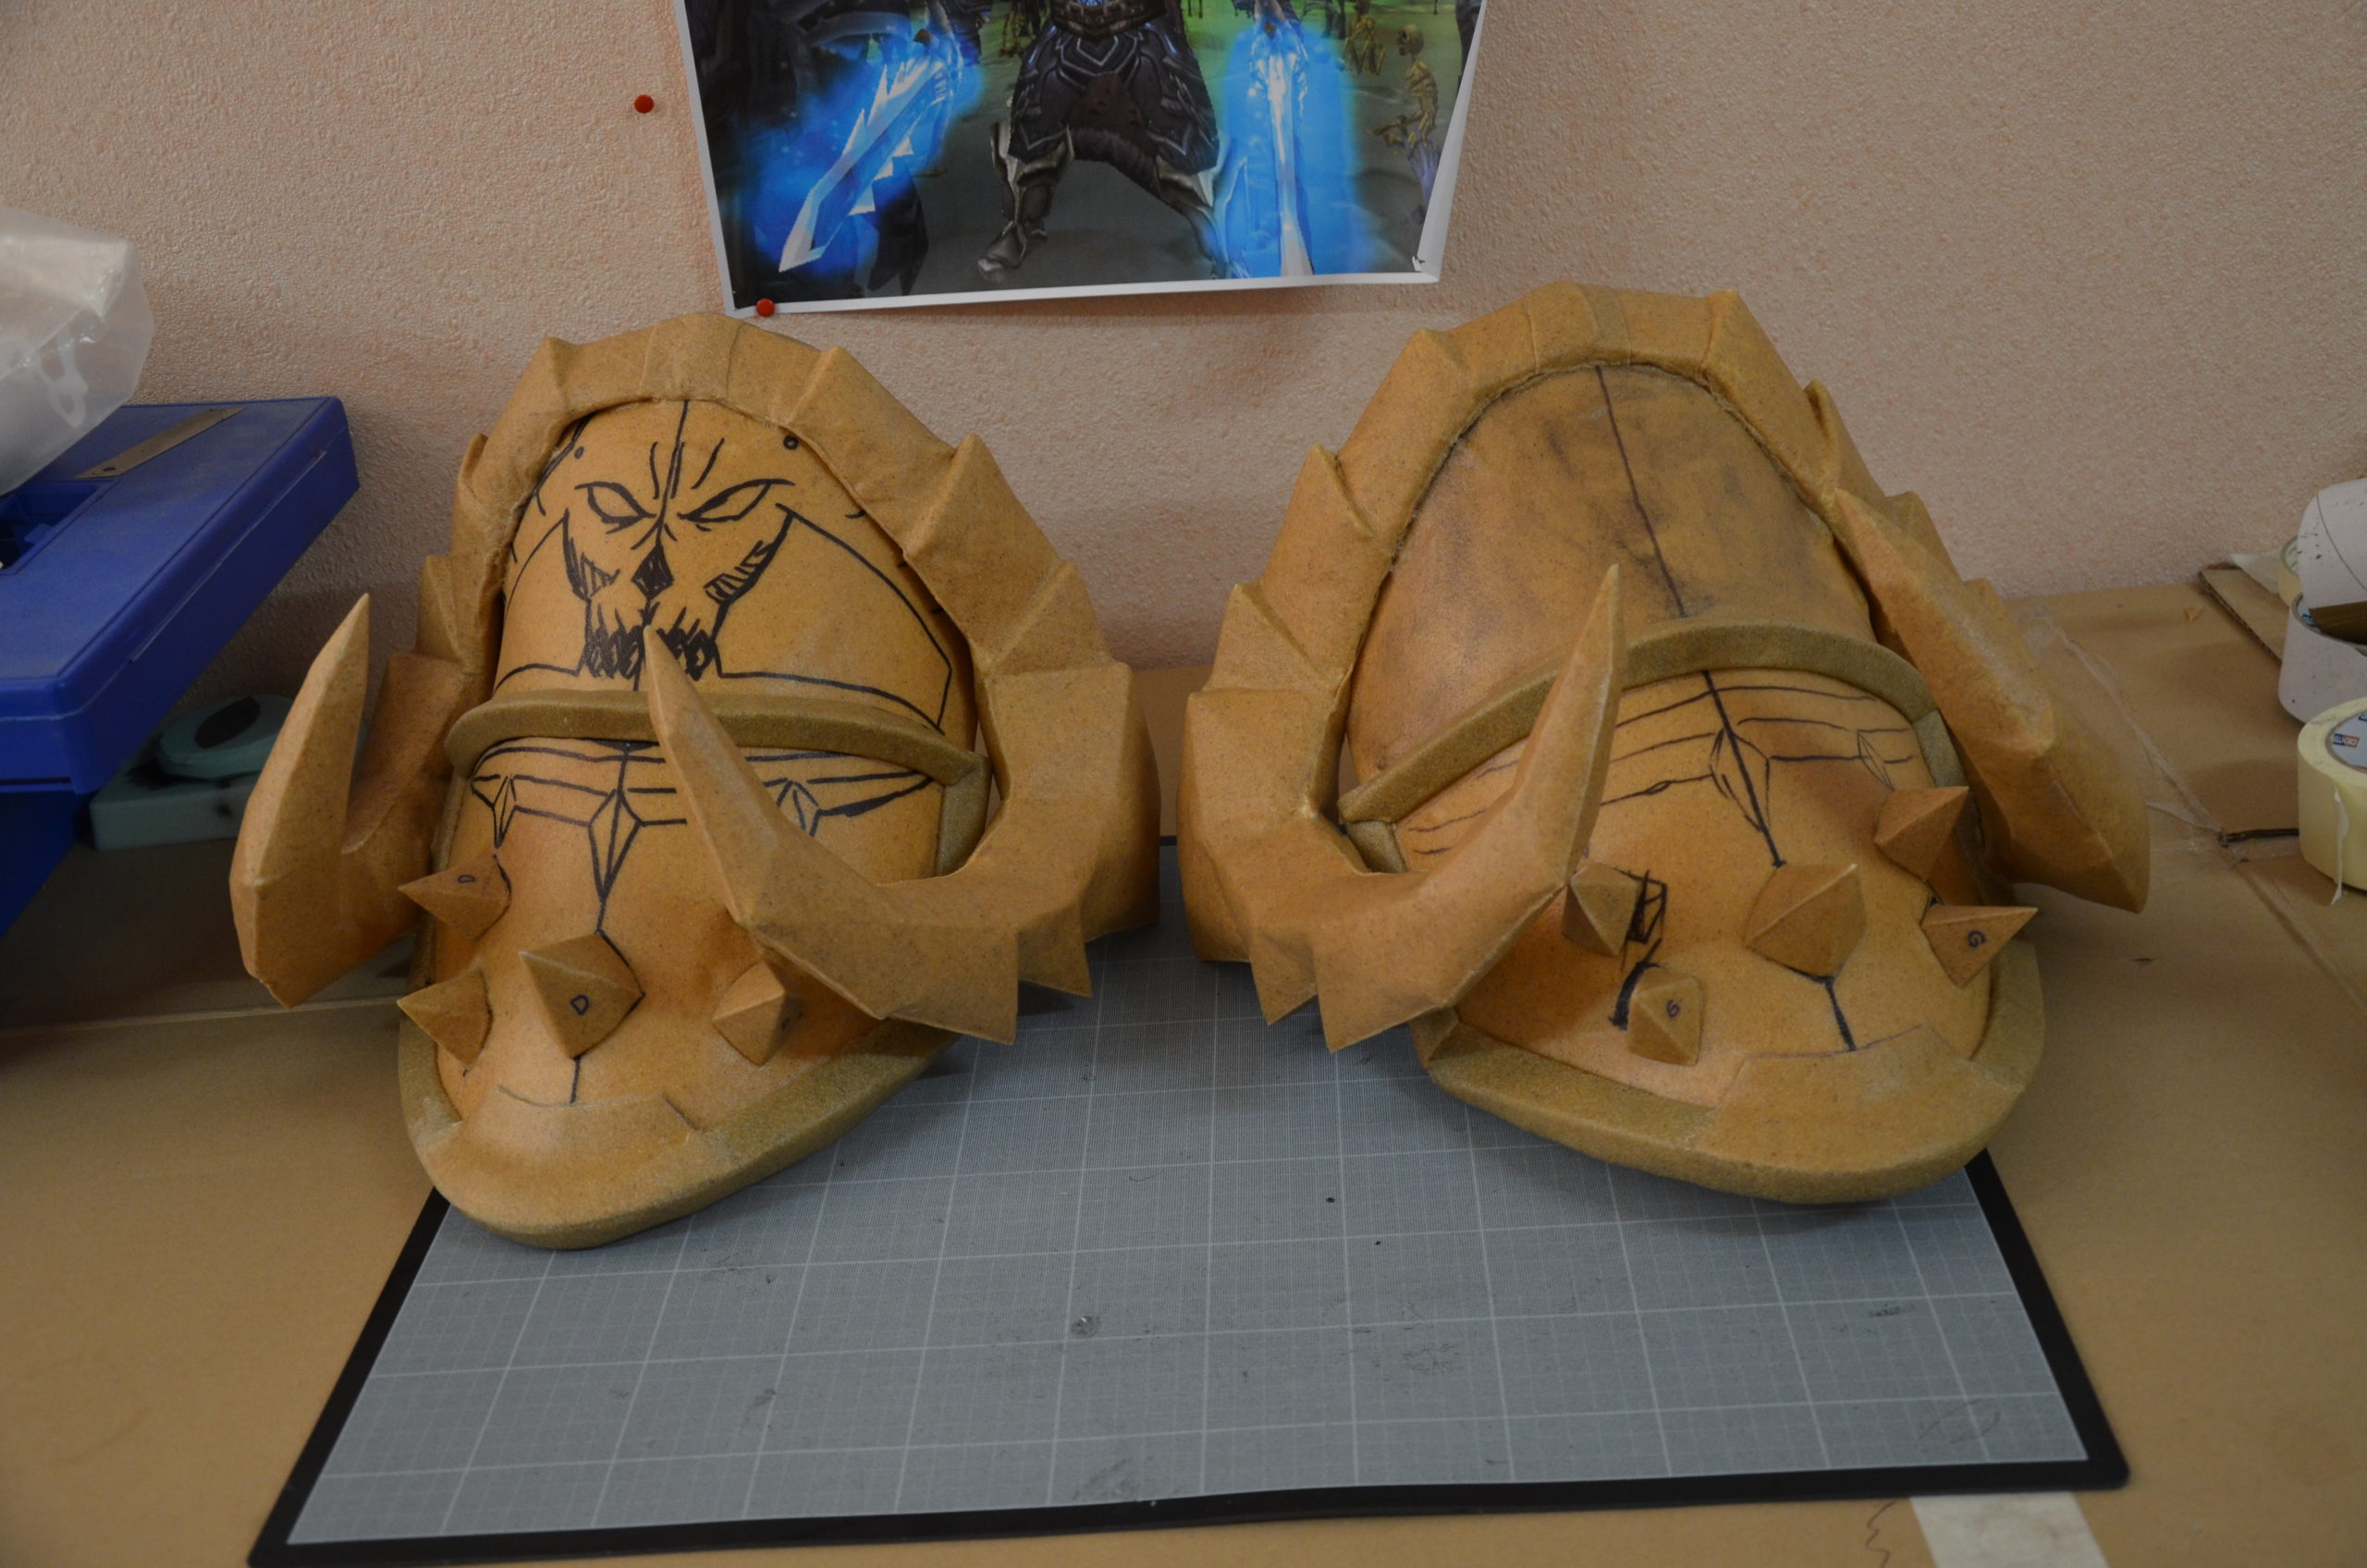
Here comes the though part : sculpting the face directly with Worbla. We put some Worbla’s Black Art «sausages» on the surface to create elevation and we shaped them.
We added the lower part of the helmet, made of foam and Worbla.
Then, we attached the horns (remember the ones in Pepakura covered with Worbla ?) by screwing them from the inside of the helmet.
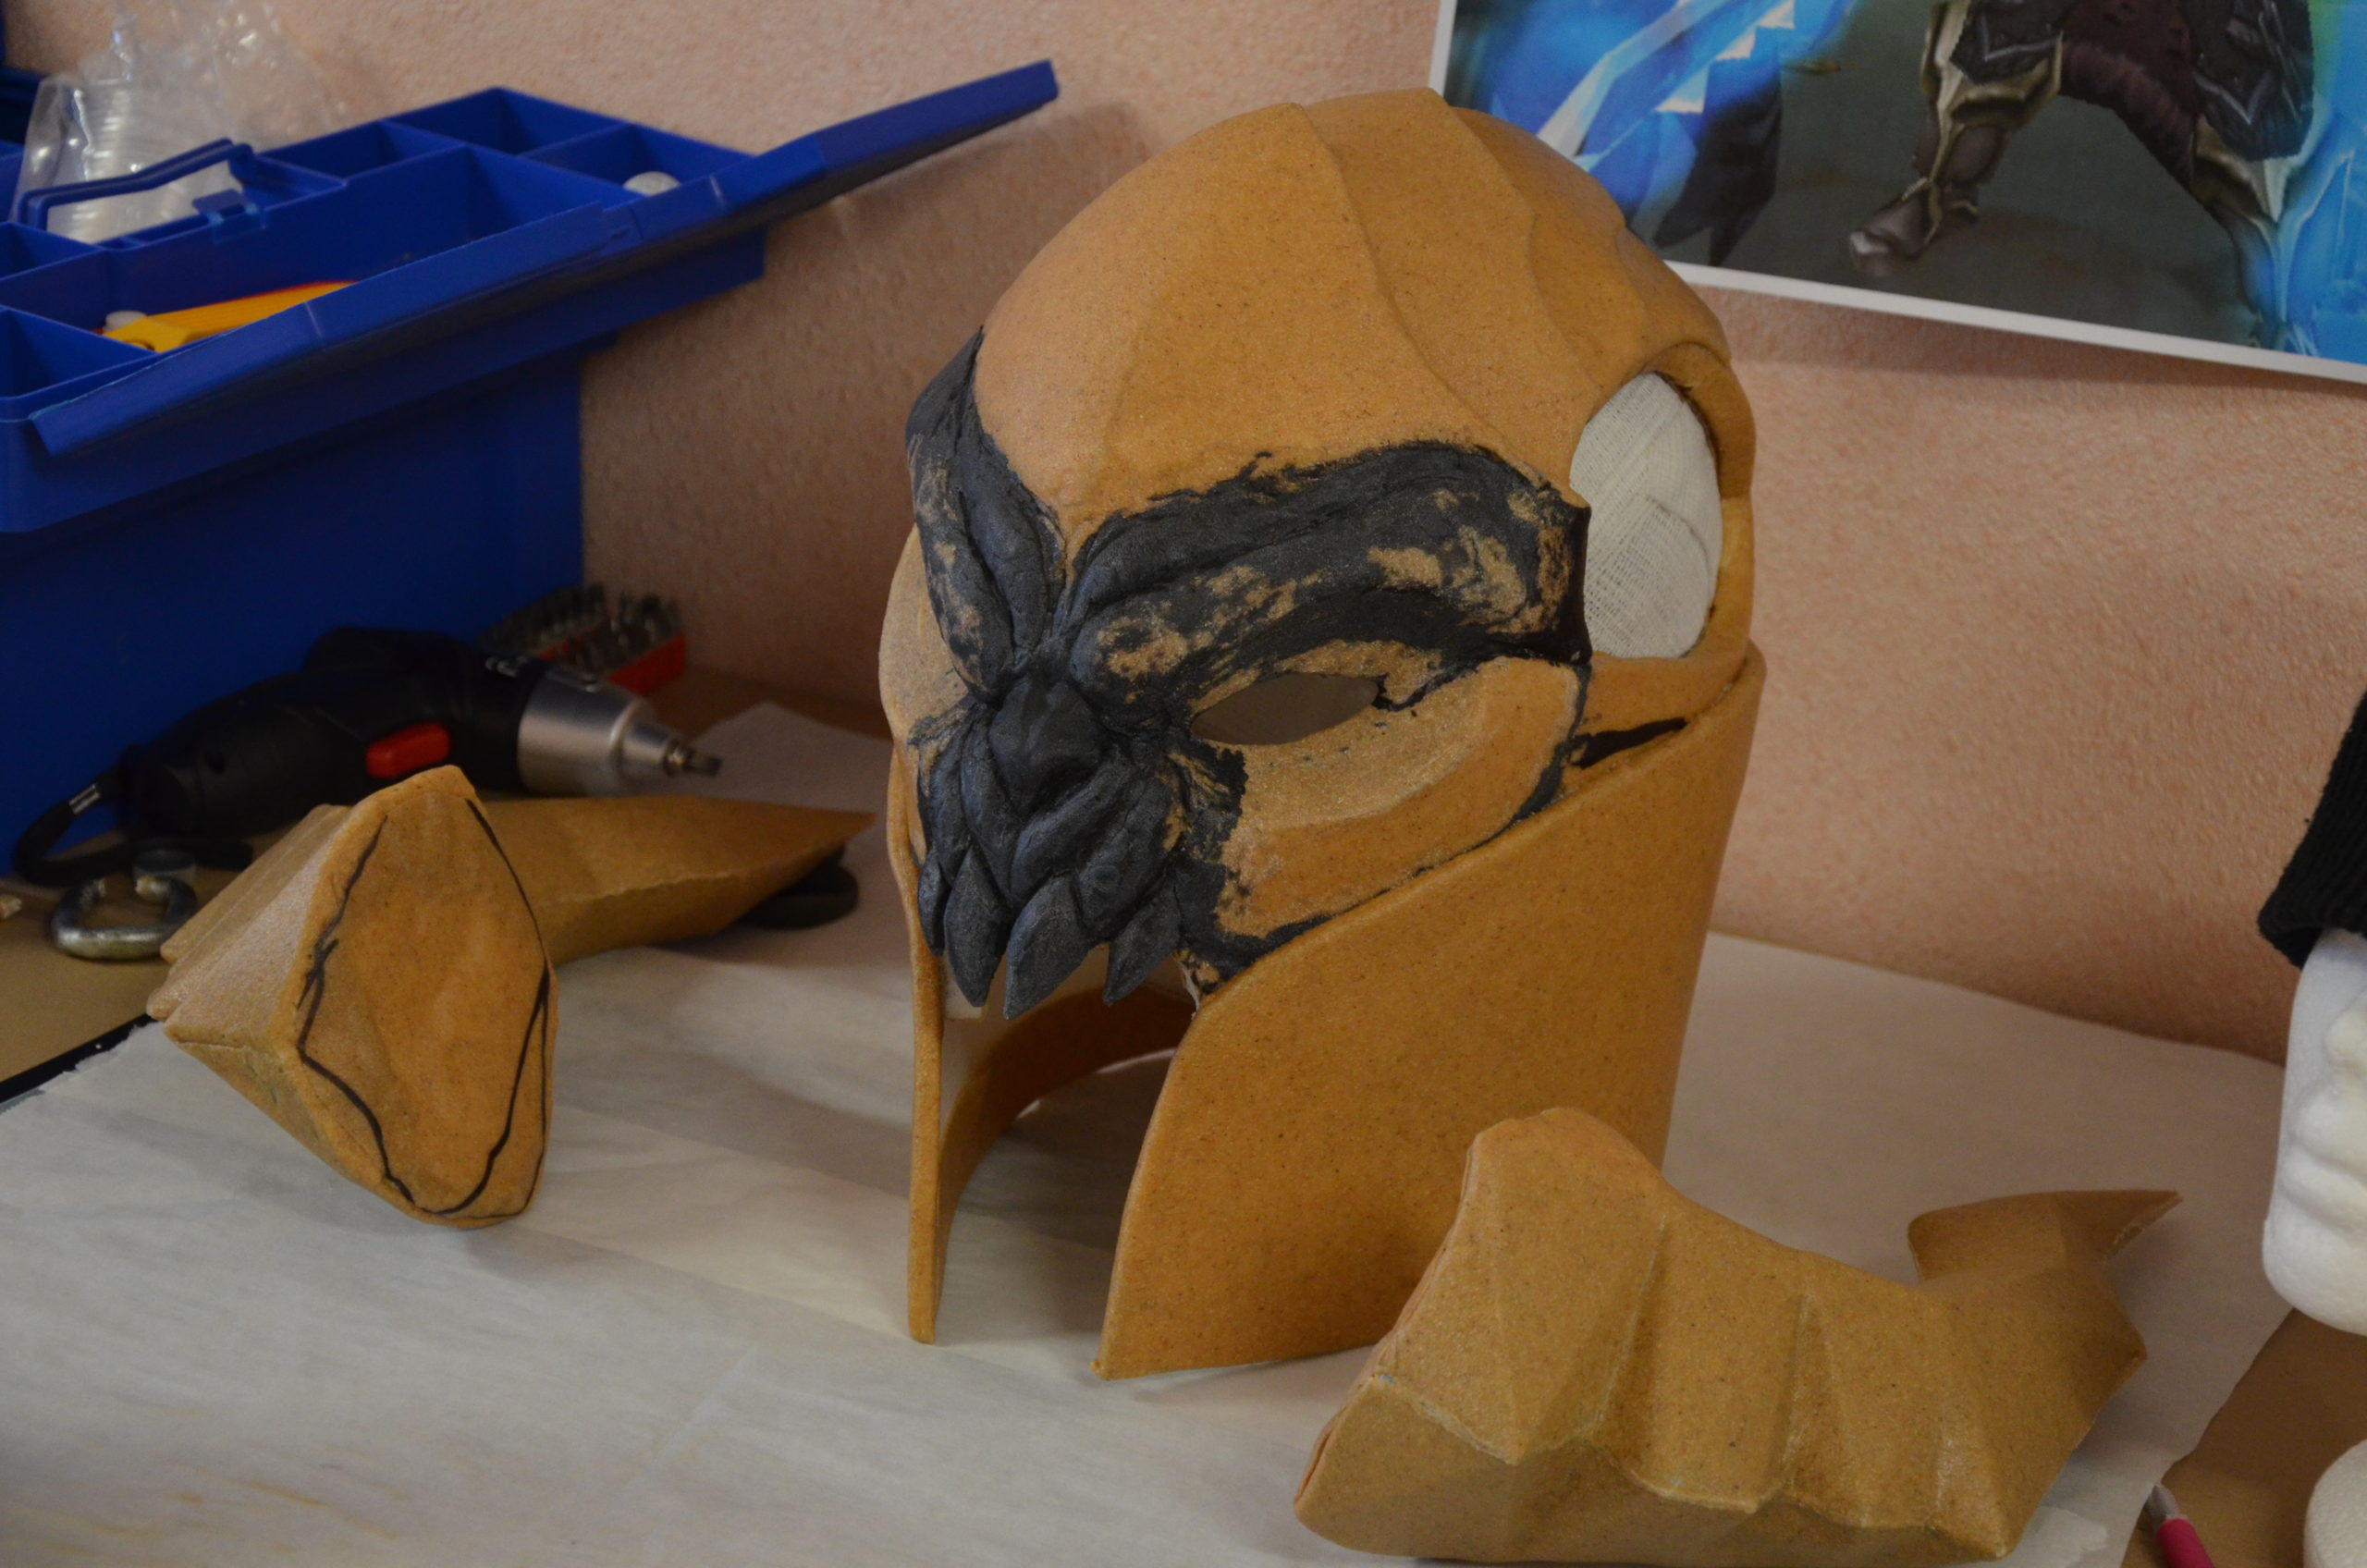
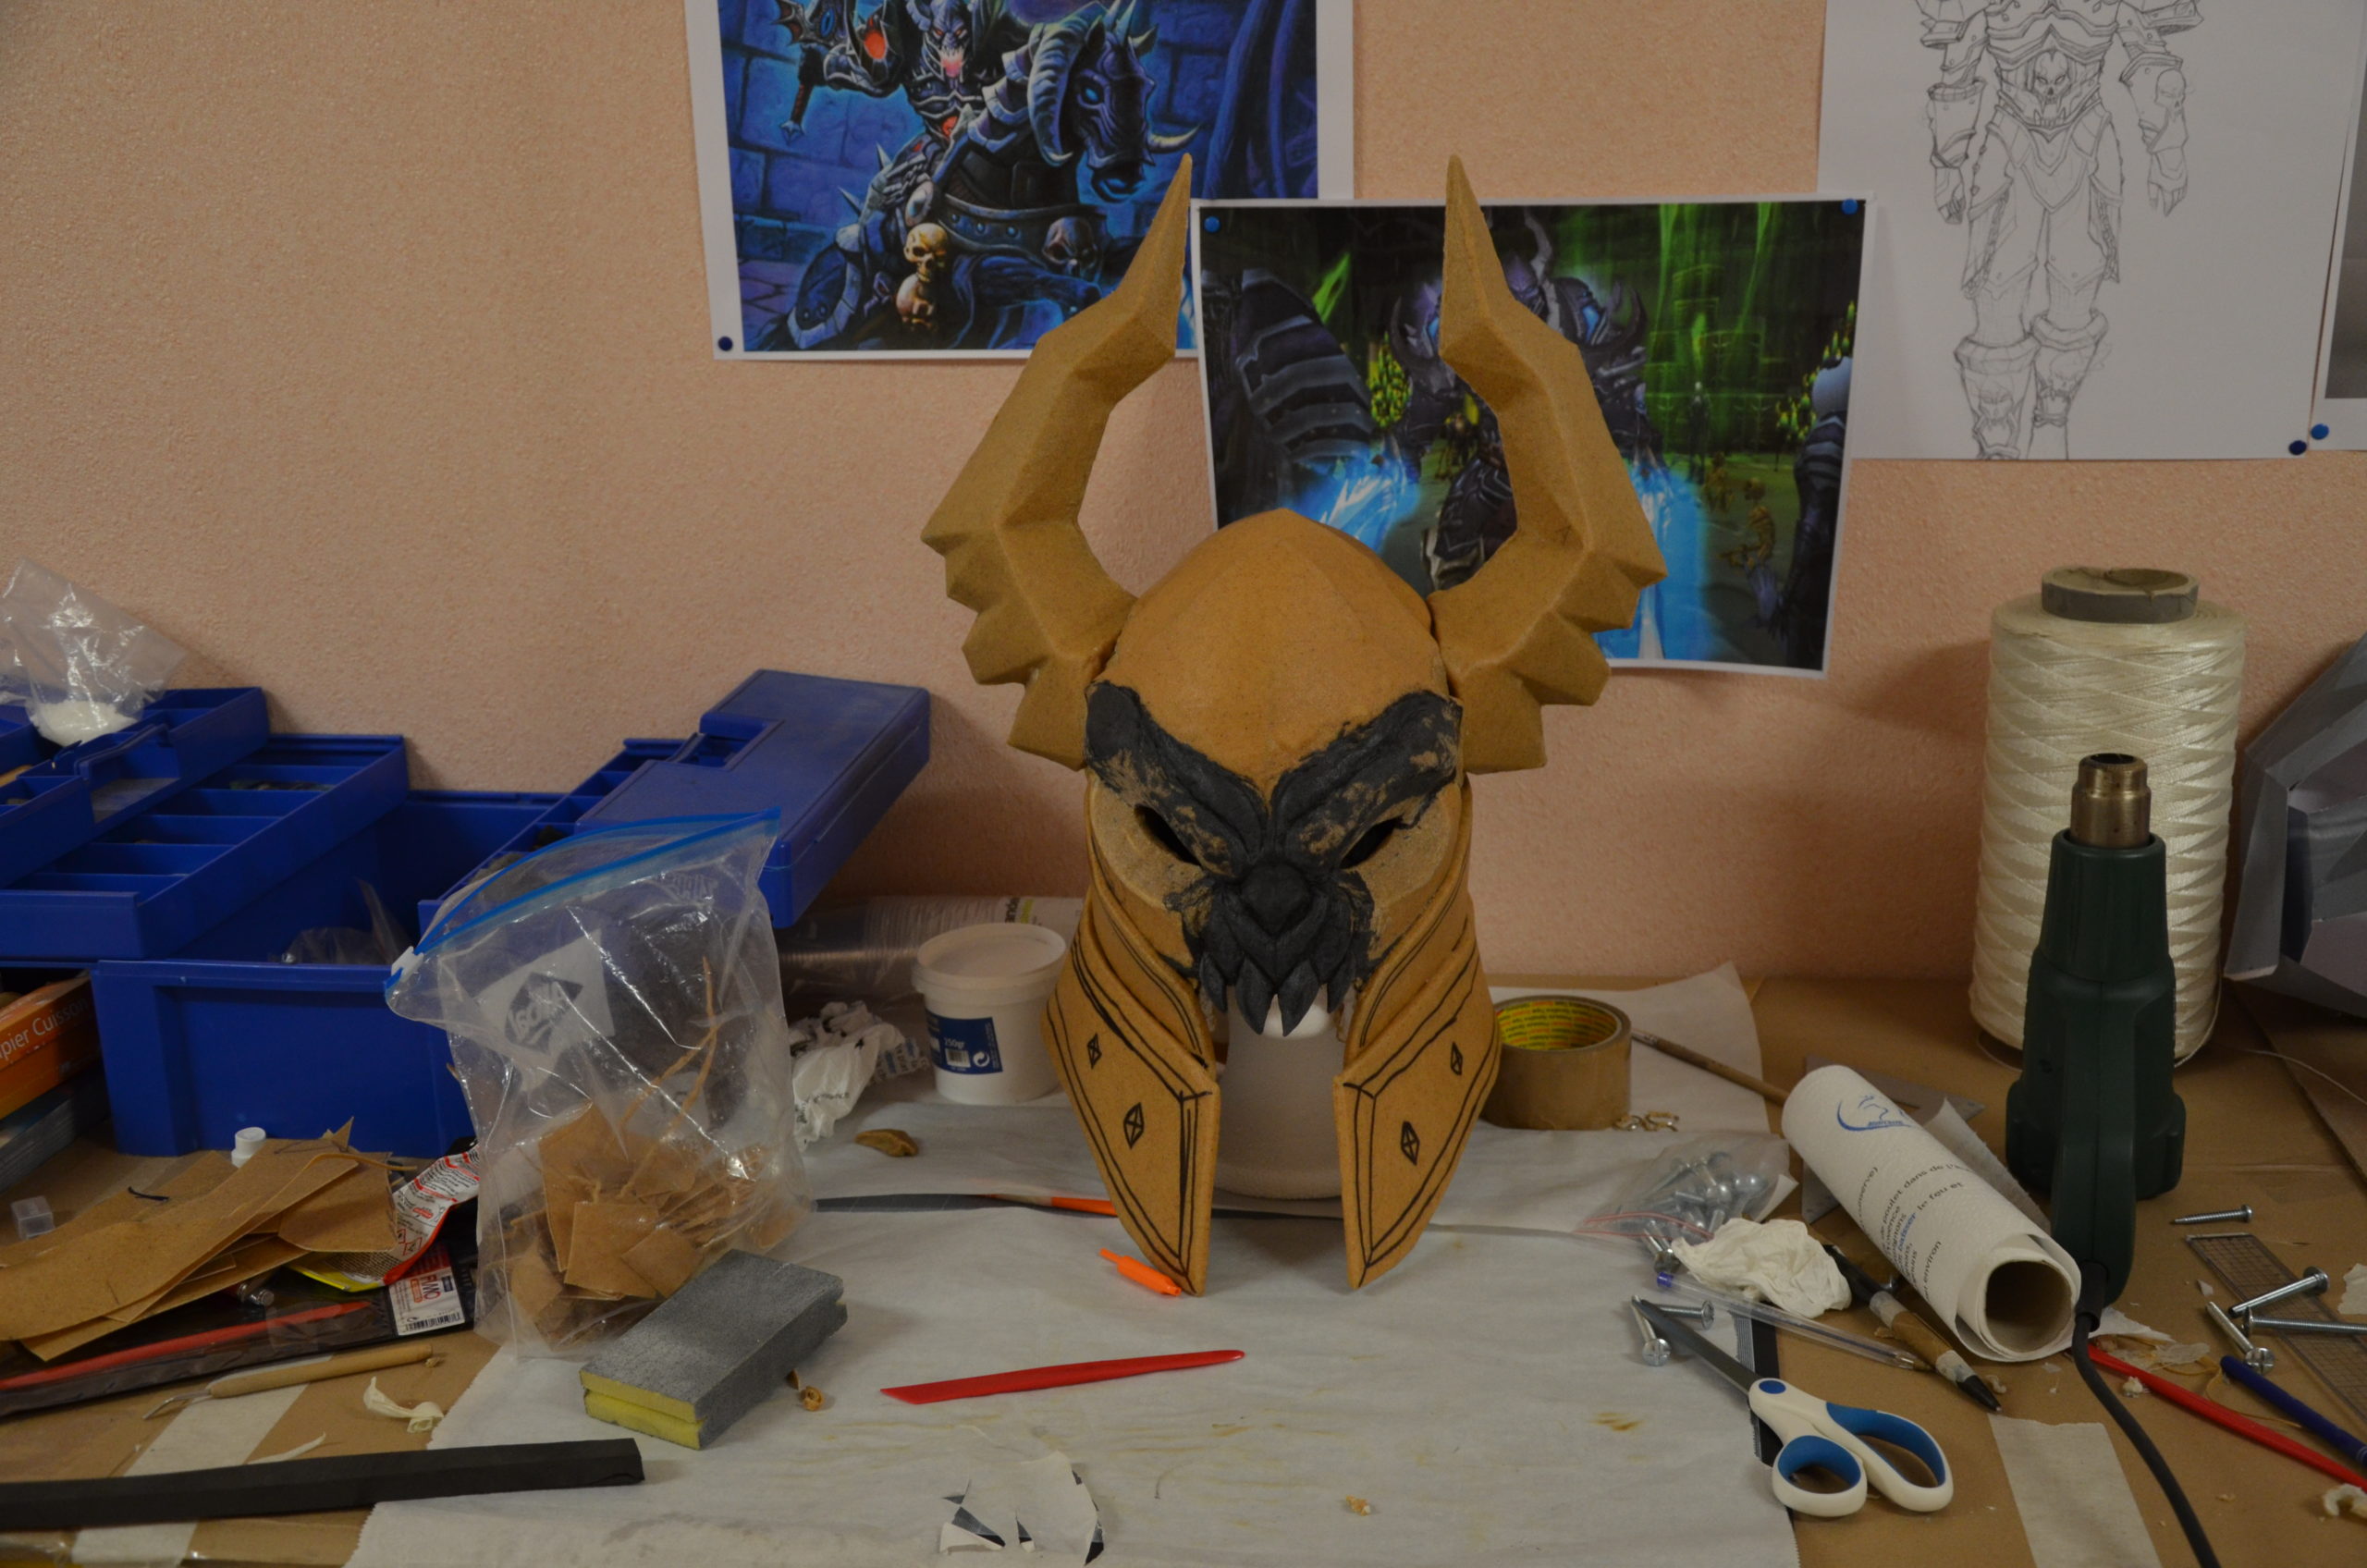
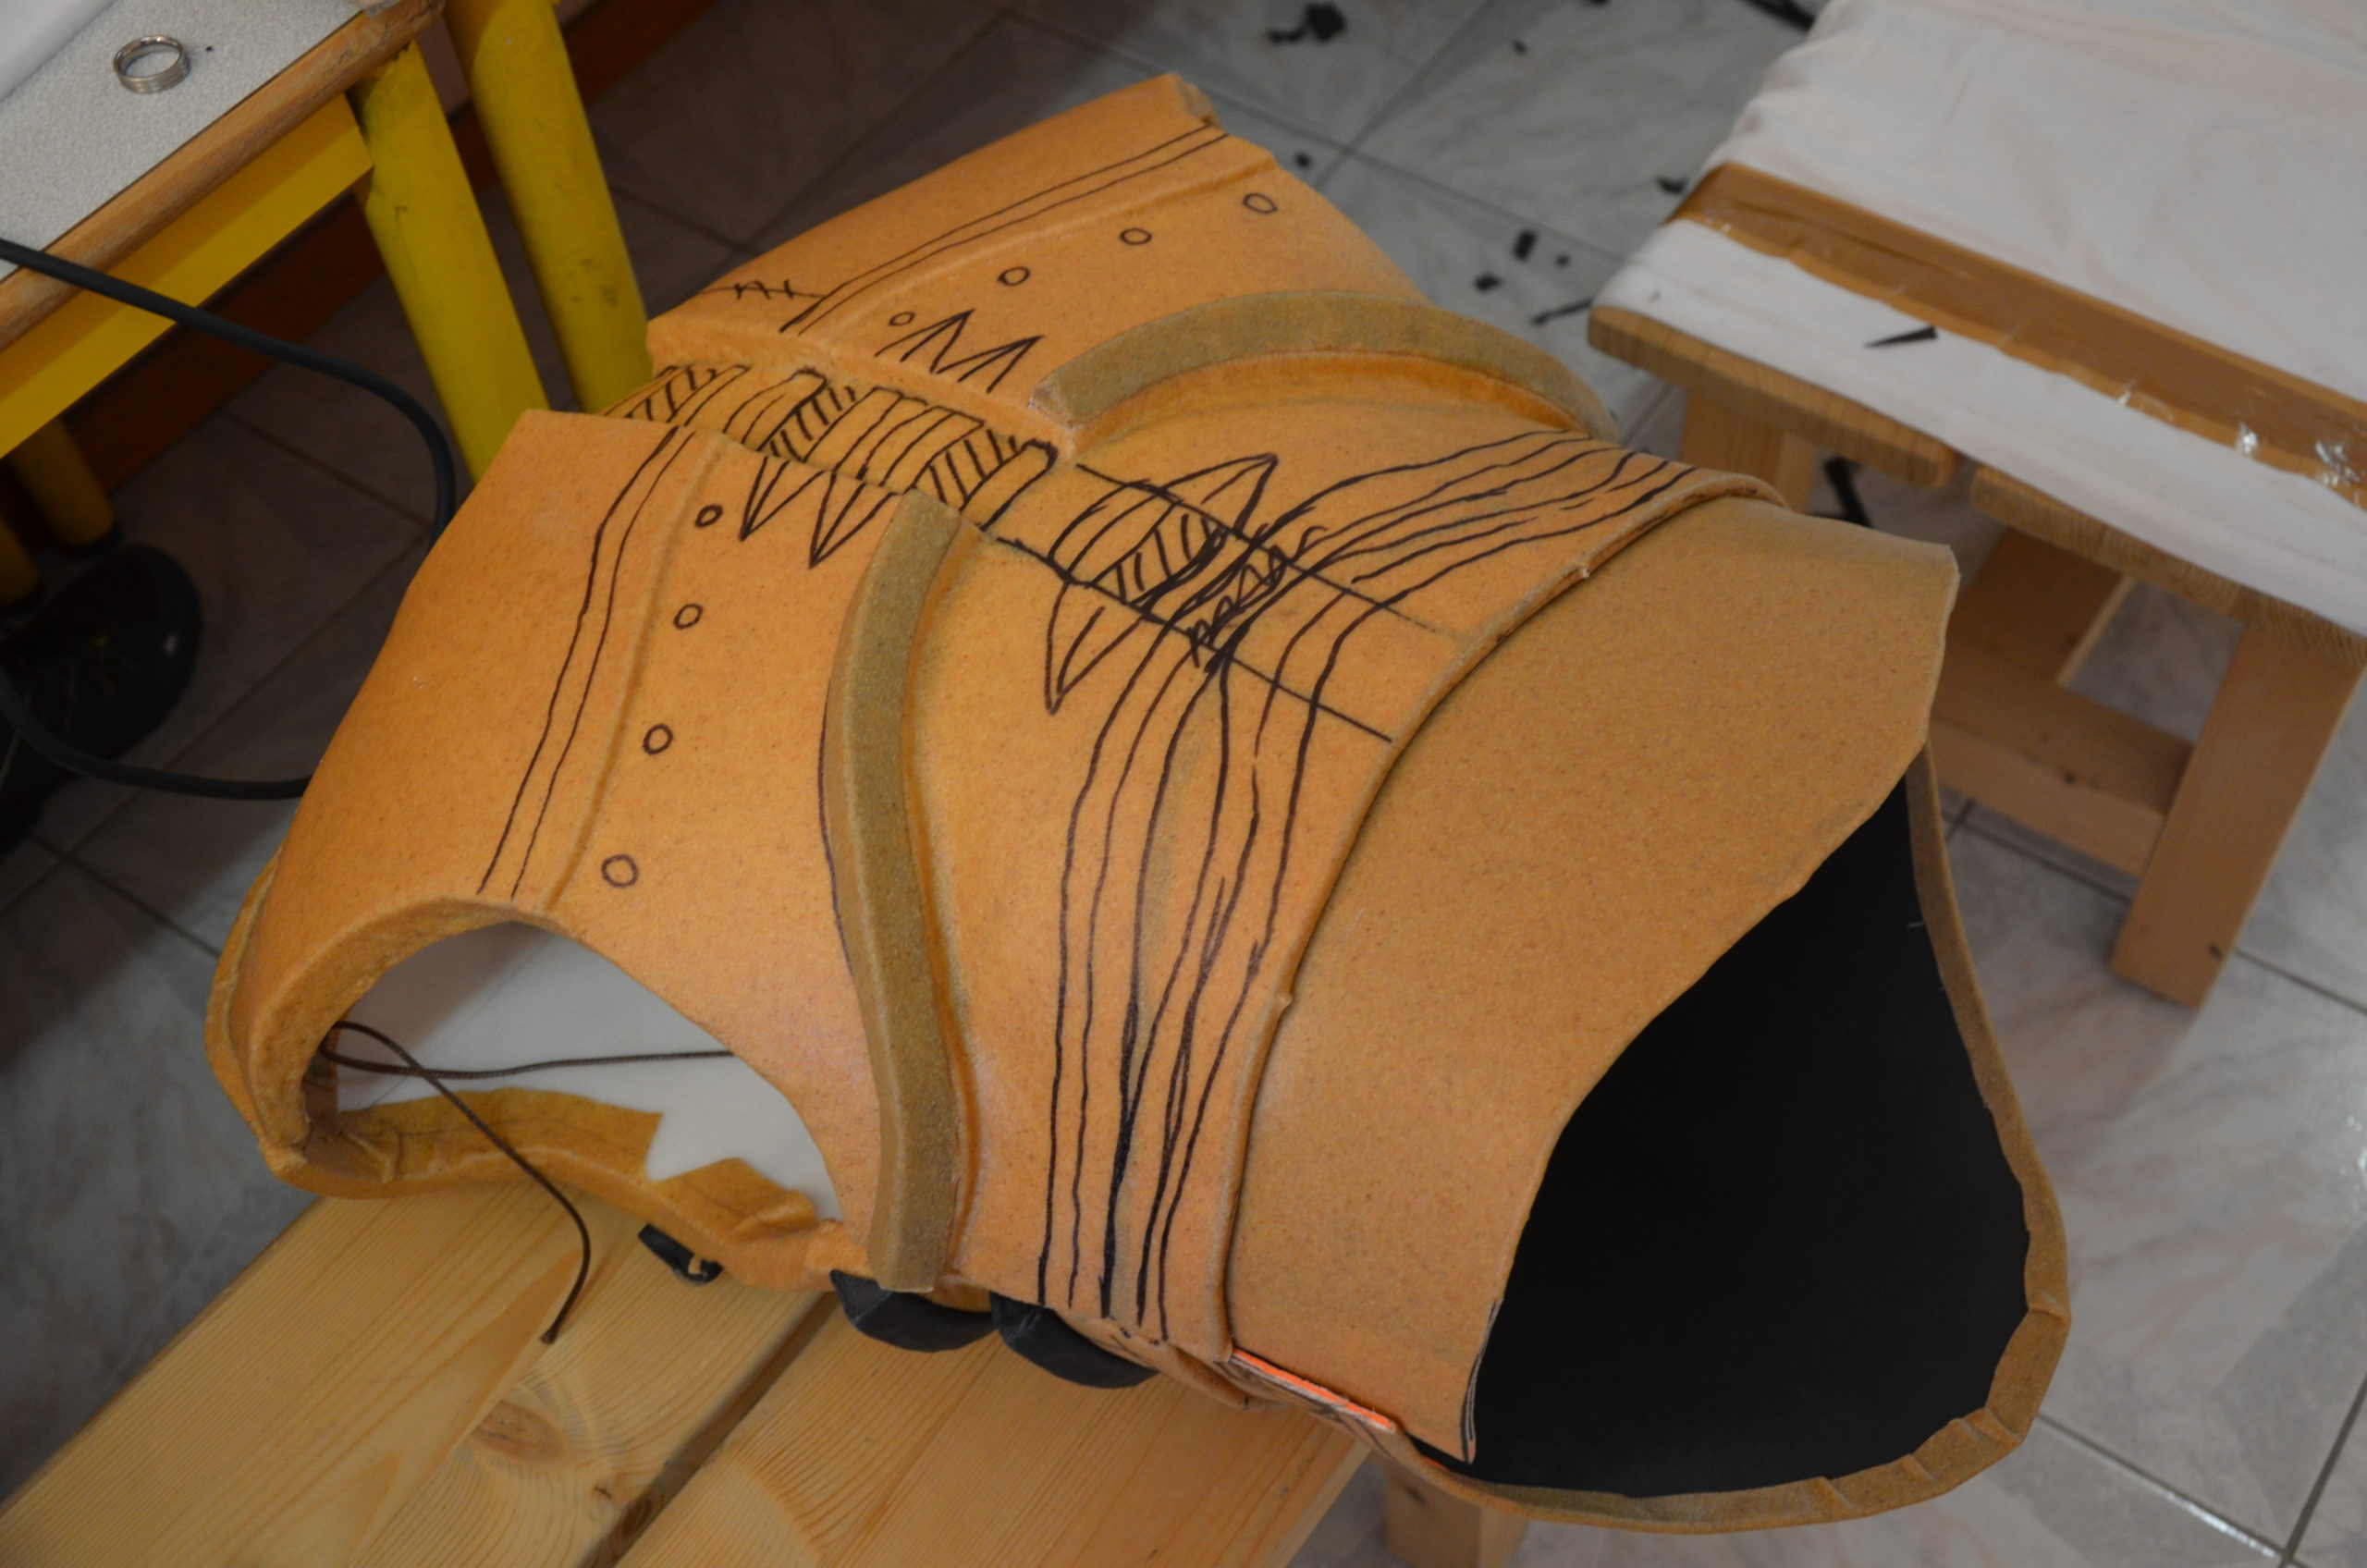
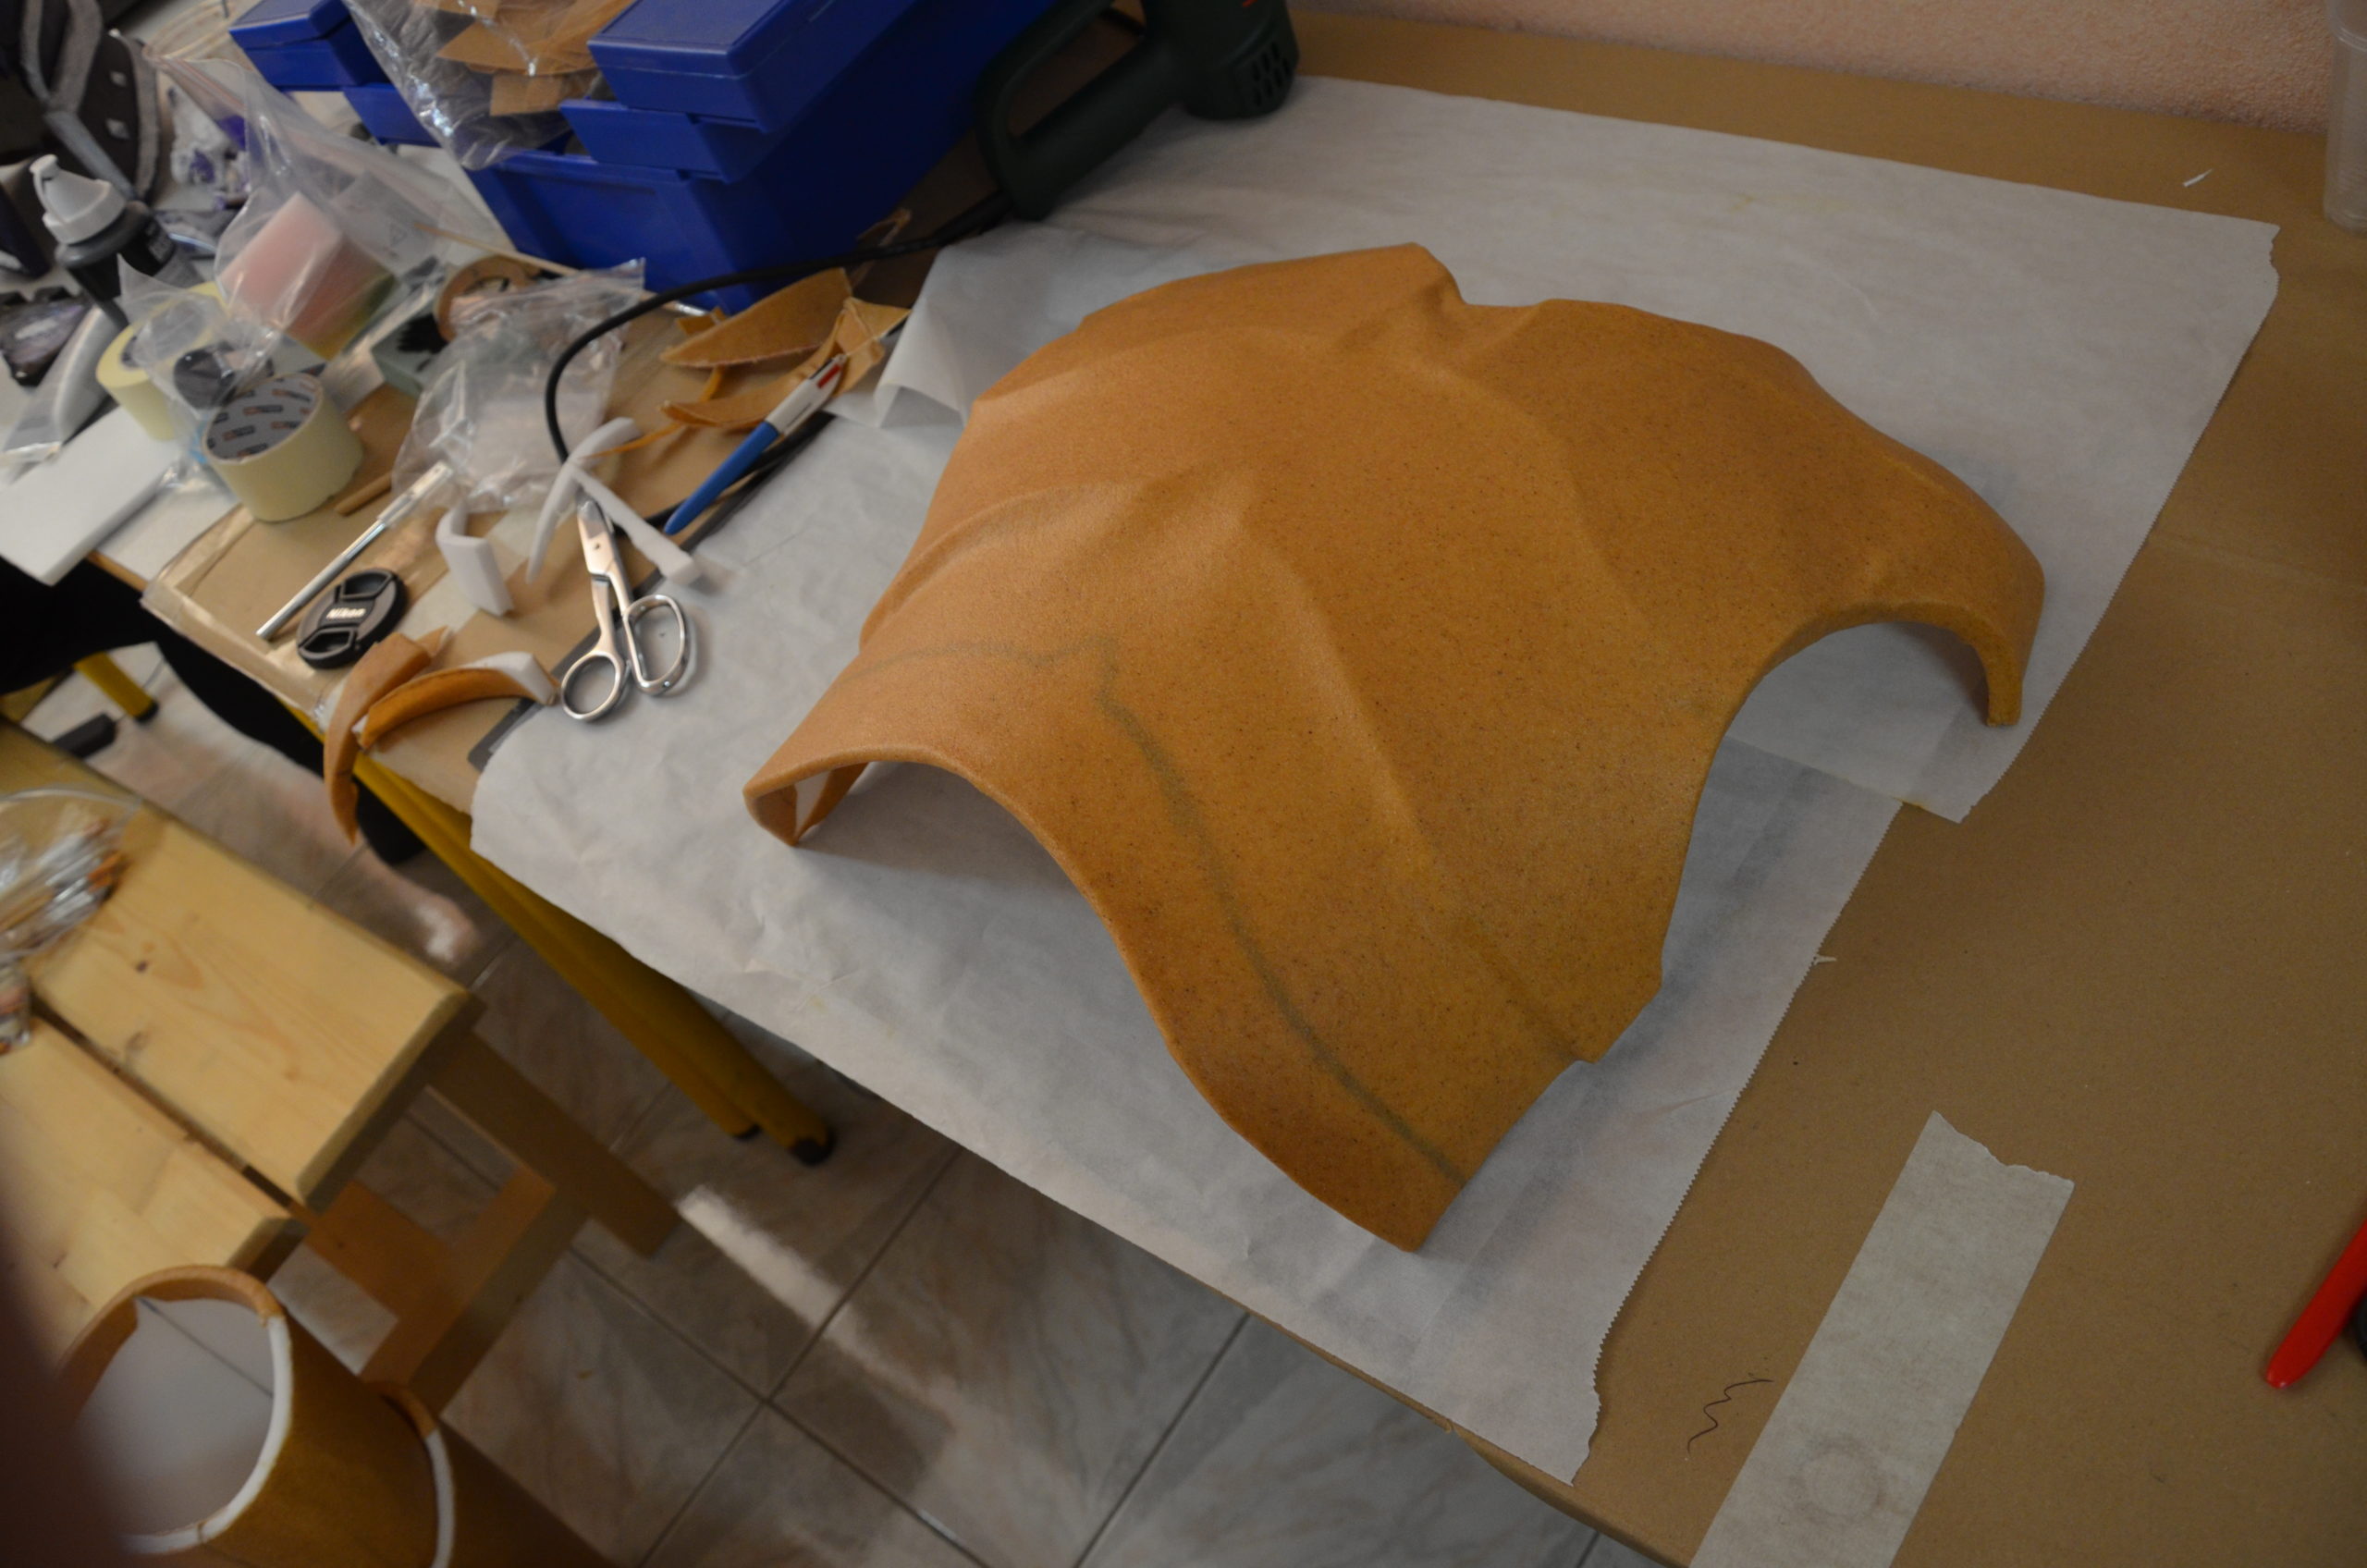
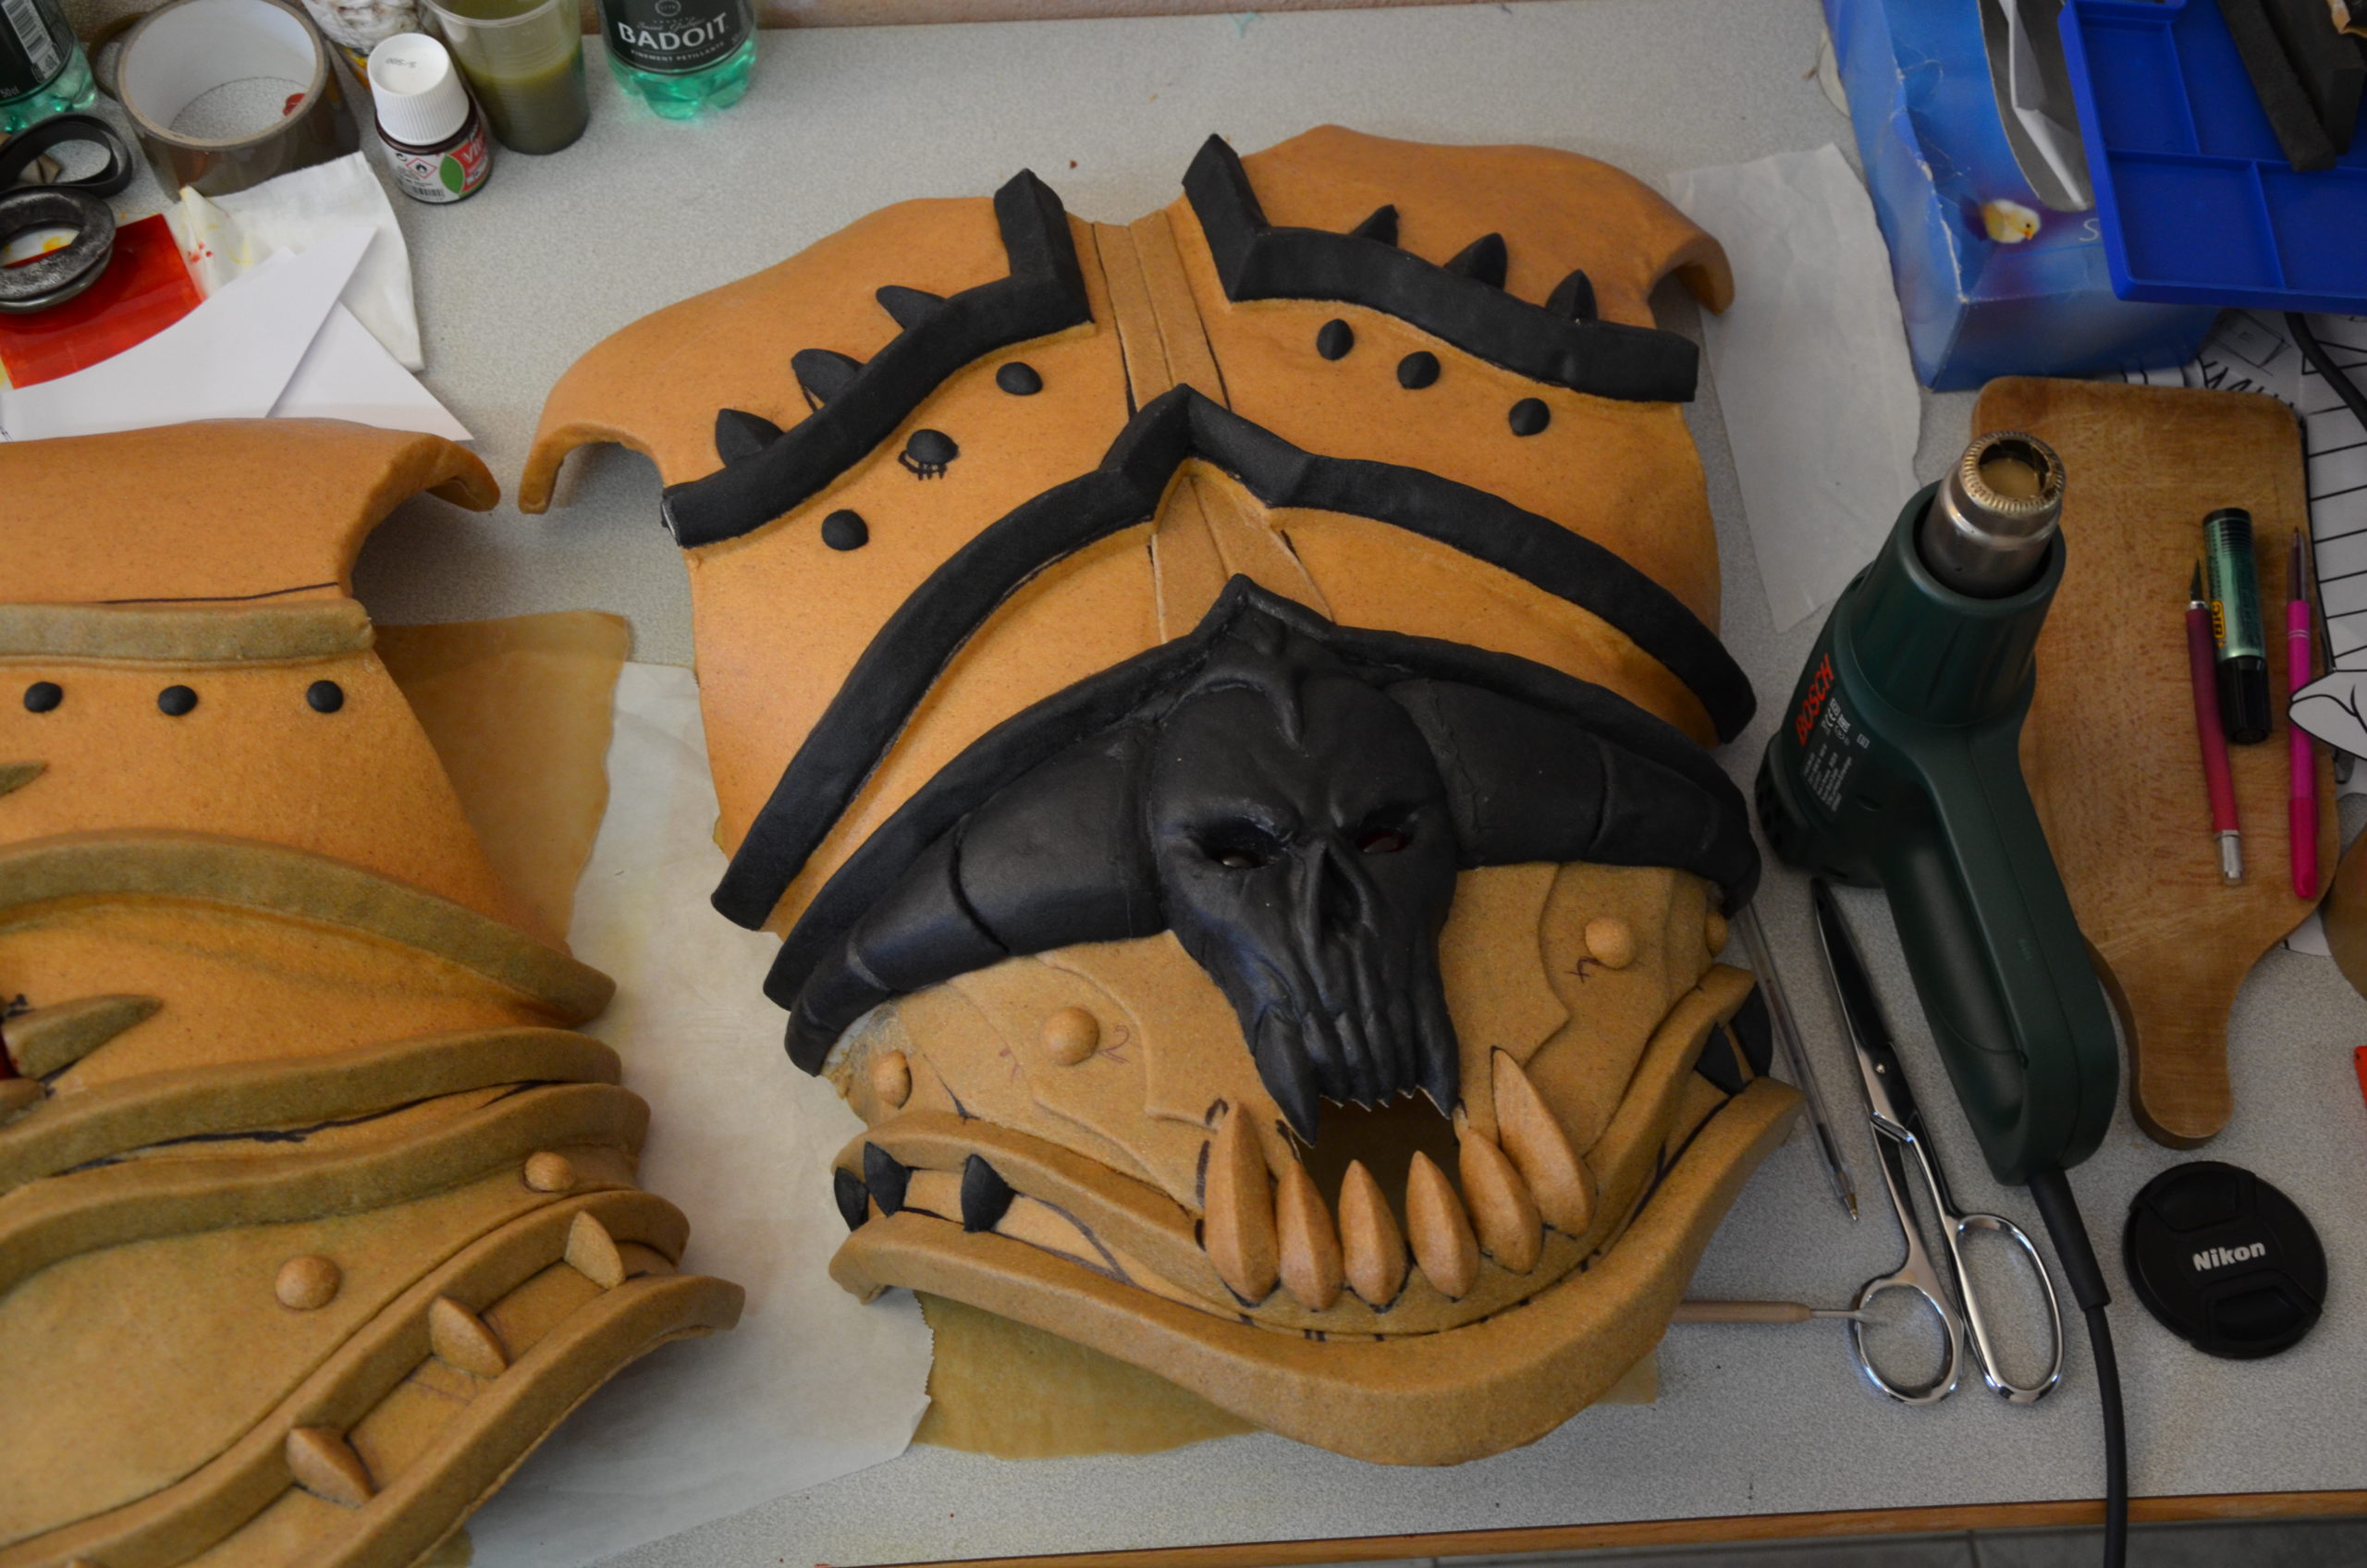
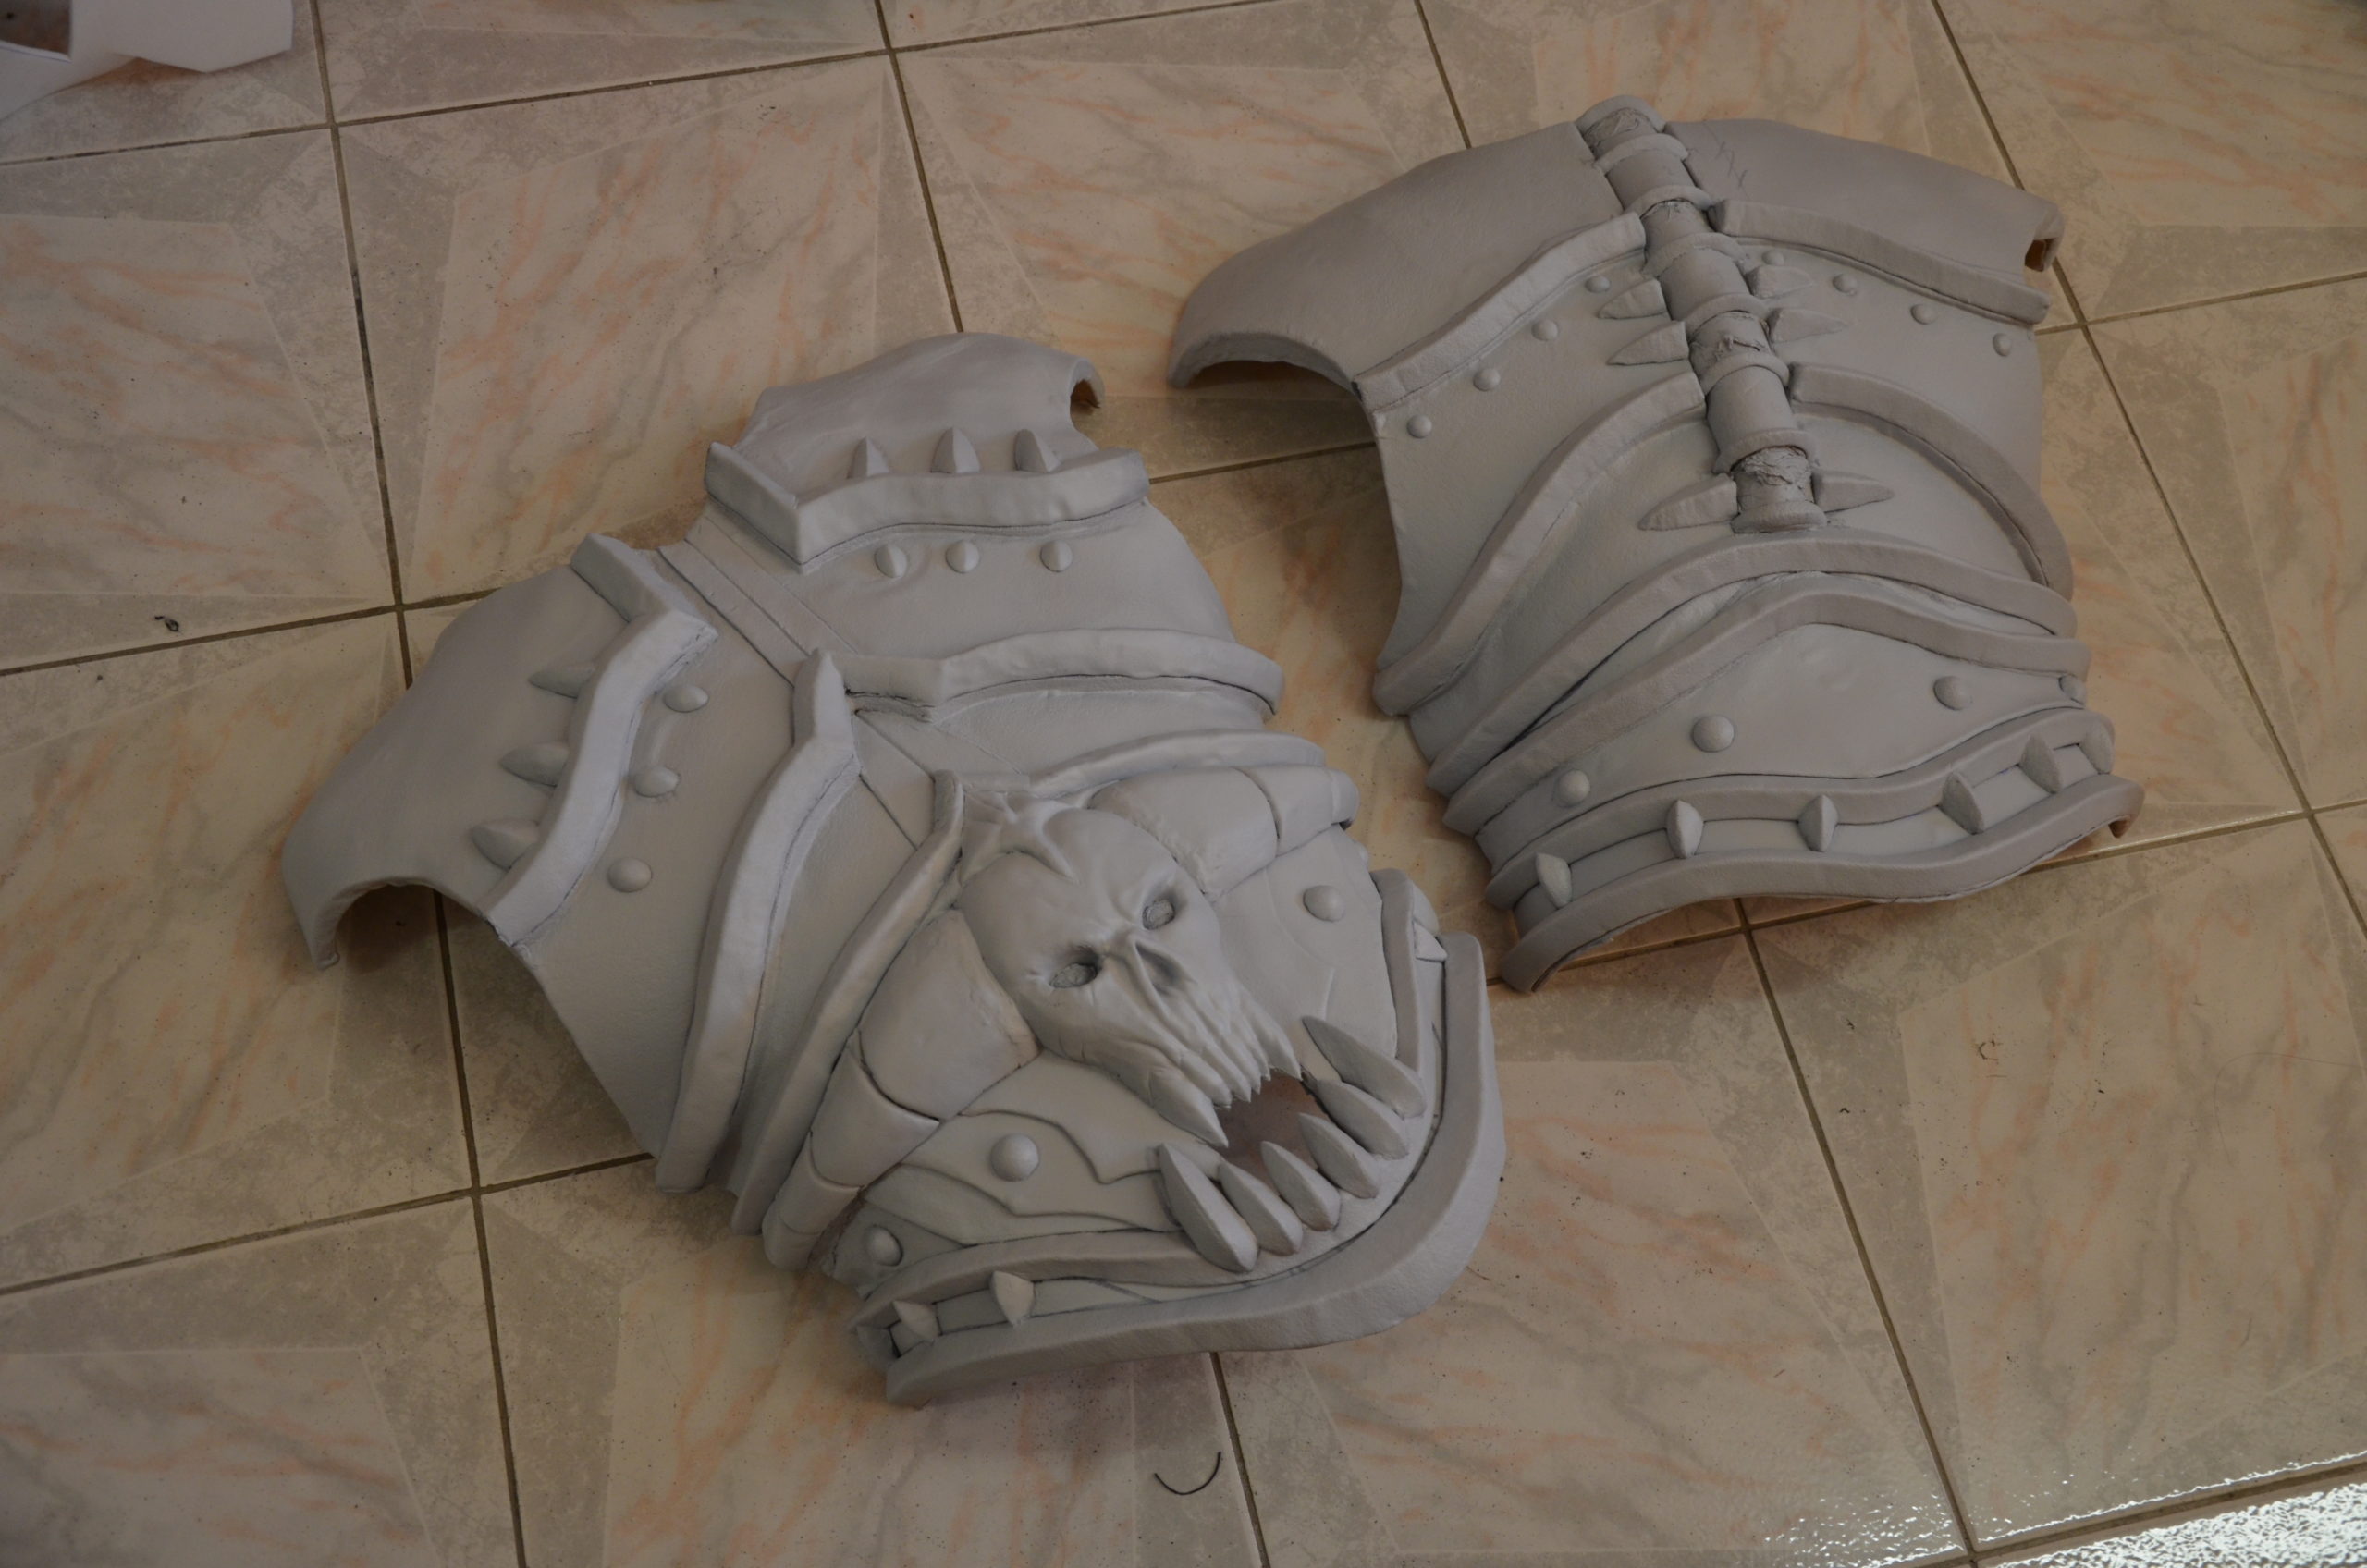
Like previously done, we made the part bases with thick foam covered in Worbla.

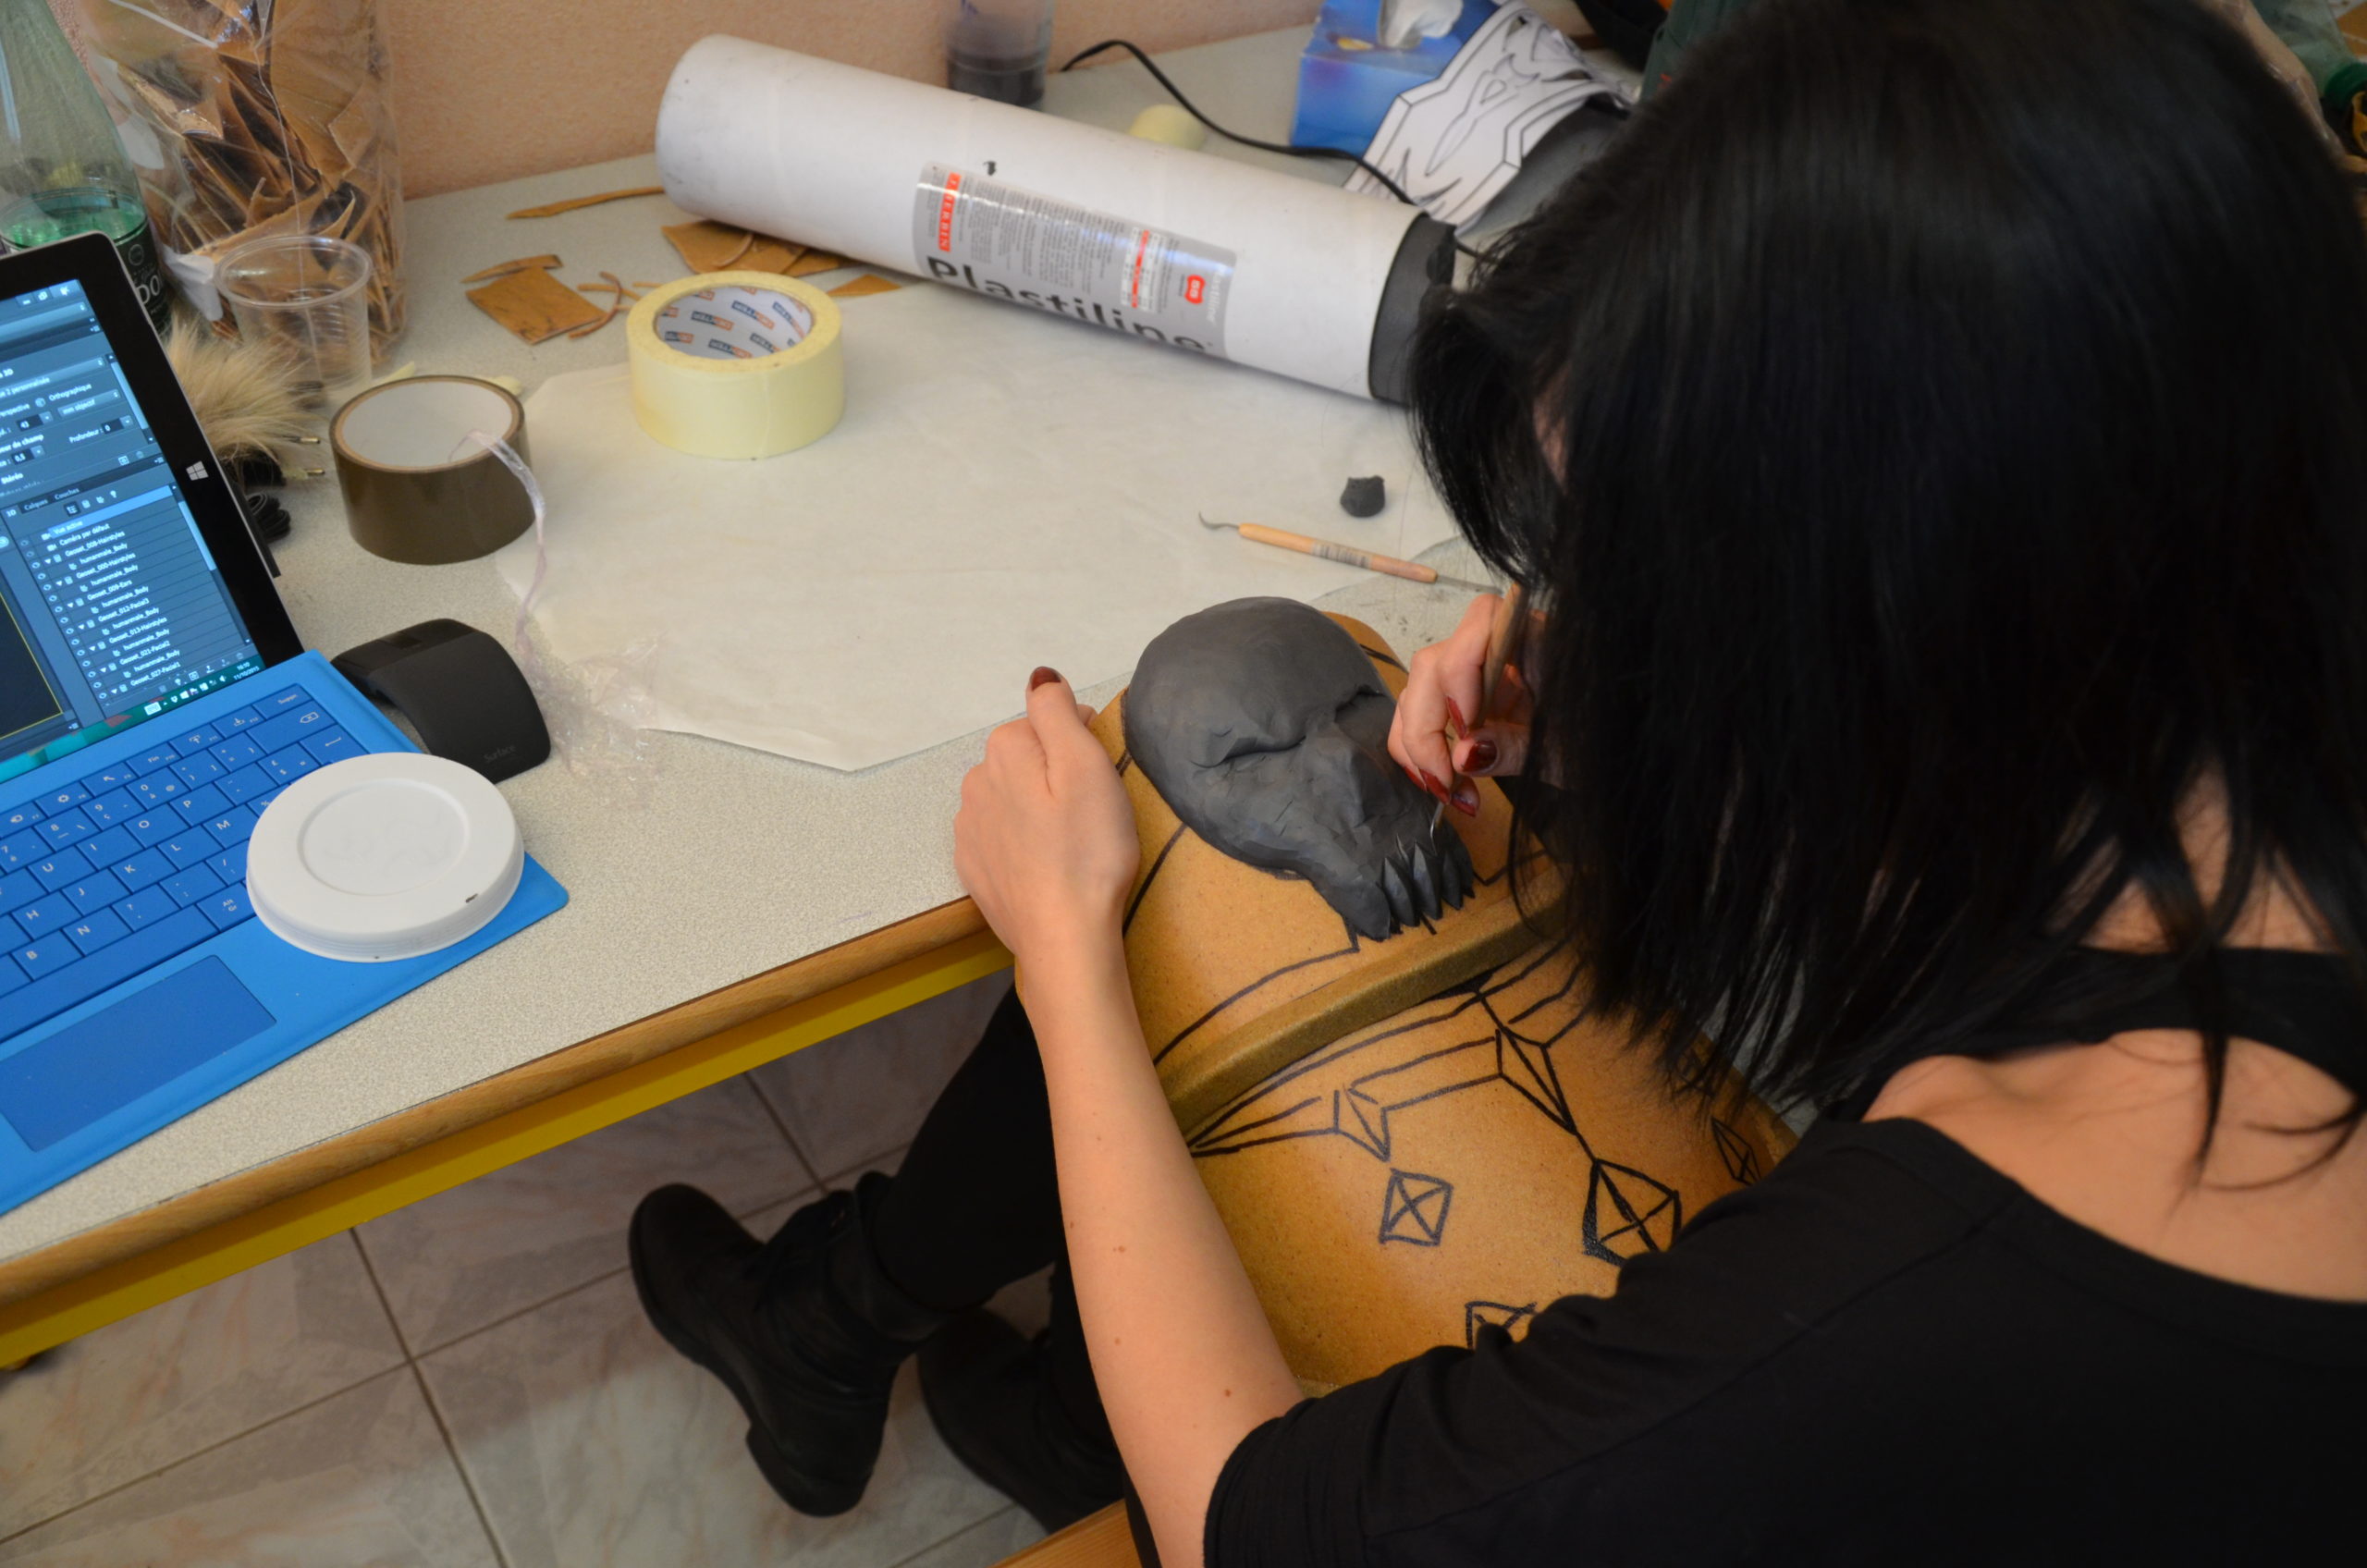
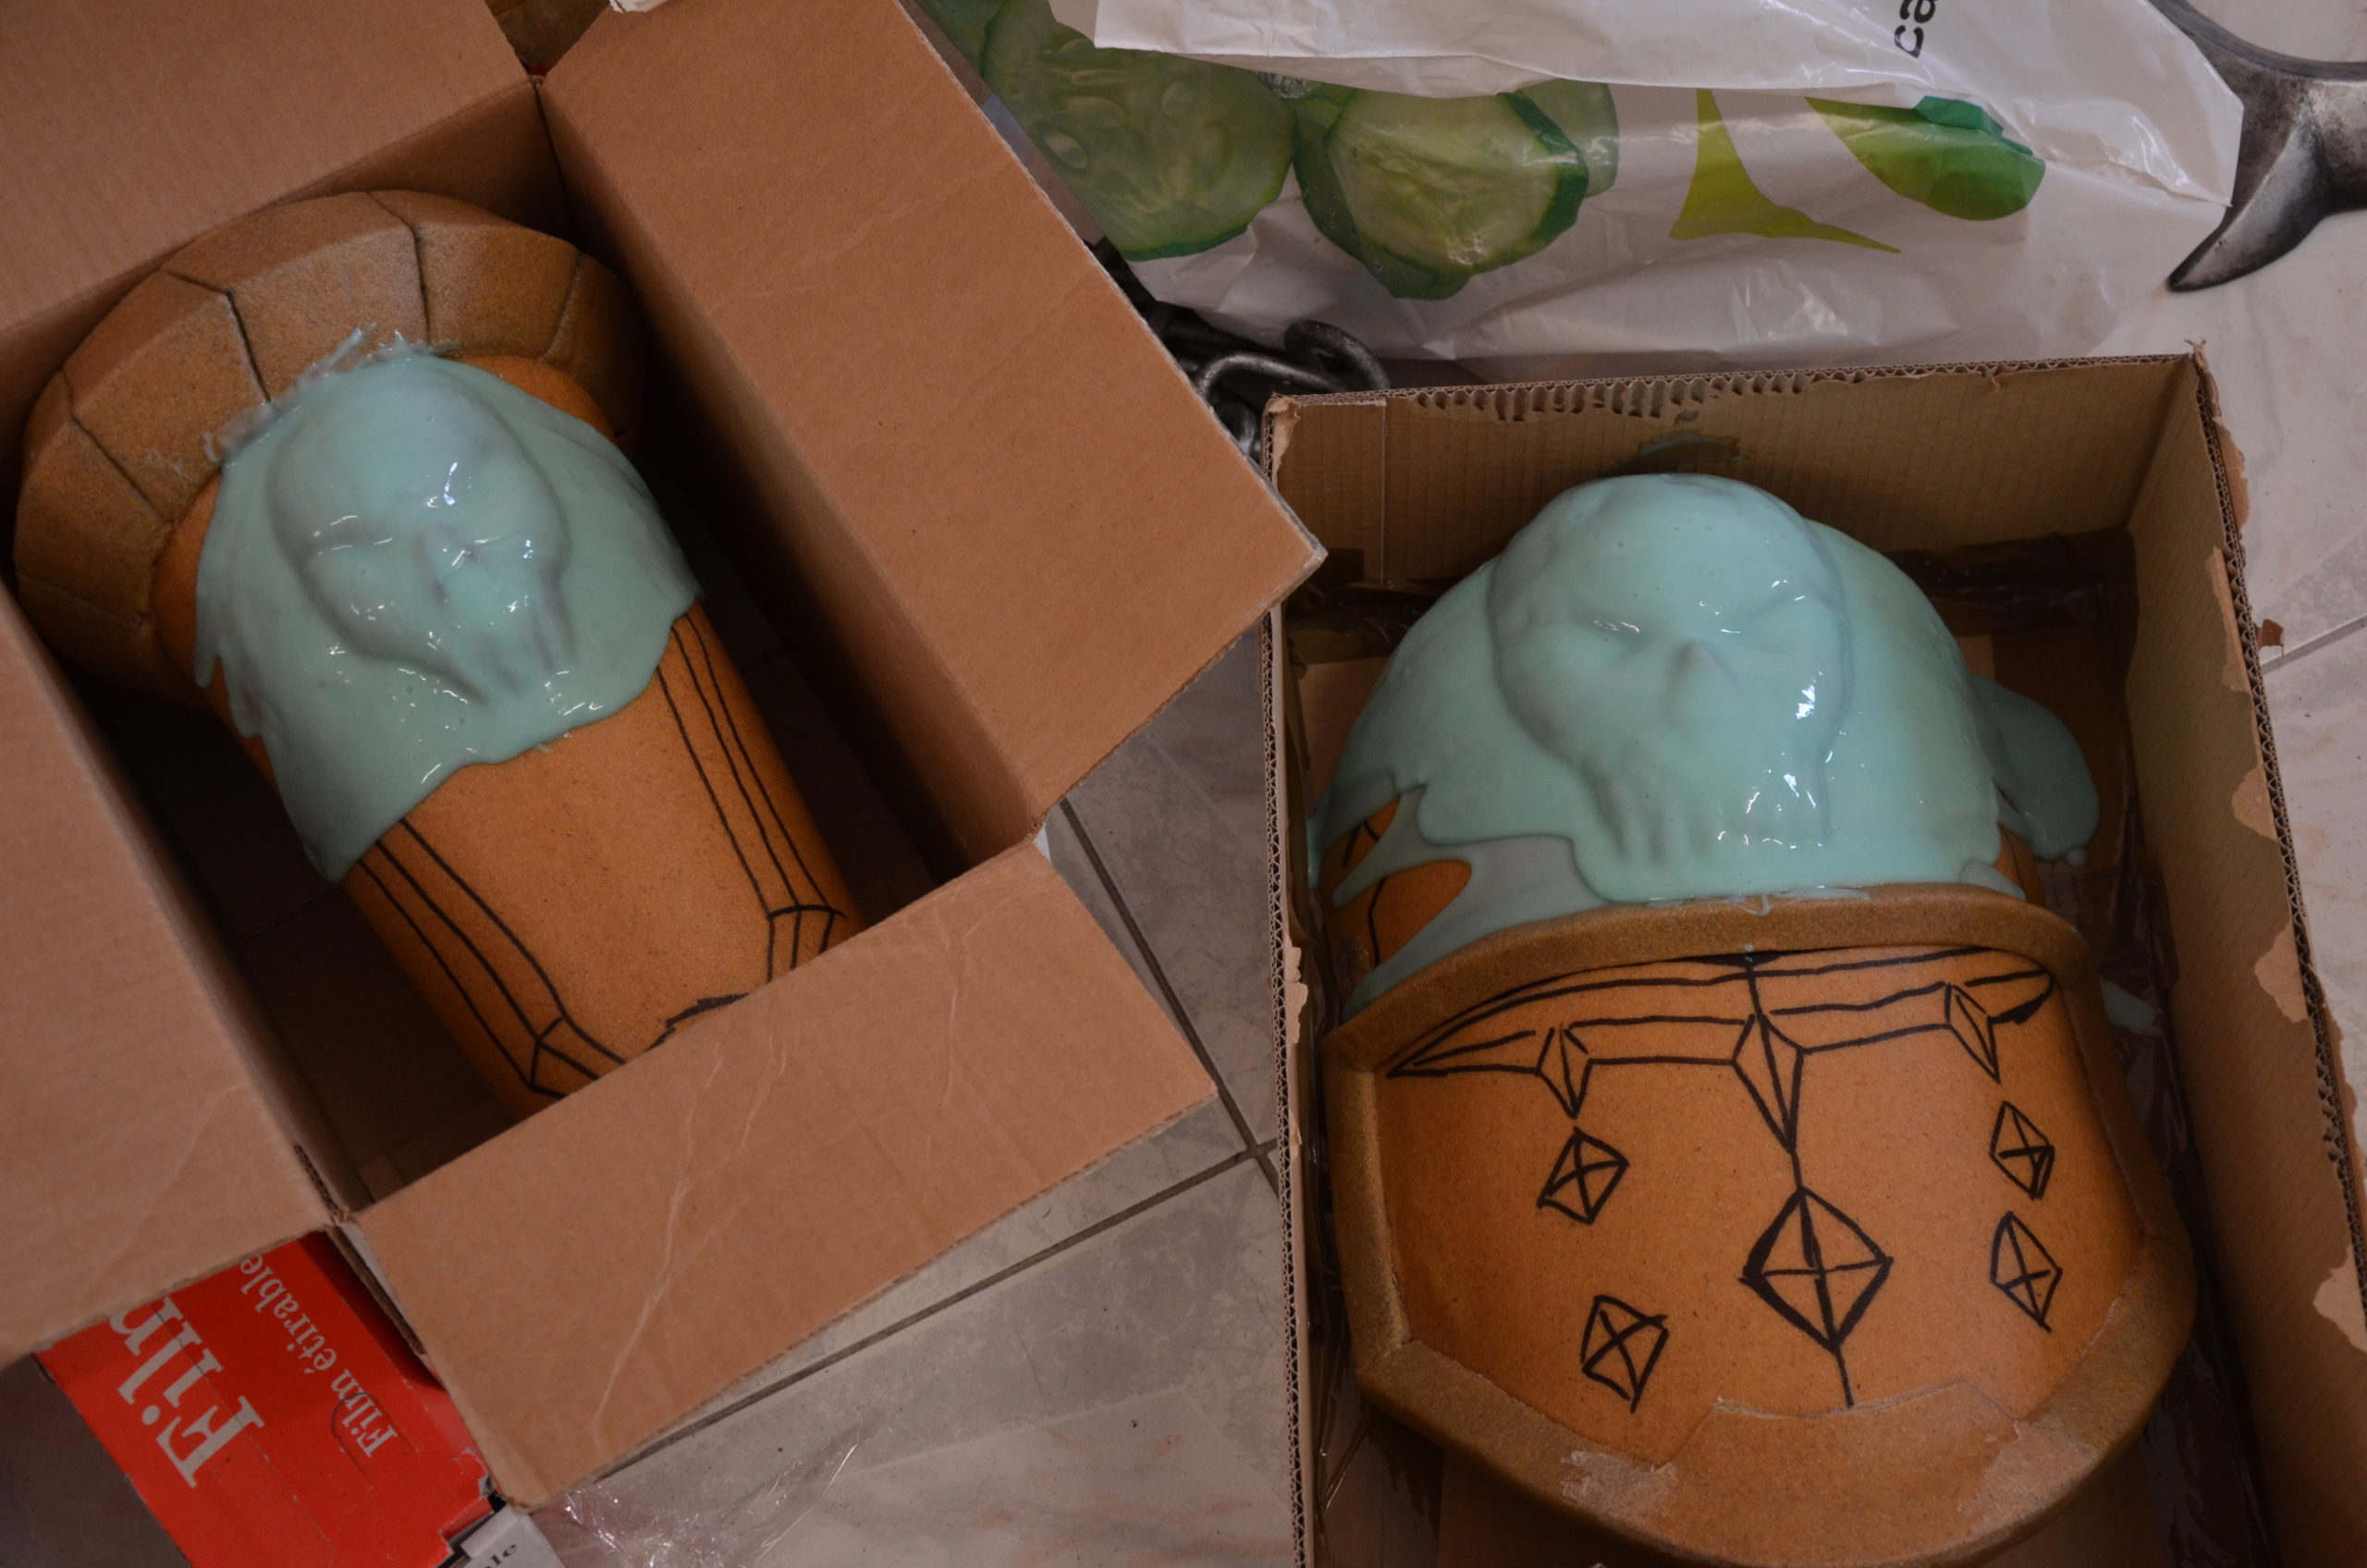
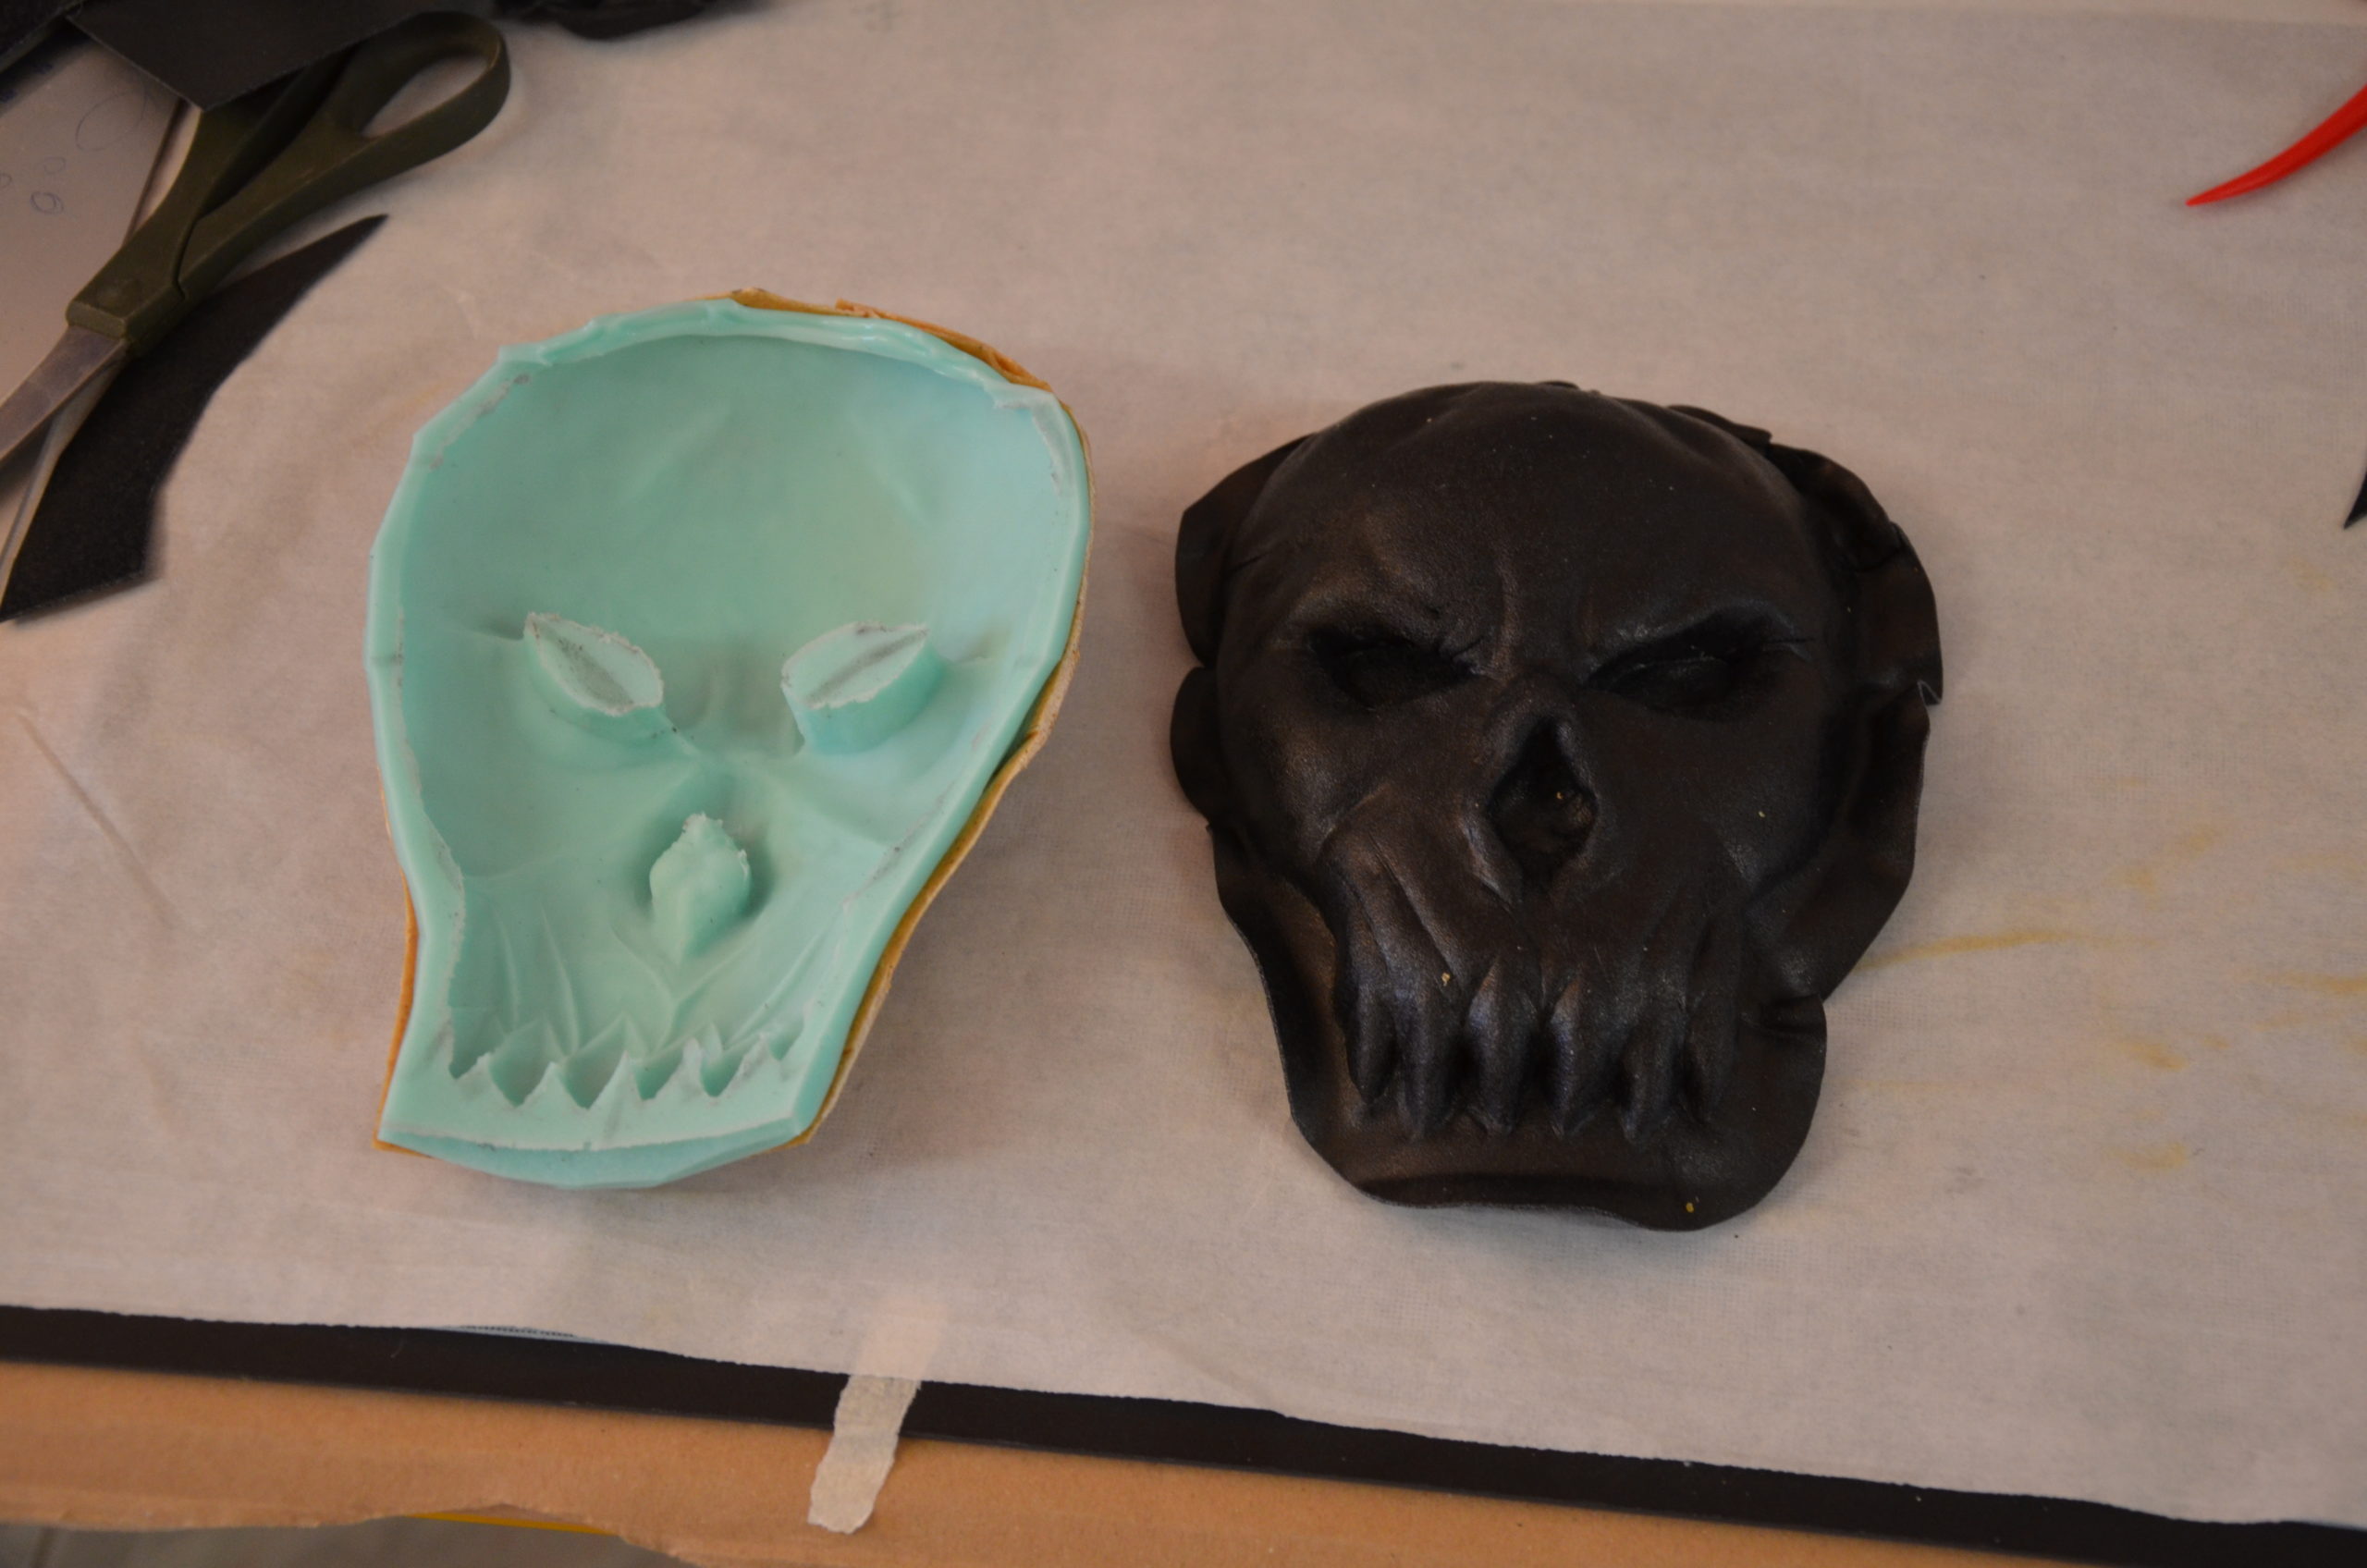
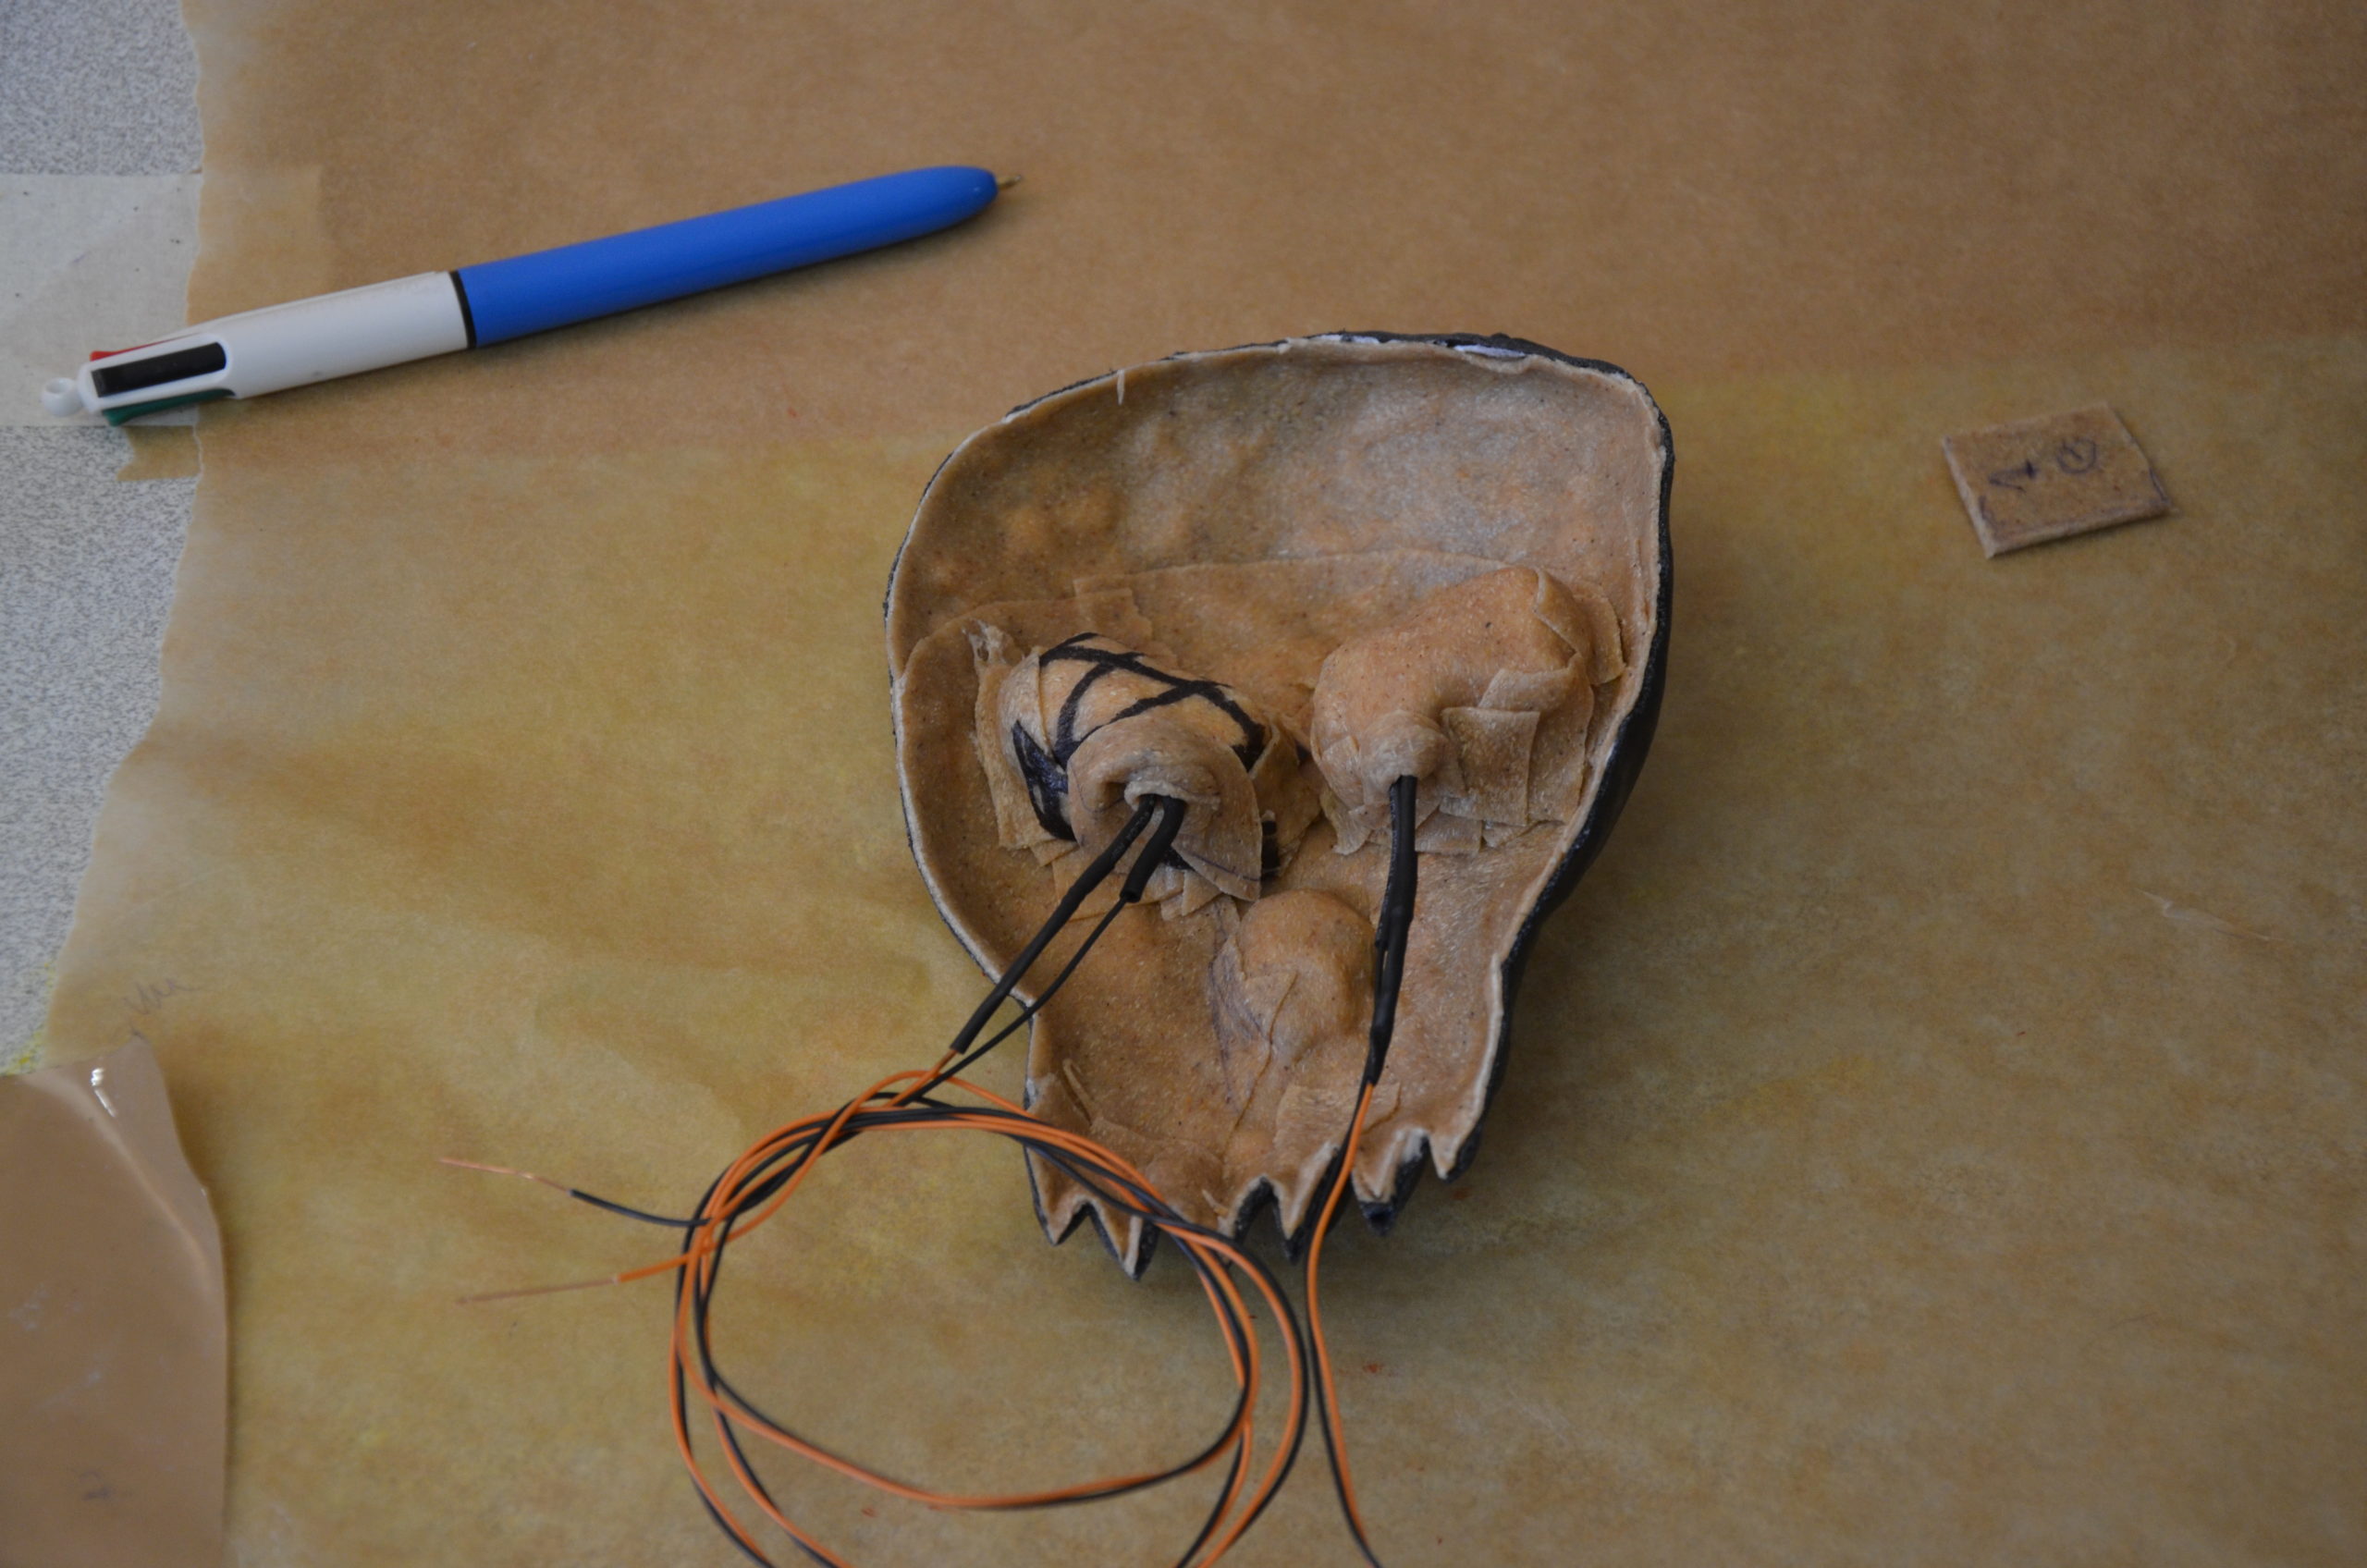
Making the skulls was a bit more complicated. We needed them to be hollow so we could hide all the lights and cables.
Marie started by sculpting them with Plastiline directly onto the Worbla.
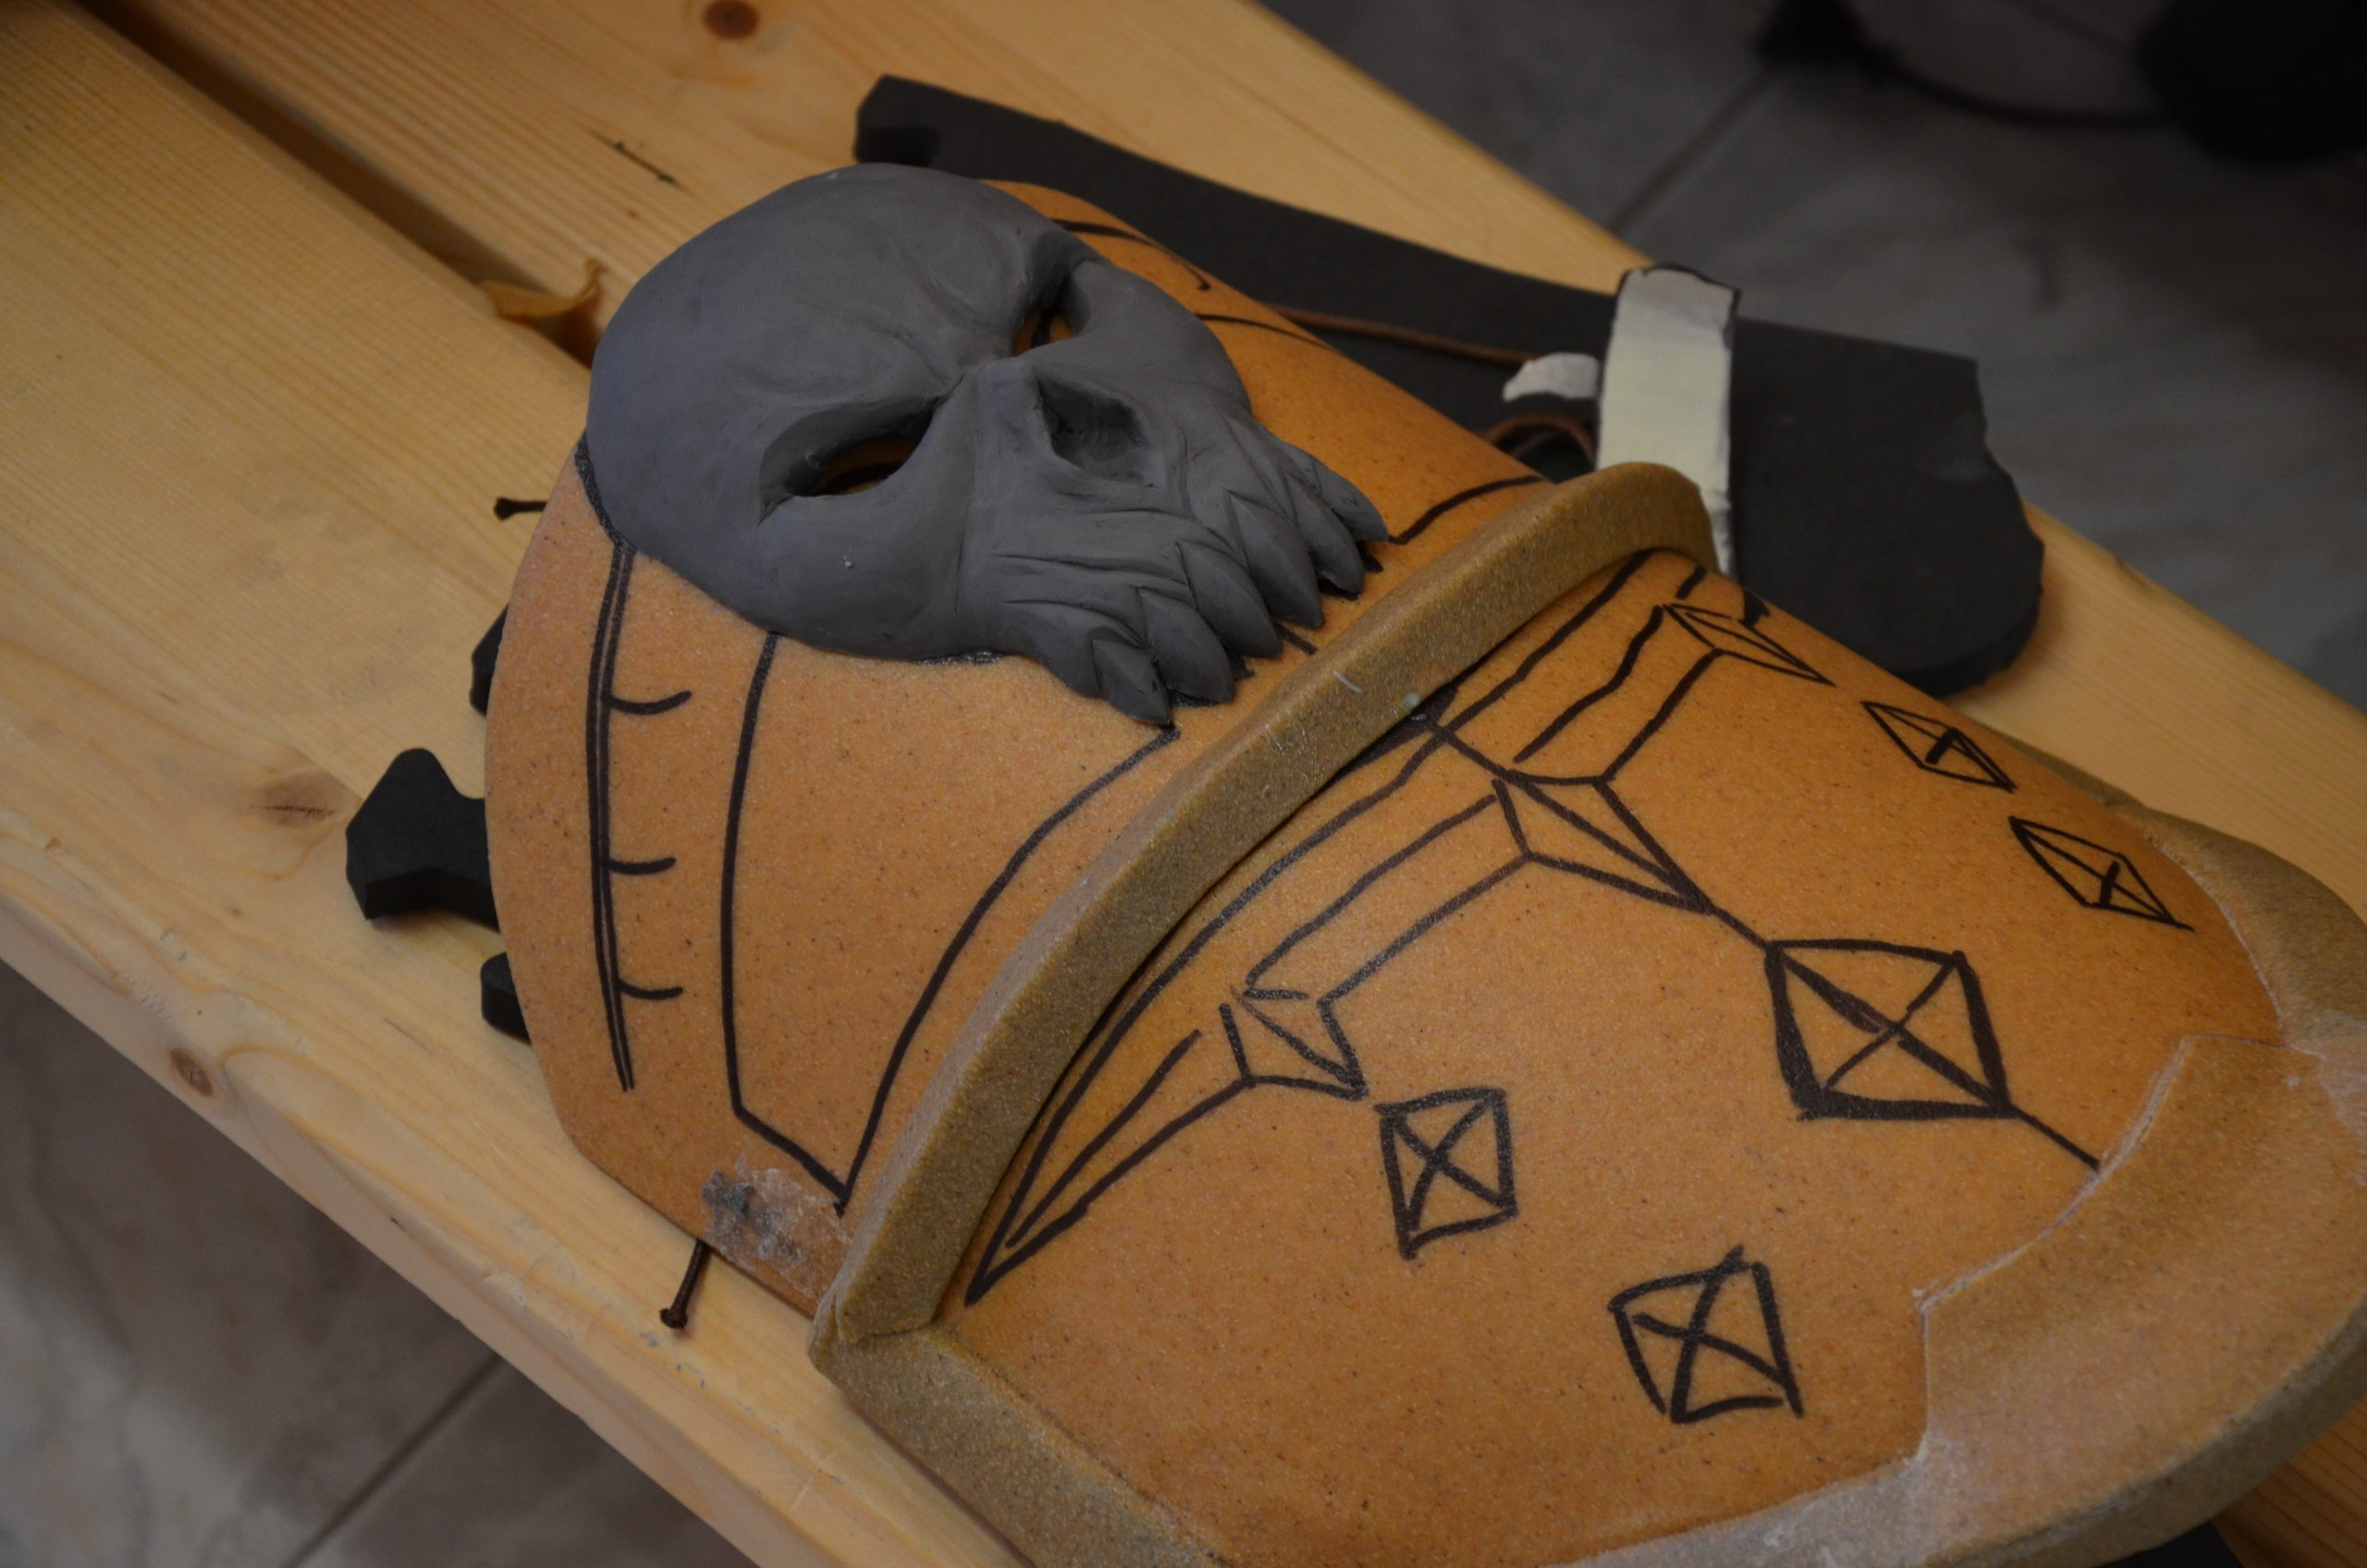
I made a mold out if these skulls with Mold Max 40 silicone.
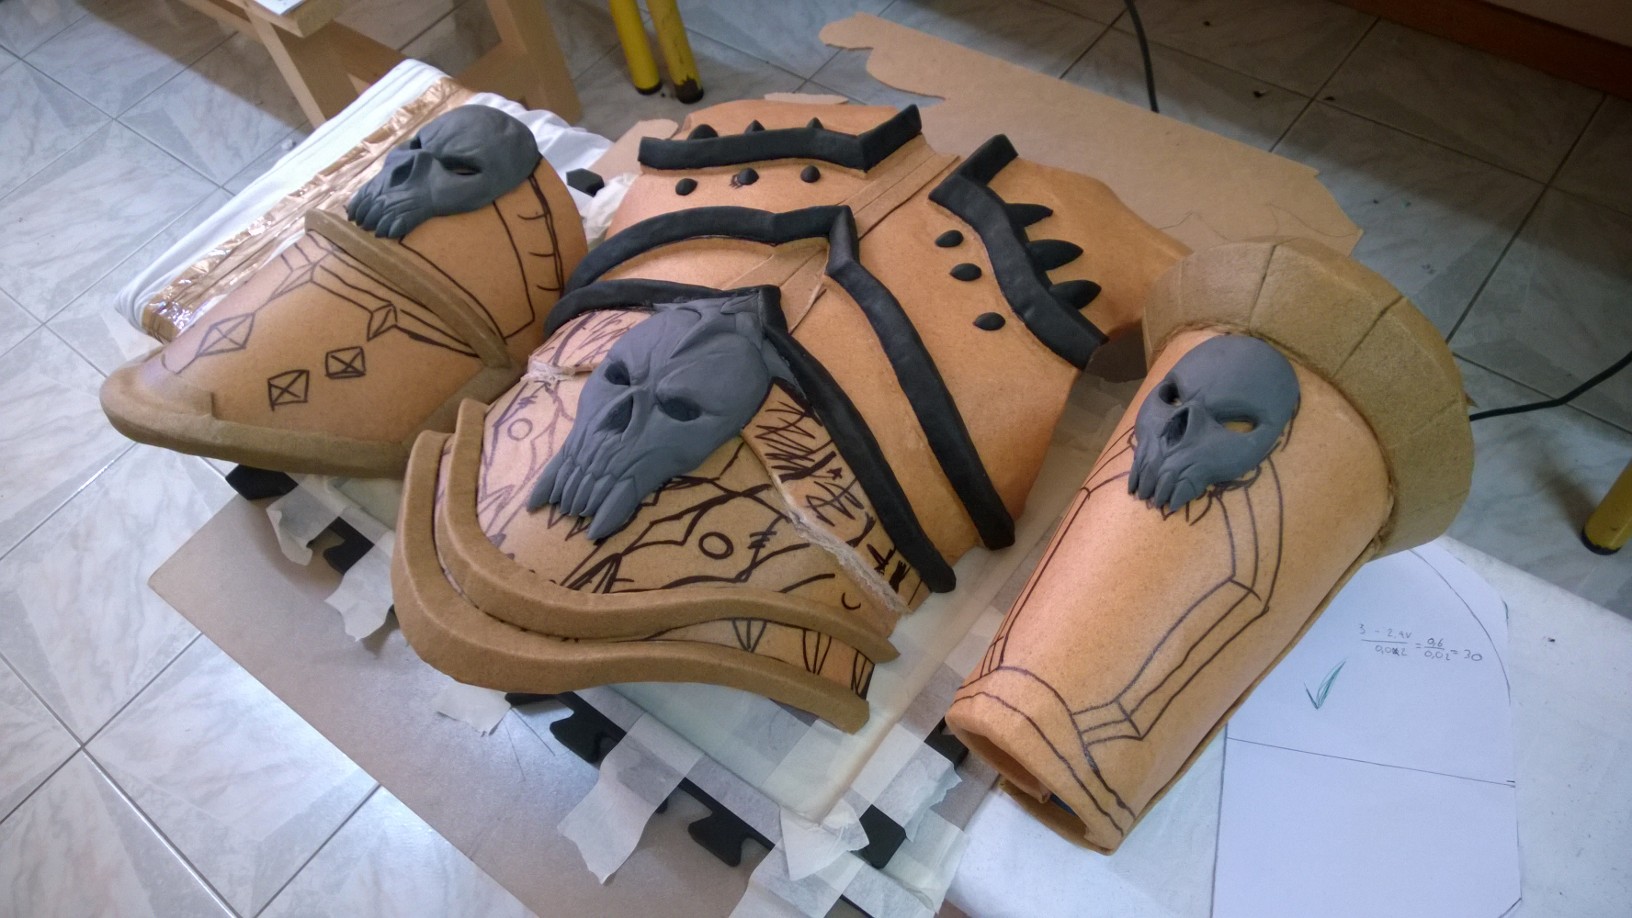
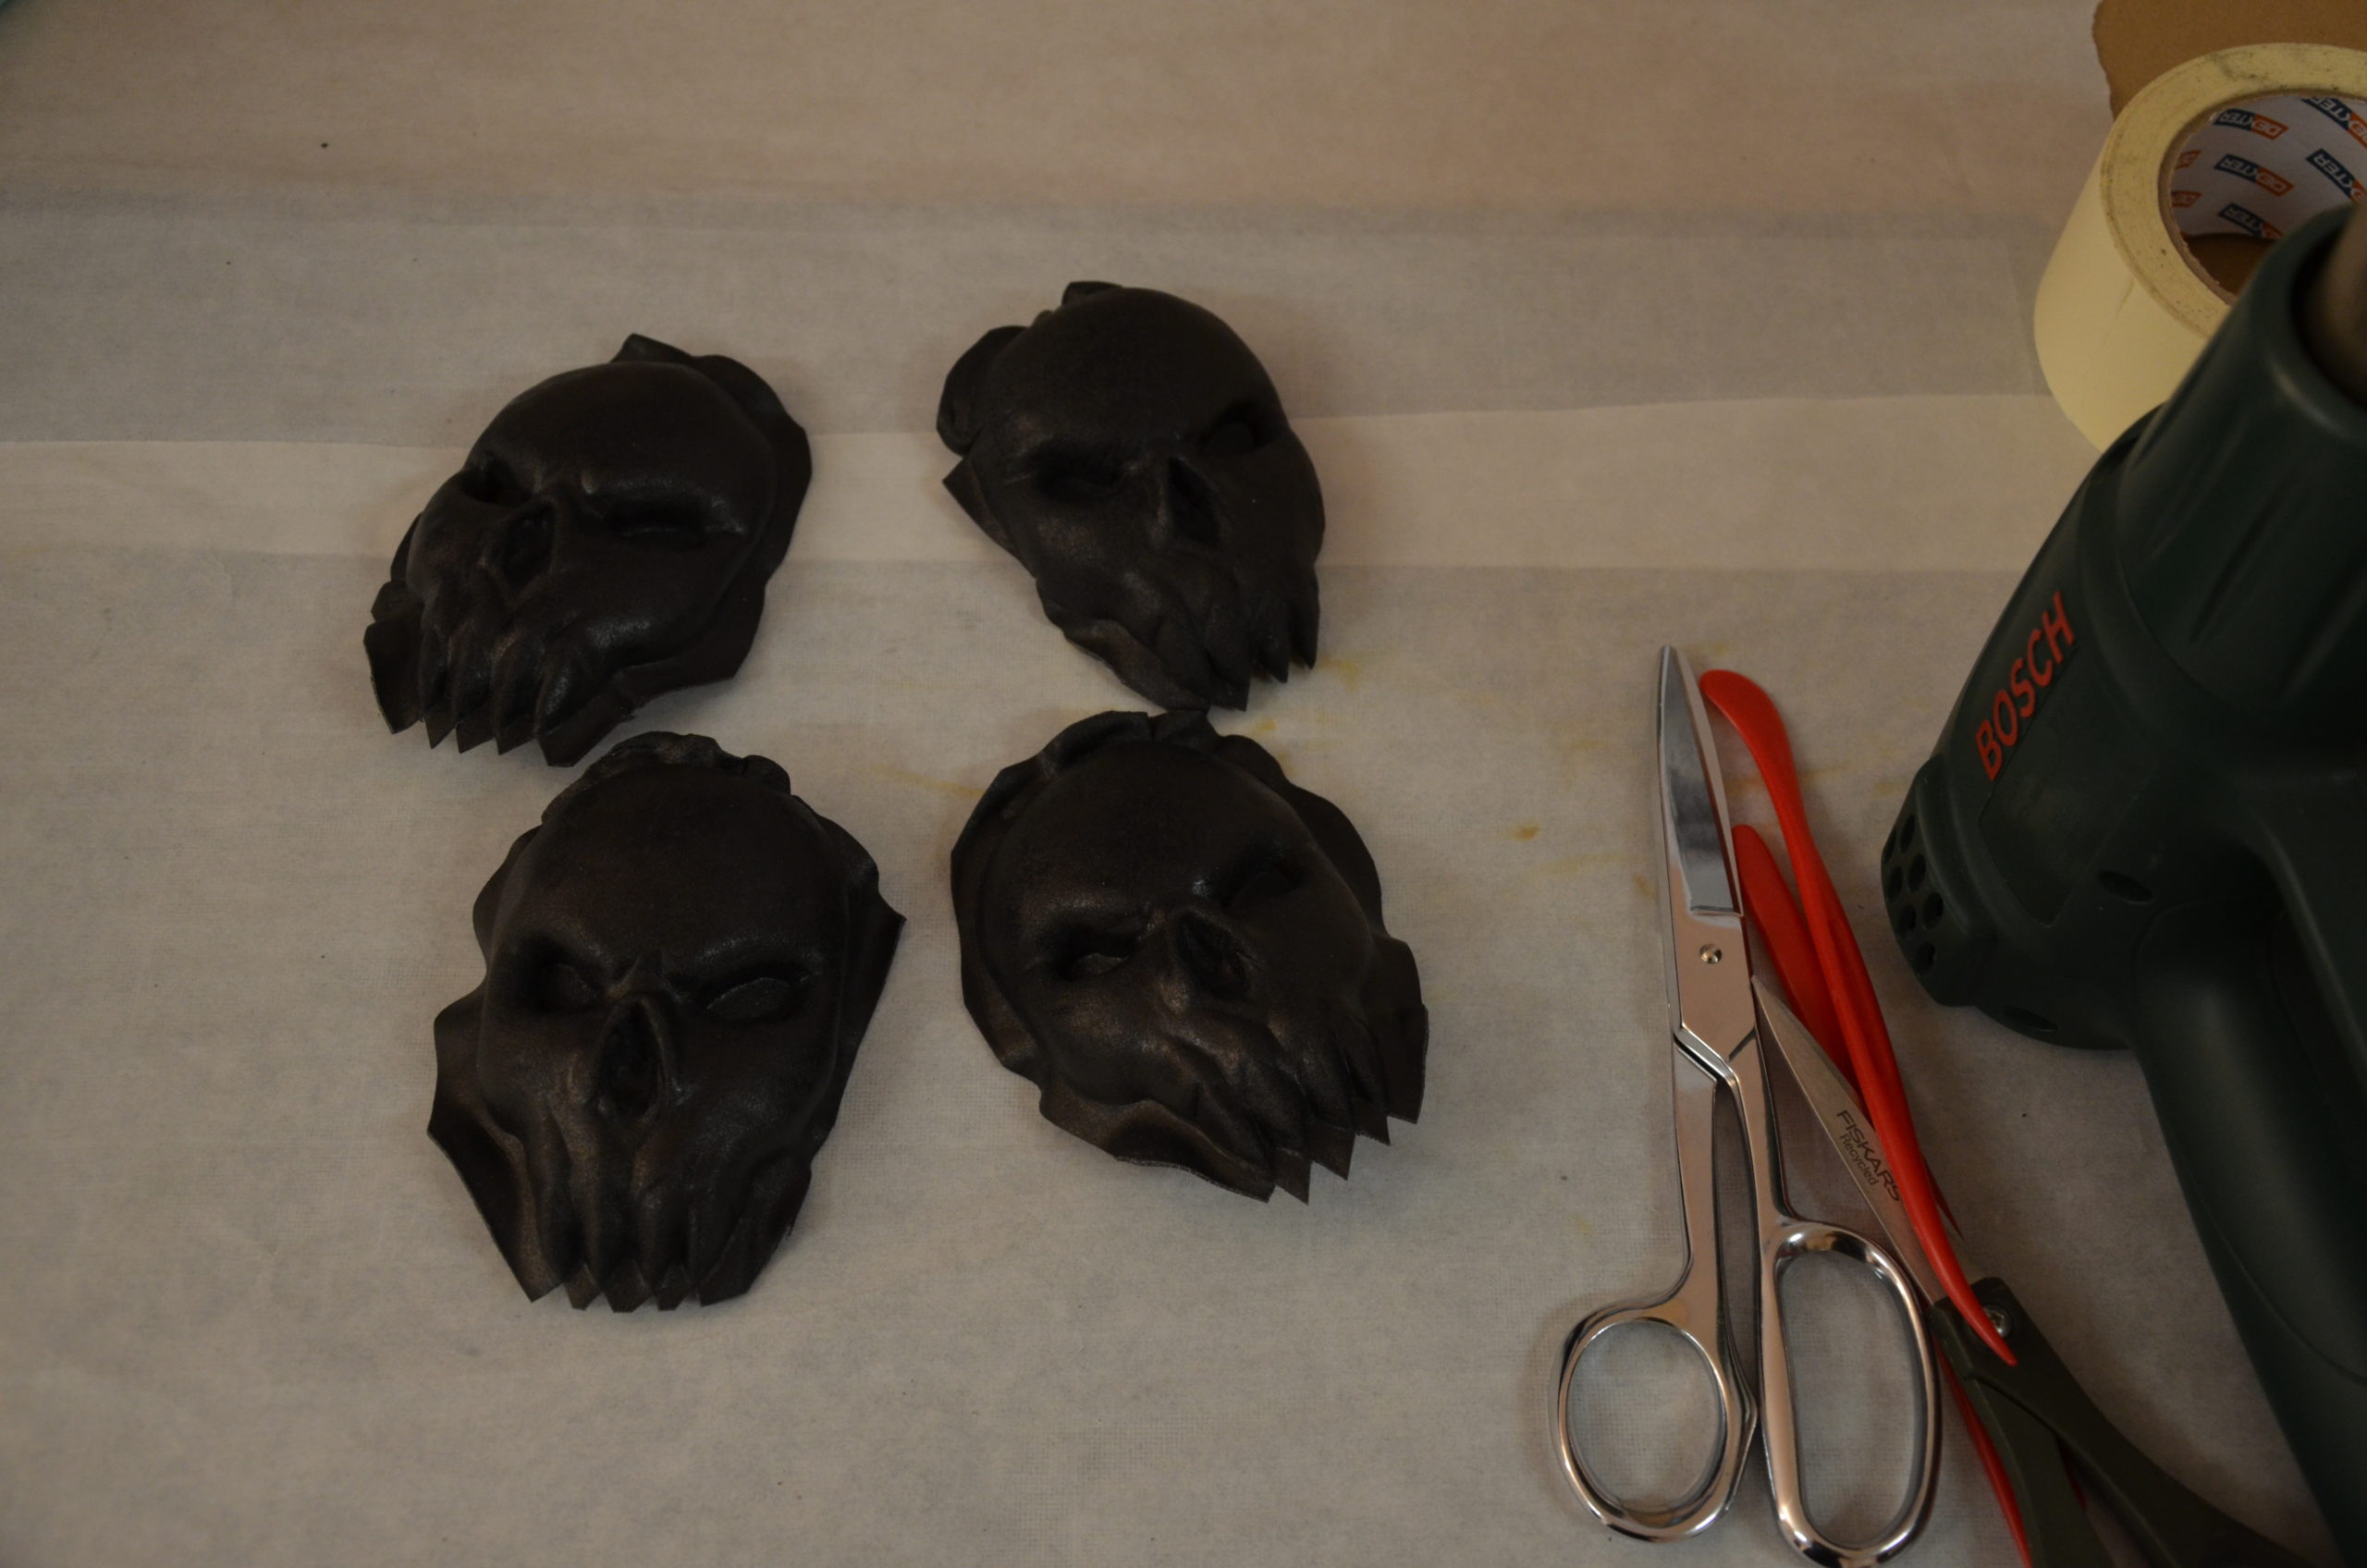
Once again we tried some new techniques… this time we made a cast only using Worbla Black by pushing it directly into the mold. And it worked pretty well !
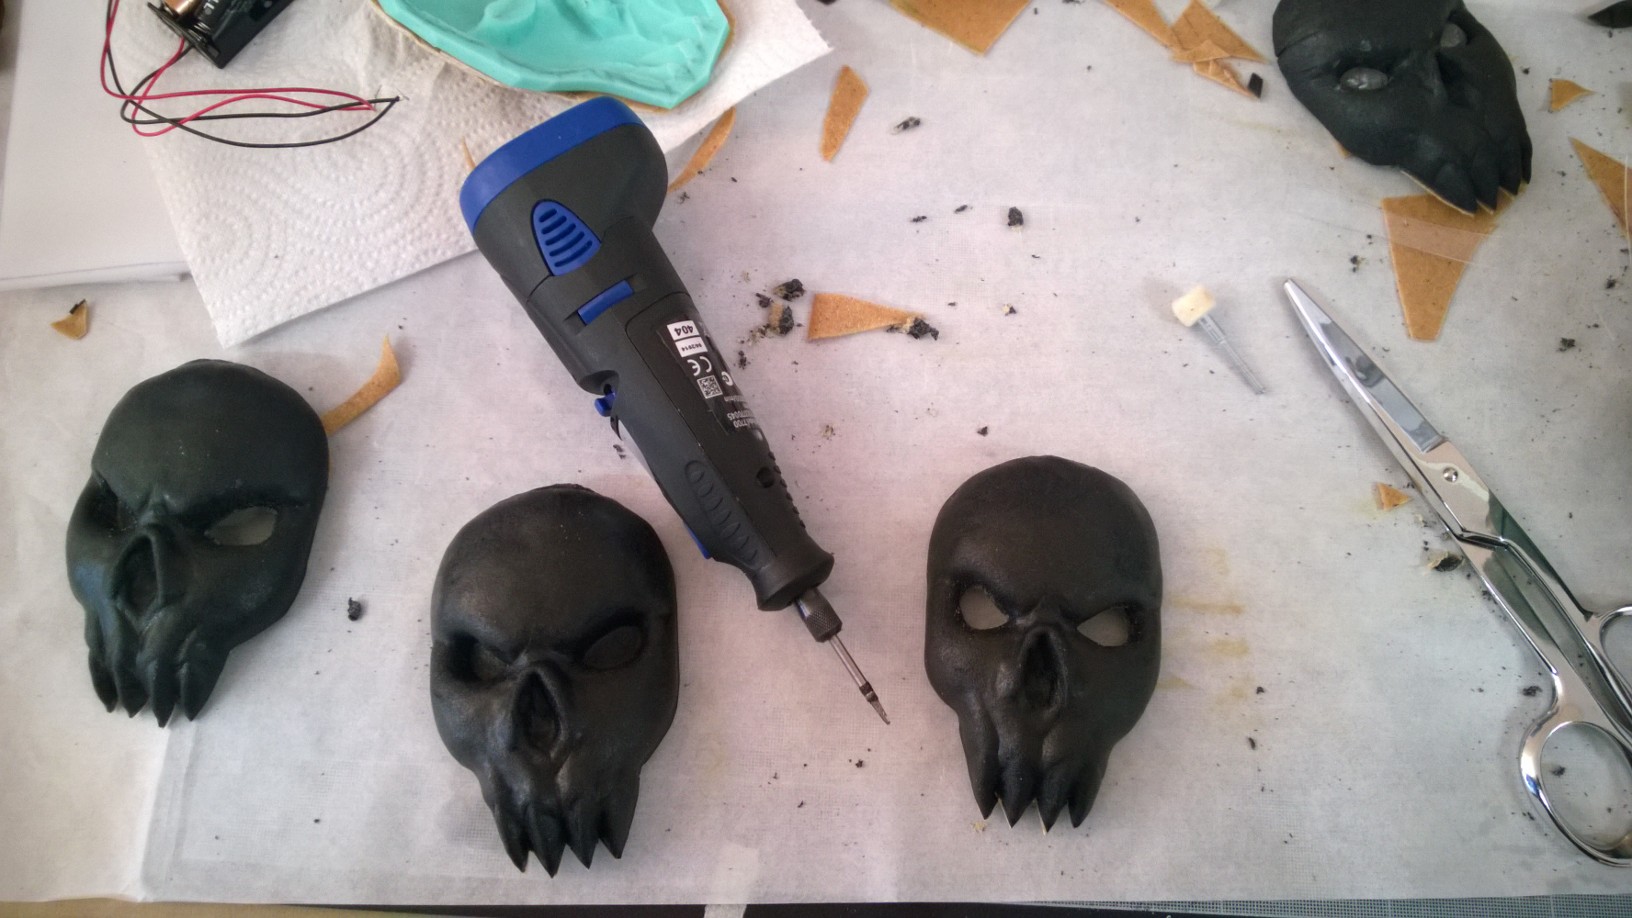
And thus, we got hollow and light pieces that will stick to the Worbla armor without any problem.

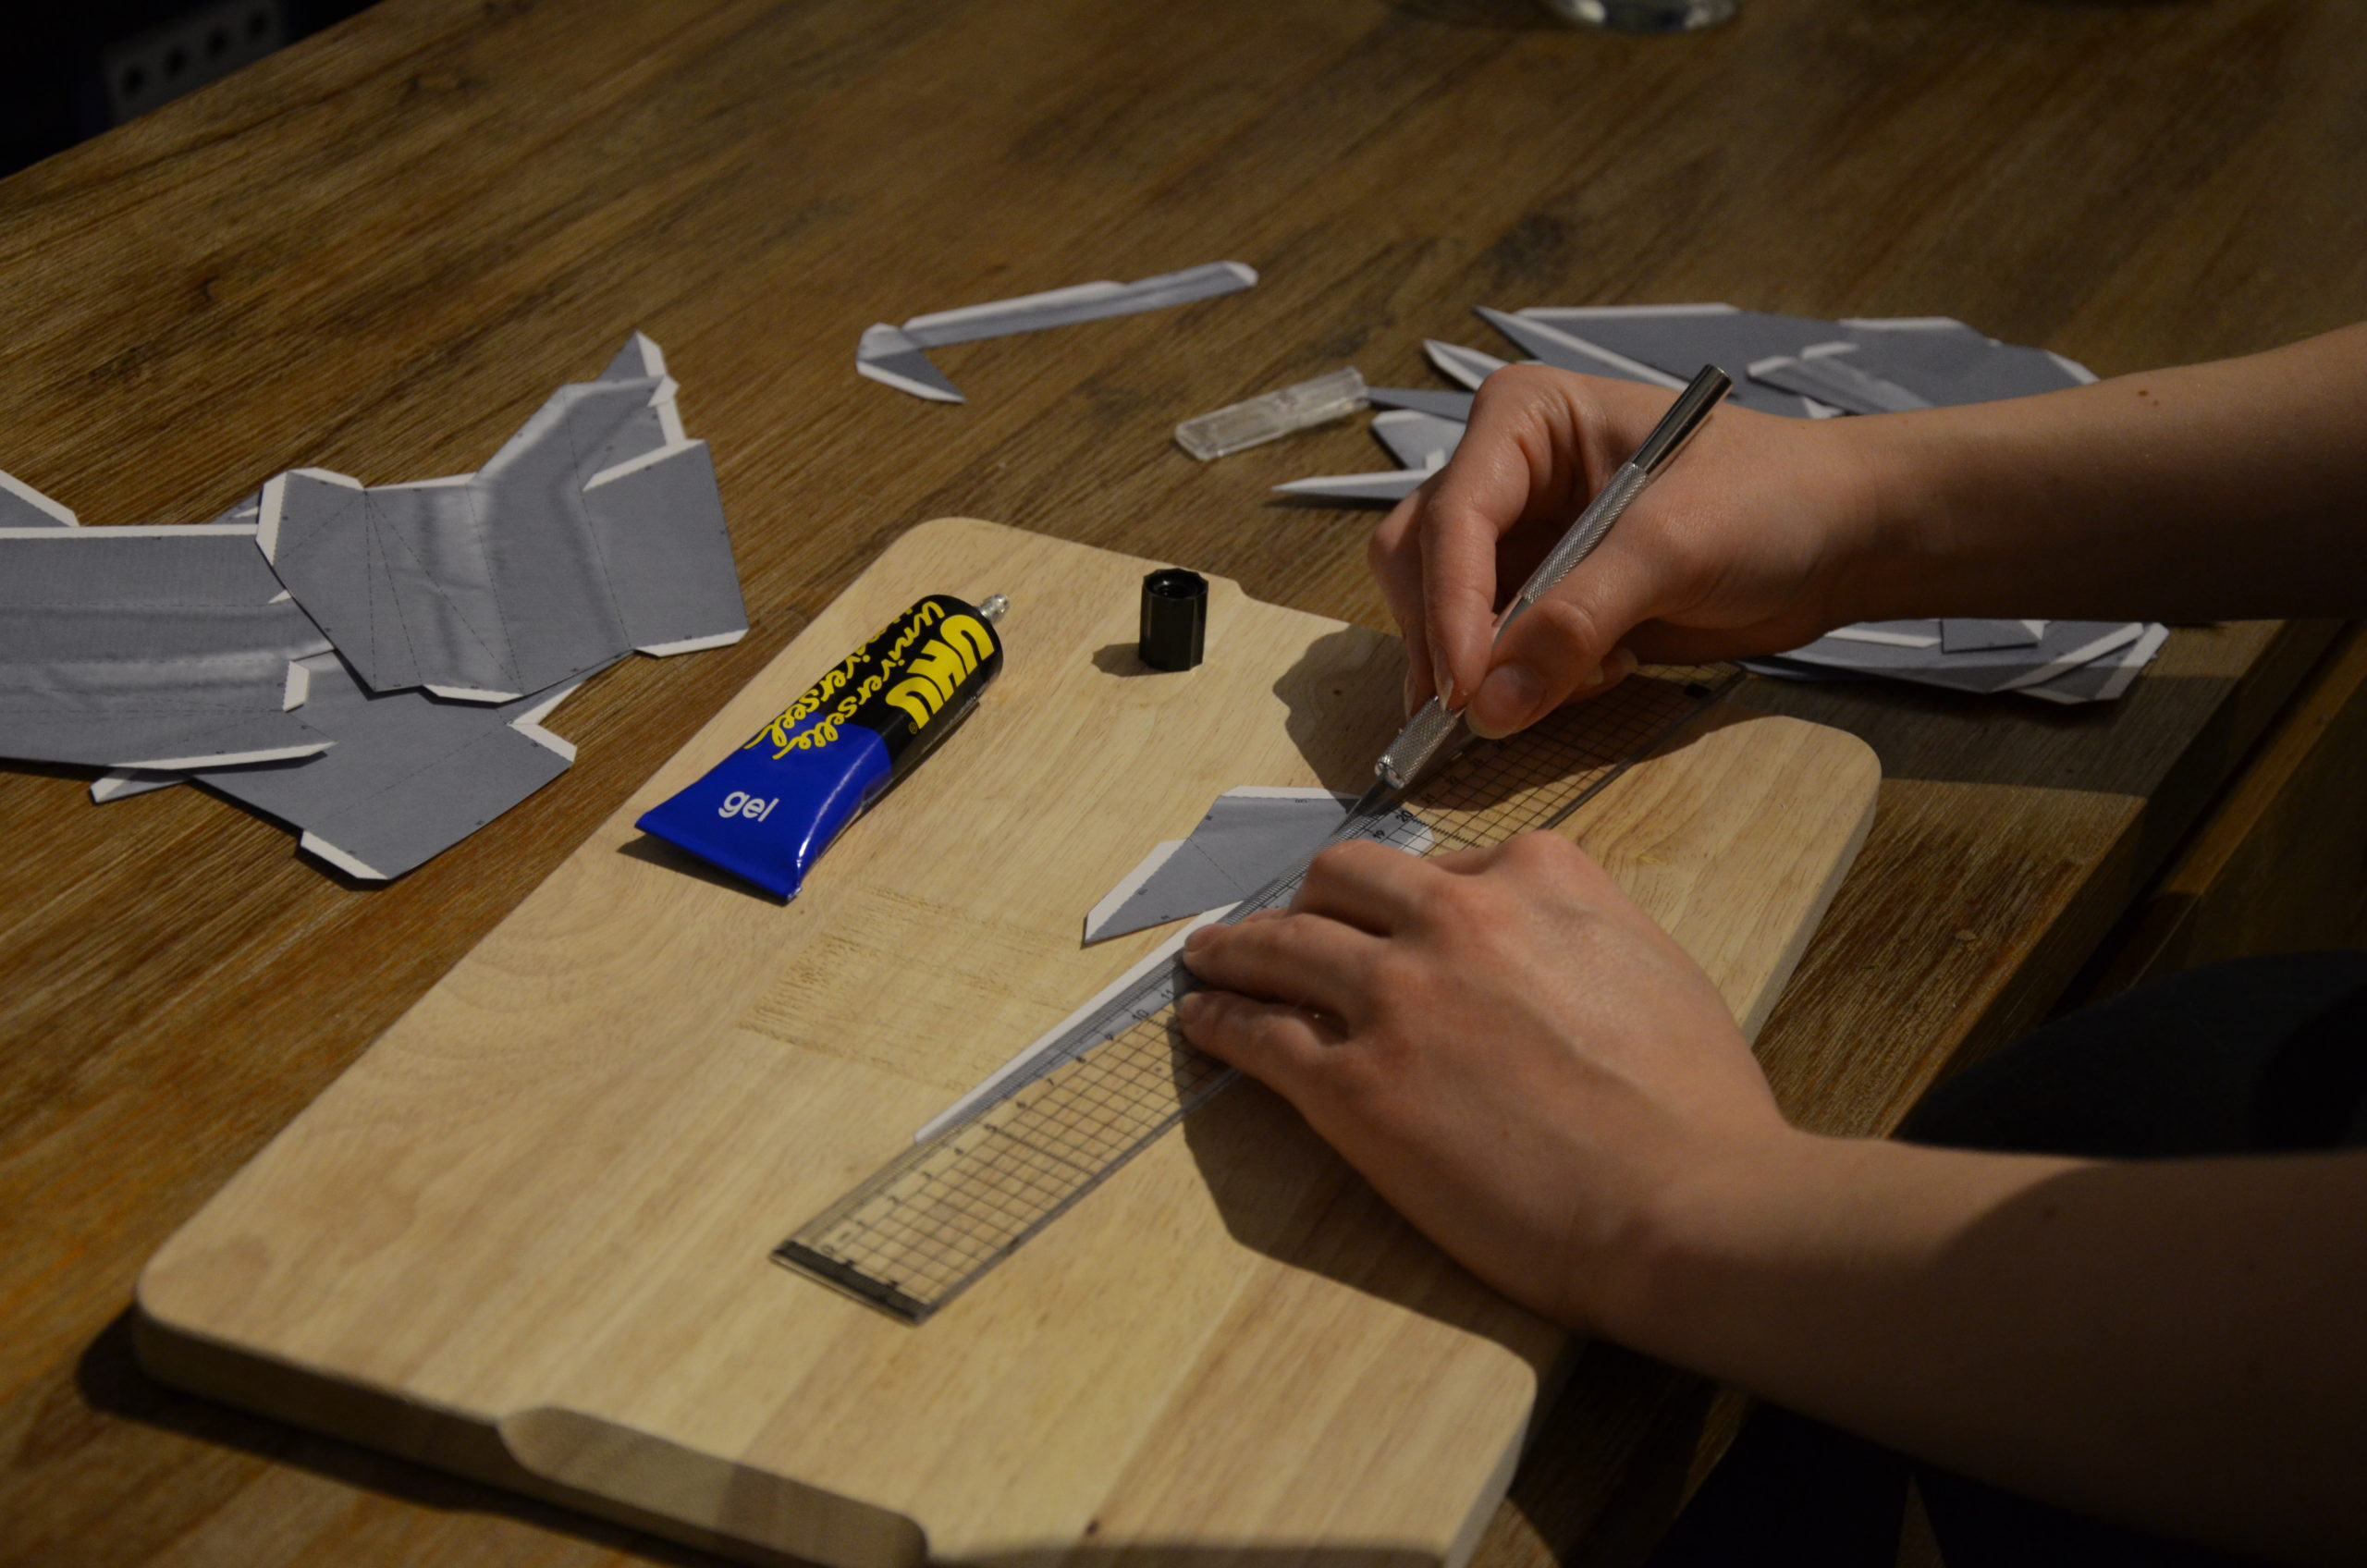
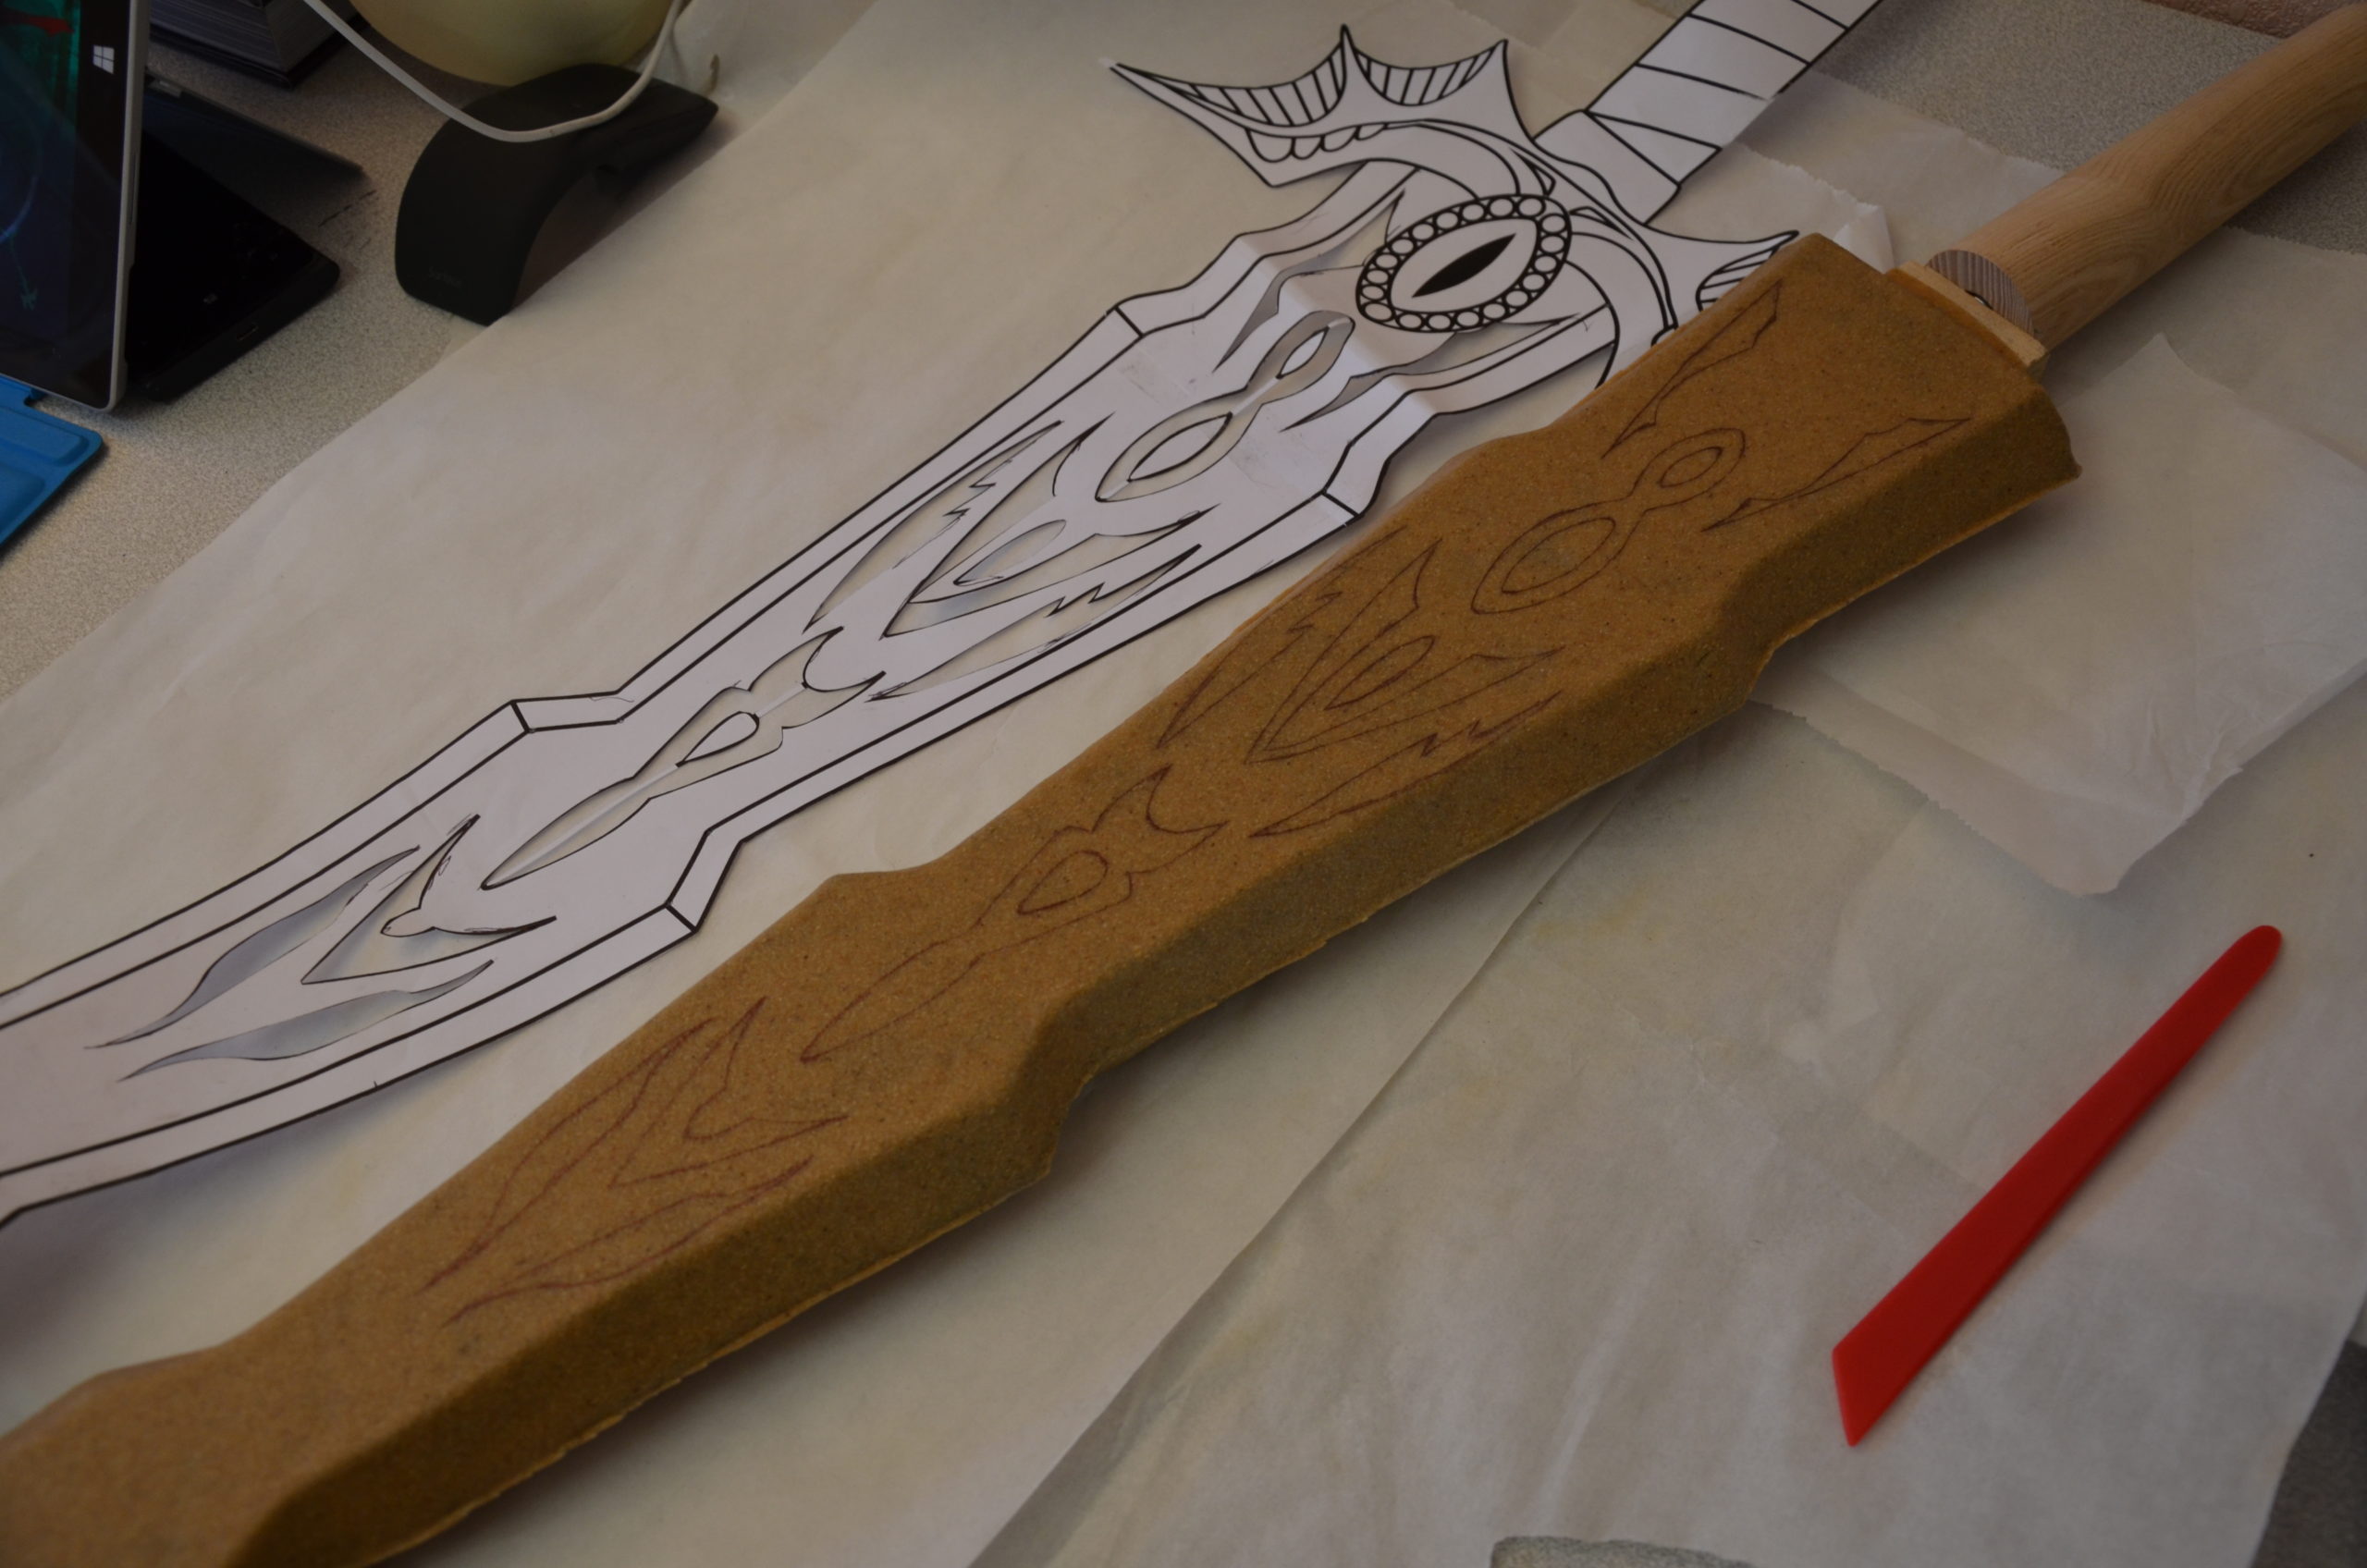
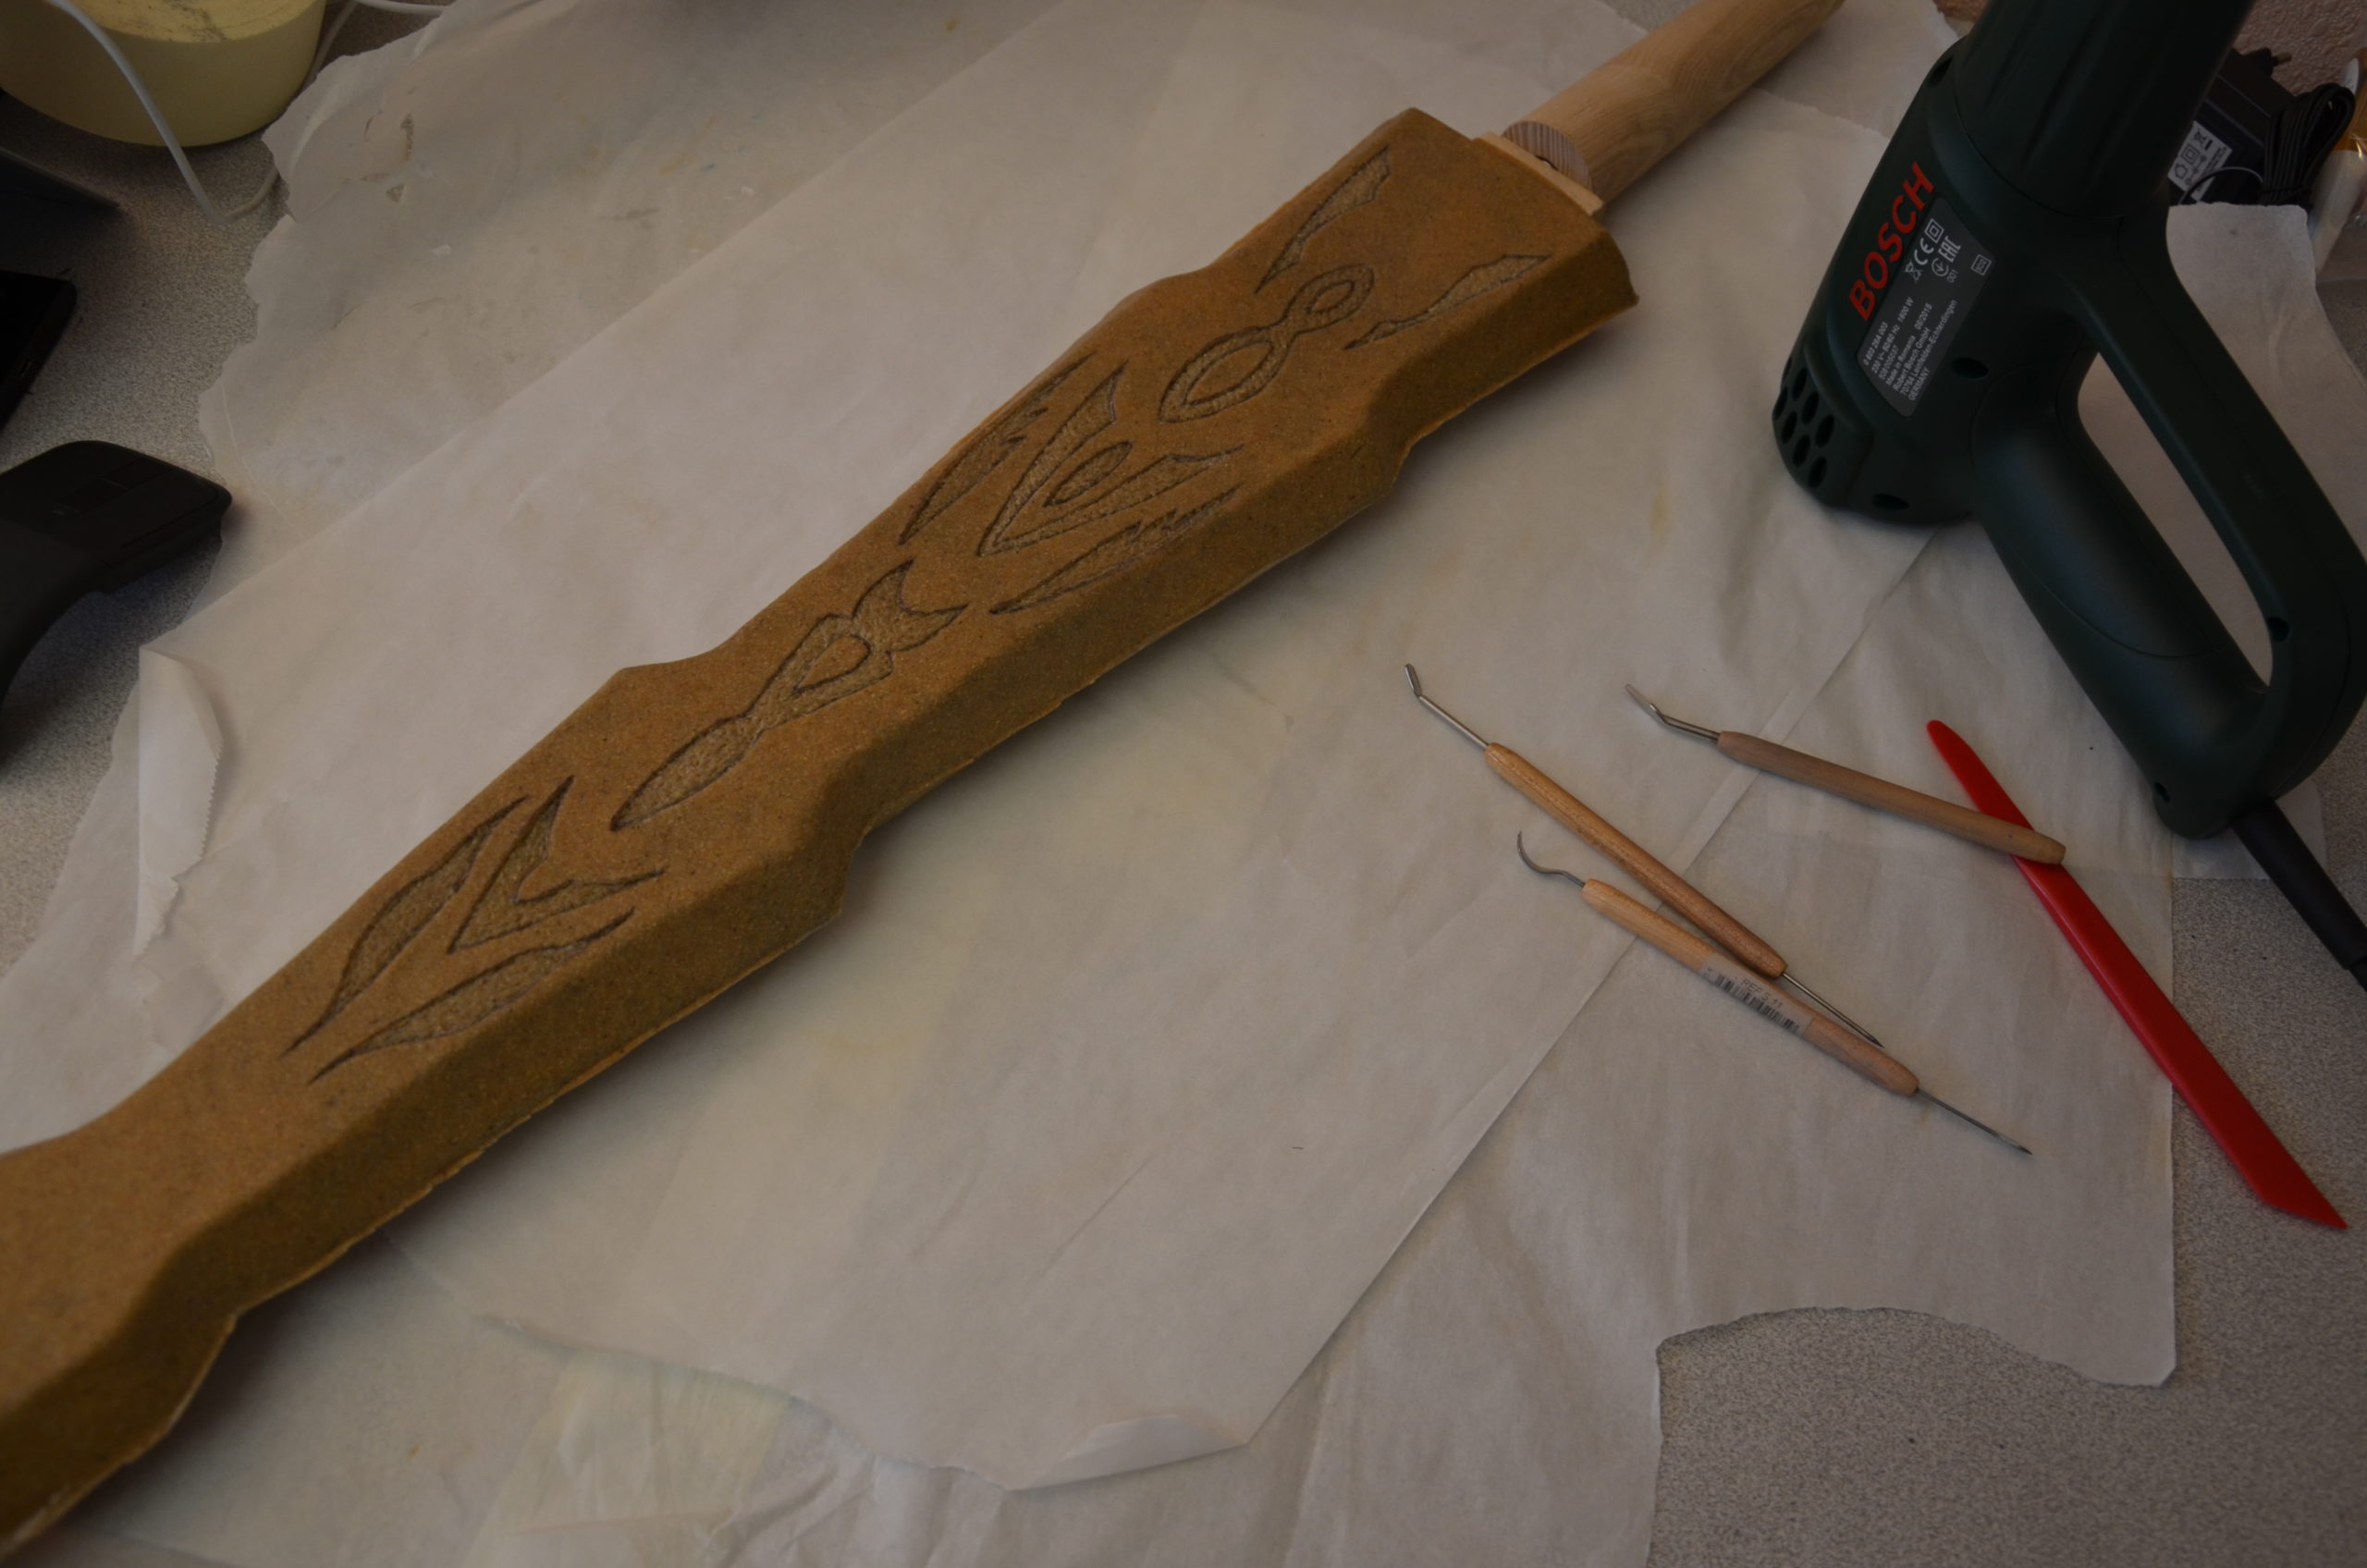
Joris made a wooden body for the sword (handle + blade). On top of this basis, we sculpted the blade with foam and covered it with Worbla.
Patterns are «engraved» by hand onto the Worbla using sculpting tools.
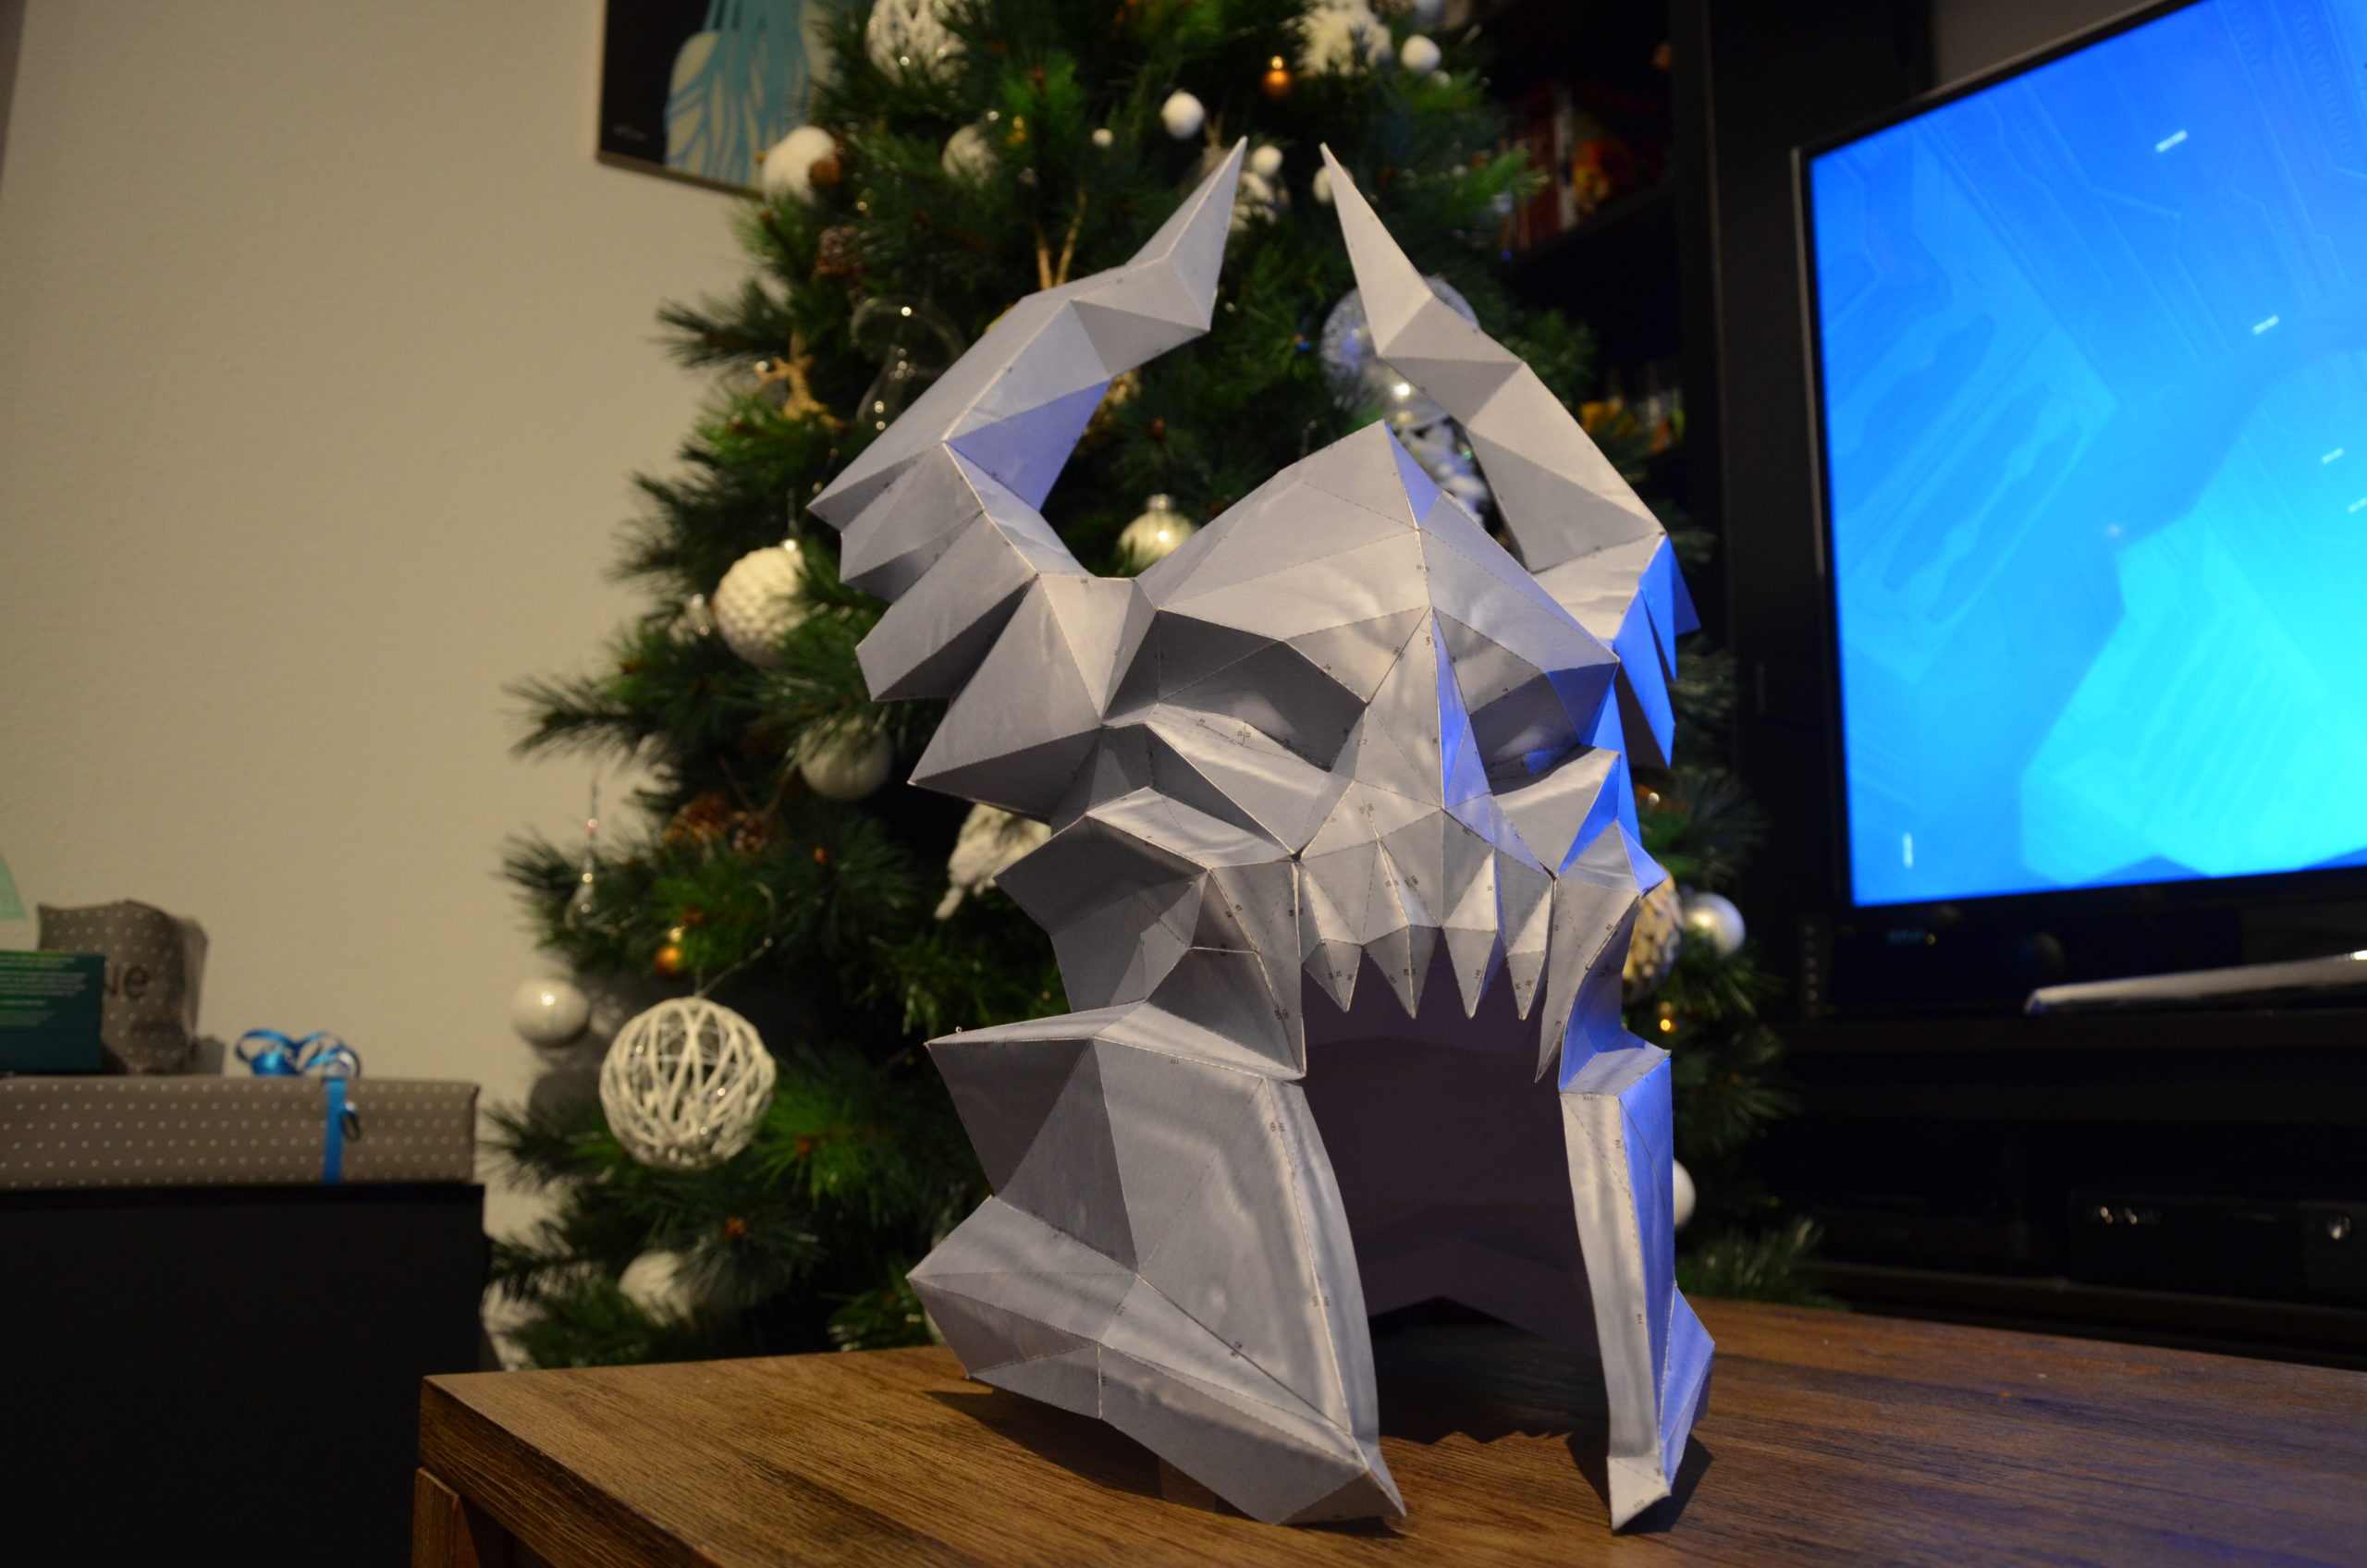
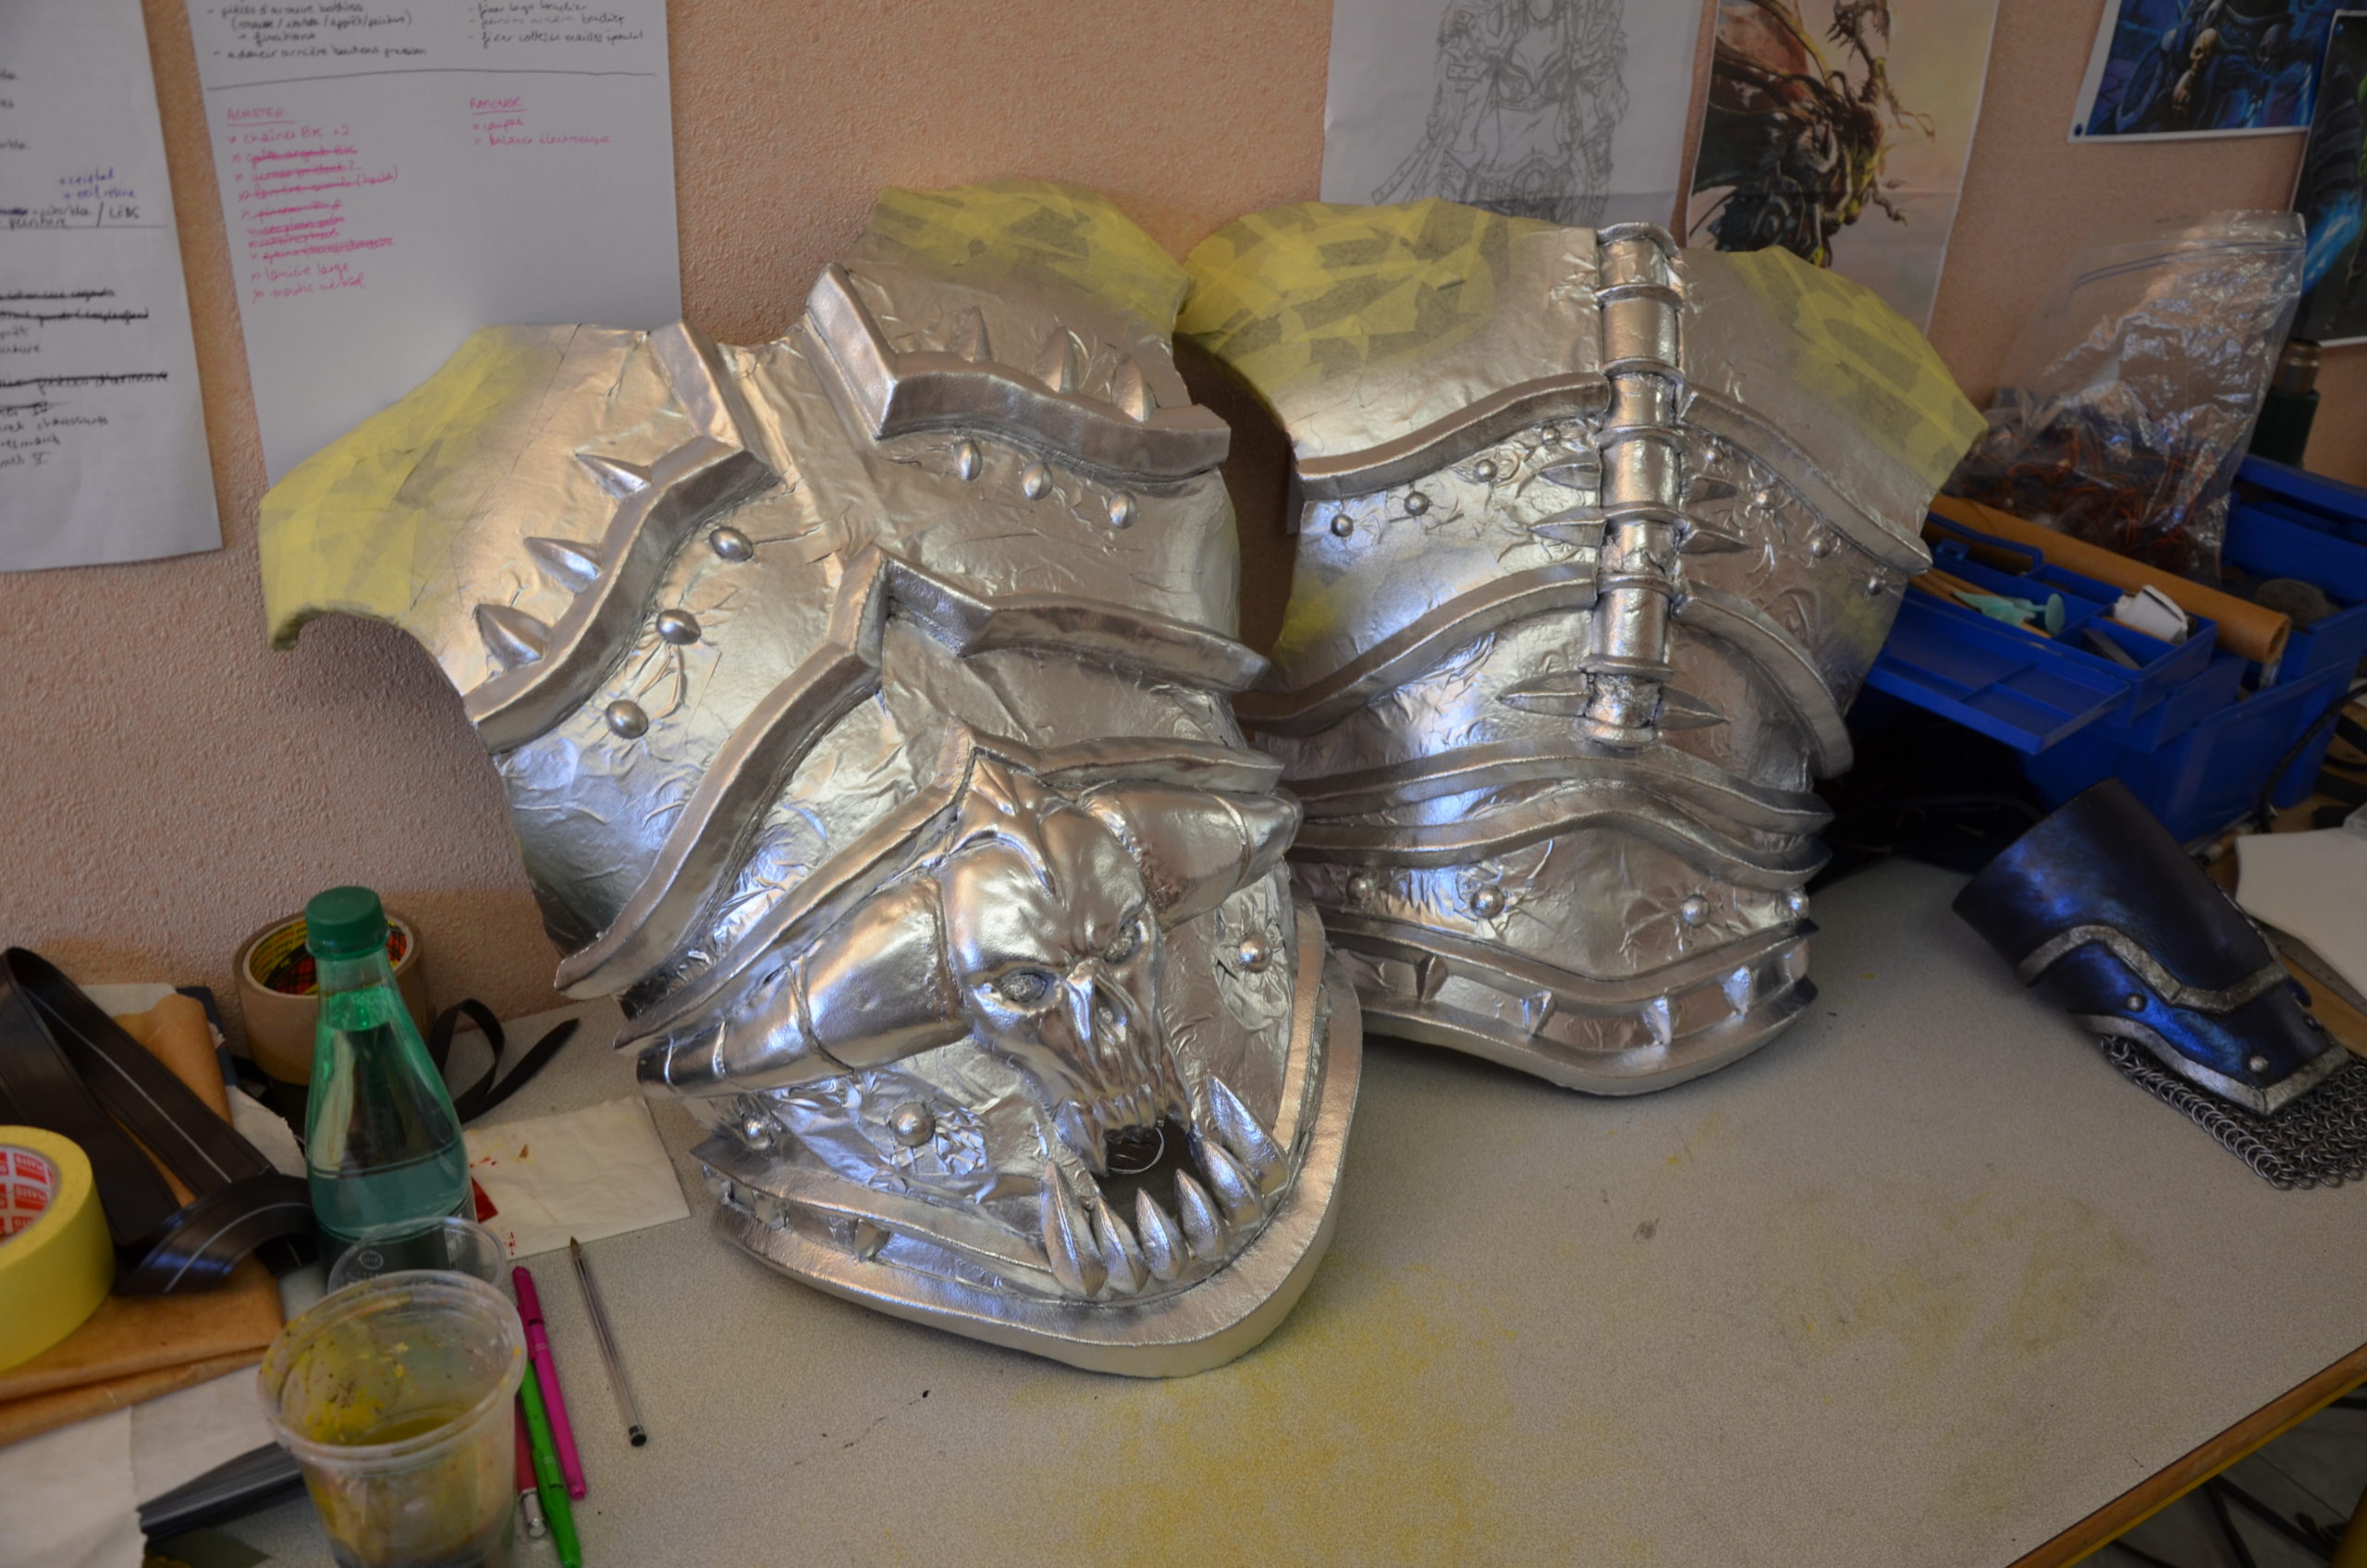
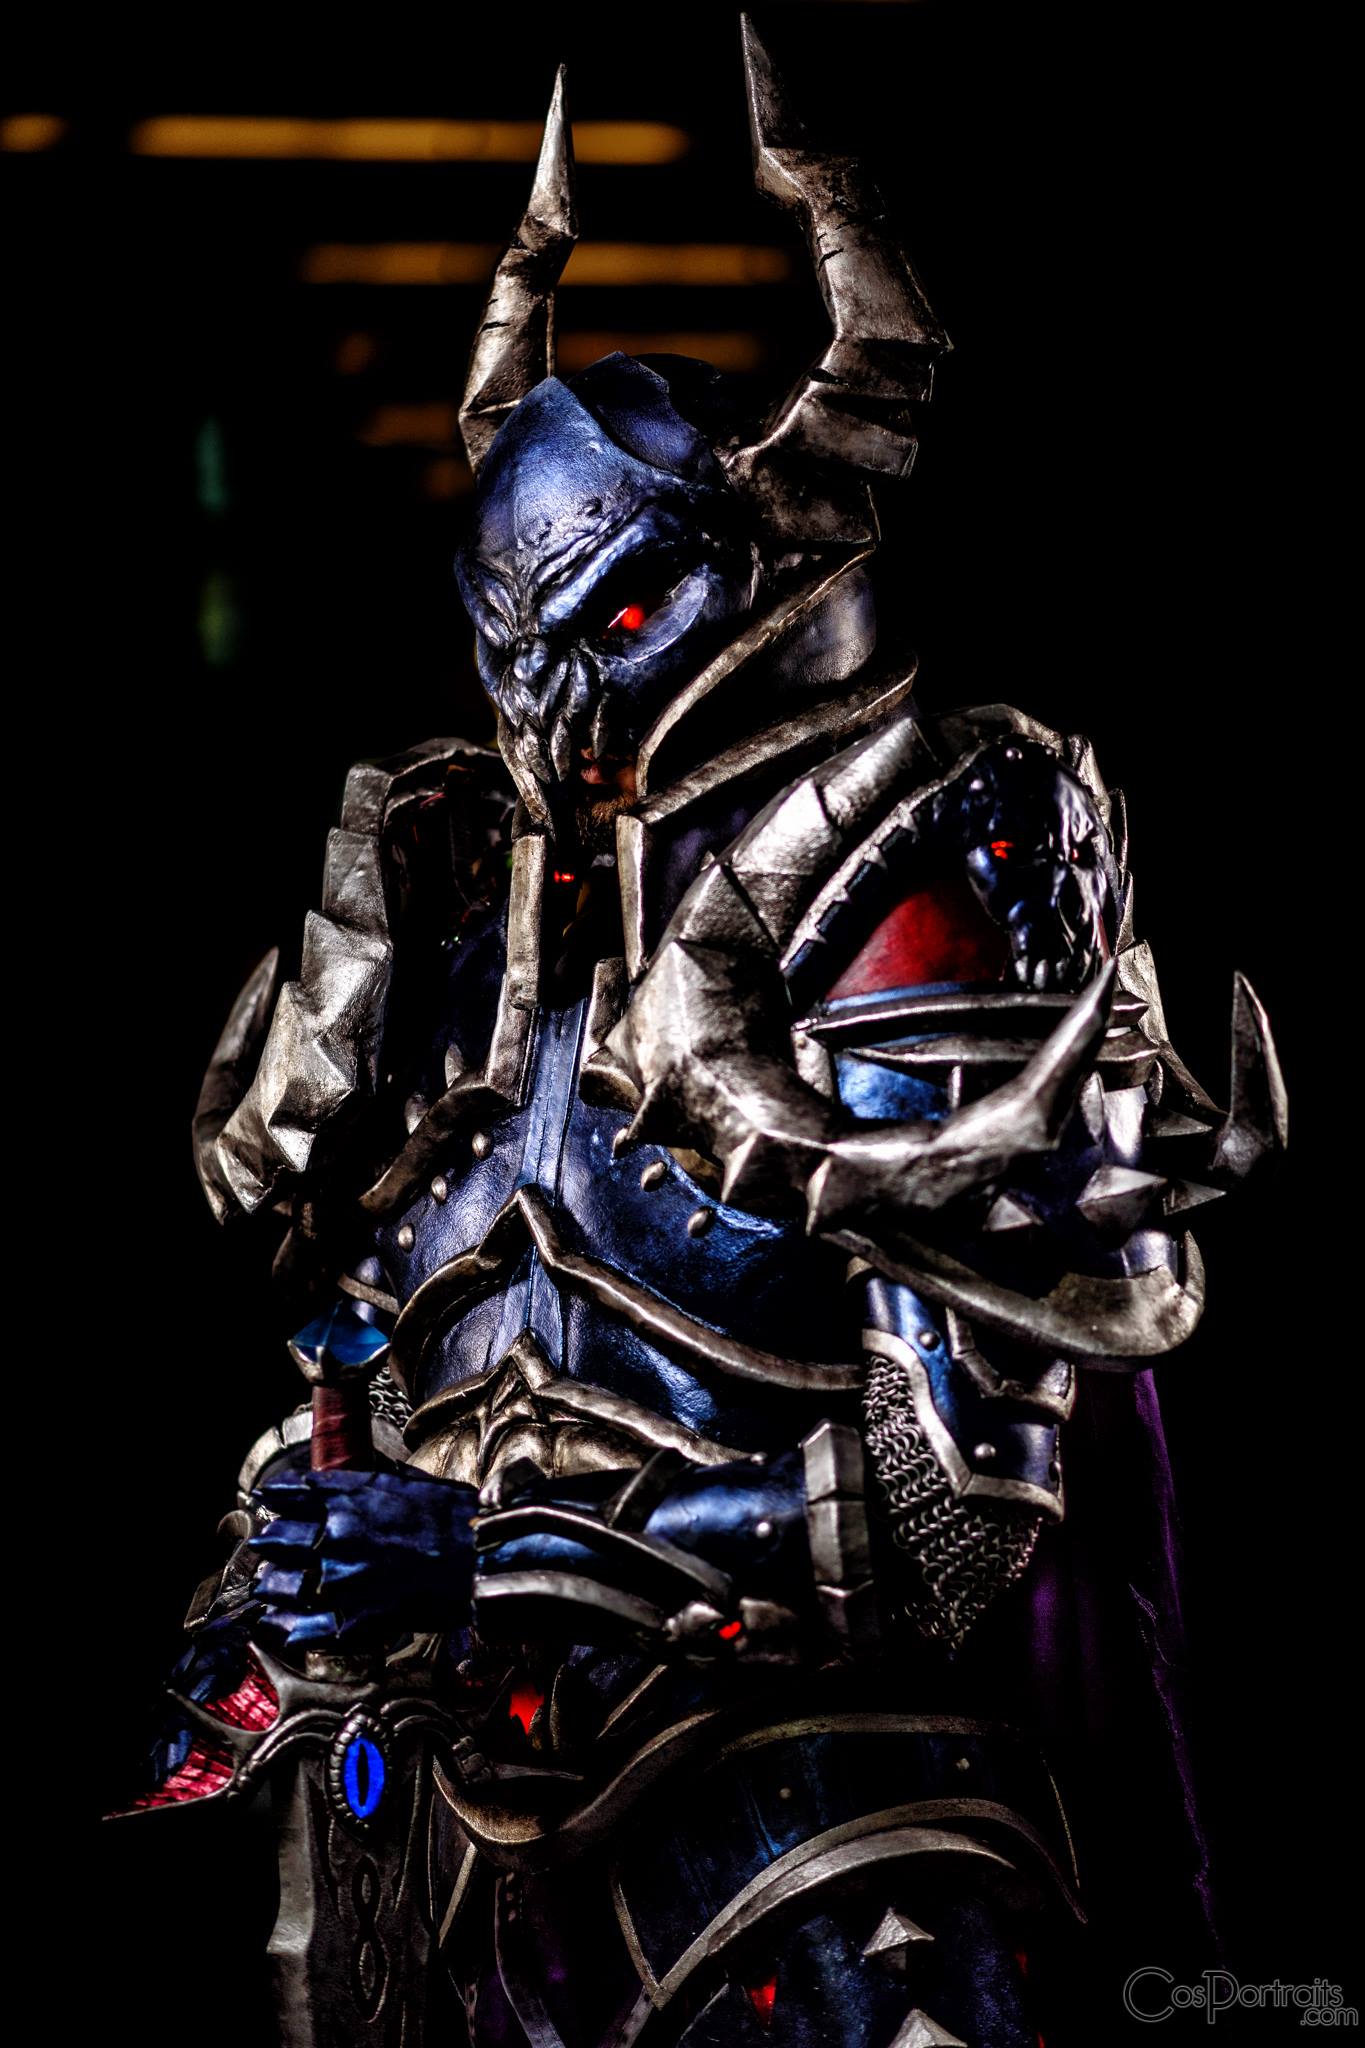
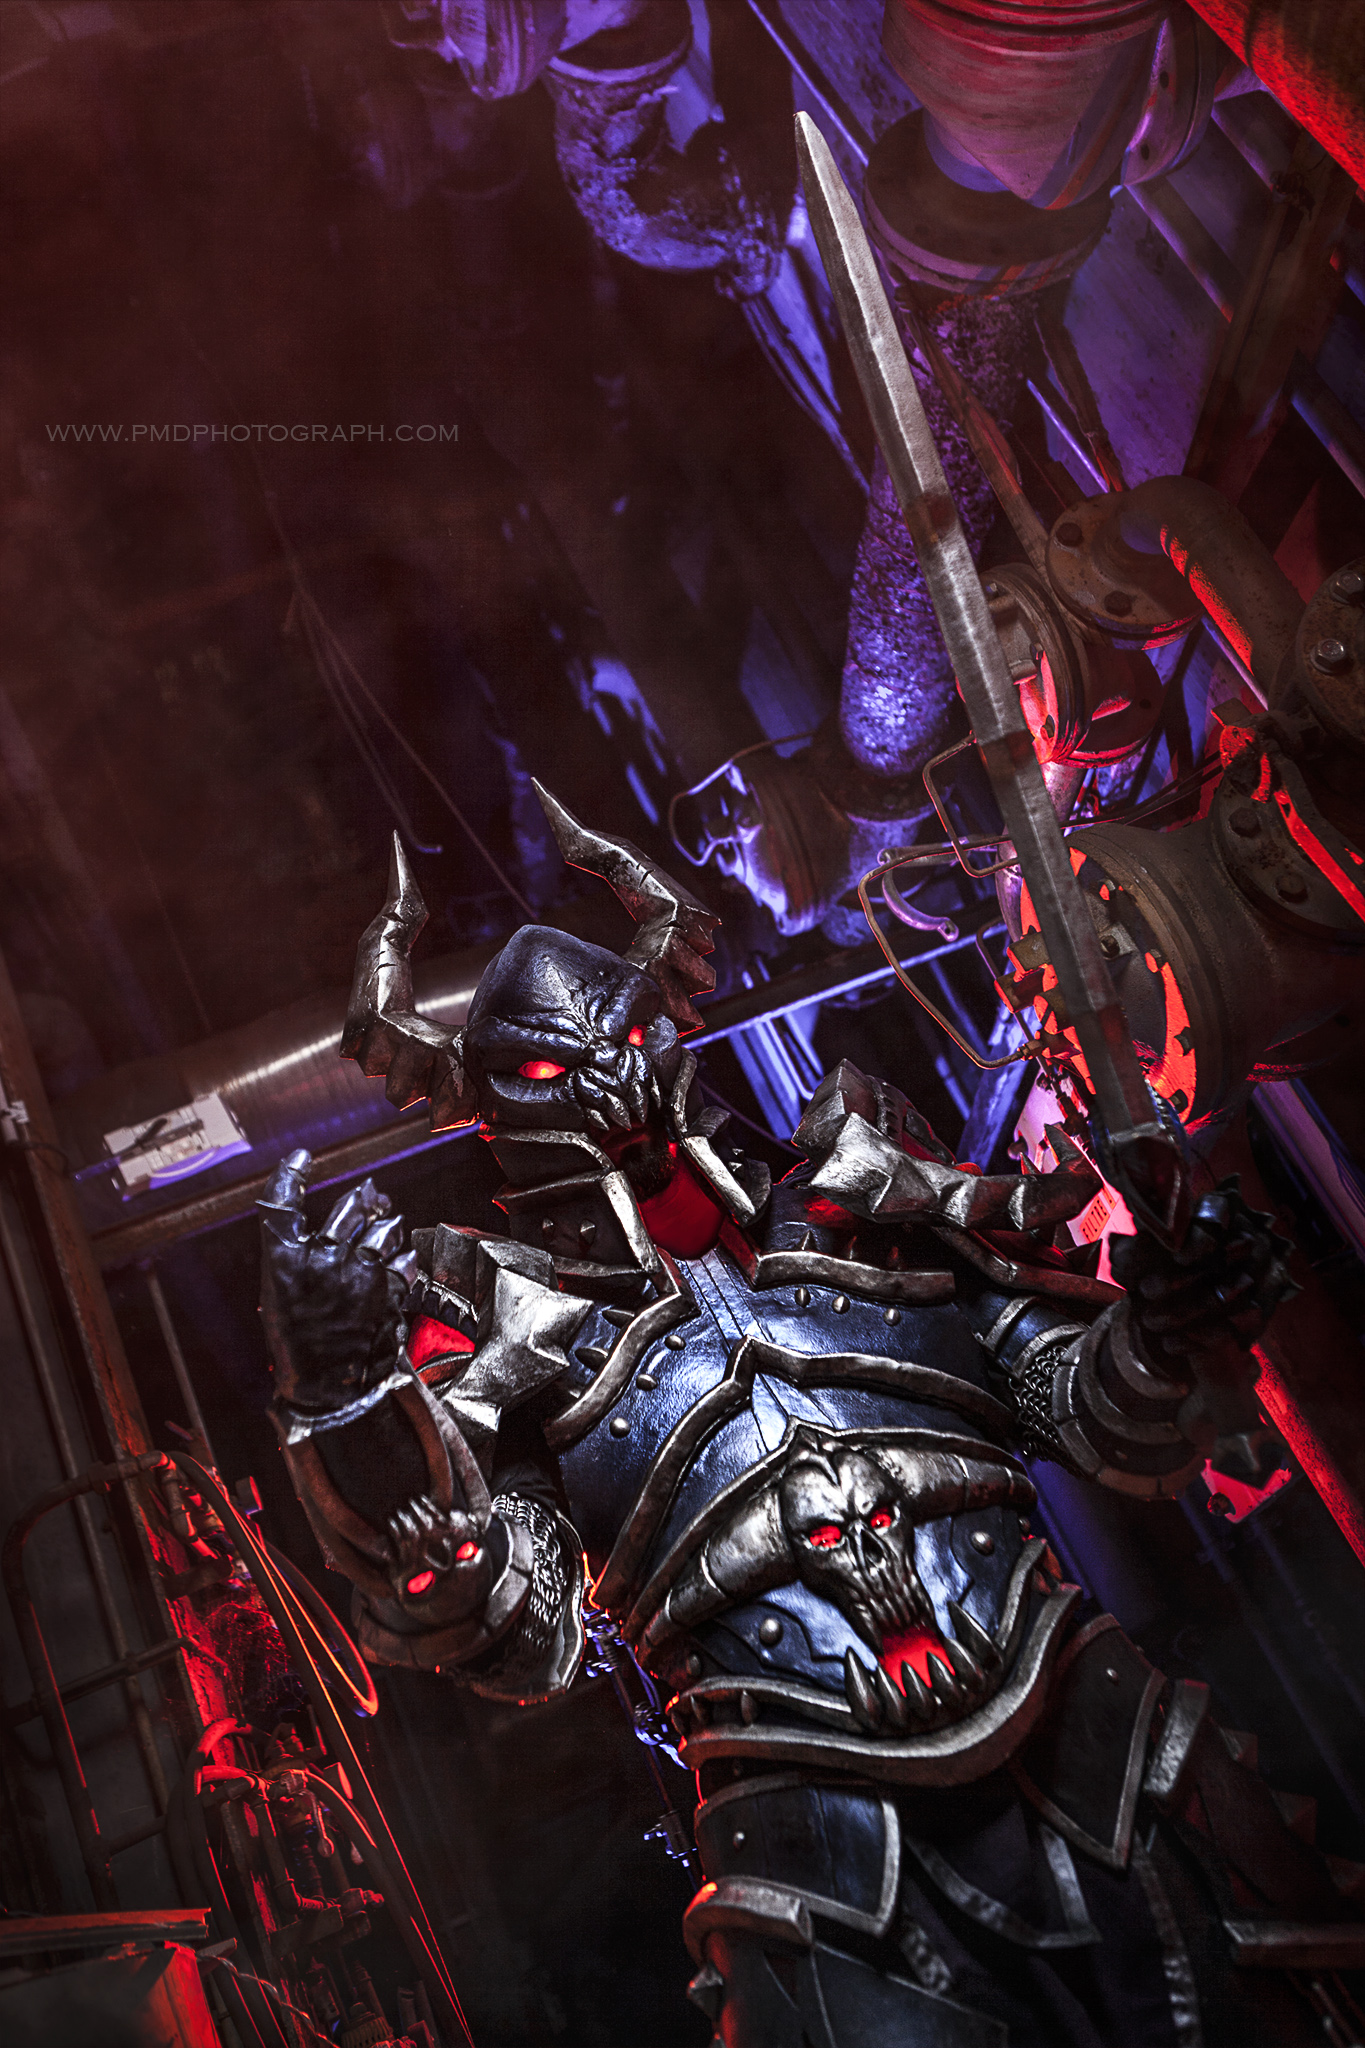
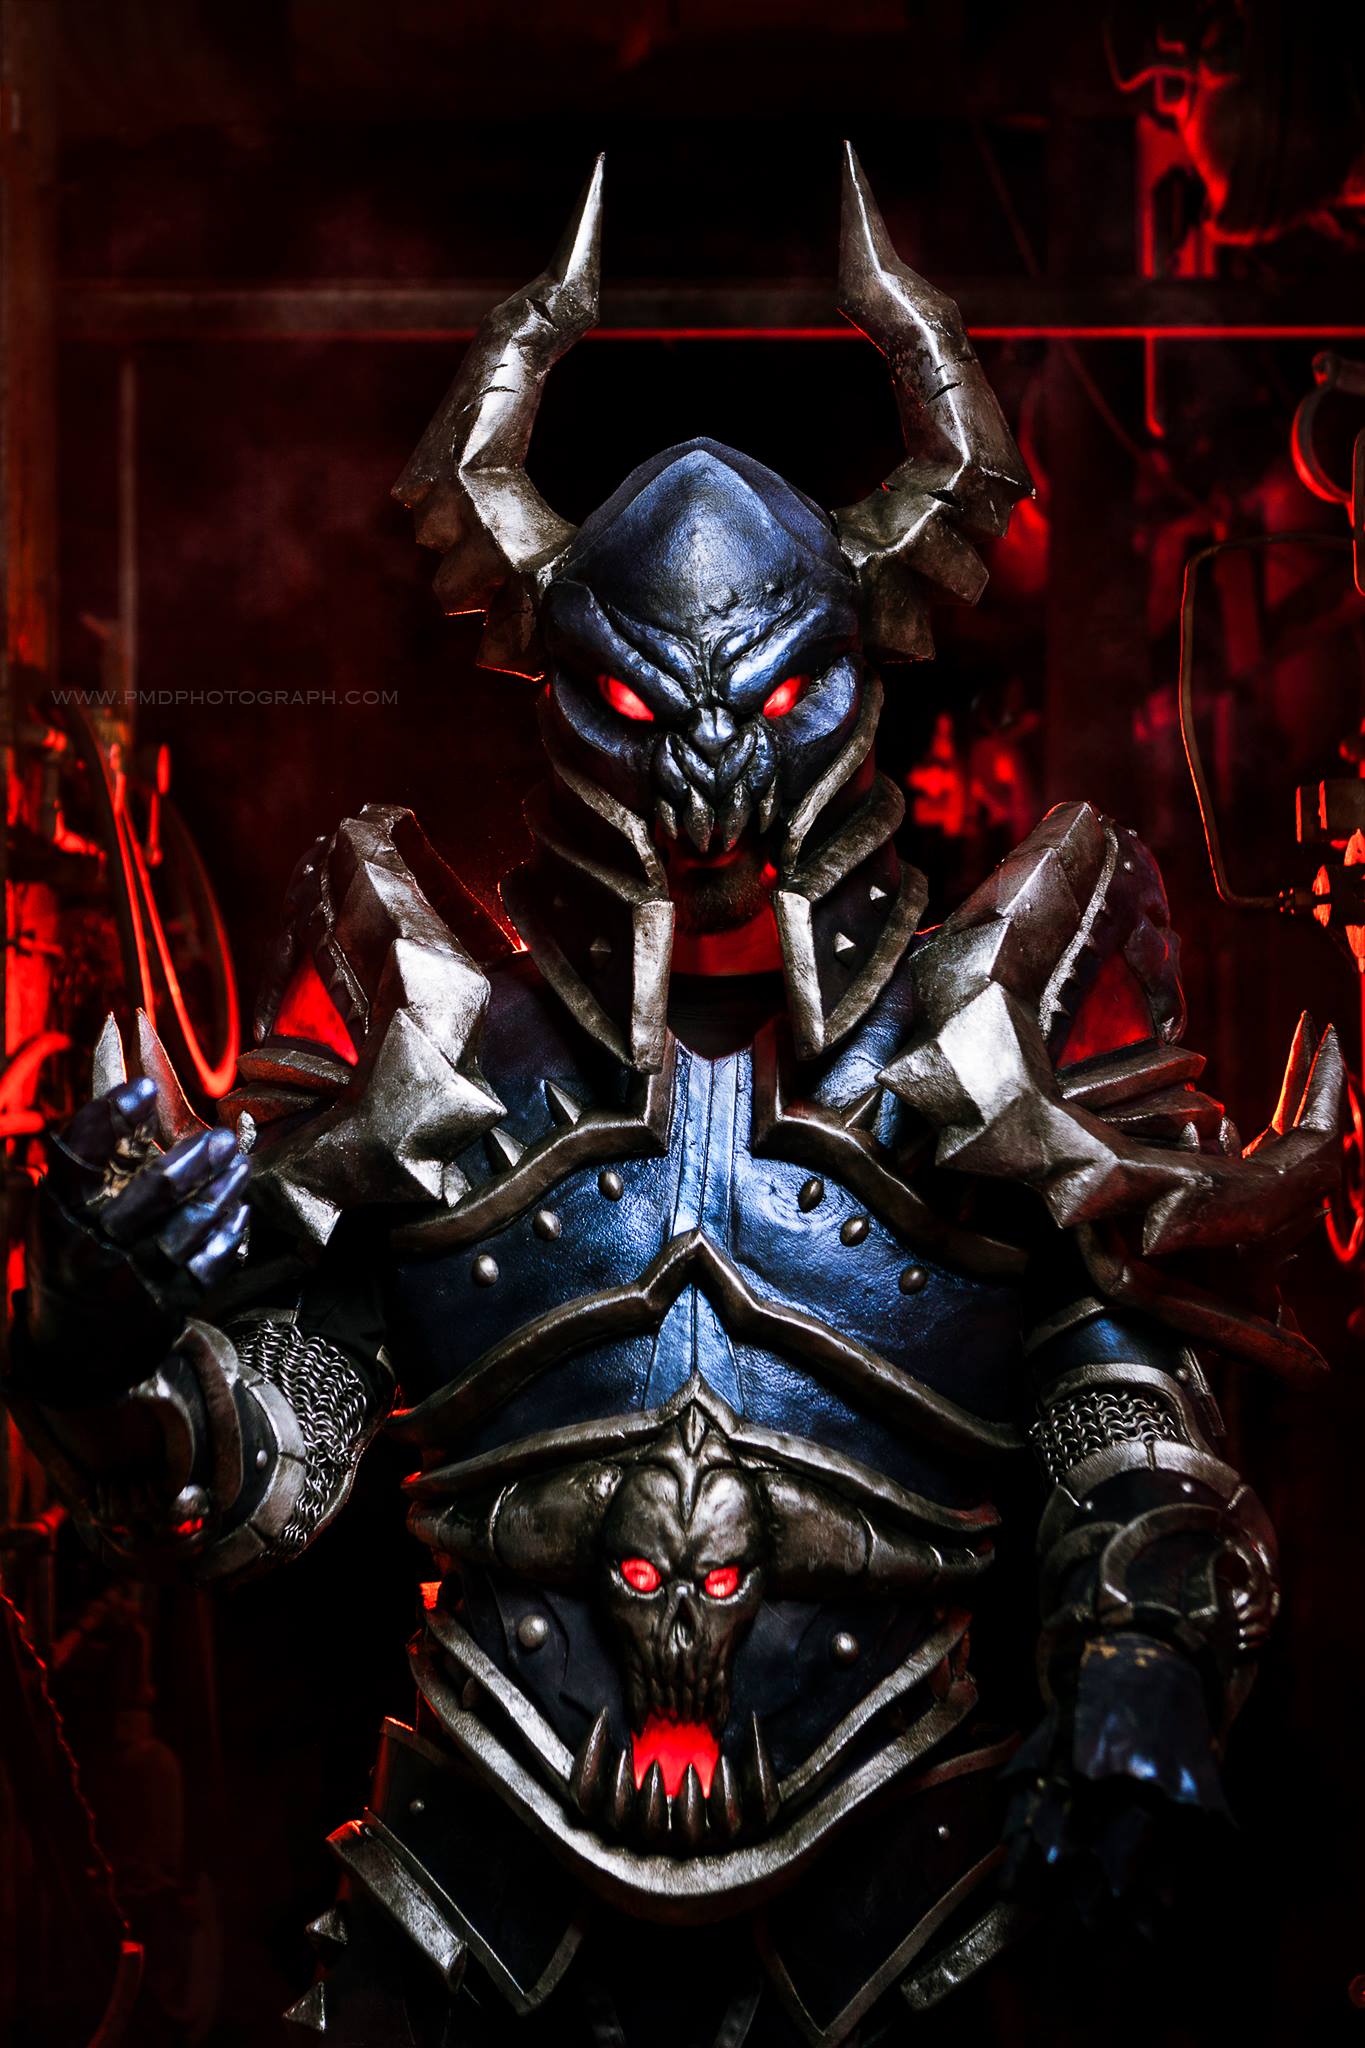
The parts were primed, then painted in an iridescent black tone. Once the layer was dry, the sections that needed to stay black were covered with tape, and the others sections sprayed with a layer of silver paint.
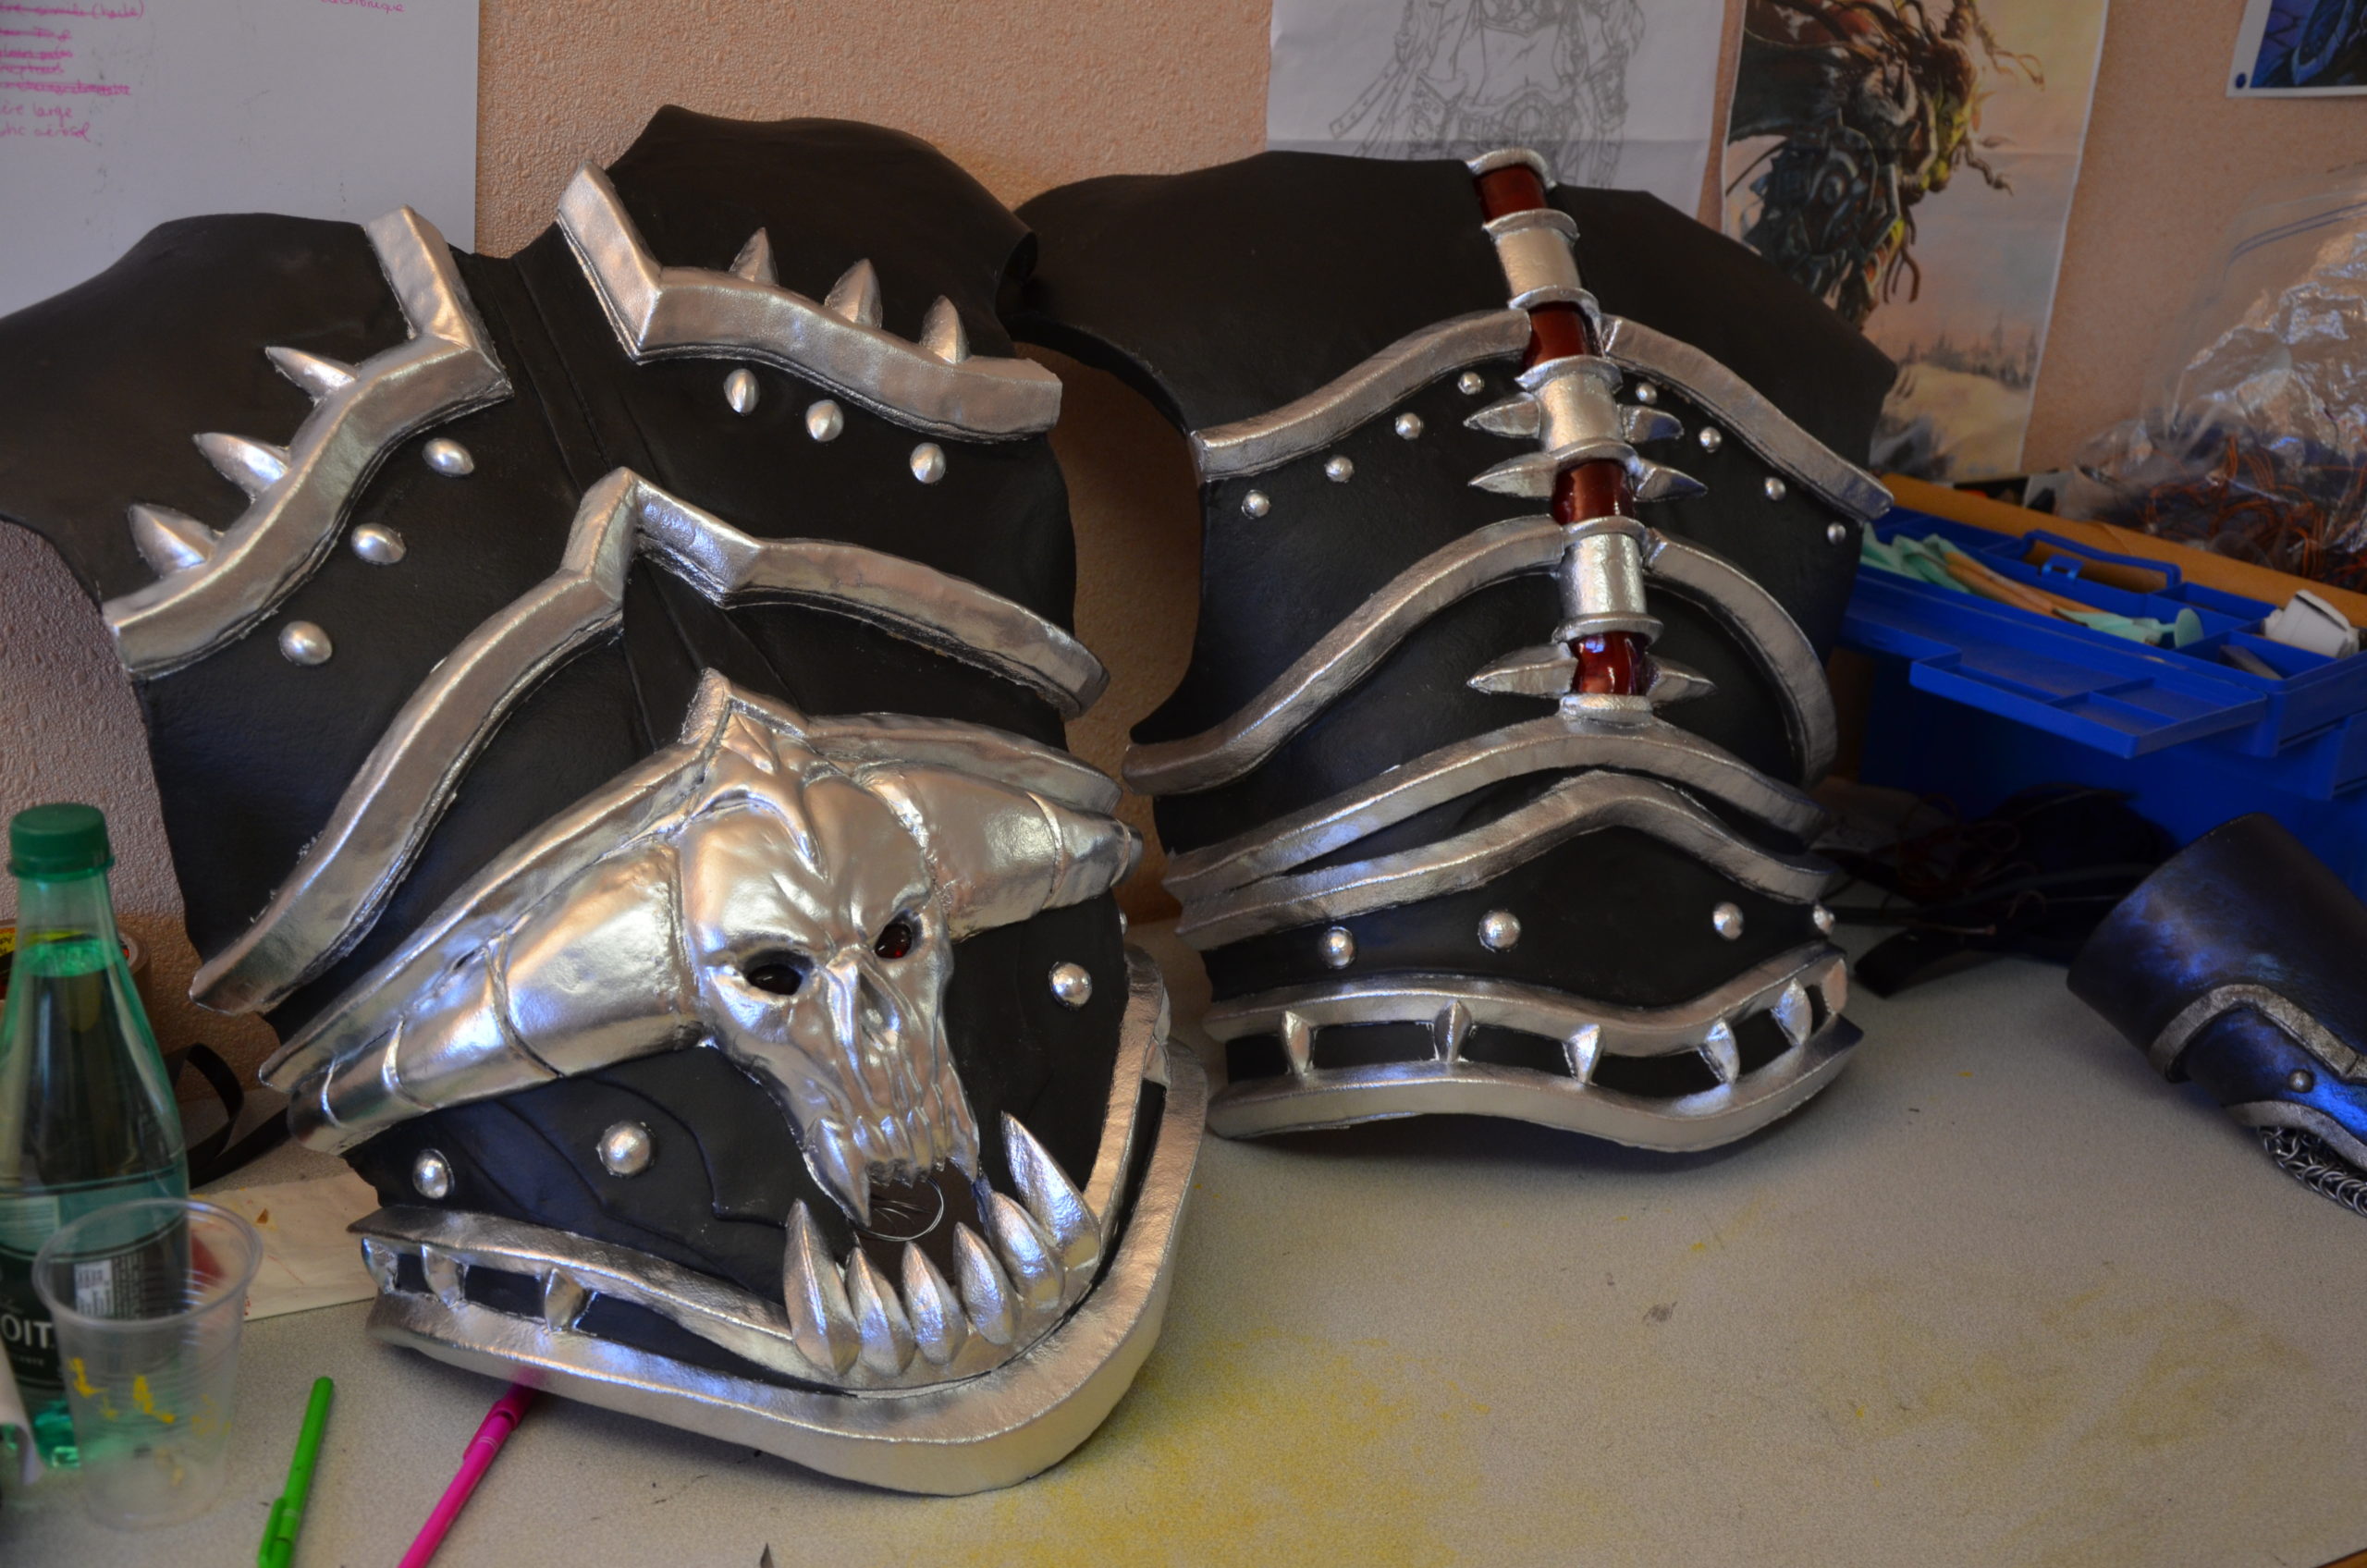
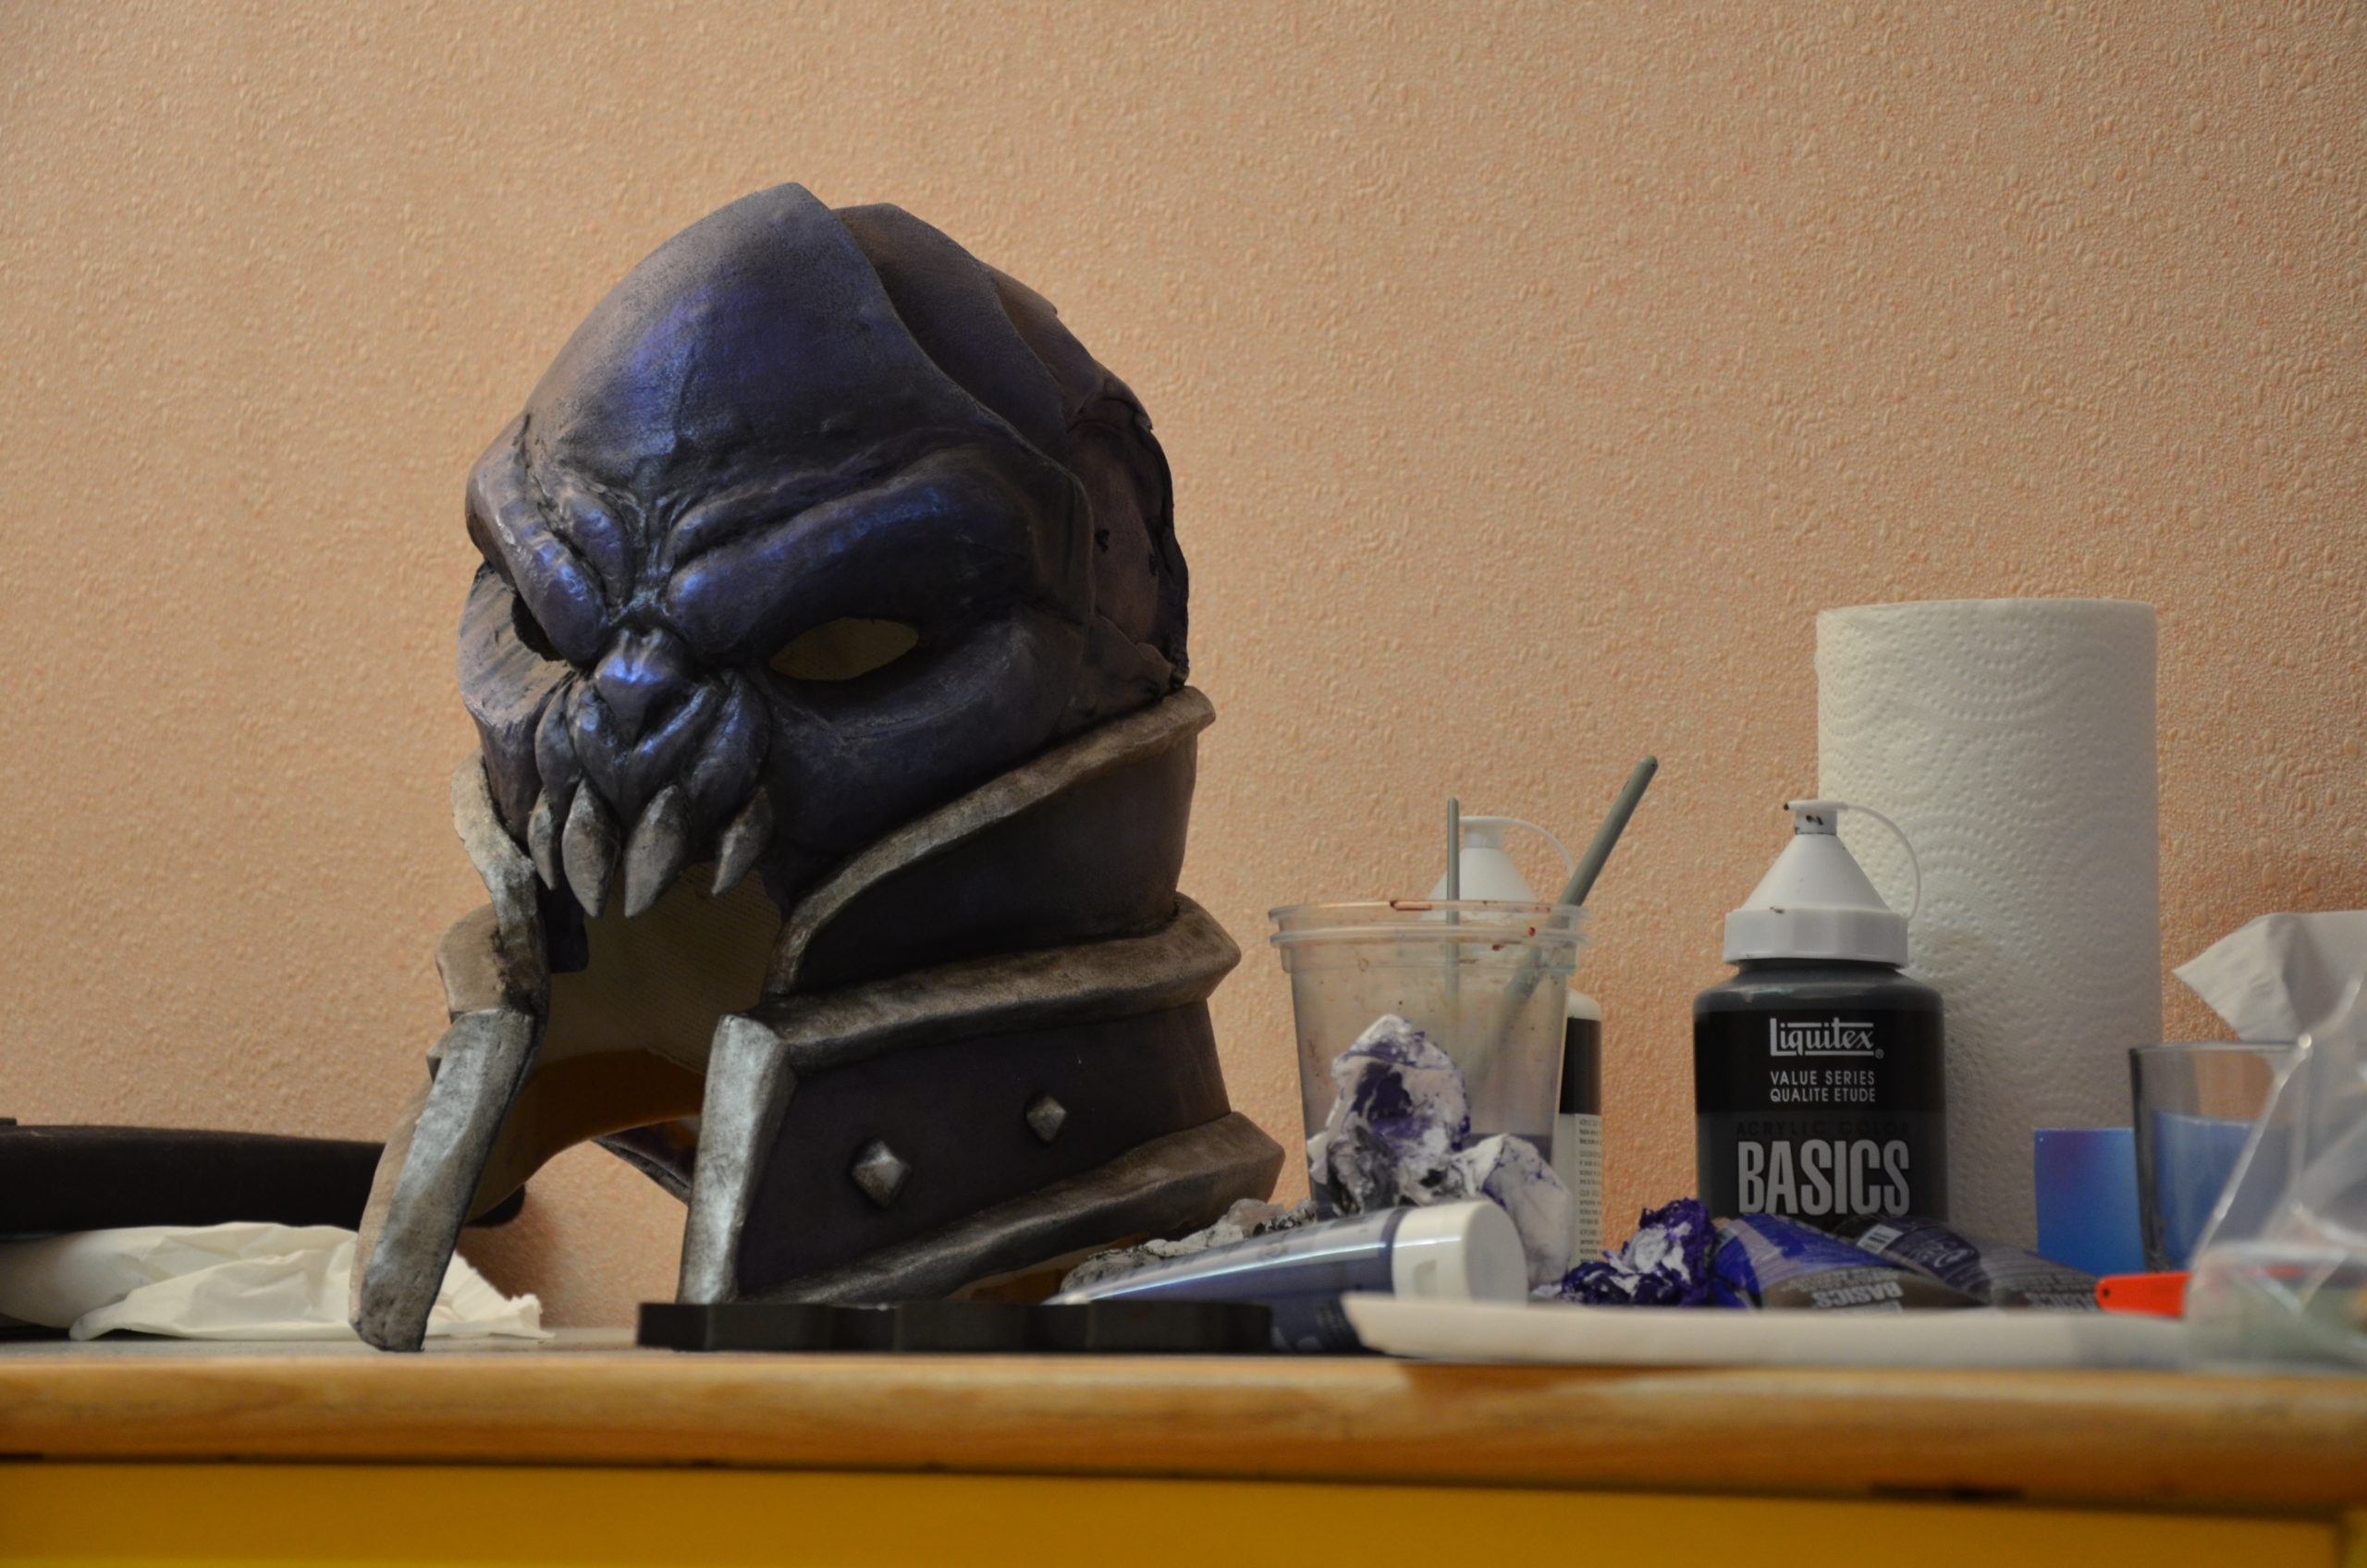
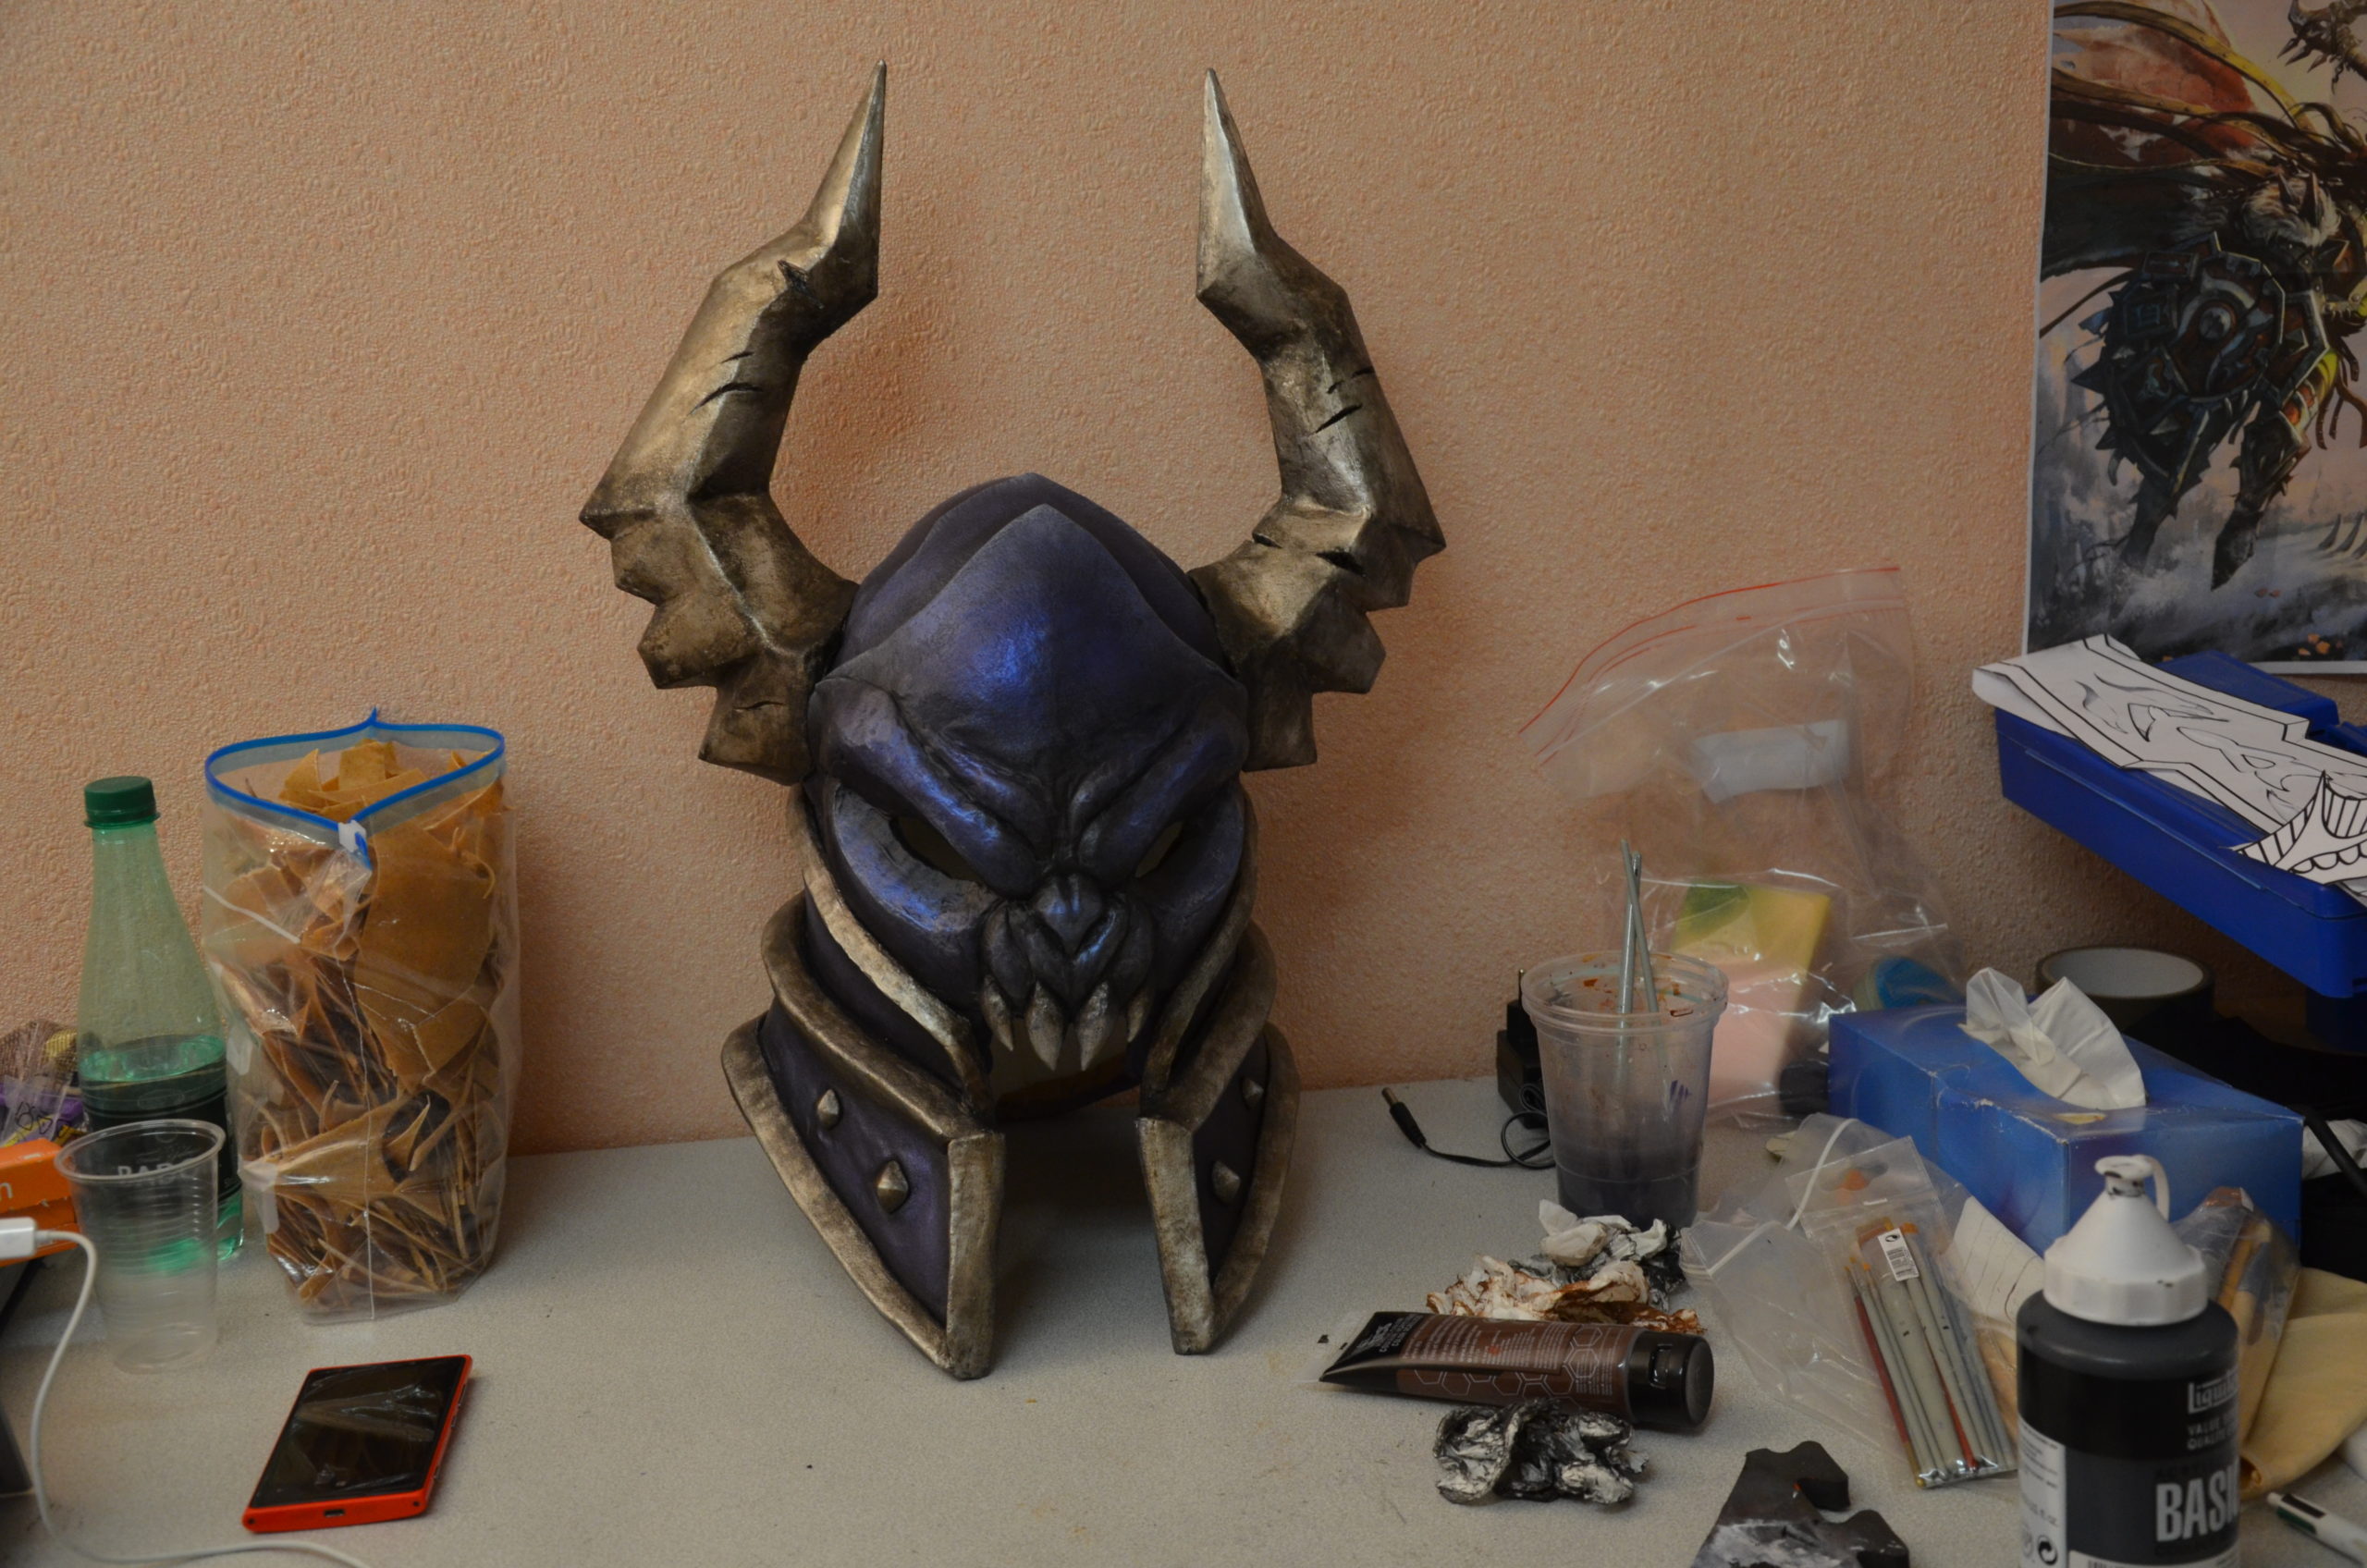
To finish, we add some accent by dry brushing blue/purple iridescent paint on the black sections. And some black paint on the silver ones.
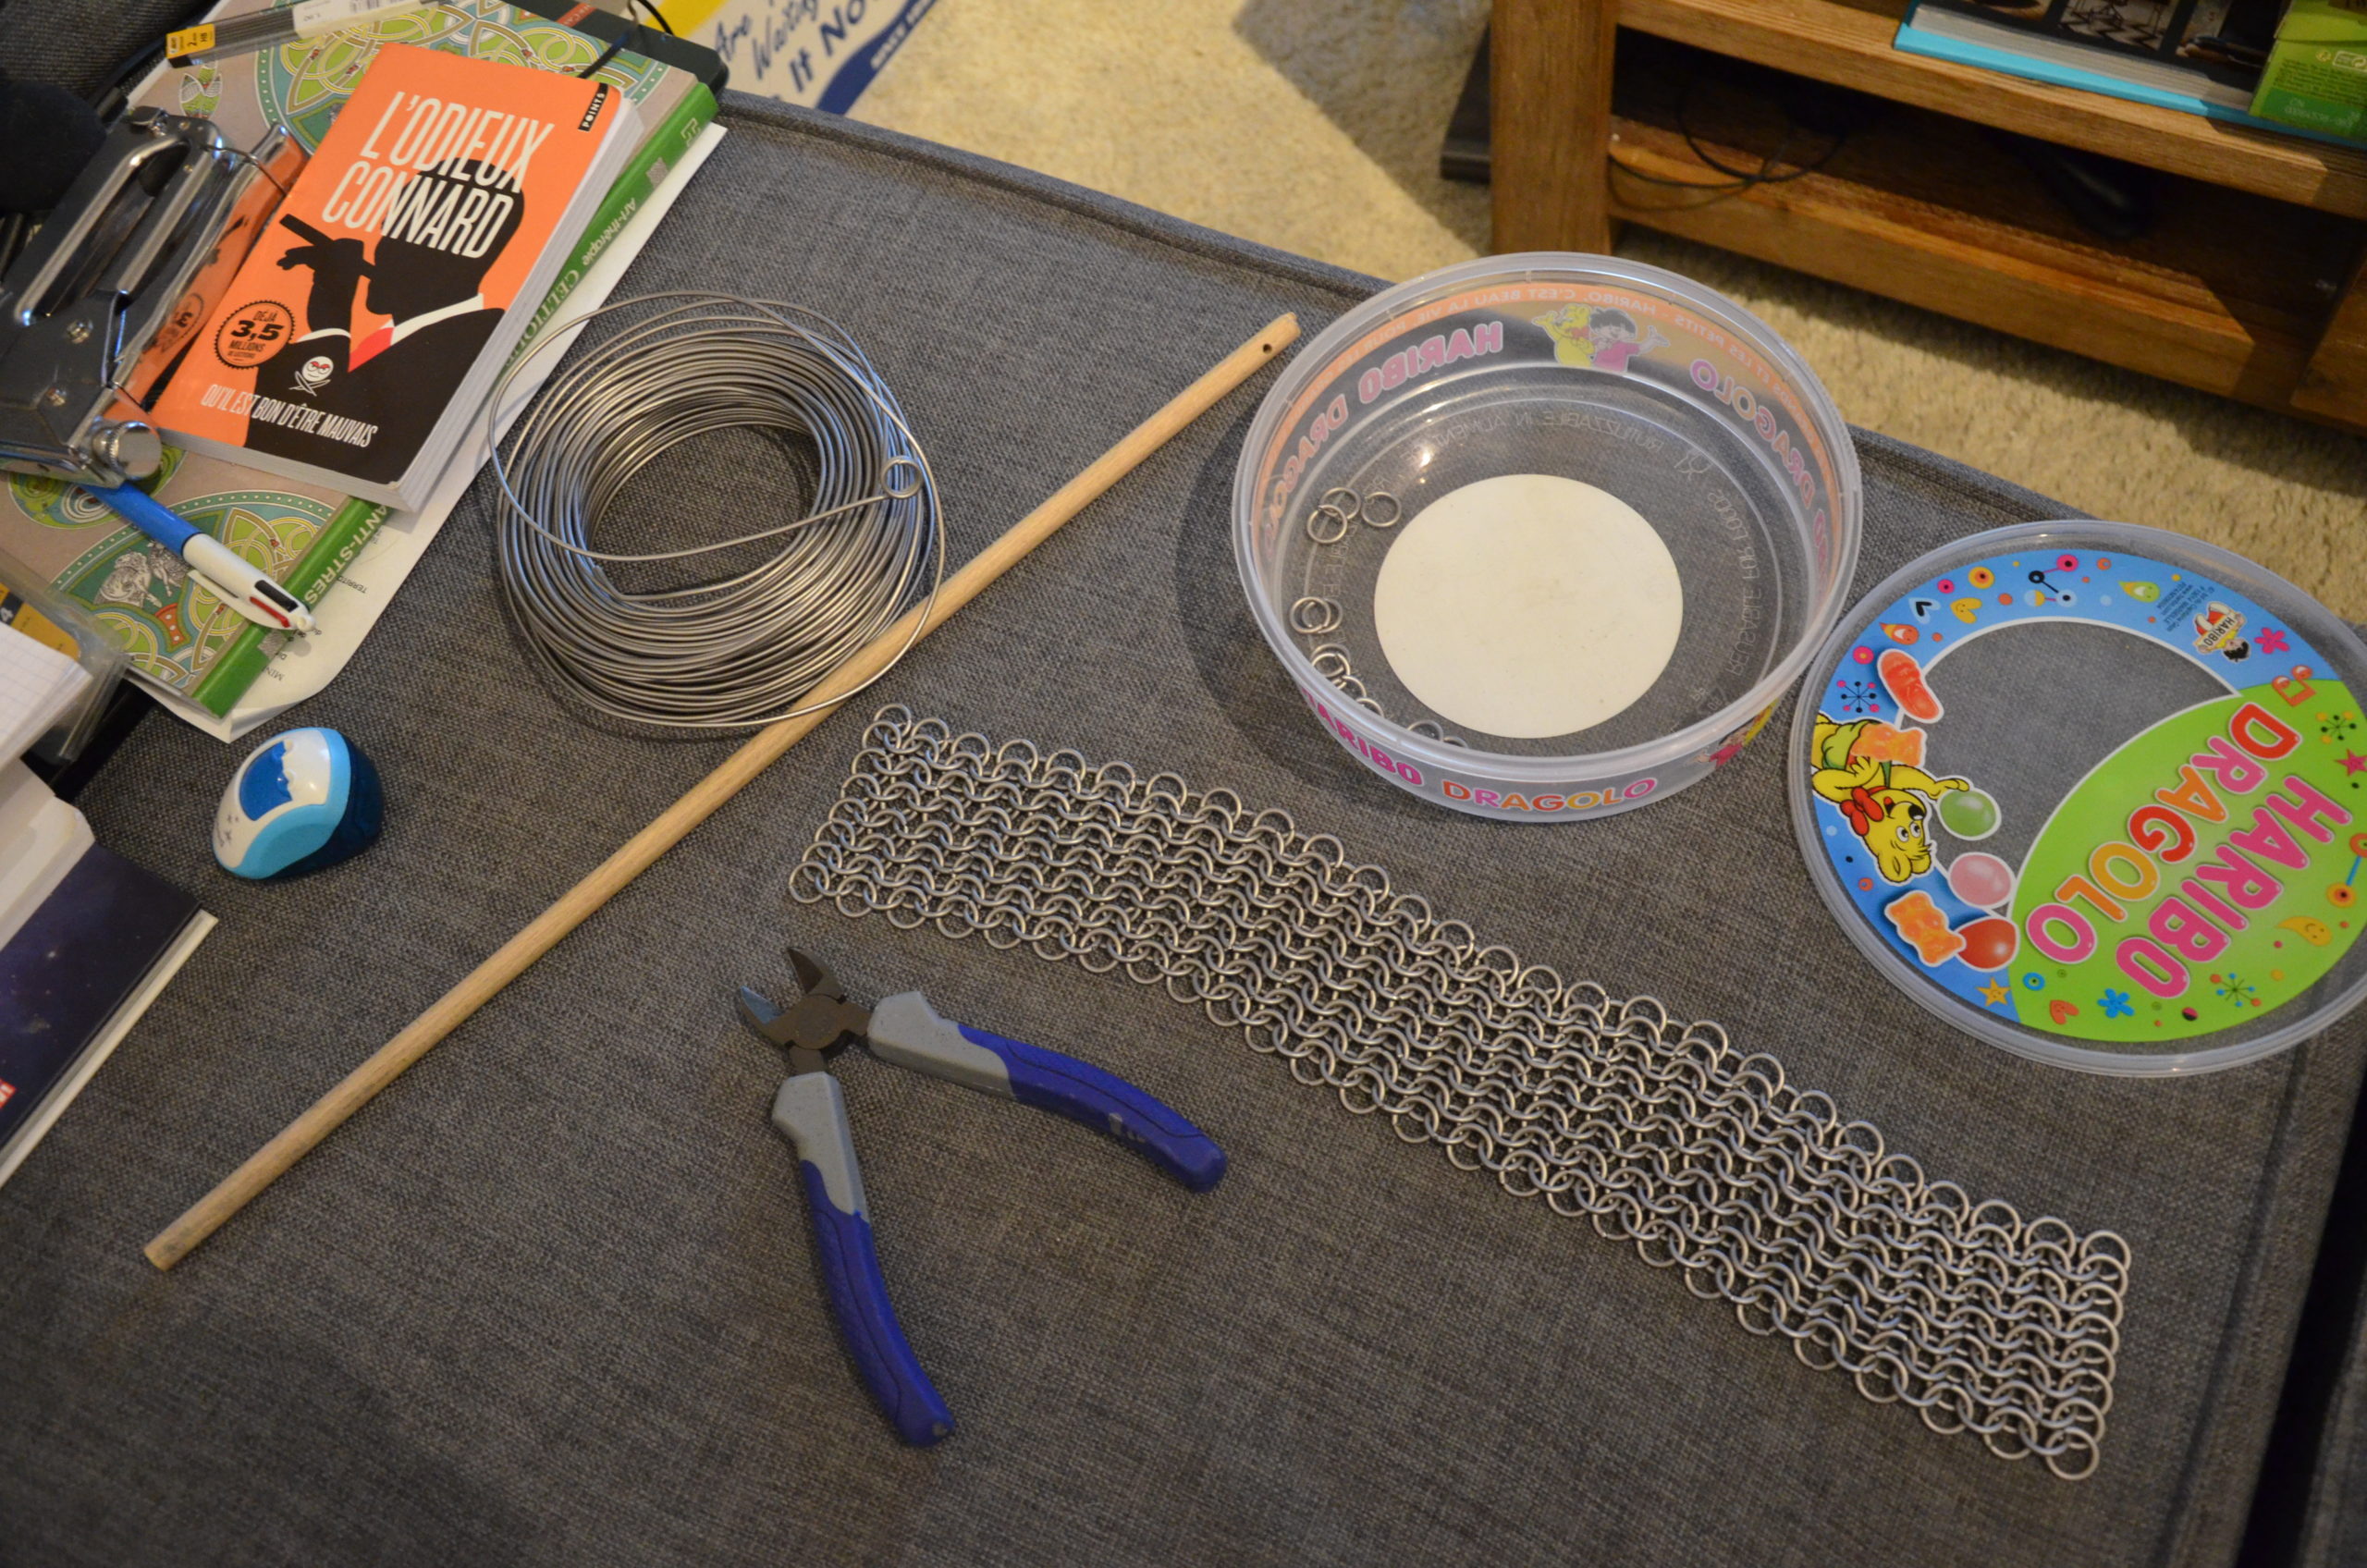
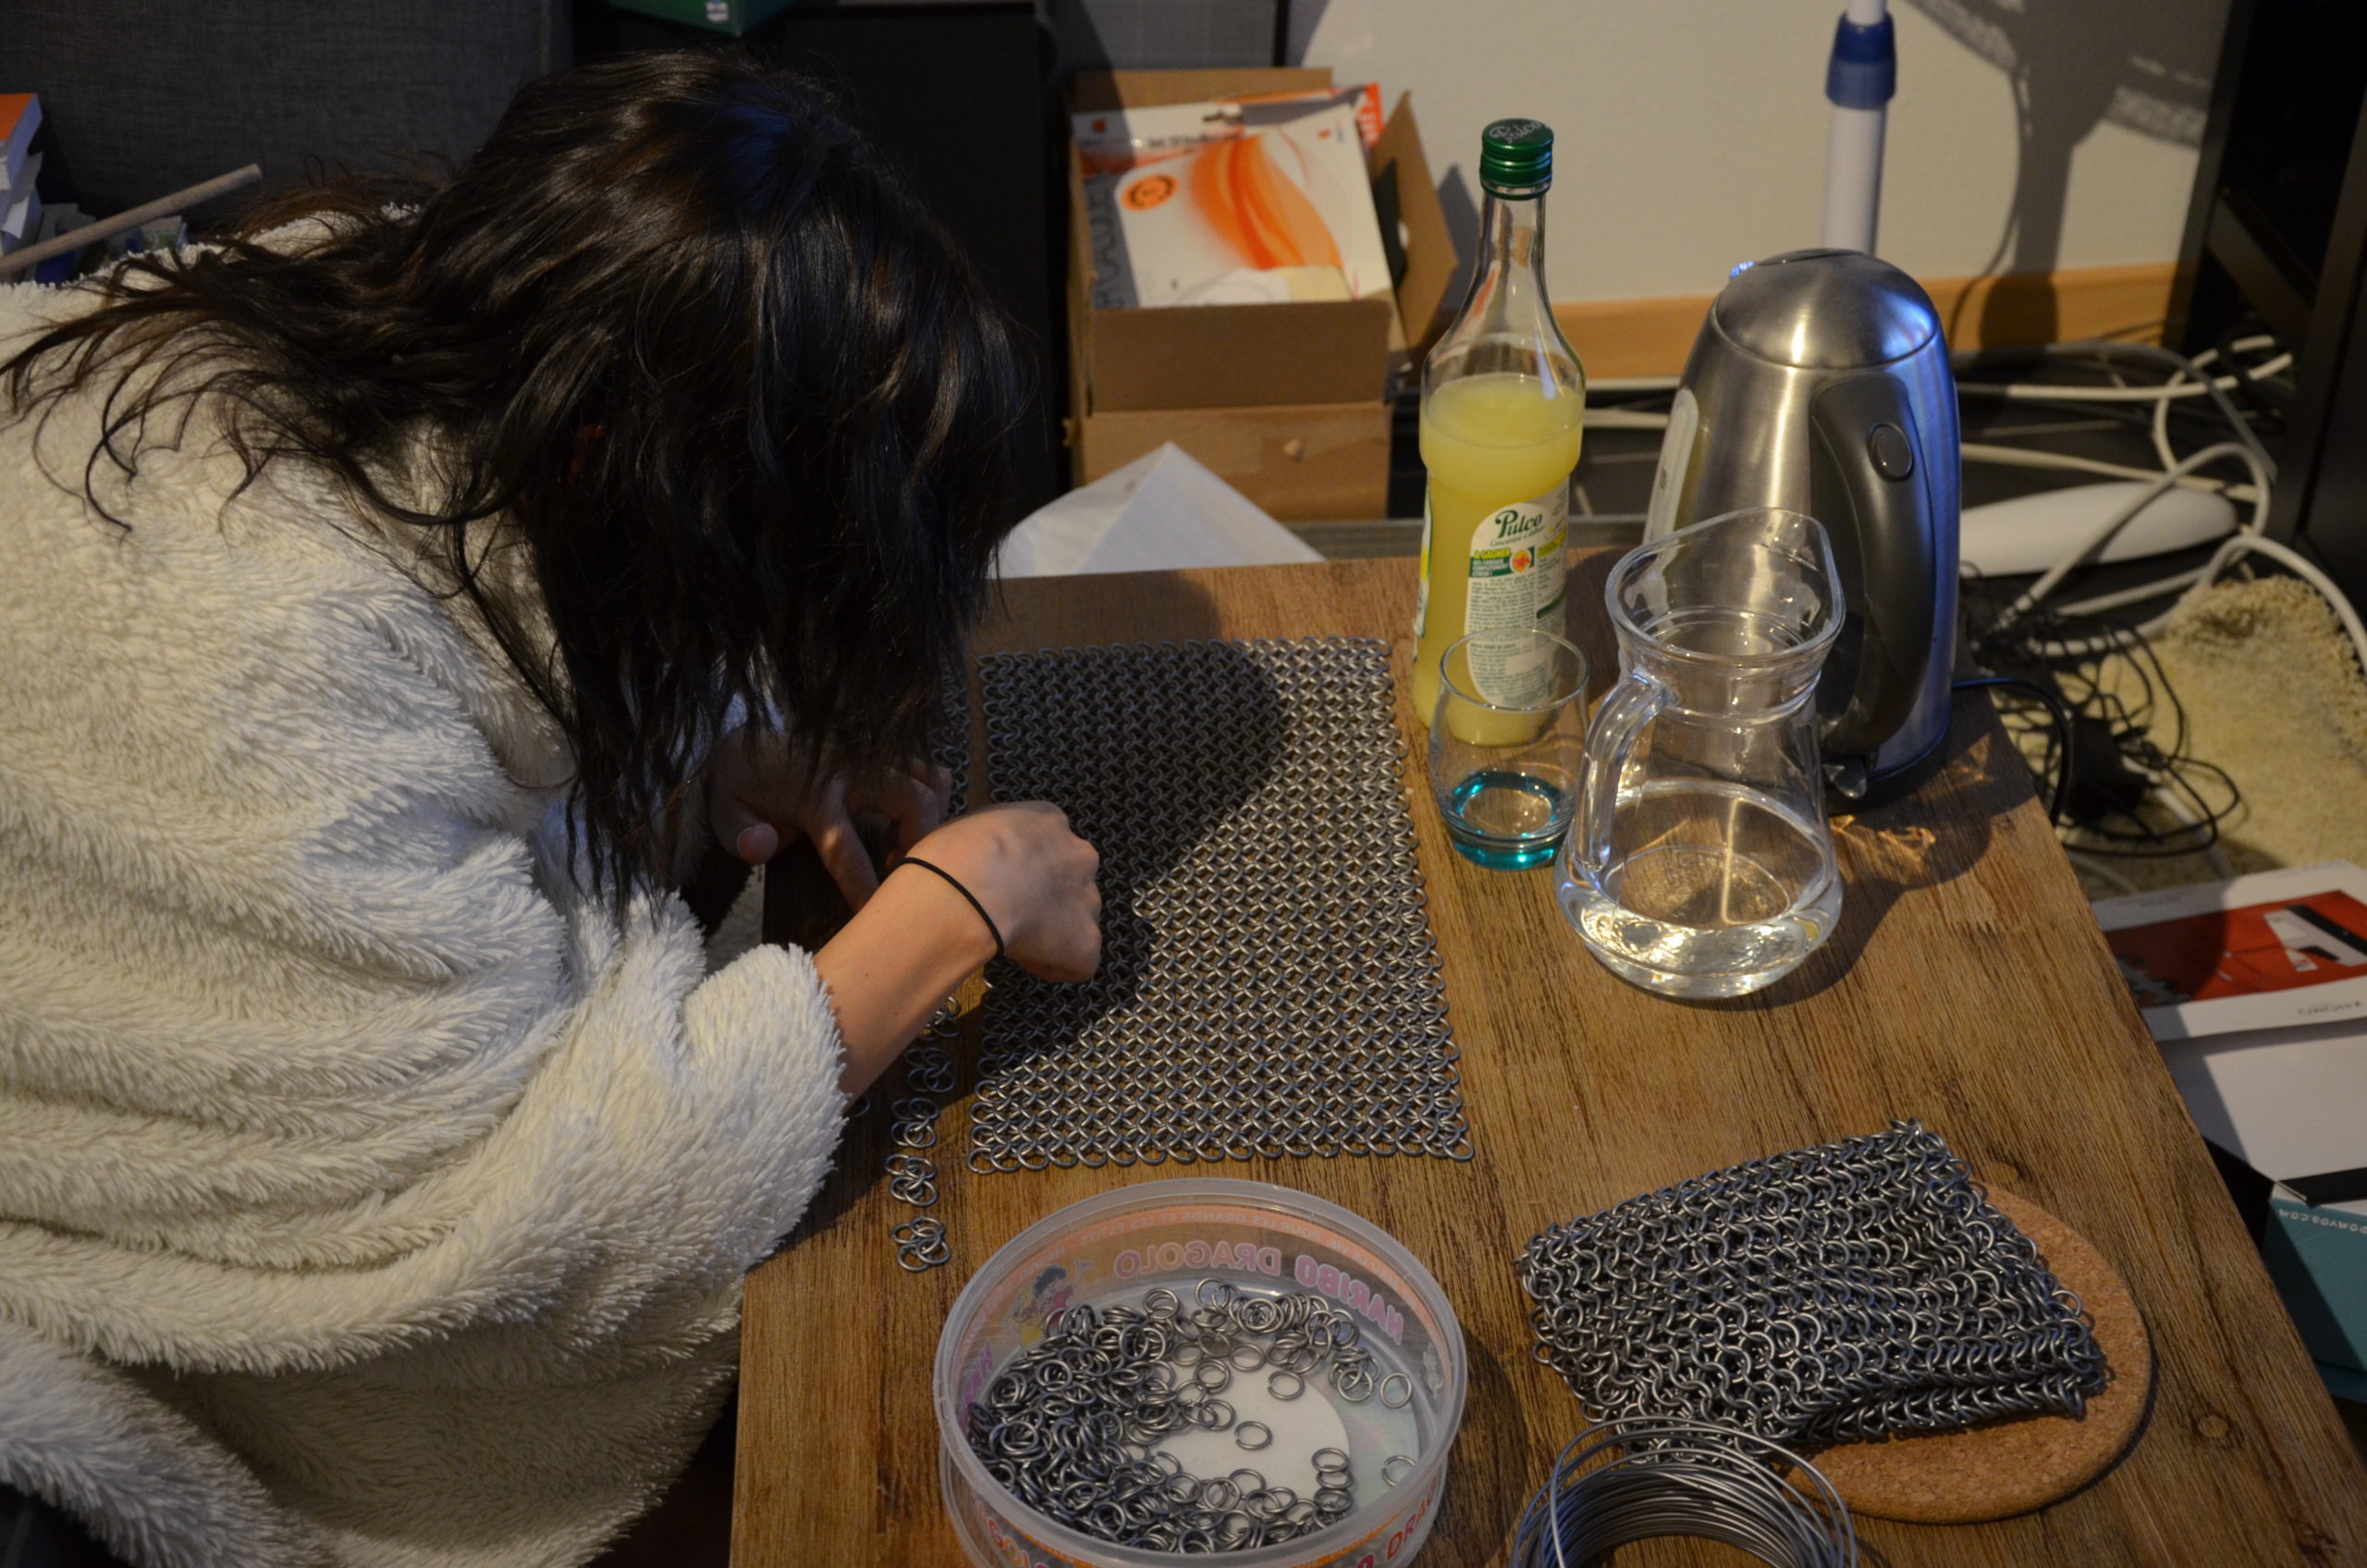
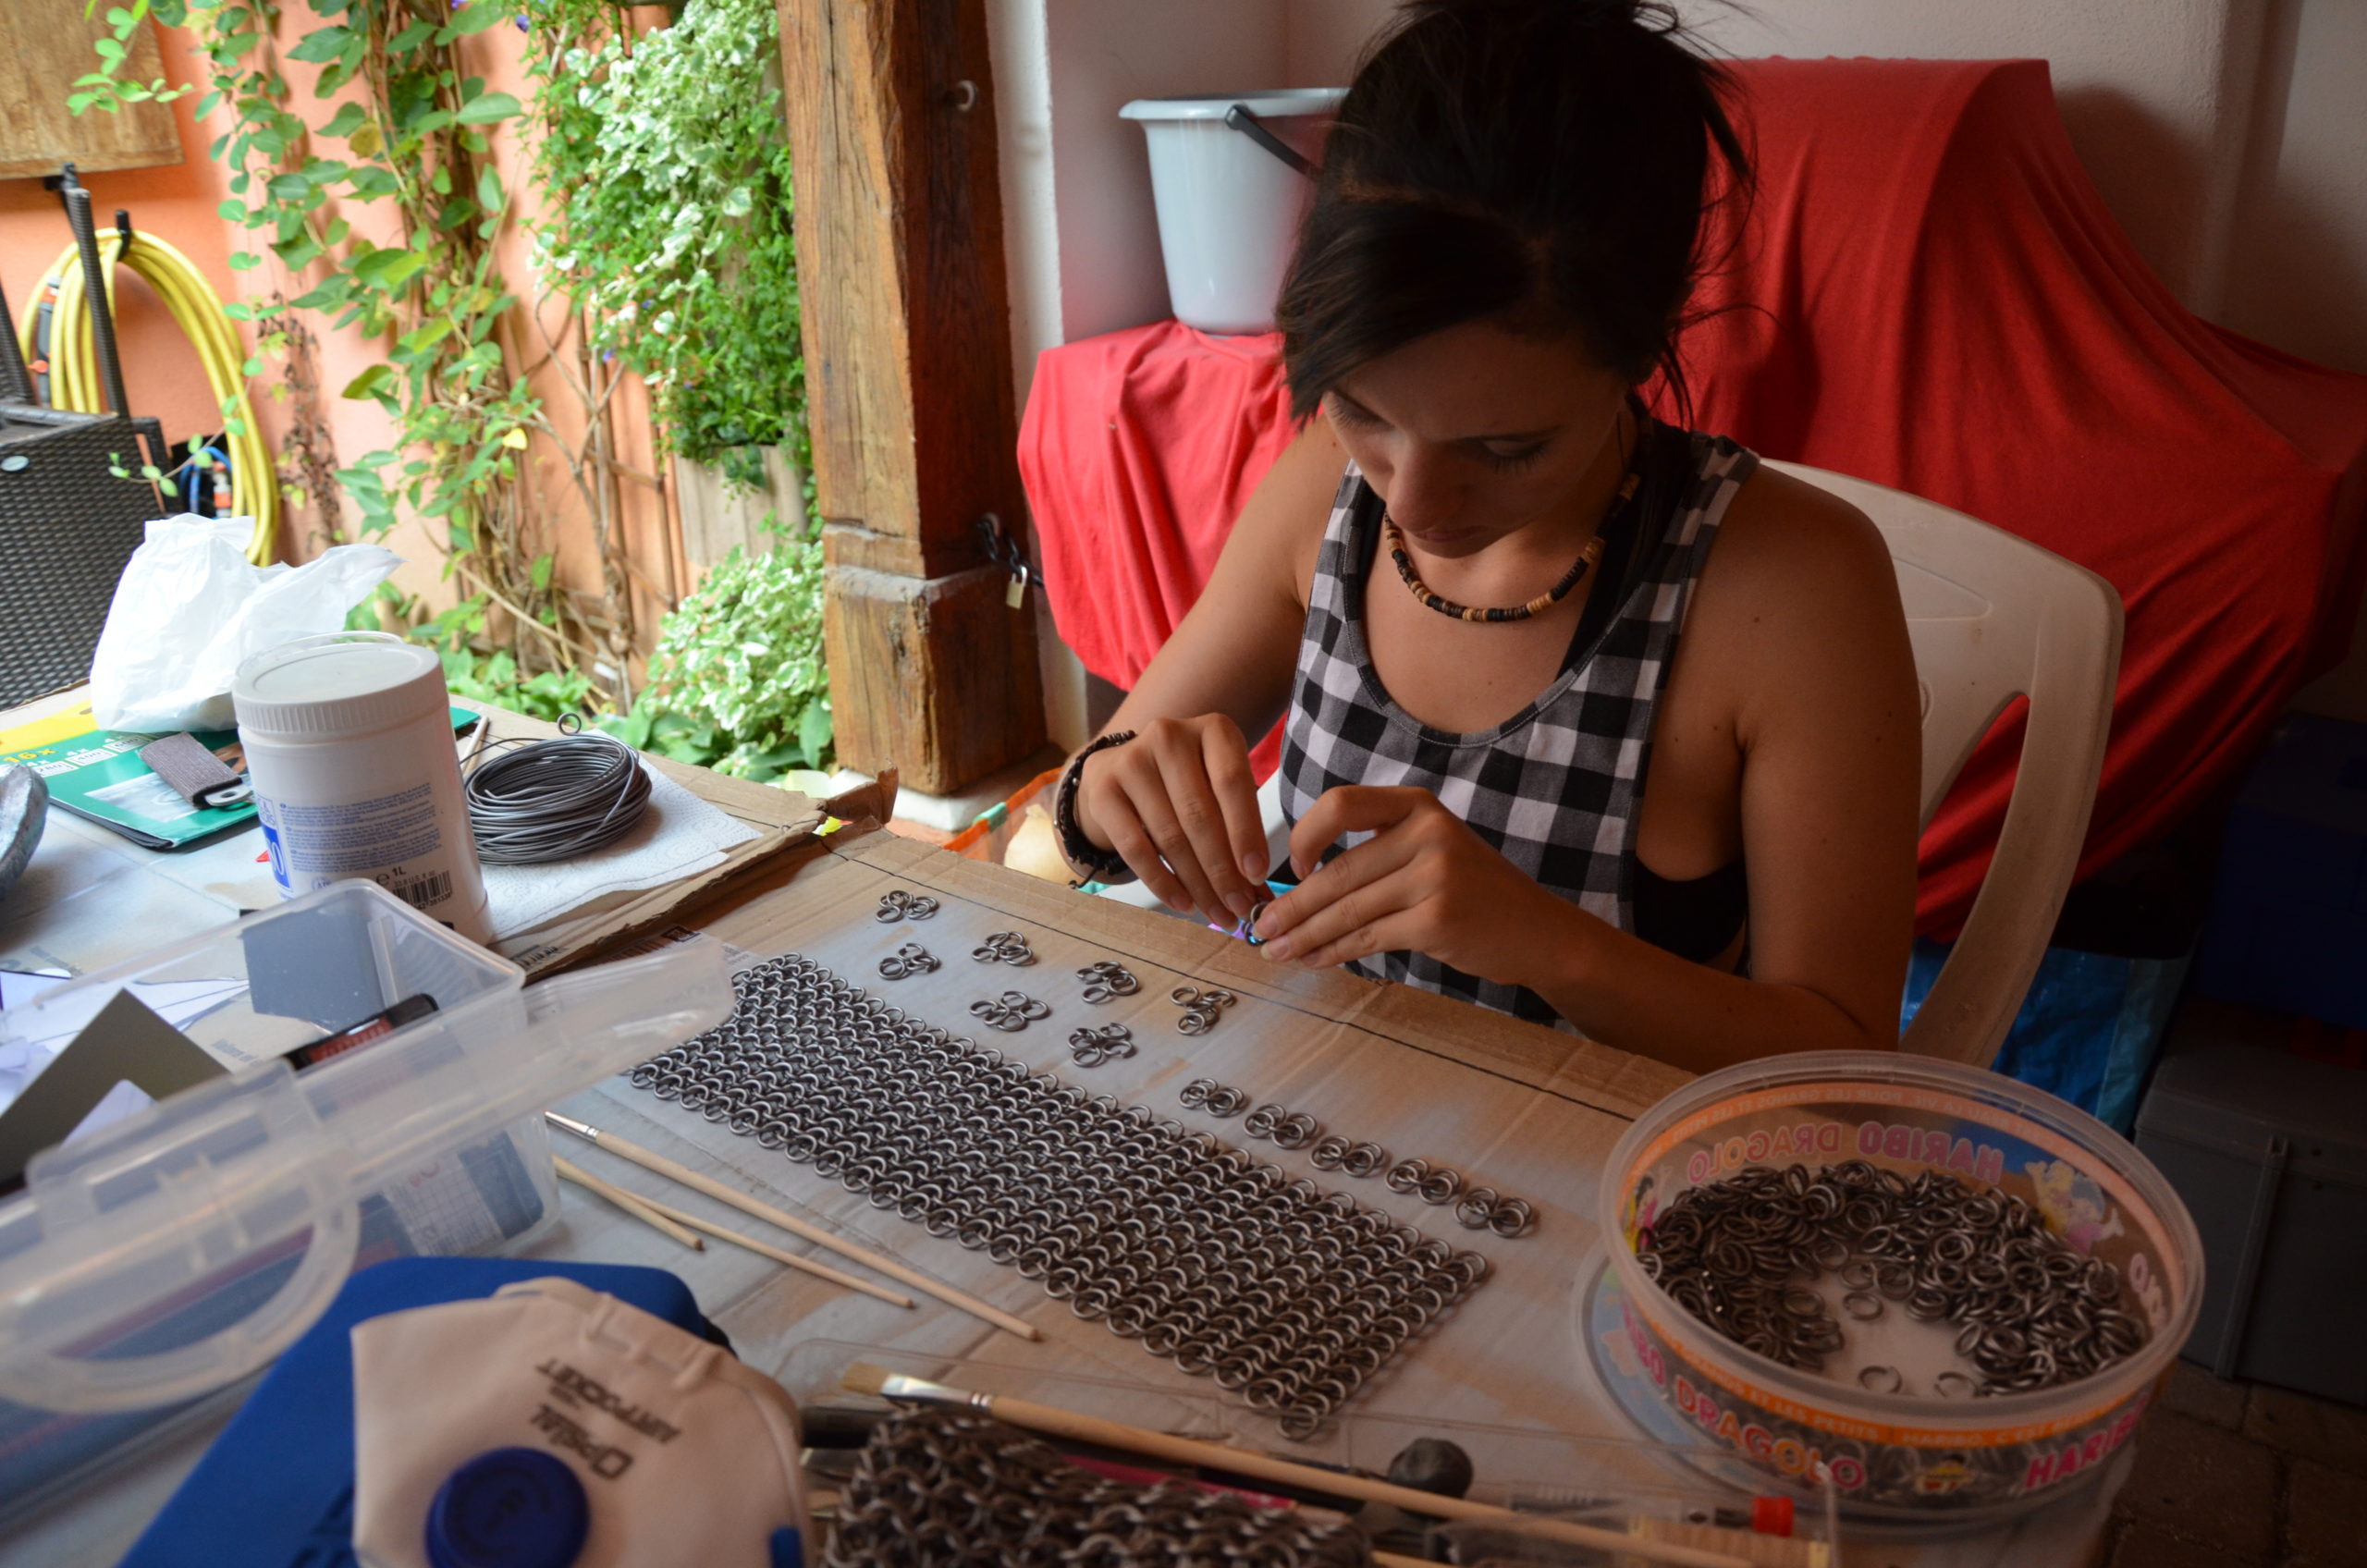
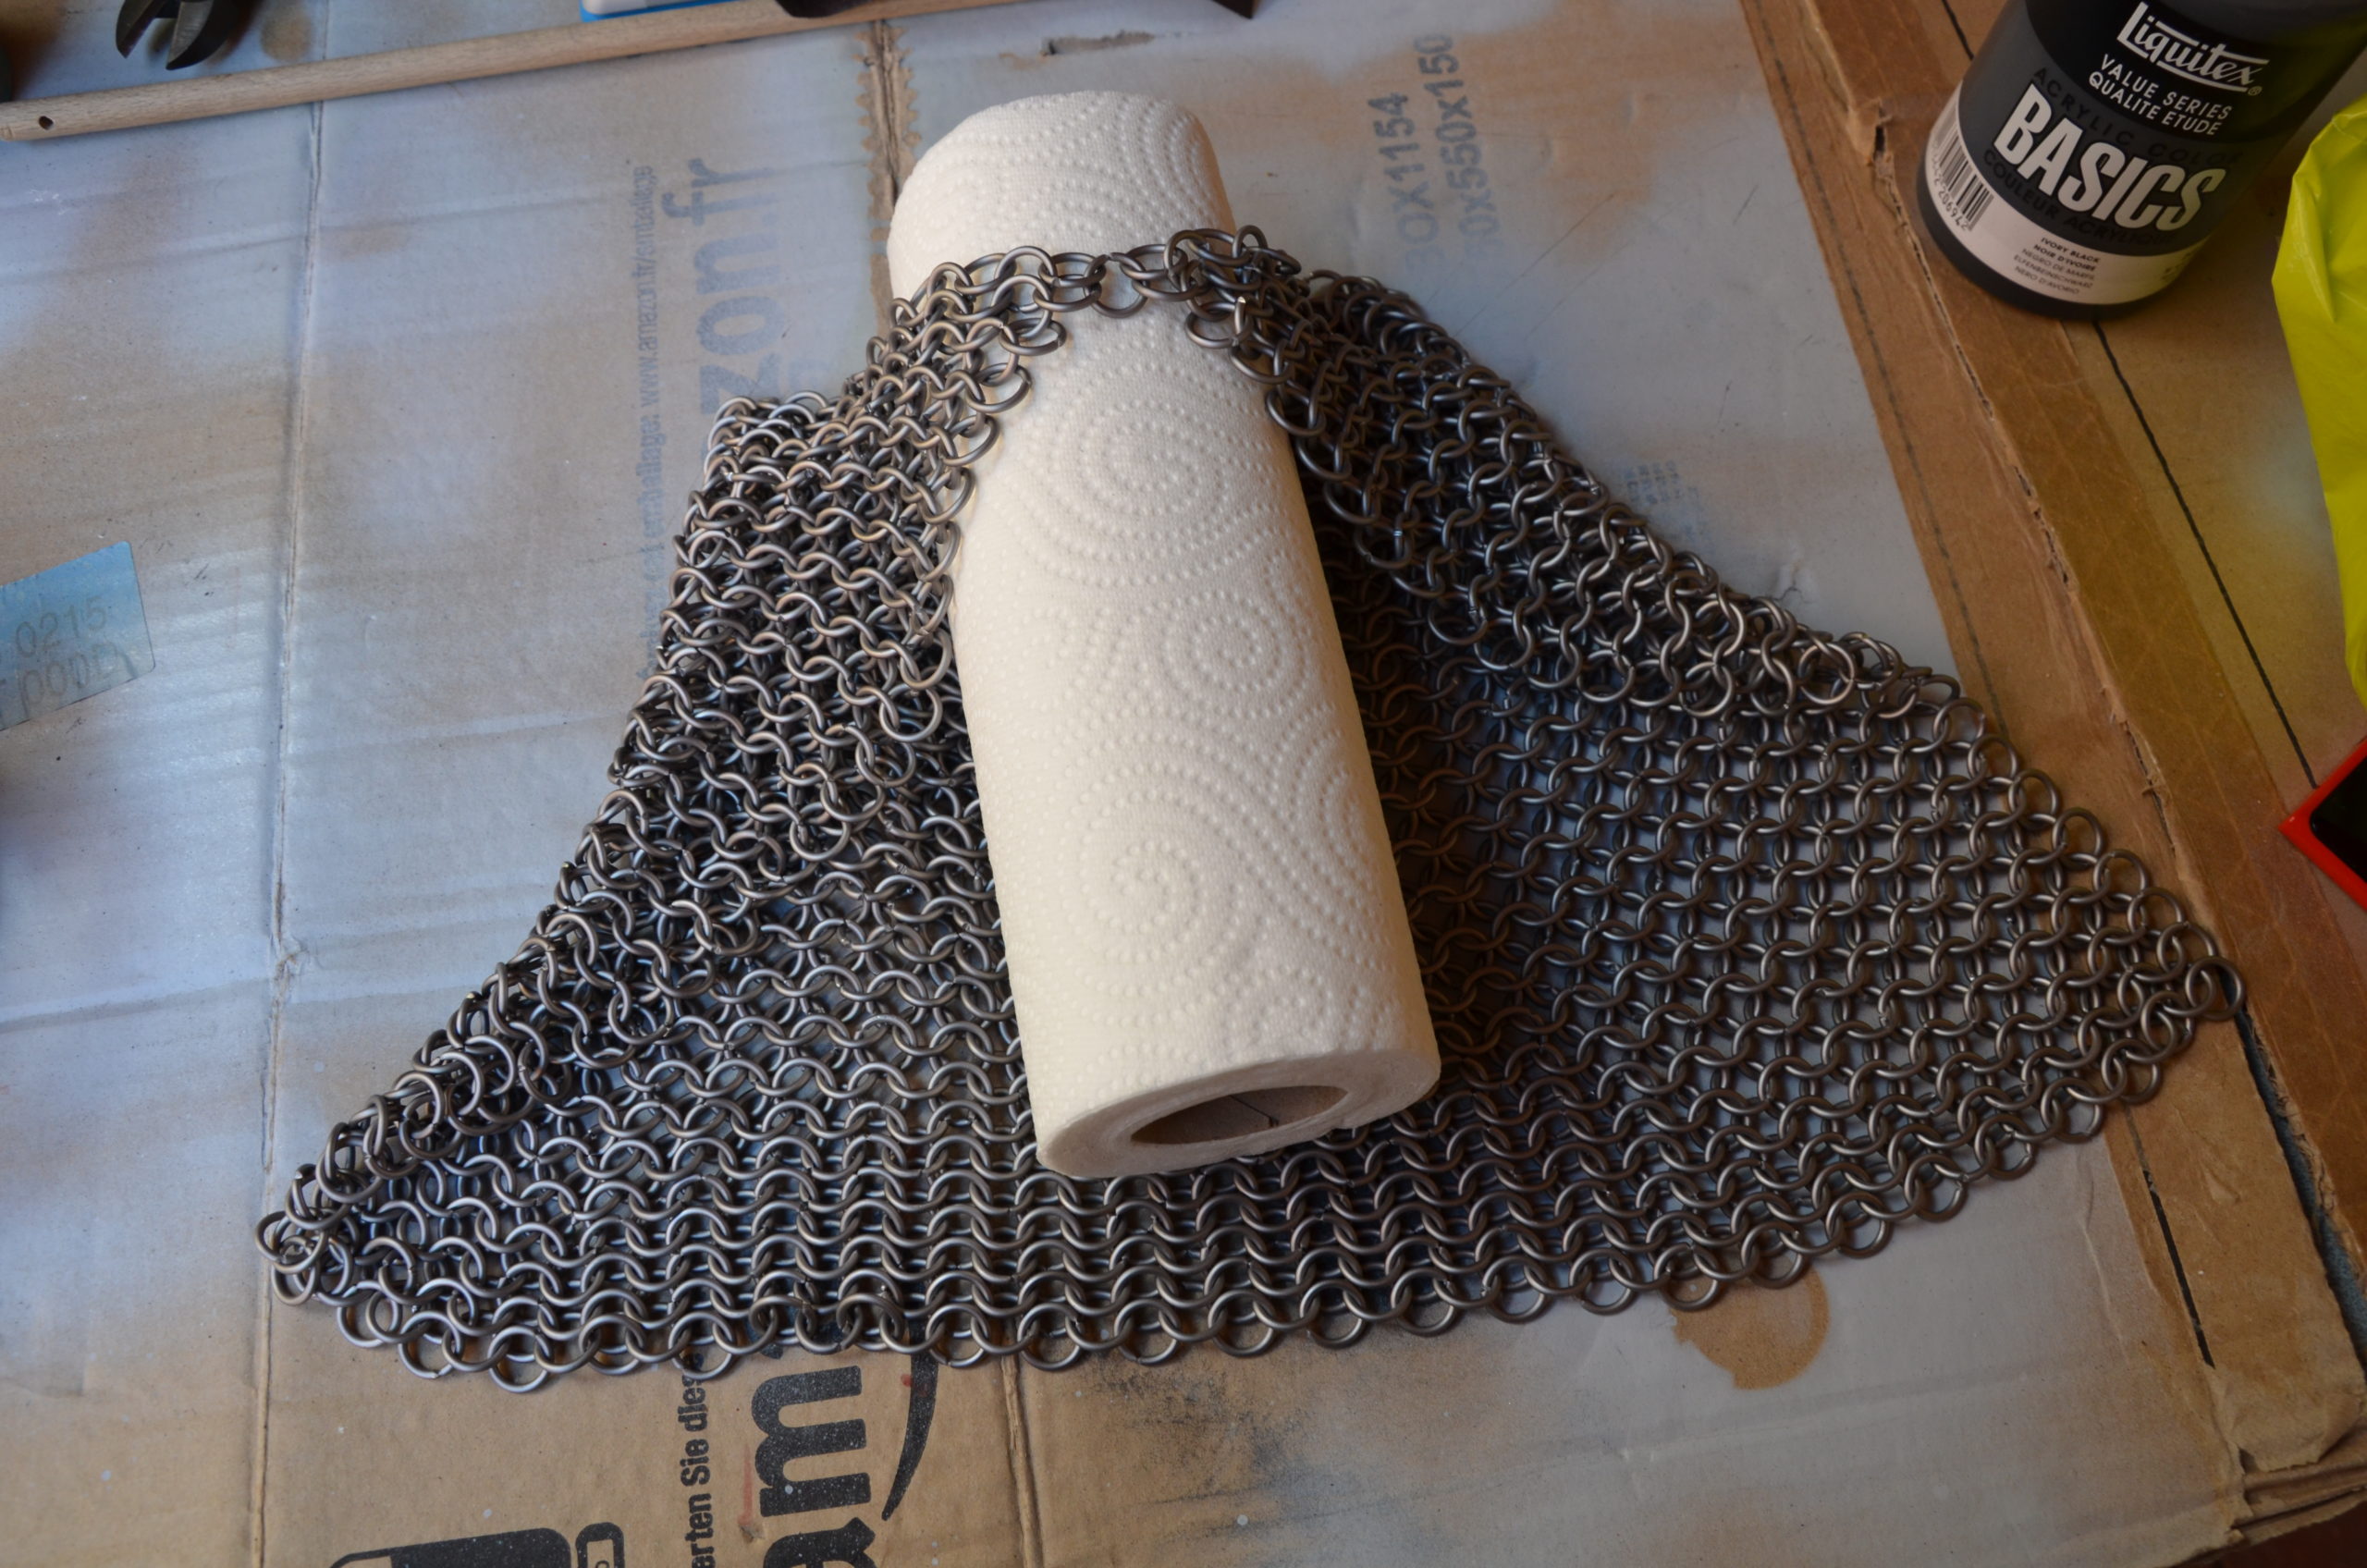
To craft the Black Knight’s chain mails, we opted for a darker plain grey.
If you want to learn more about the technique we used to do the chain mails, you can read our tutorial here.
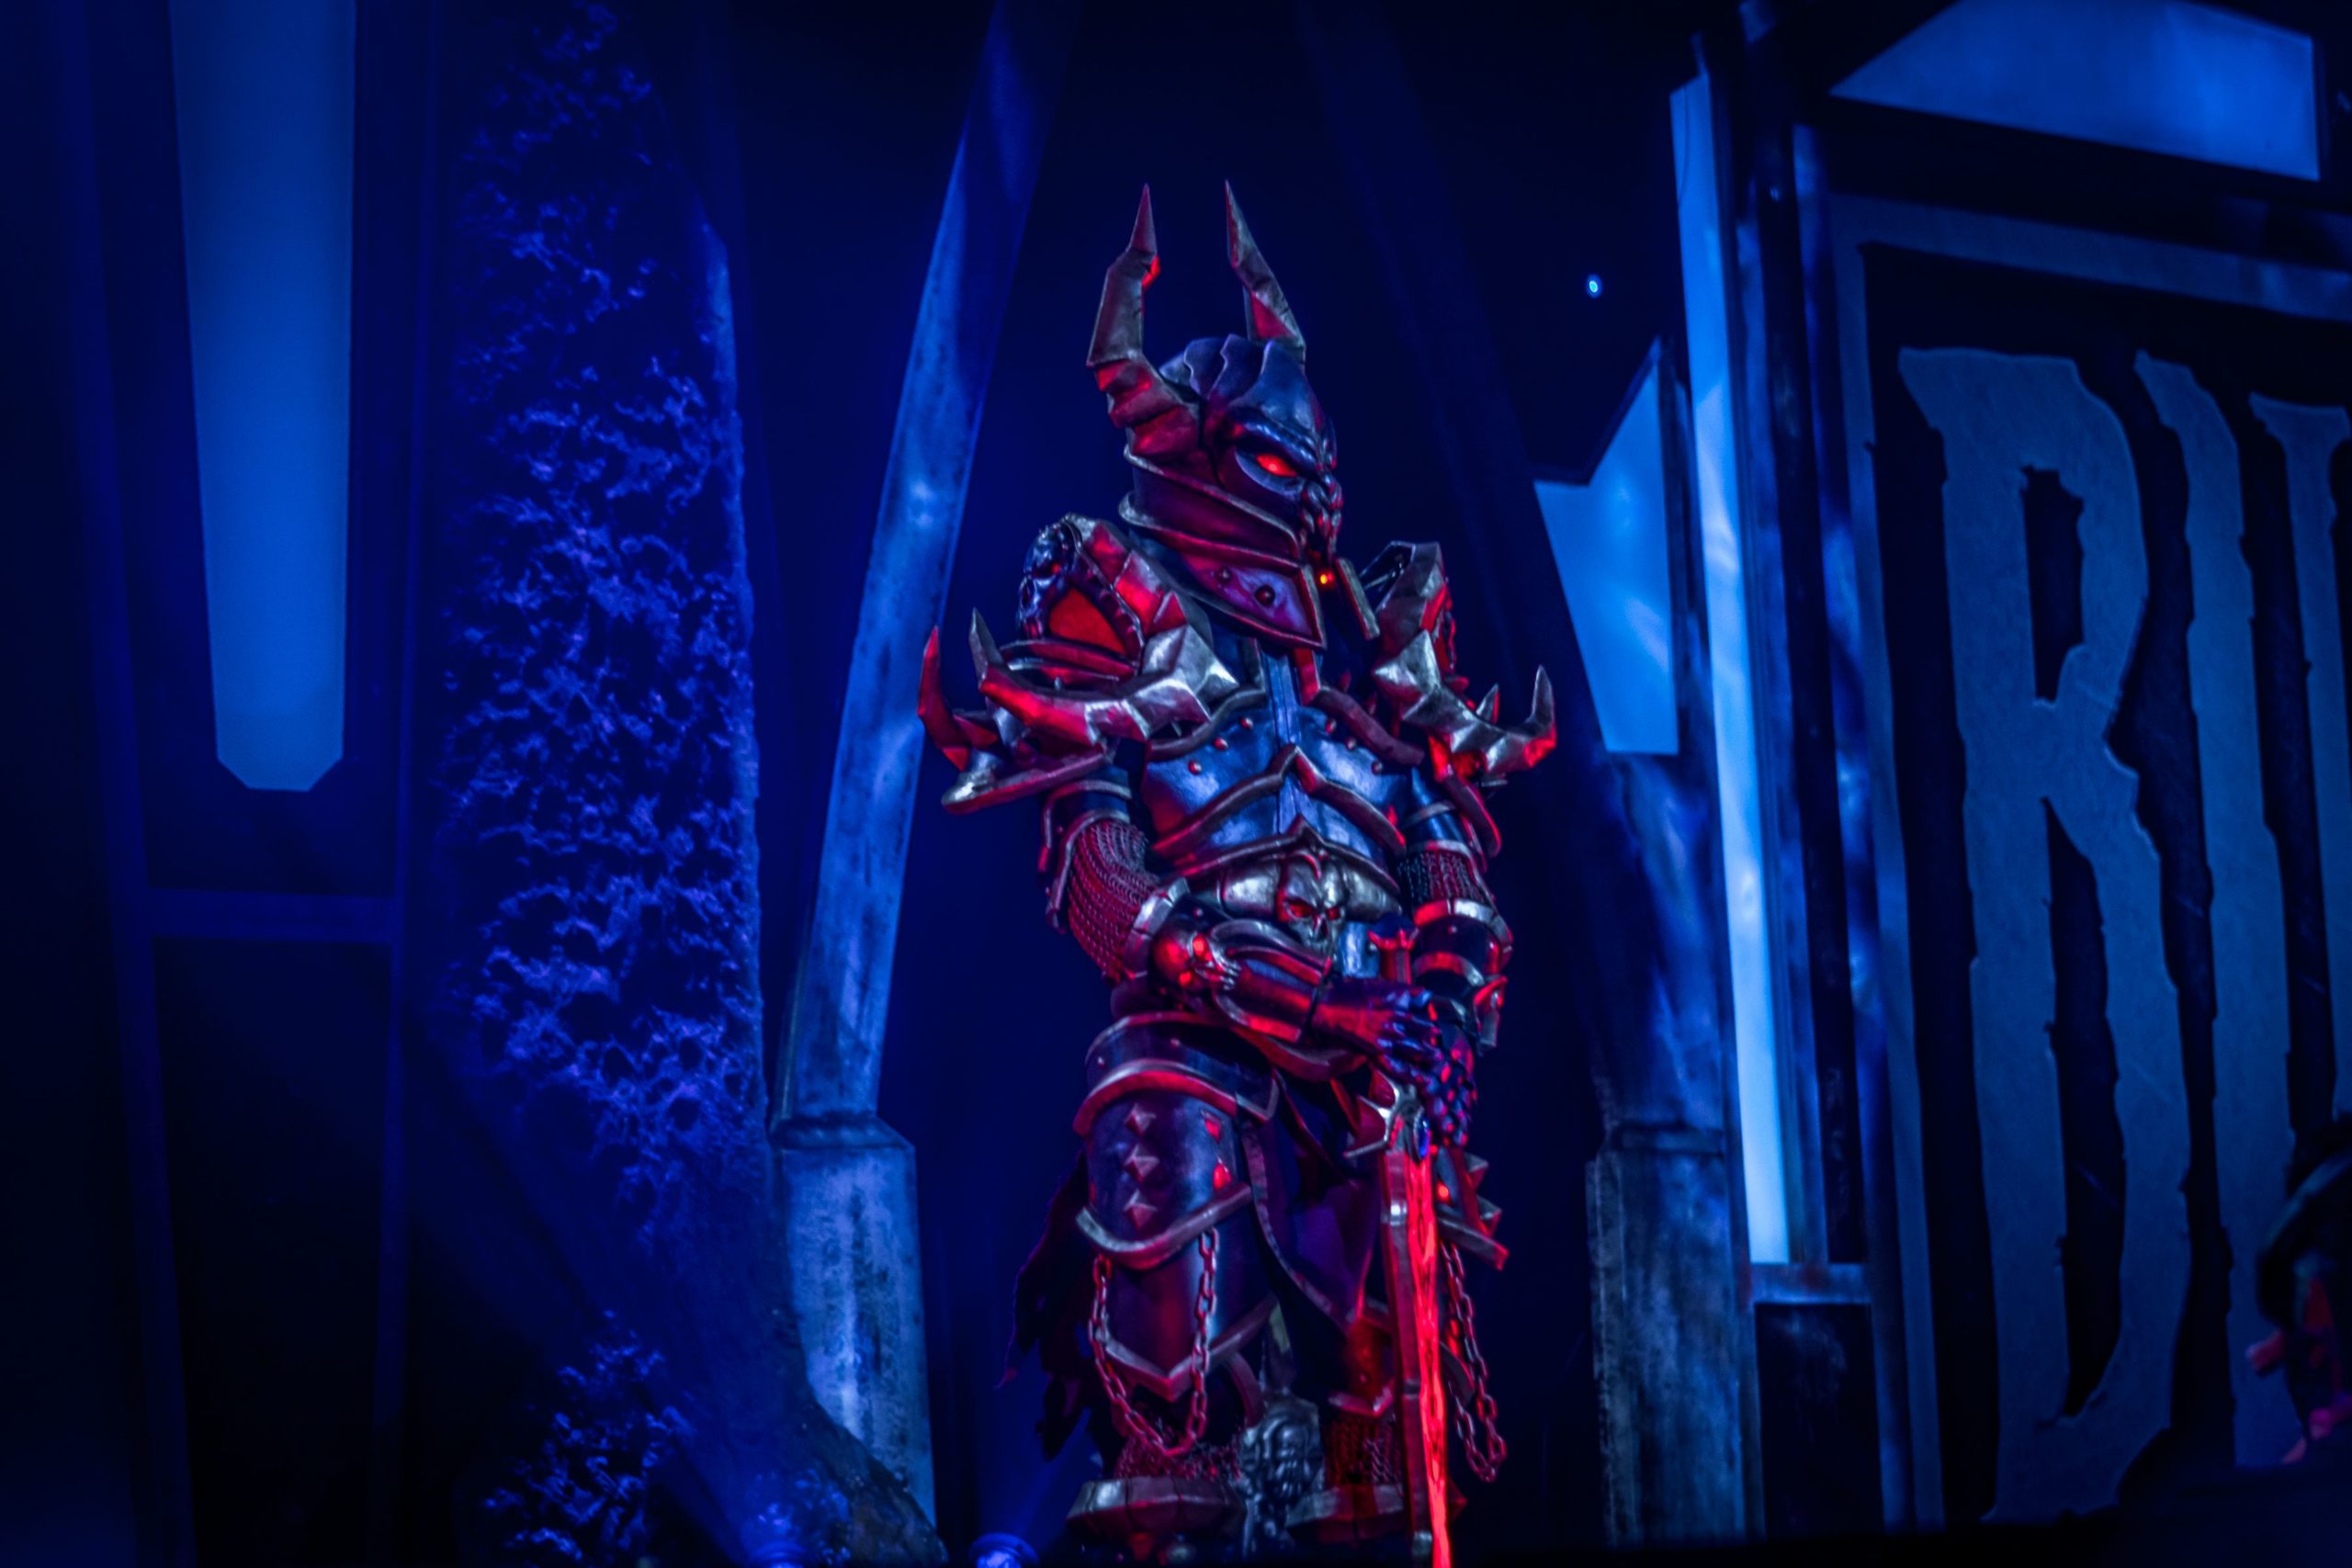
Obviously, the Black Knight wouldn’t be anything without some super badass red aura.
We made the skulls’ eyes and all of the other lit areas with Worbla’s Transpa Art. These transparent pieces were sanded on the inside and painted with red stained glass paint.
Then we attached the LEDs behind the parts using Worbla.

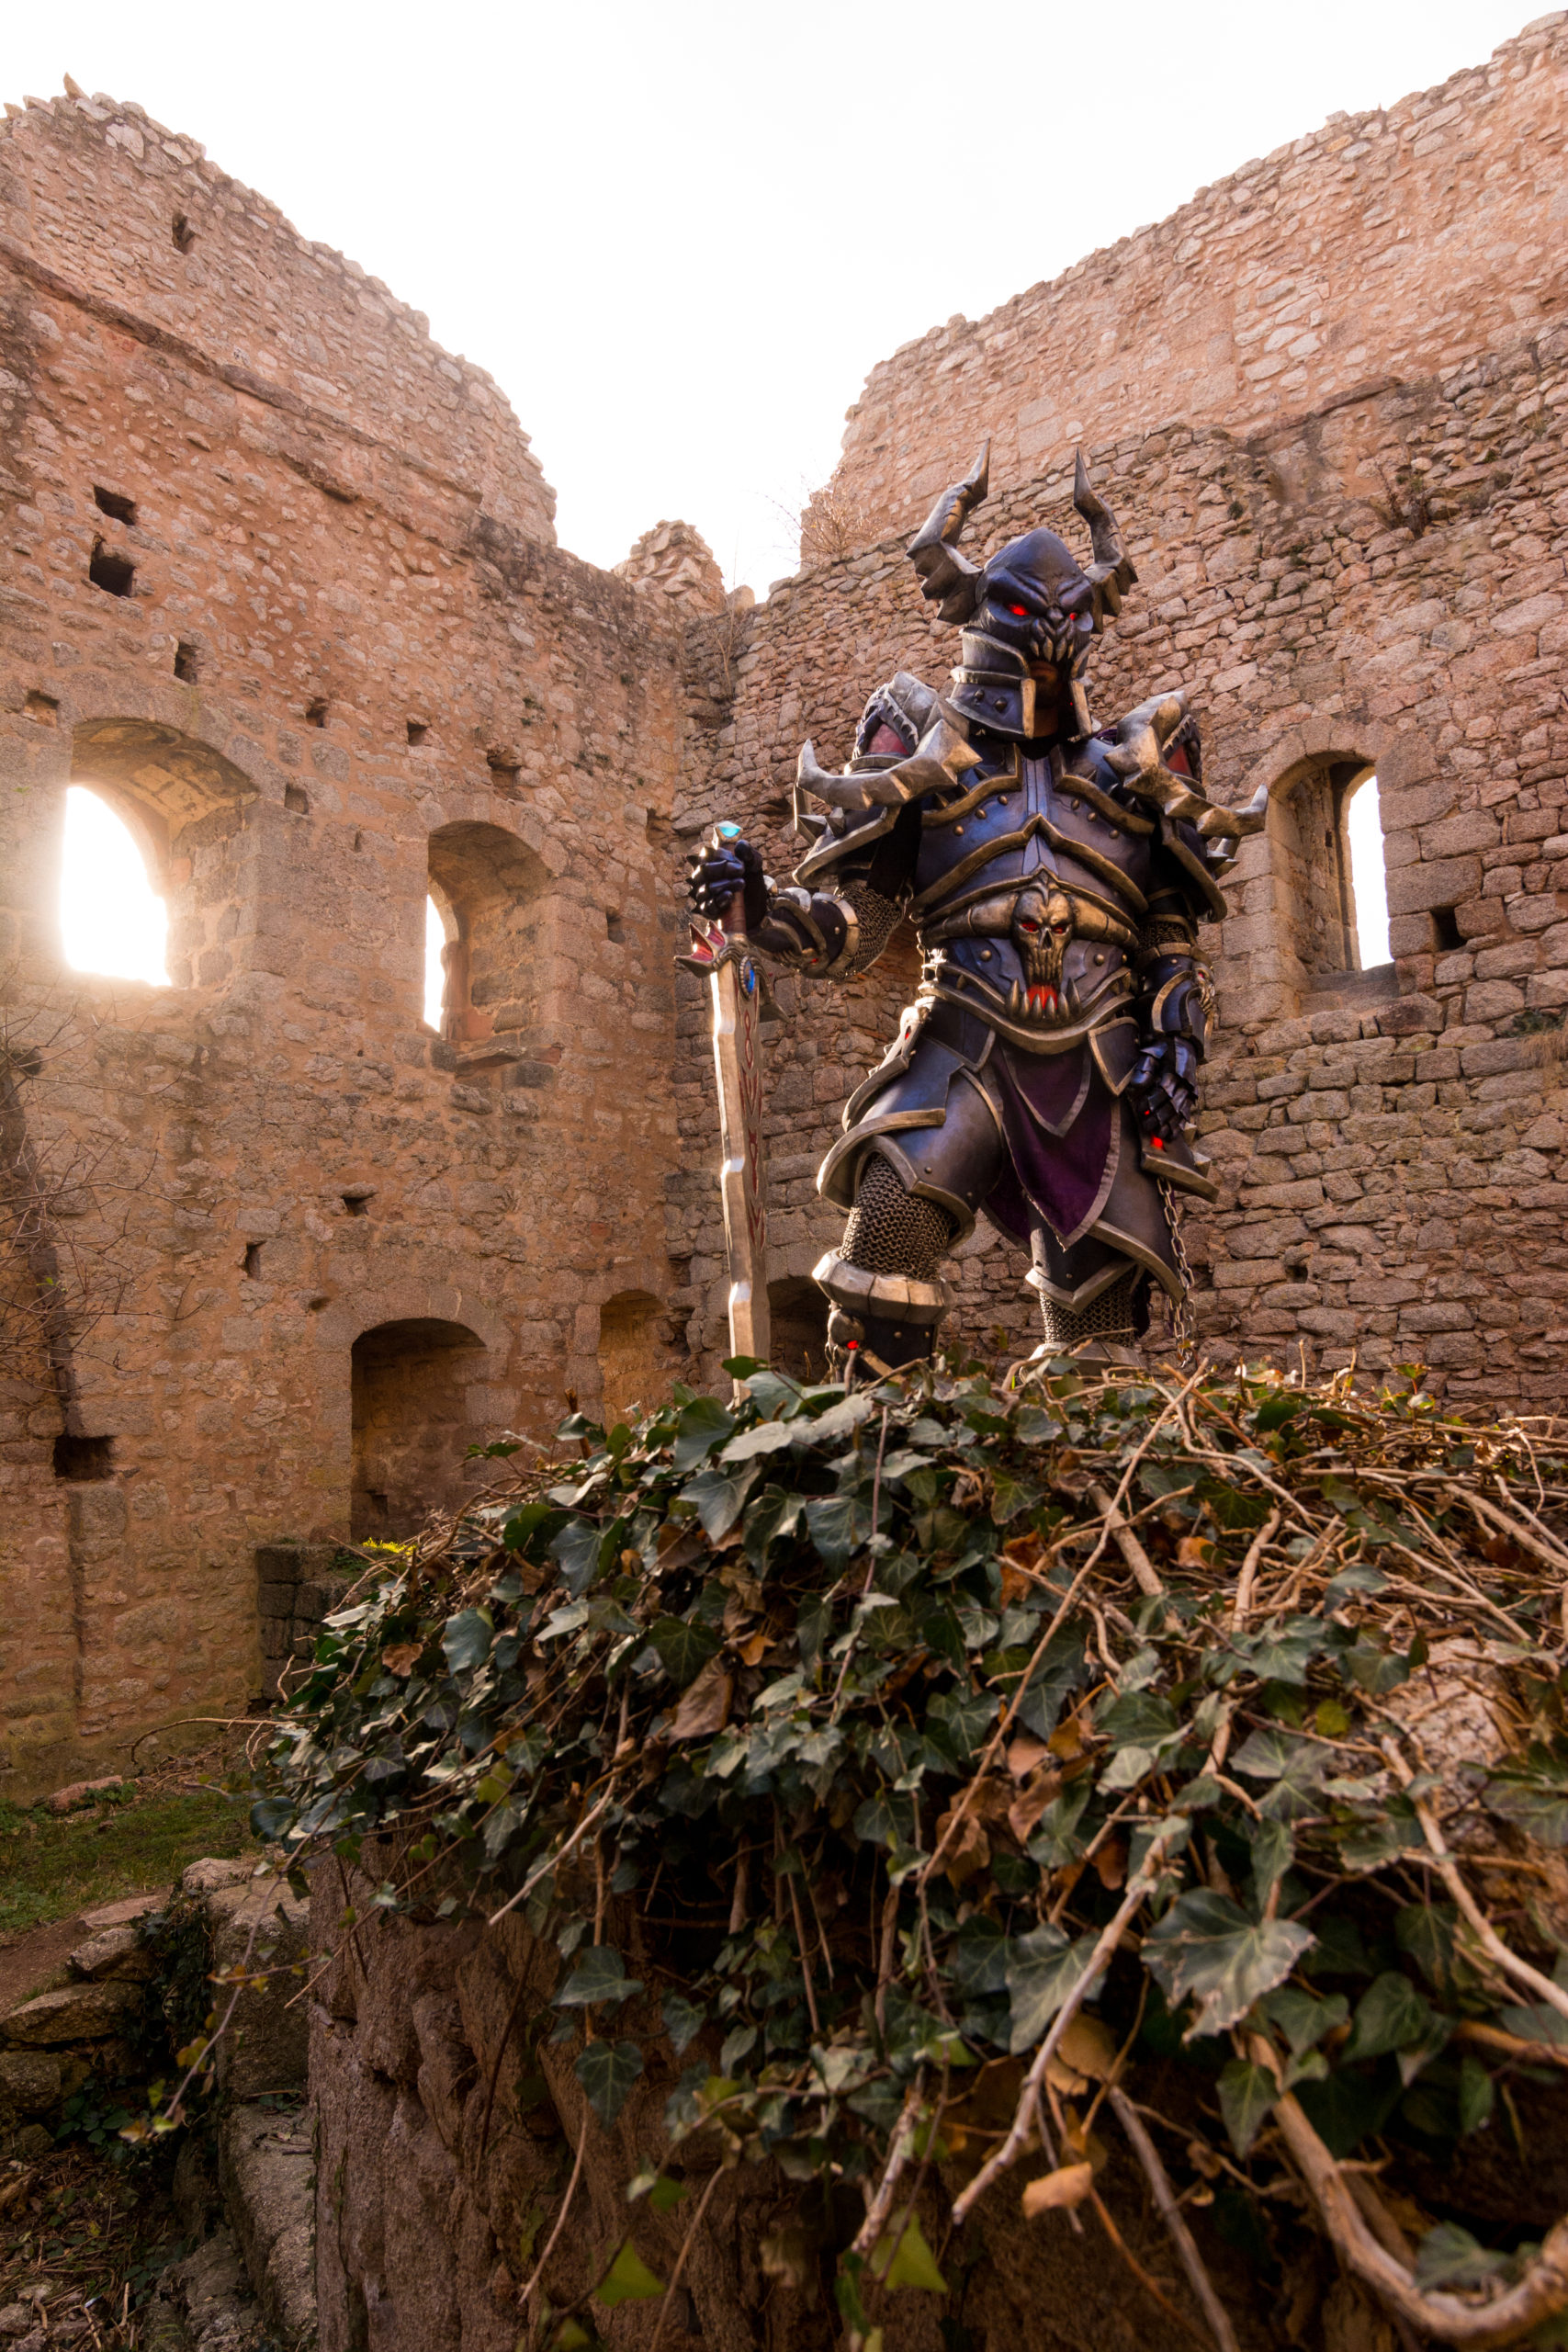
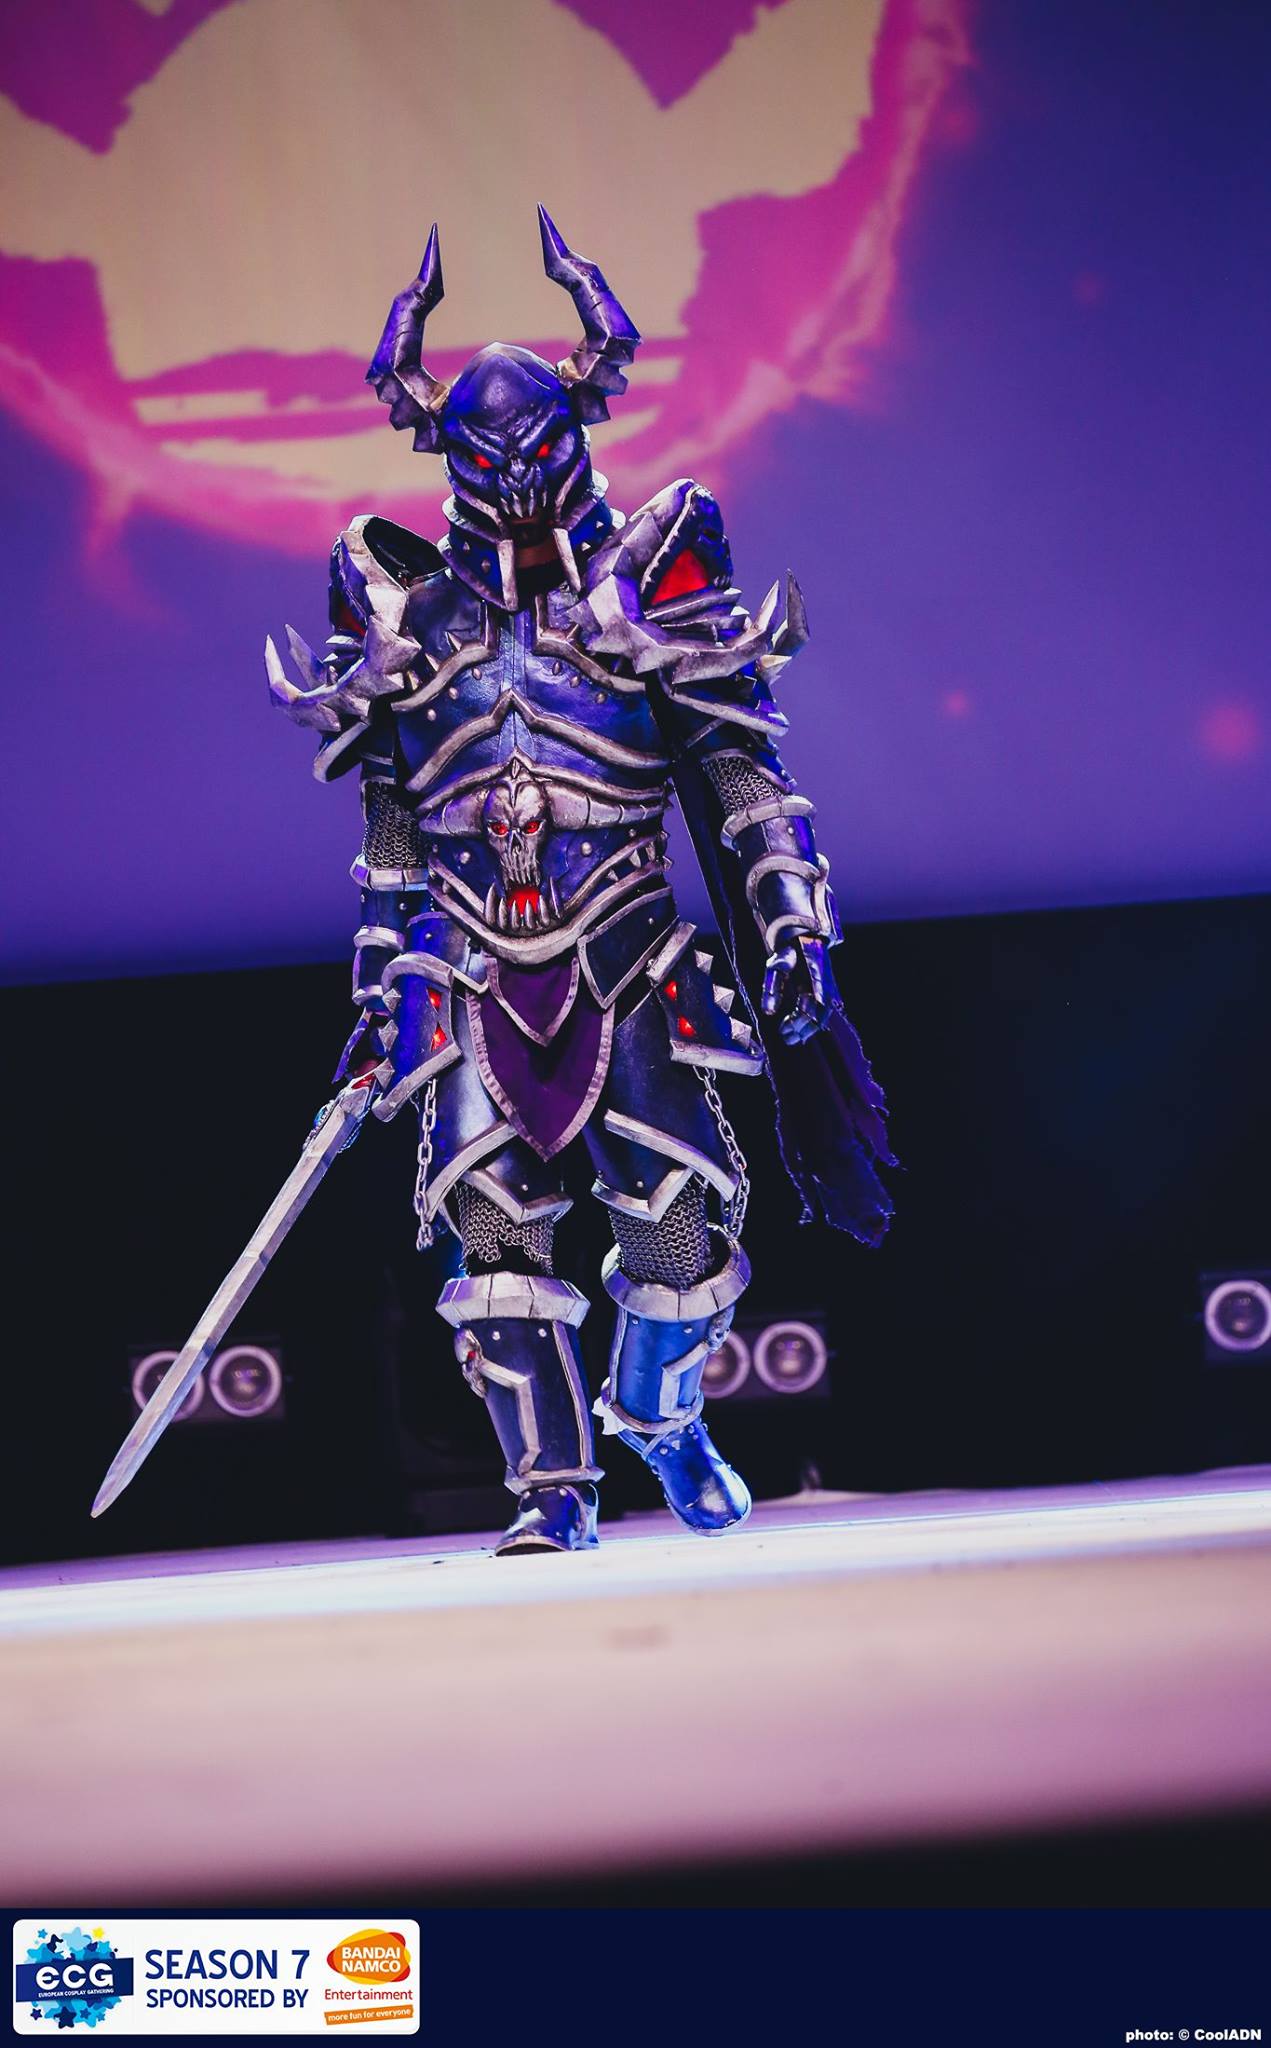
The costume was ready just in time for Blizzcon, you can check out the video and pictures right under here.
We hope you have enjoyed this making-of ! 🙂


Hi!
Thanks a lot!
Yes, the chest and back plates are connected. We used straps with snaps 😉
Manuel
Hi,
a little question:
Are the chest and back plates connected to each other?
If so, how did you do it? What kind of connections do you prefer between the different pieces of armor?
Thank you for your reply 🙂
P.S. your costumes are awesome 😉 🙂