Process : Power Gaming Series 2018 Trophies
Every year, the Power House Gaming school schedules a big E-sport event at the “Palais des Sports” of Mulhouse (a “traditional” sports venues in the city), the Power Gaming Series. It serves as an end-of-year exam for the students of the school, who must set up a spectacular competition putting face to face the best local teams to grab a cashprize of more than 7500 €.
The school wanted to make its event shine with a trophy worthy of its ambitions. We had already made the 2017’s edition (much more modest by the way), and it was only natural to us to offer our services to PHG for this year’s trophies as well.
In this article we will show you the process of creating this resin juggernaut, from the initial sketches to the studio photos, with all of the (sometimes difficult) manufacturing stages.
Let’s go!
Concept
Sketches
To begin the project, Marie drew some sketches to know in which direction we were going.

We opted for transparent crystals quite early, because the rendering of this type of trophy is excellent, as evidenced by many achievements of the master in the field: Volpin Props.
Here we went for the “spinning flames” version because of its imposing look and impressive physics.
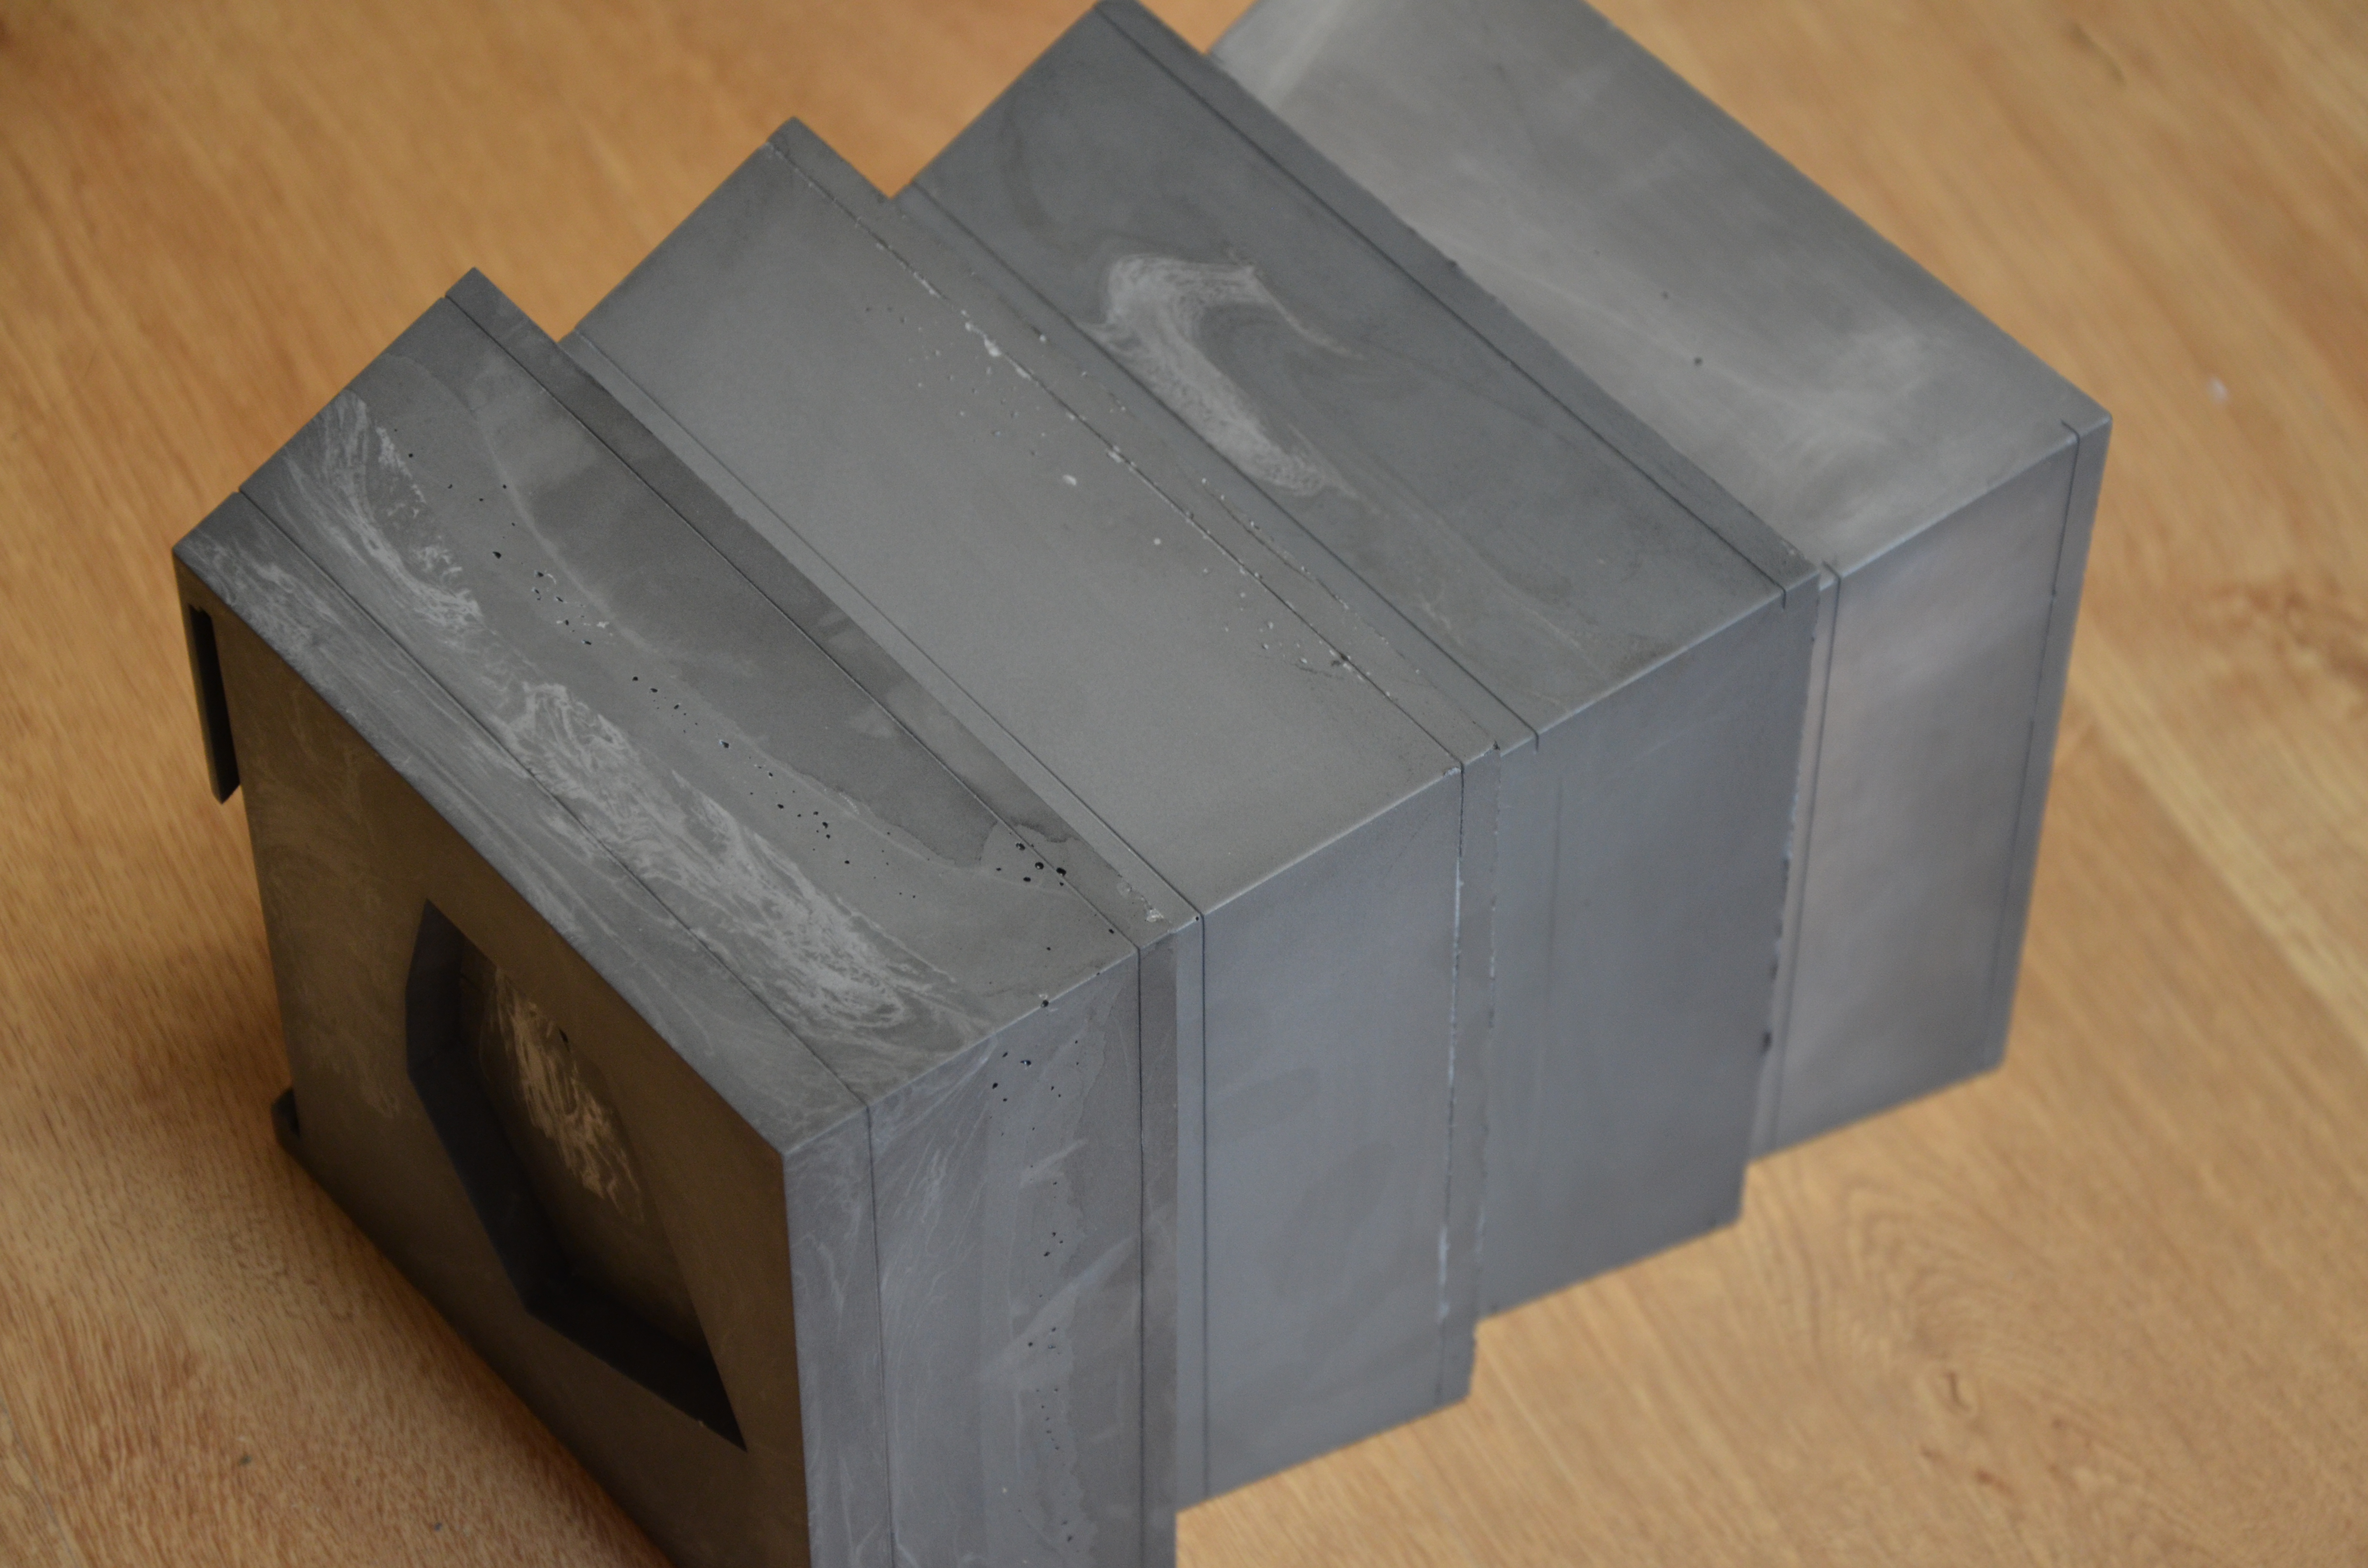
The base is massive to stay consistent with the proportions of the flame, but it remains very sober with its truncated pyramid shape (or “keyboard key” shape as we like to call it) and the two grooves that run all around it. This keeps the viewer’s attention on the gem.
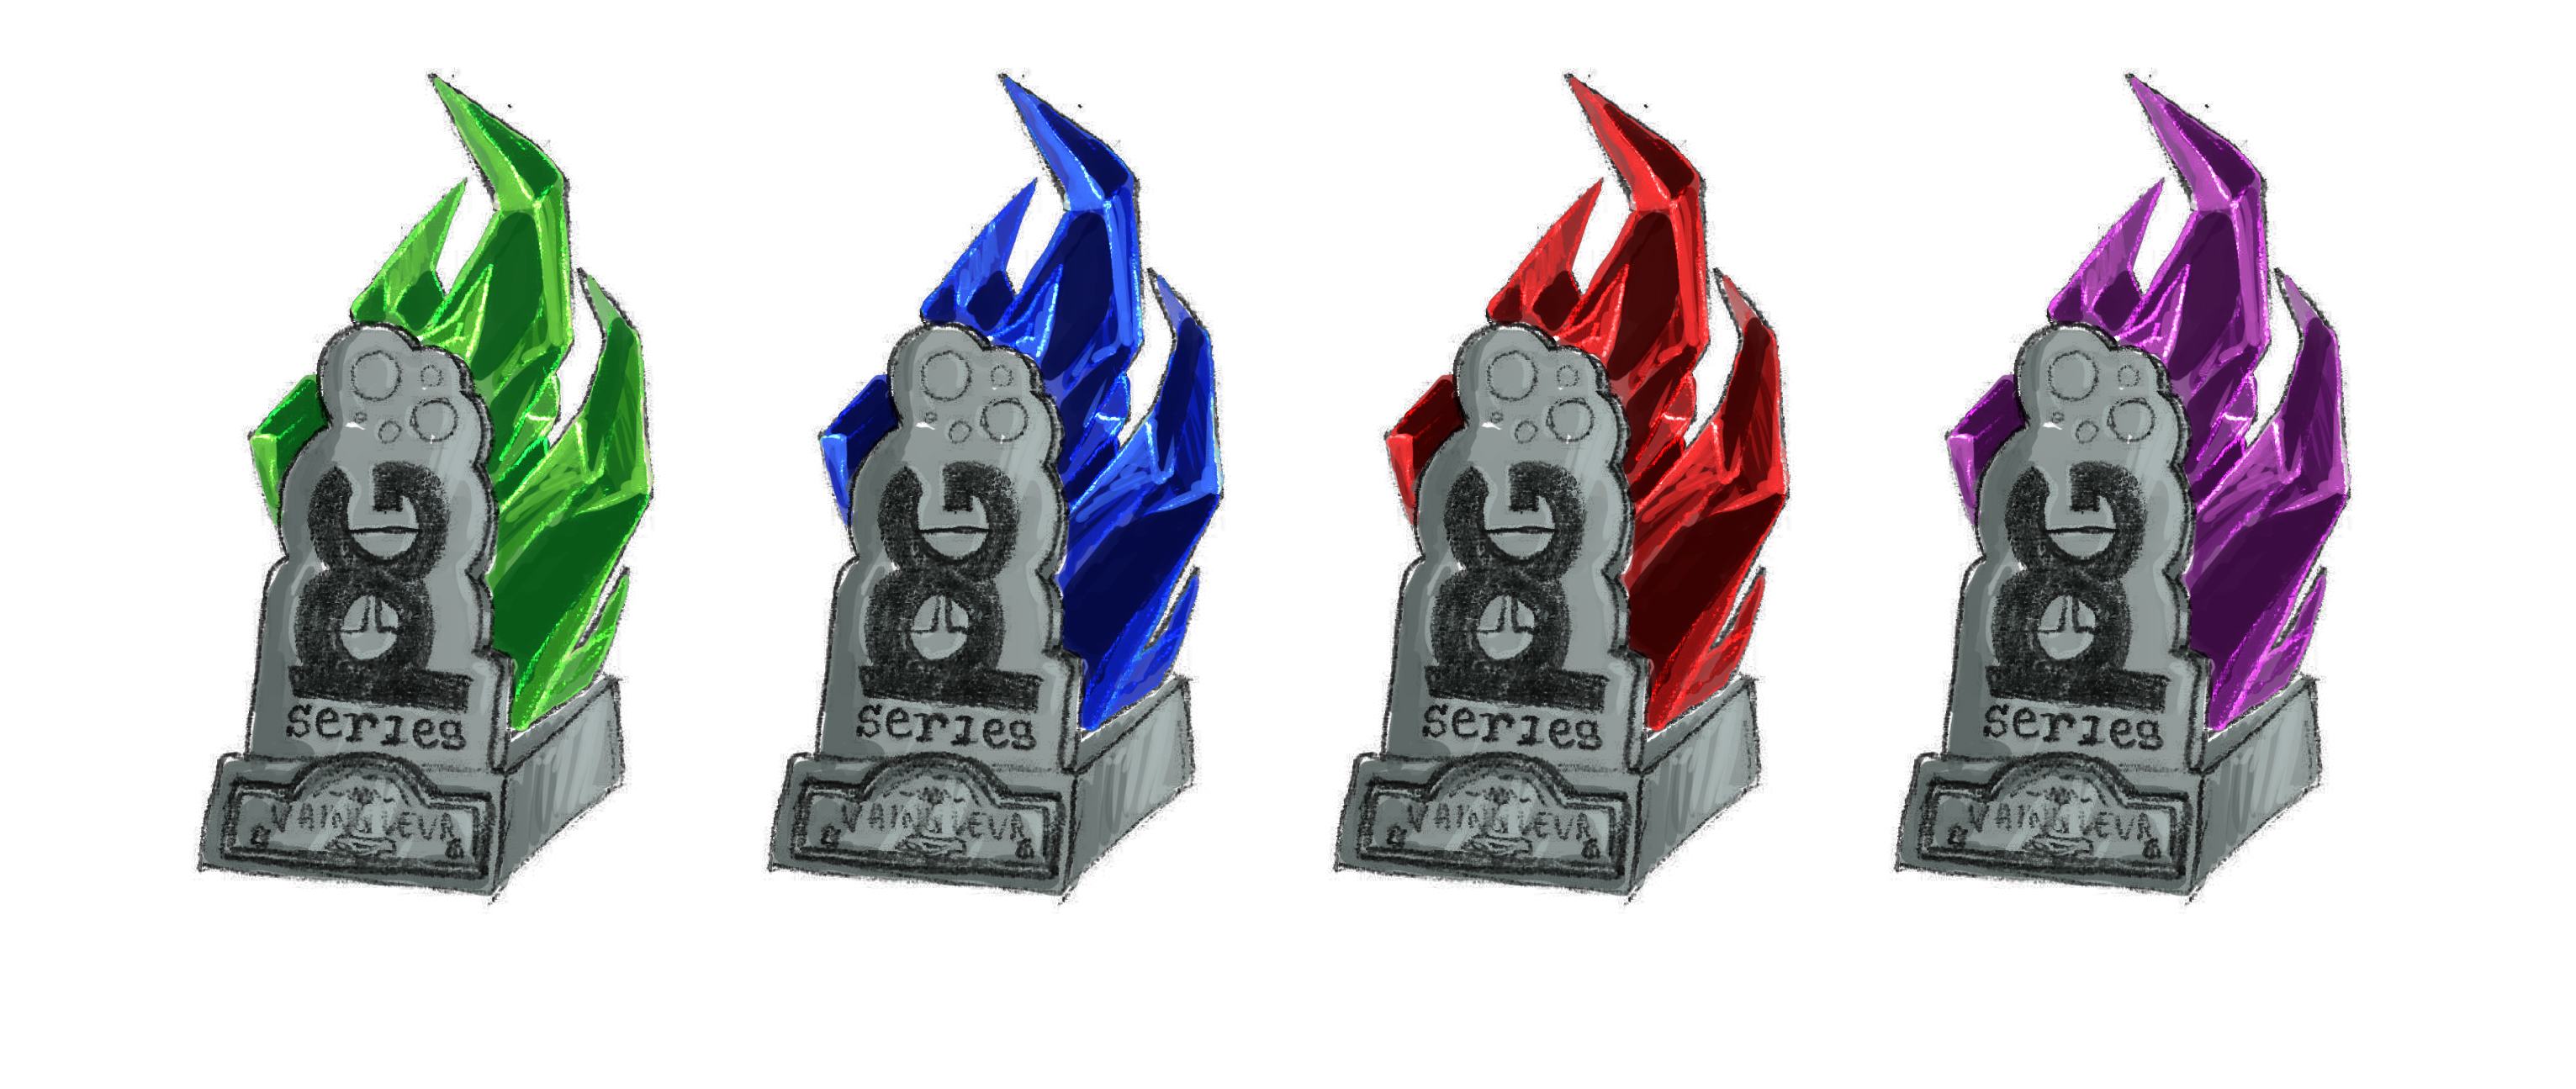
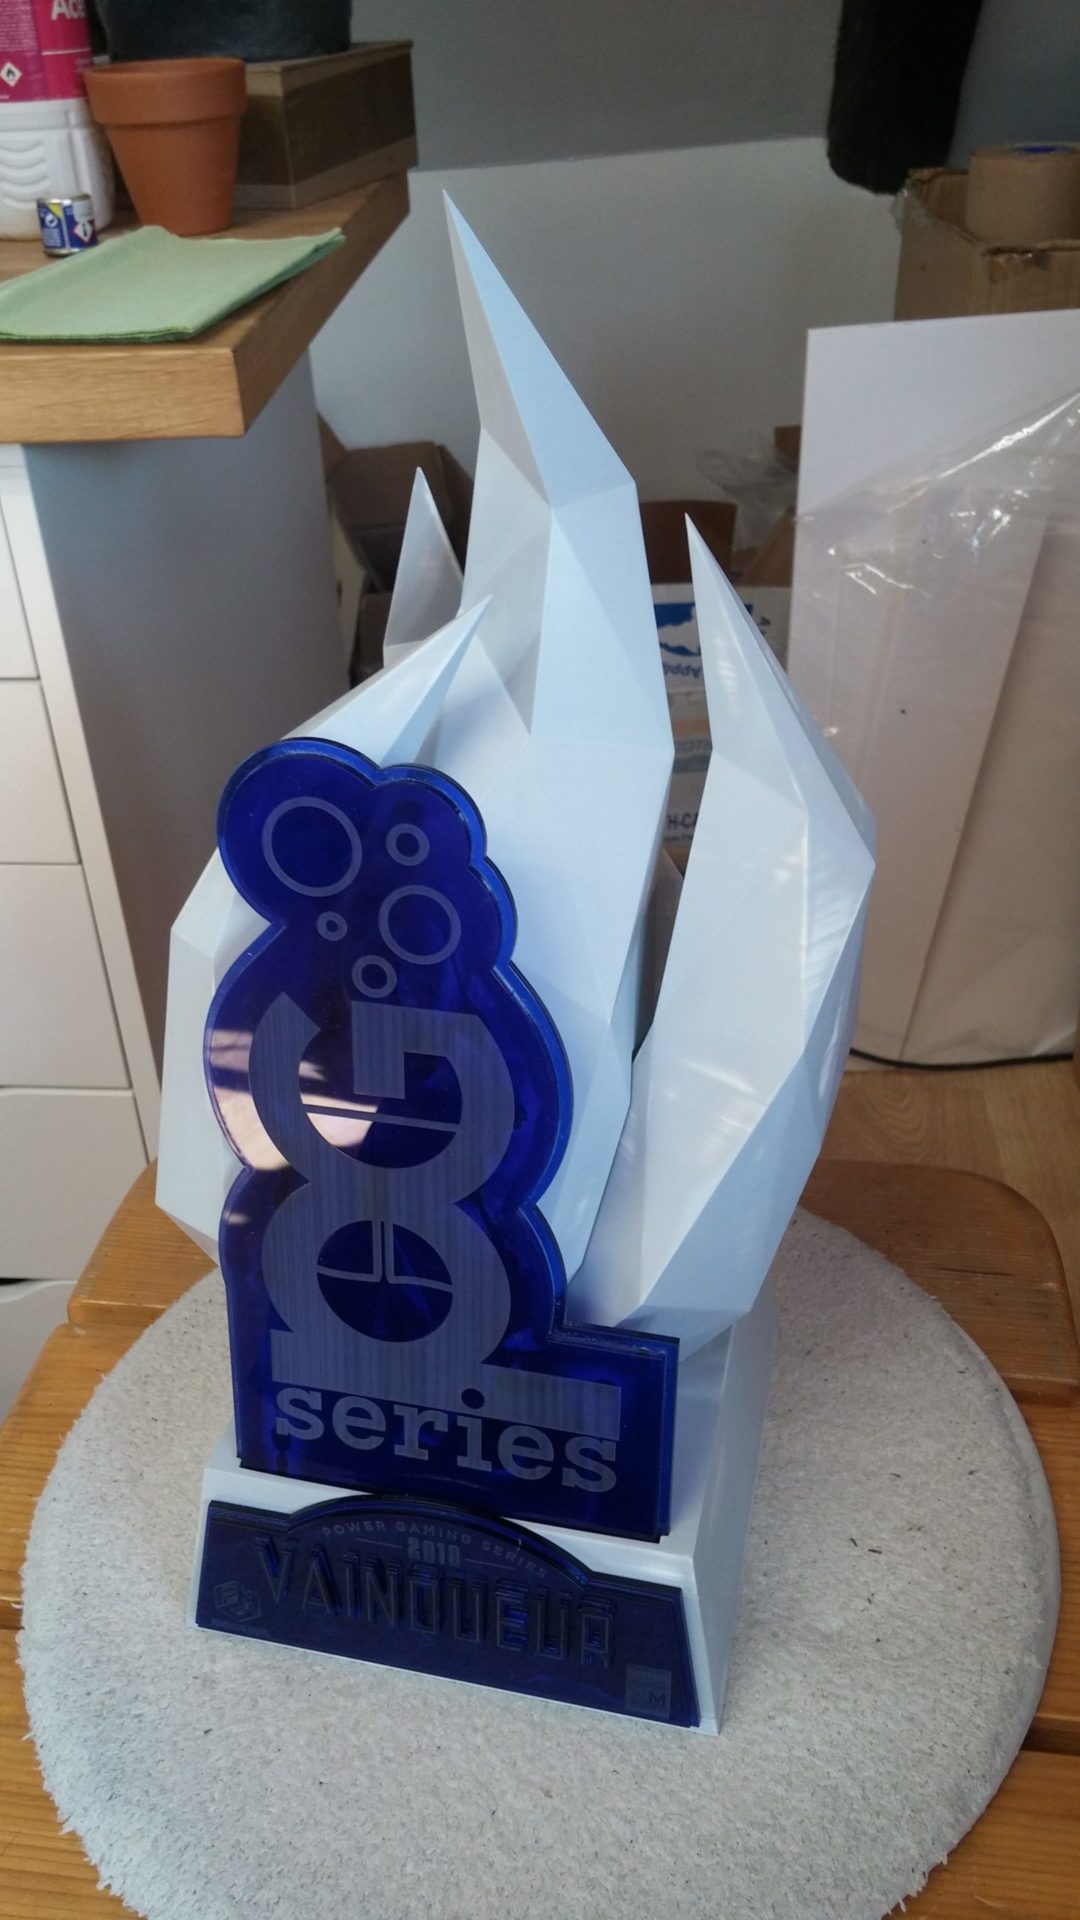
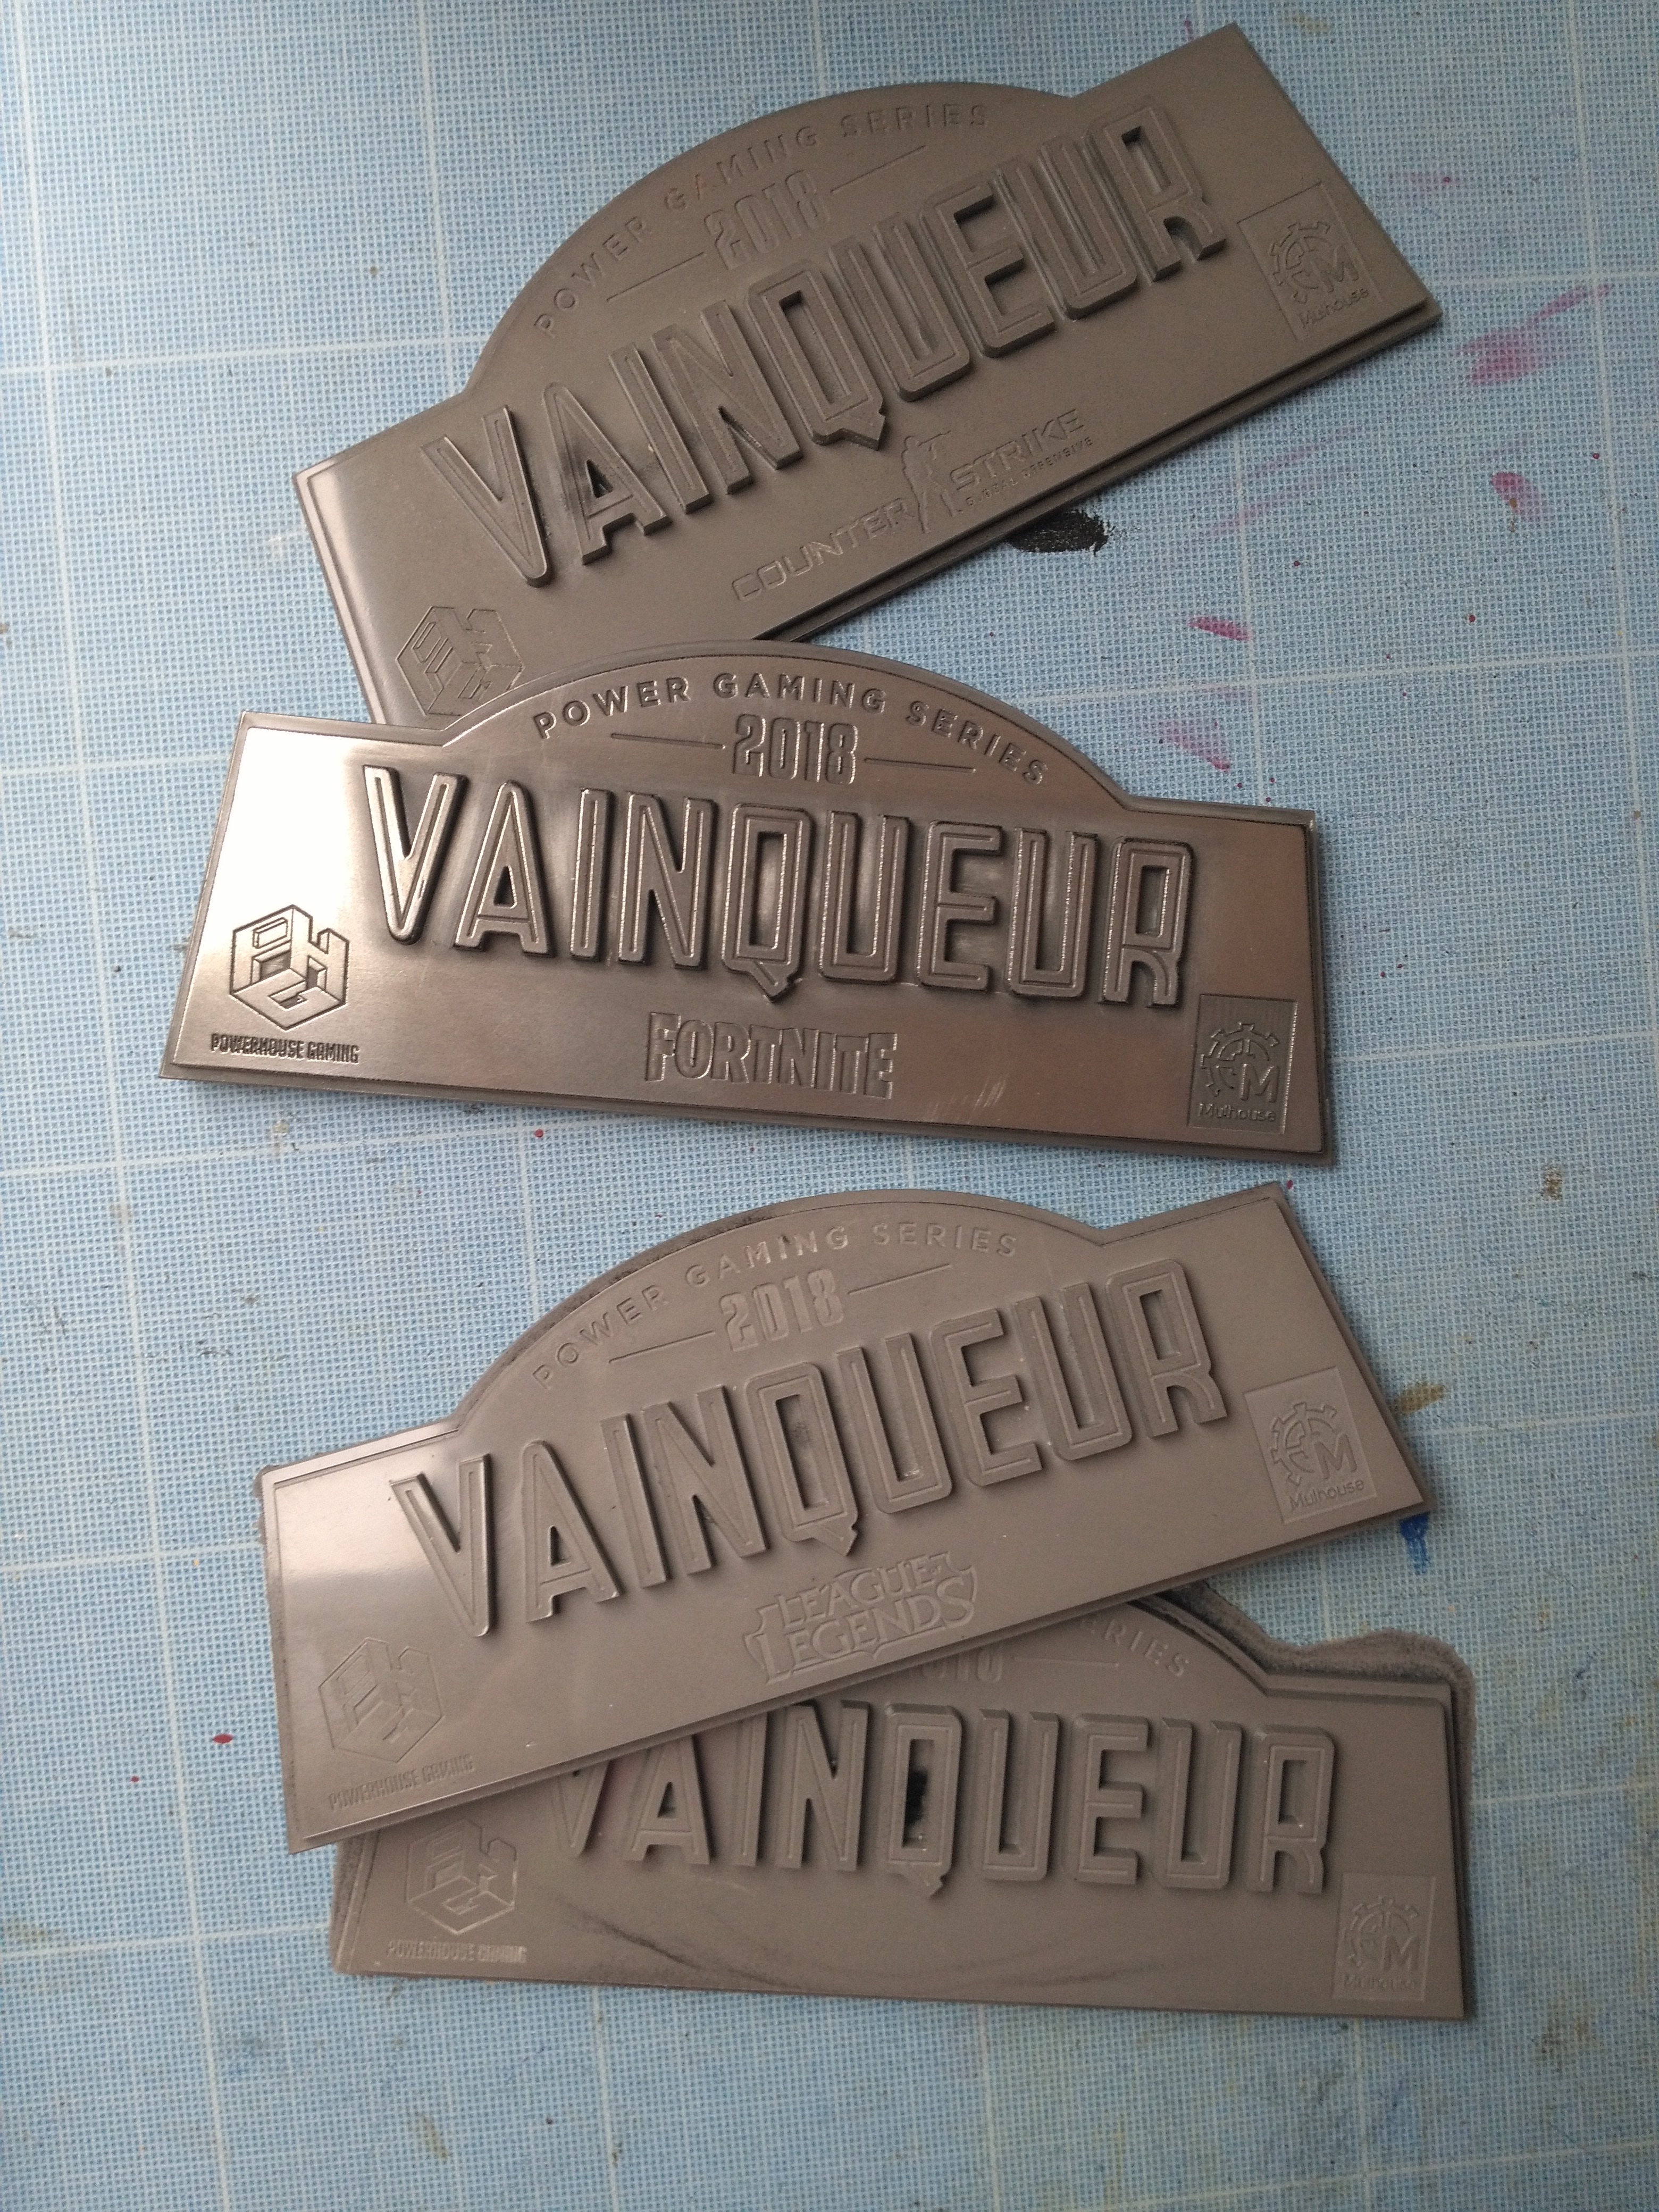
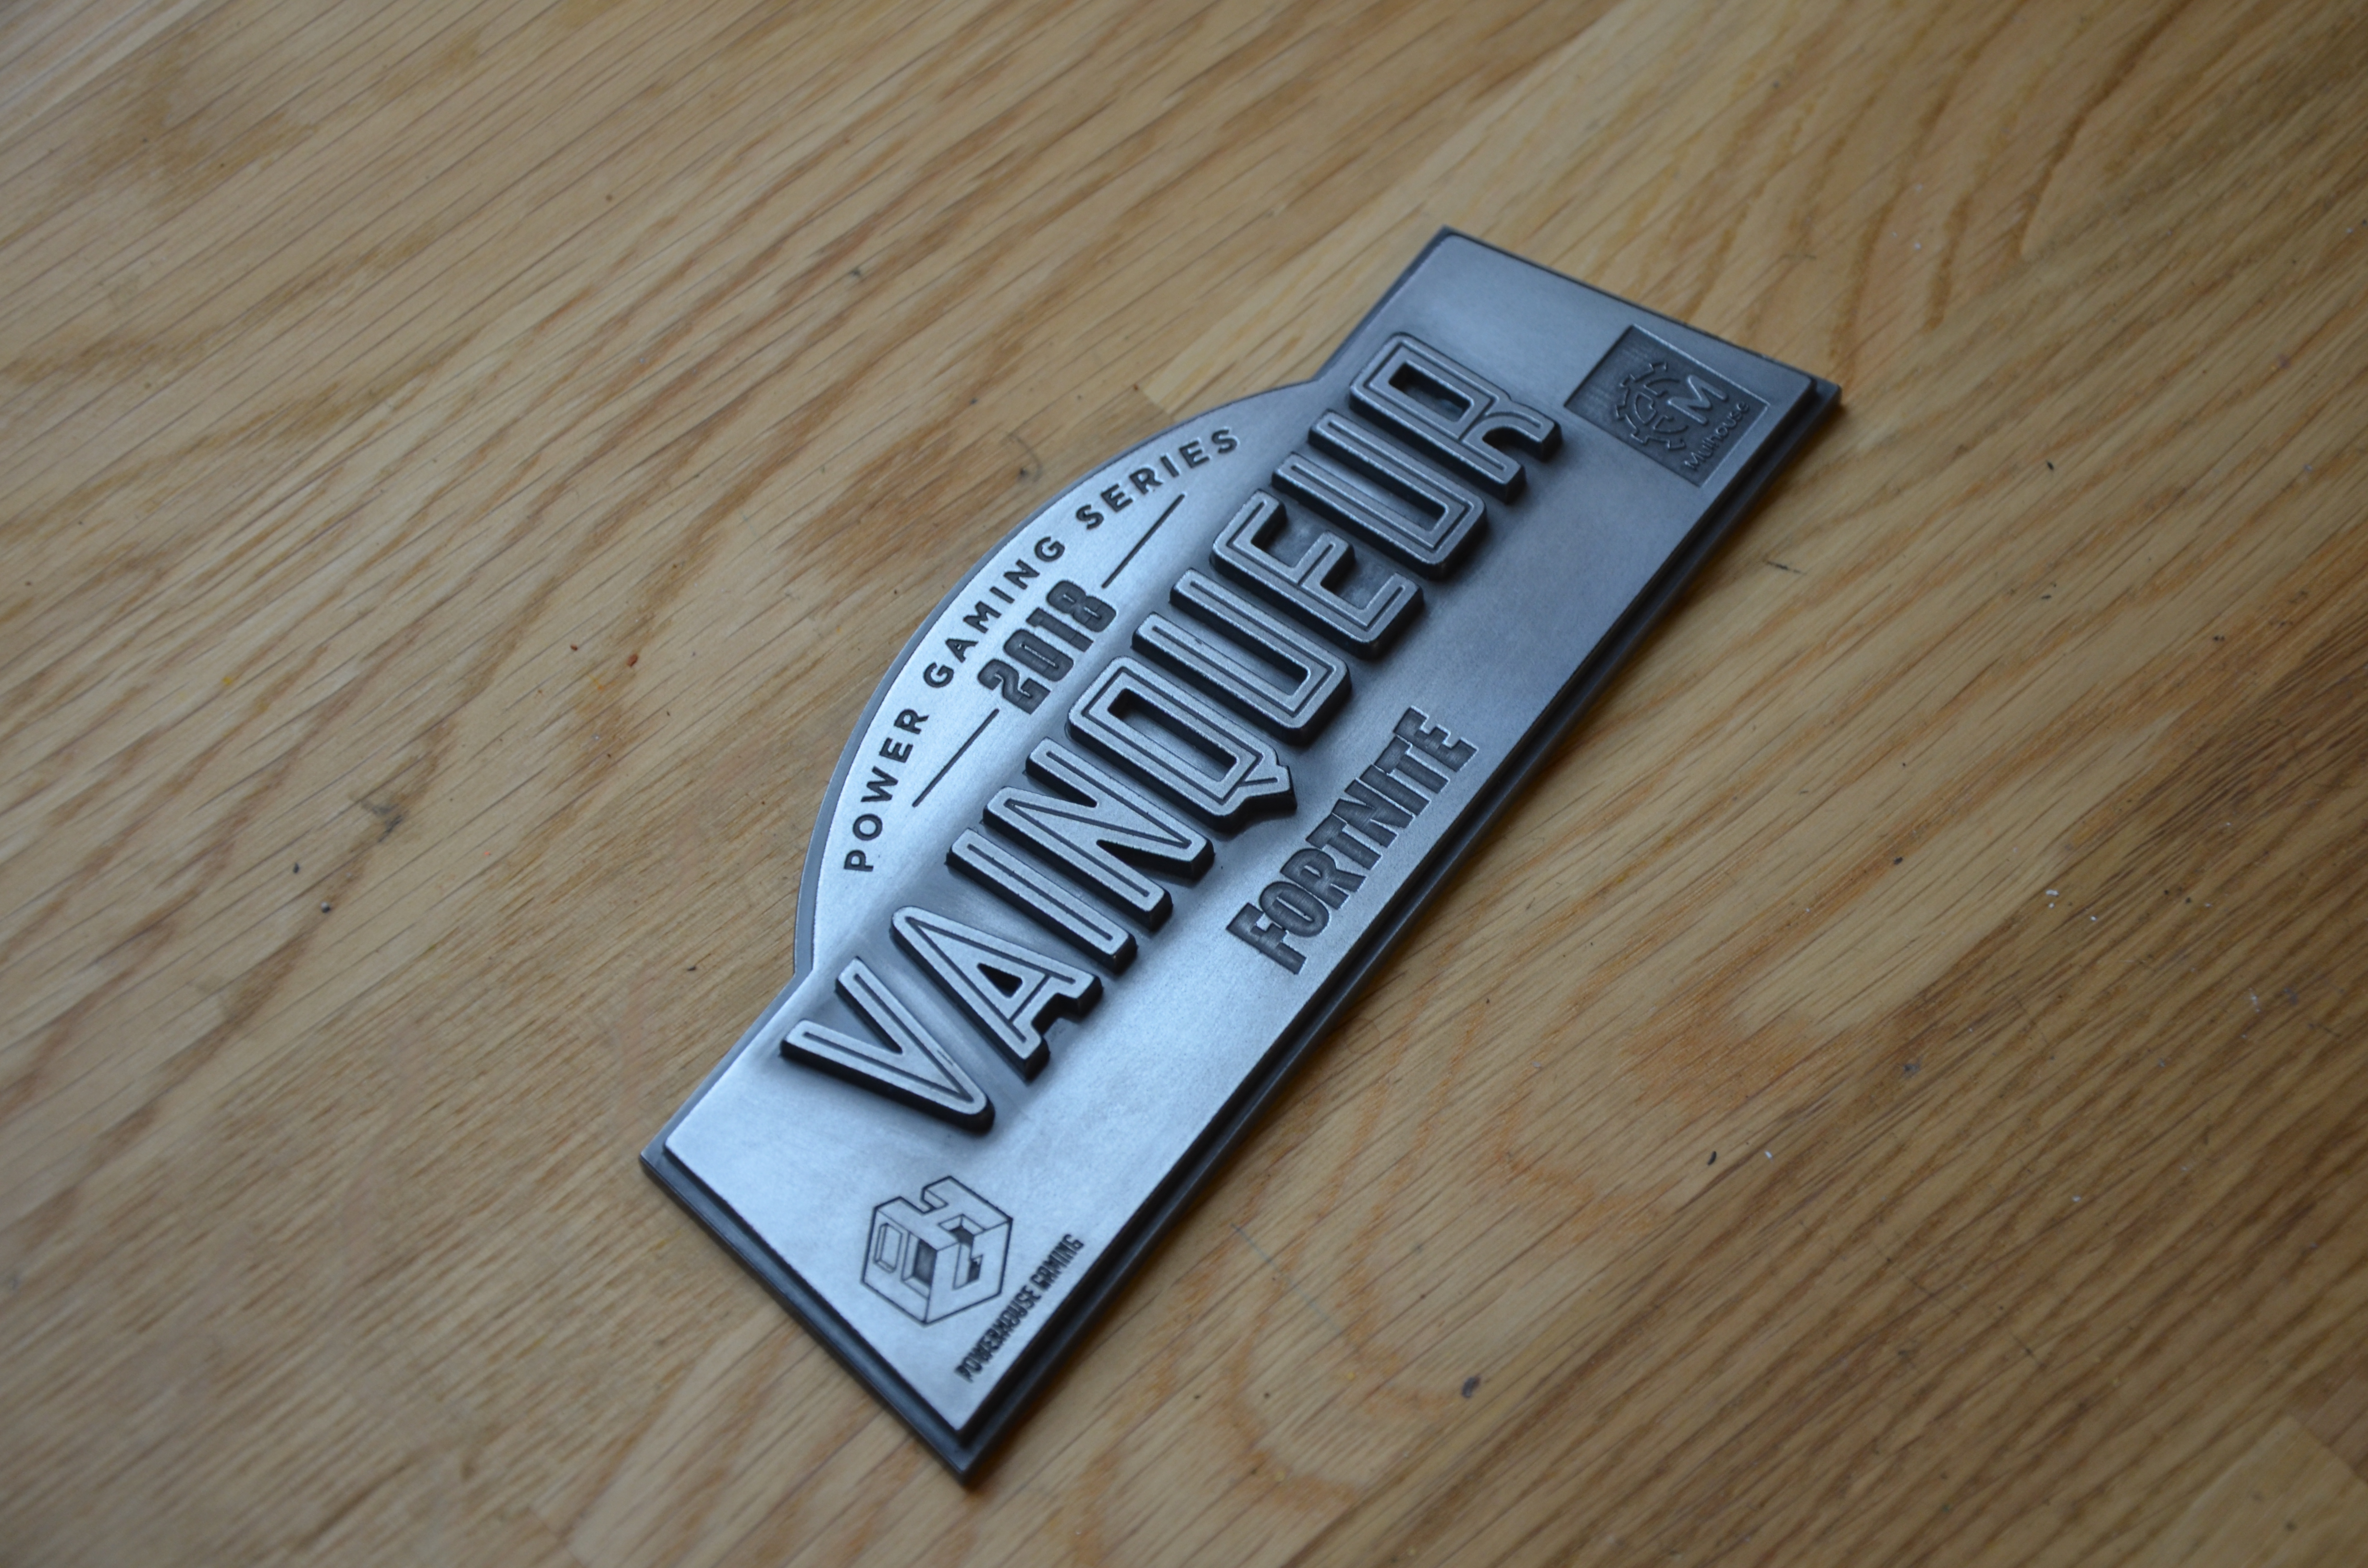
Finally, each trophy has a plate and a specific color depending on the game that it represents, which increases the work required a little bit, but greatly increases the prestige of each of the trophies!
After having validated the design with our client, we were able to begin the next stage of the process: turning 2D into 3D!
3D modeling
Joris took charge of this stage. He is more fluent at parametric modeling (with dimensions and functions) than organic modeling (with dots and meshes), but modeling whirling crystal flames has proven far too complicated using only parametric modeling. So he had to adapt.
He chose the software “Fusion 360”, which, thanks to its parametric AND organic modeling capabilities, was the ideal tool for this project. And the icing on the cake? These two types of modeling can blend together to create clean and precise assemblies.
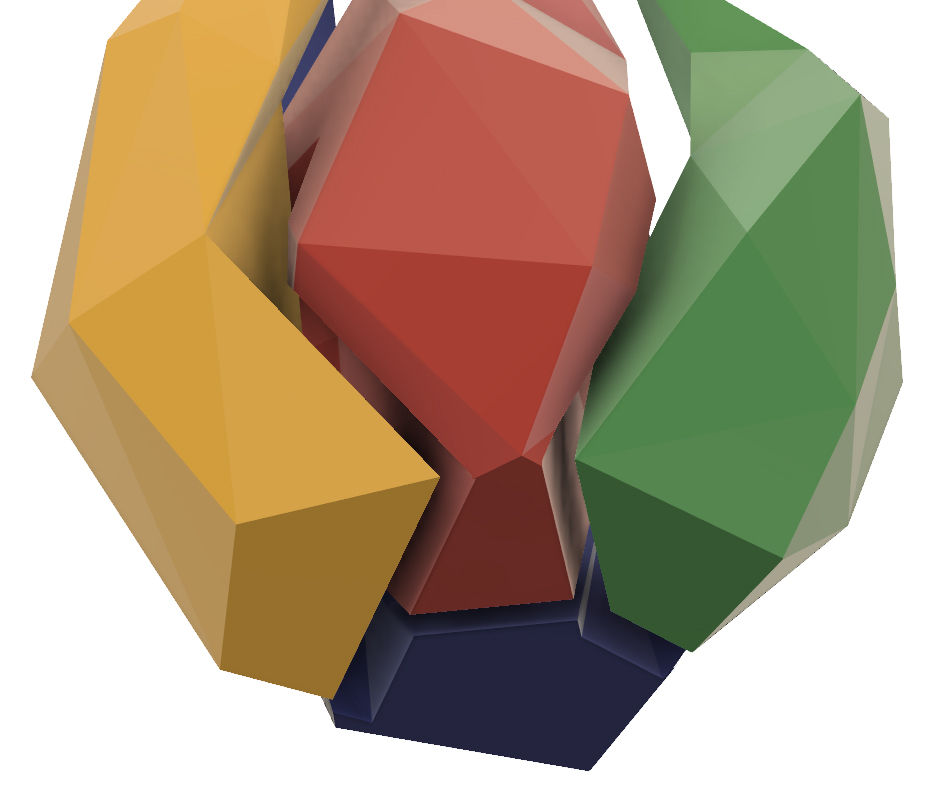
The four flames were modeled one by one, by hand, simply starting with a five-sided prism. They were then put in place to have a first glimpse of the overall shape.
Once finished and placed, the flames intersected one another in the drawing. To create the assembly, we just had to “subtract” each flame to the next to obtain notches, which would make them match perfectly when putting the big flame together afterwards.
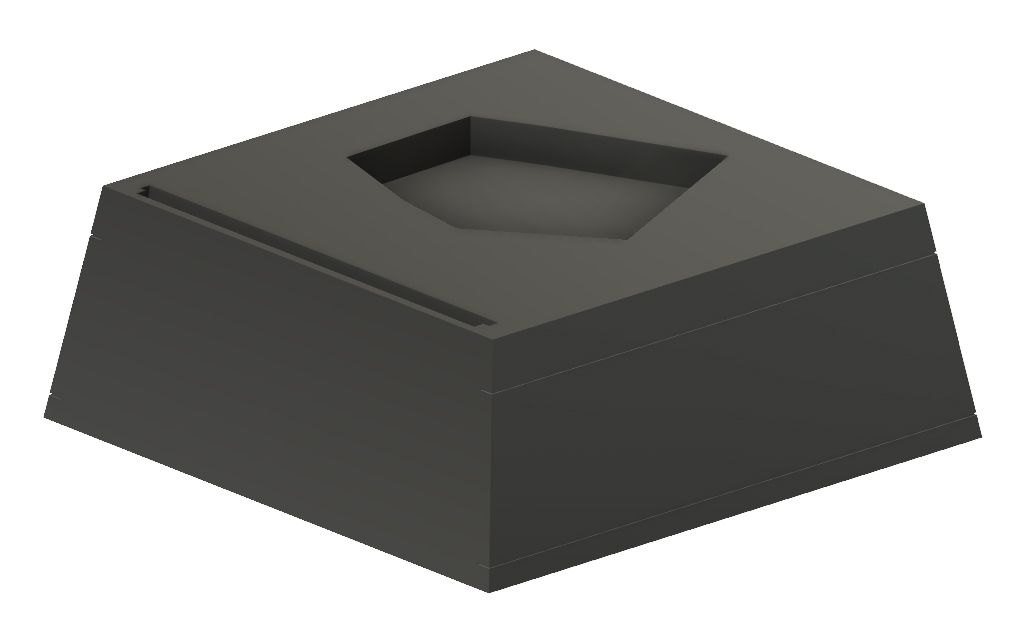
To host this mighty flame, we needed a base worthy of the name. The form is very simple to do and only requires a few functions to take shape:
- A loft to create a keyboard key
- Two grooves on its sides
- A thin slot on the top to embed the PGS logo plate
- A slot to embed the flames into the base
- A quick aluminum texture
And there you go!
We then make a notch in the complete flame that will slide into the base:

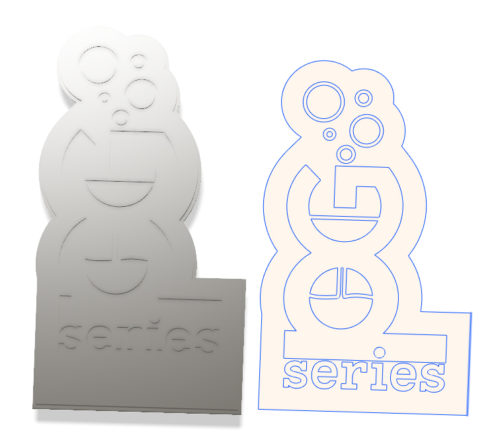
Onto the logo and game plates now : they were drawn on Illustrator by Marie in advance, and gained a dimension after a “simple” import into Fusion360.
Rendering
Working on a render was not essential to the project, but it’s always better to take a few hours so you can get a clear picture of the result of your modeling. This also allowed our client to have a view on the progress of the project and the final aspect we were going for.
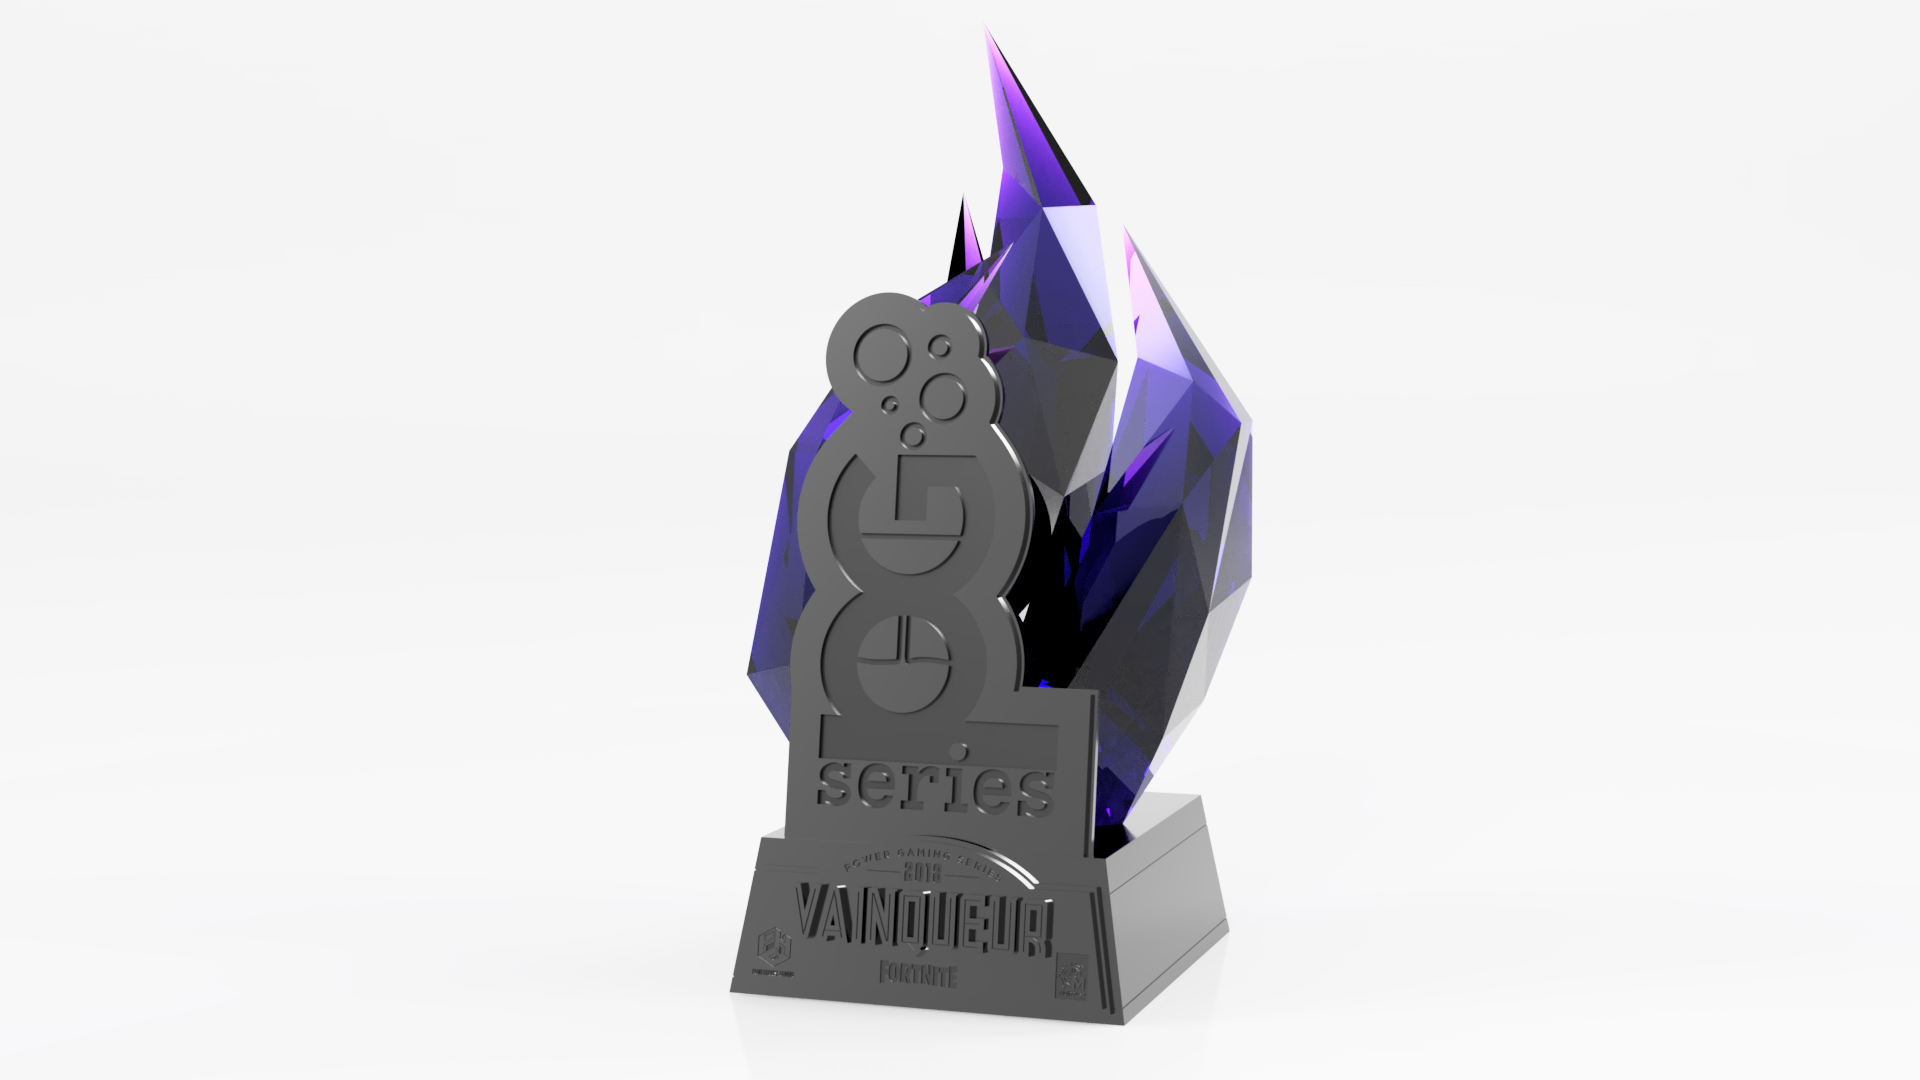
Also, it looks very cool!
Prototype
It’s now time to get down to business: making the prototype, or “master”.
Pepakura
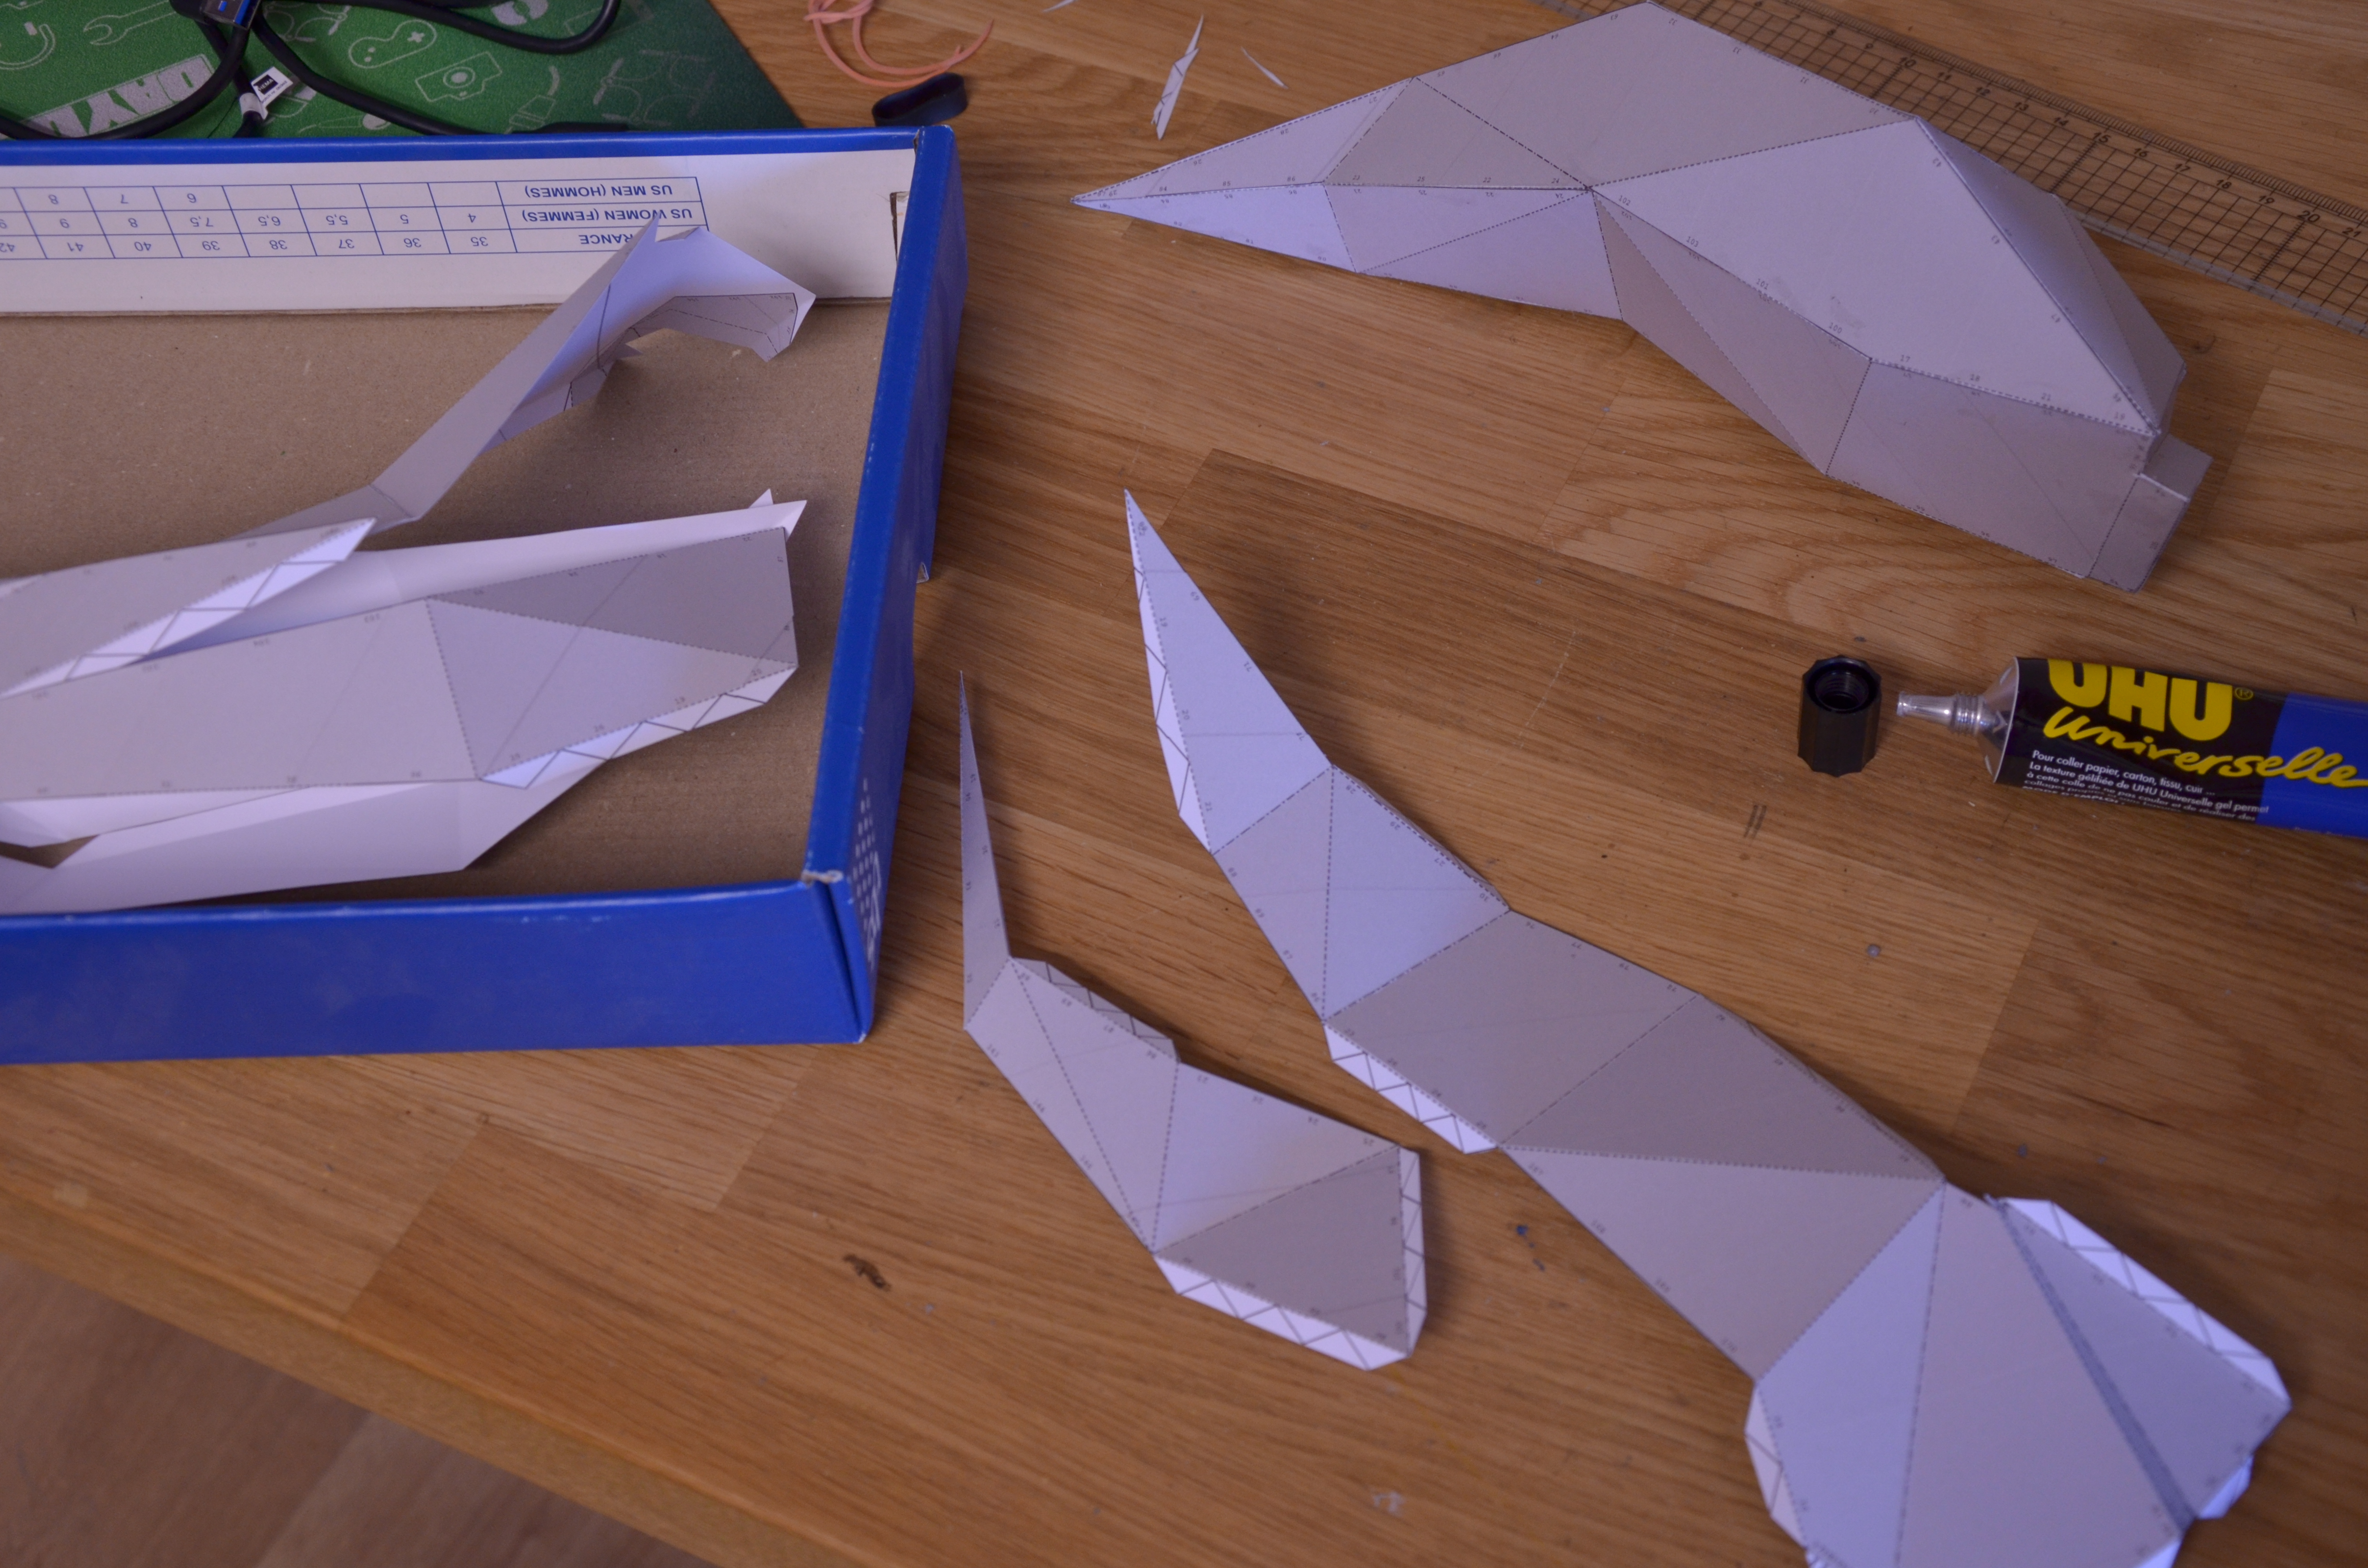
The first idea was to export the 3D models of the flames to Pepakura in order to make the complete shape in papercraft. Once assembled, the four flames would be filled with resin, separated, cleaned and then molded.
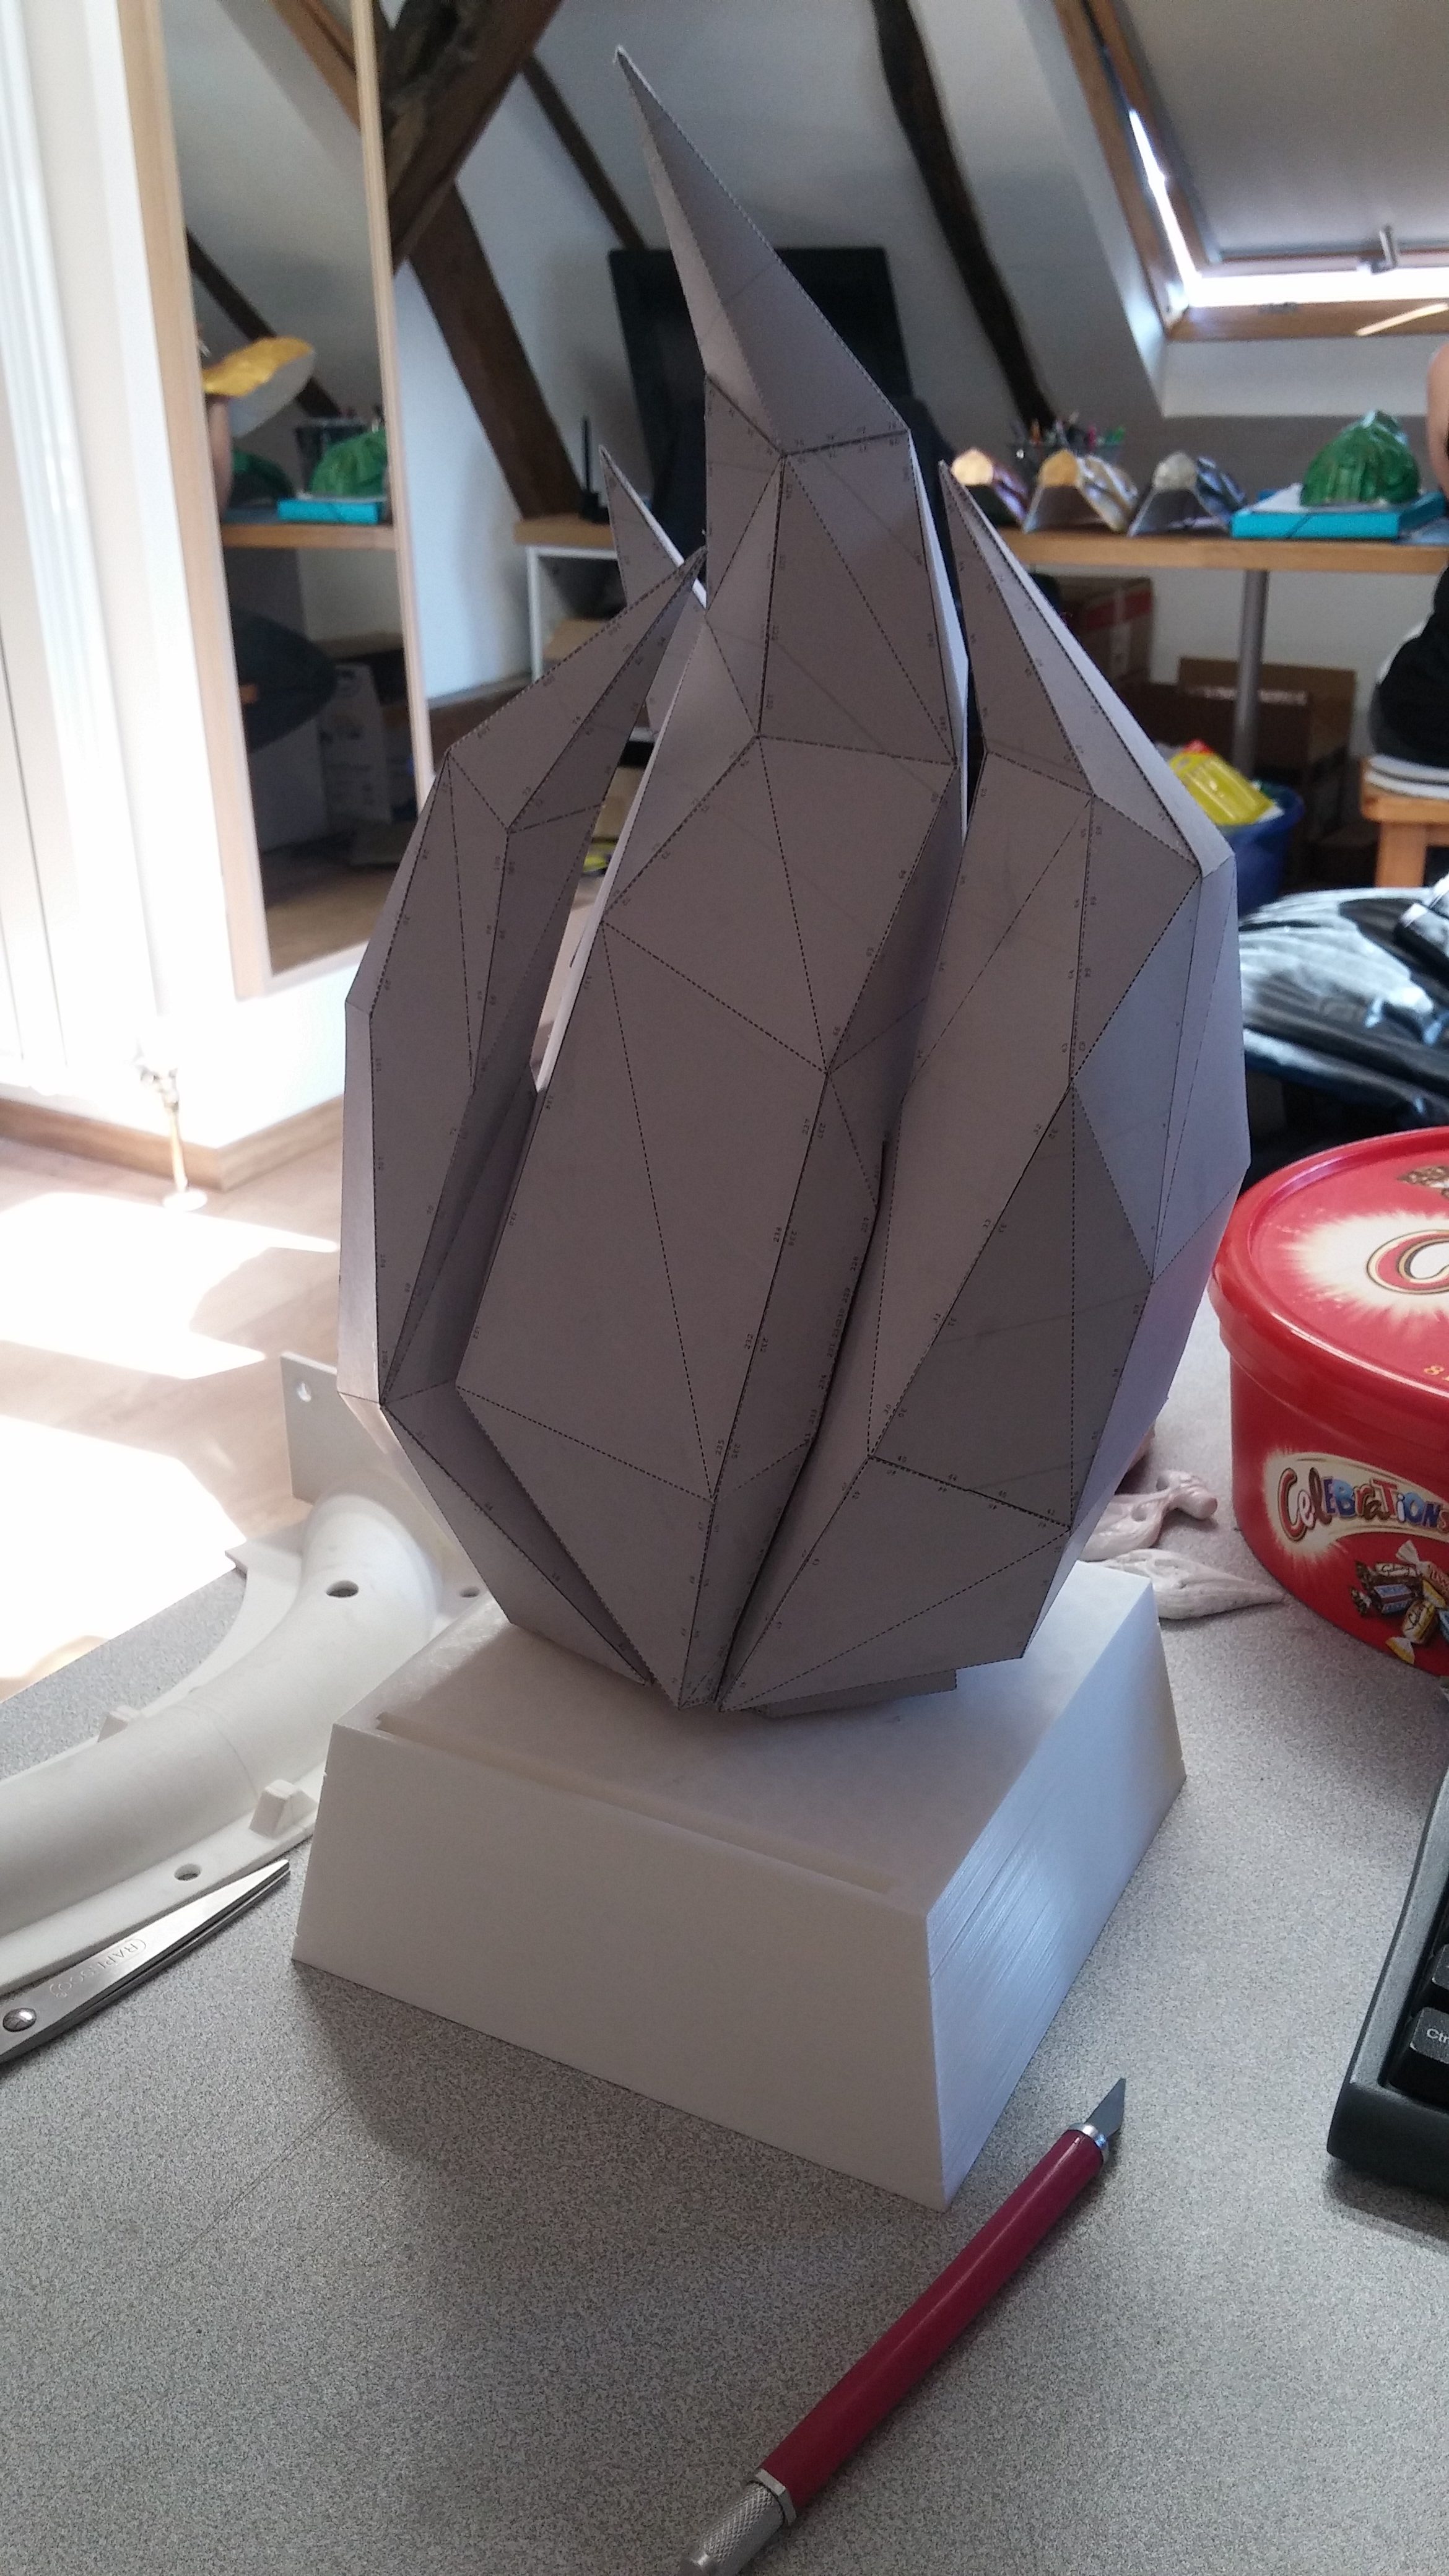
But the paper was too fragile to hold resin on the inside and the poor tightness of the assembly left something to be desired.
In addition, the notches are very precise so that the flames fit together well, and on top of that, the flame assembly is then inserted into the notch located in the base of the trophy, so the slightest deformation will prevent full assembly of the final trophy.
So we abandoned this idea and went for:
3D printing
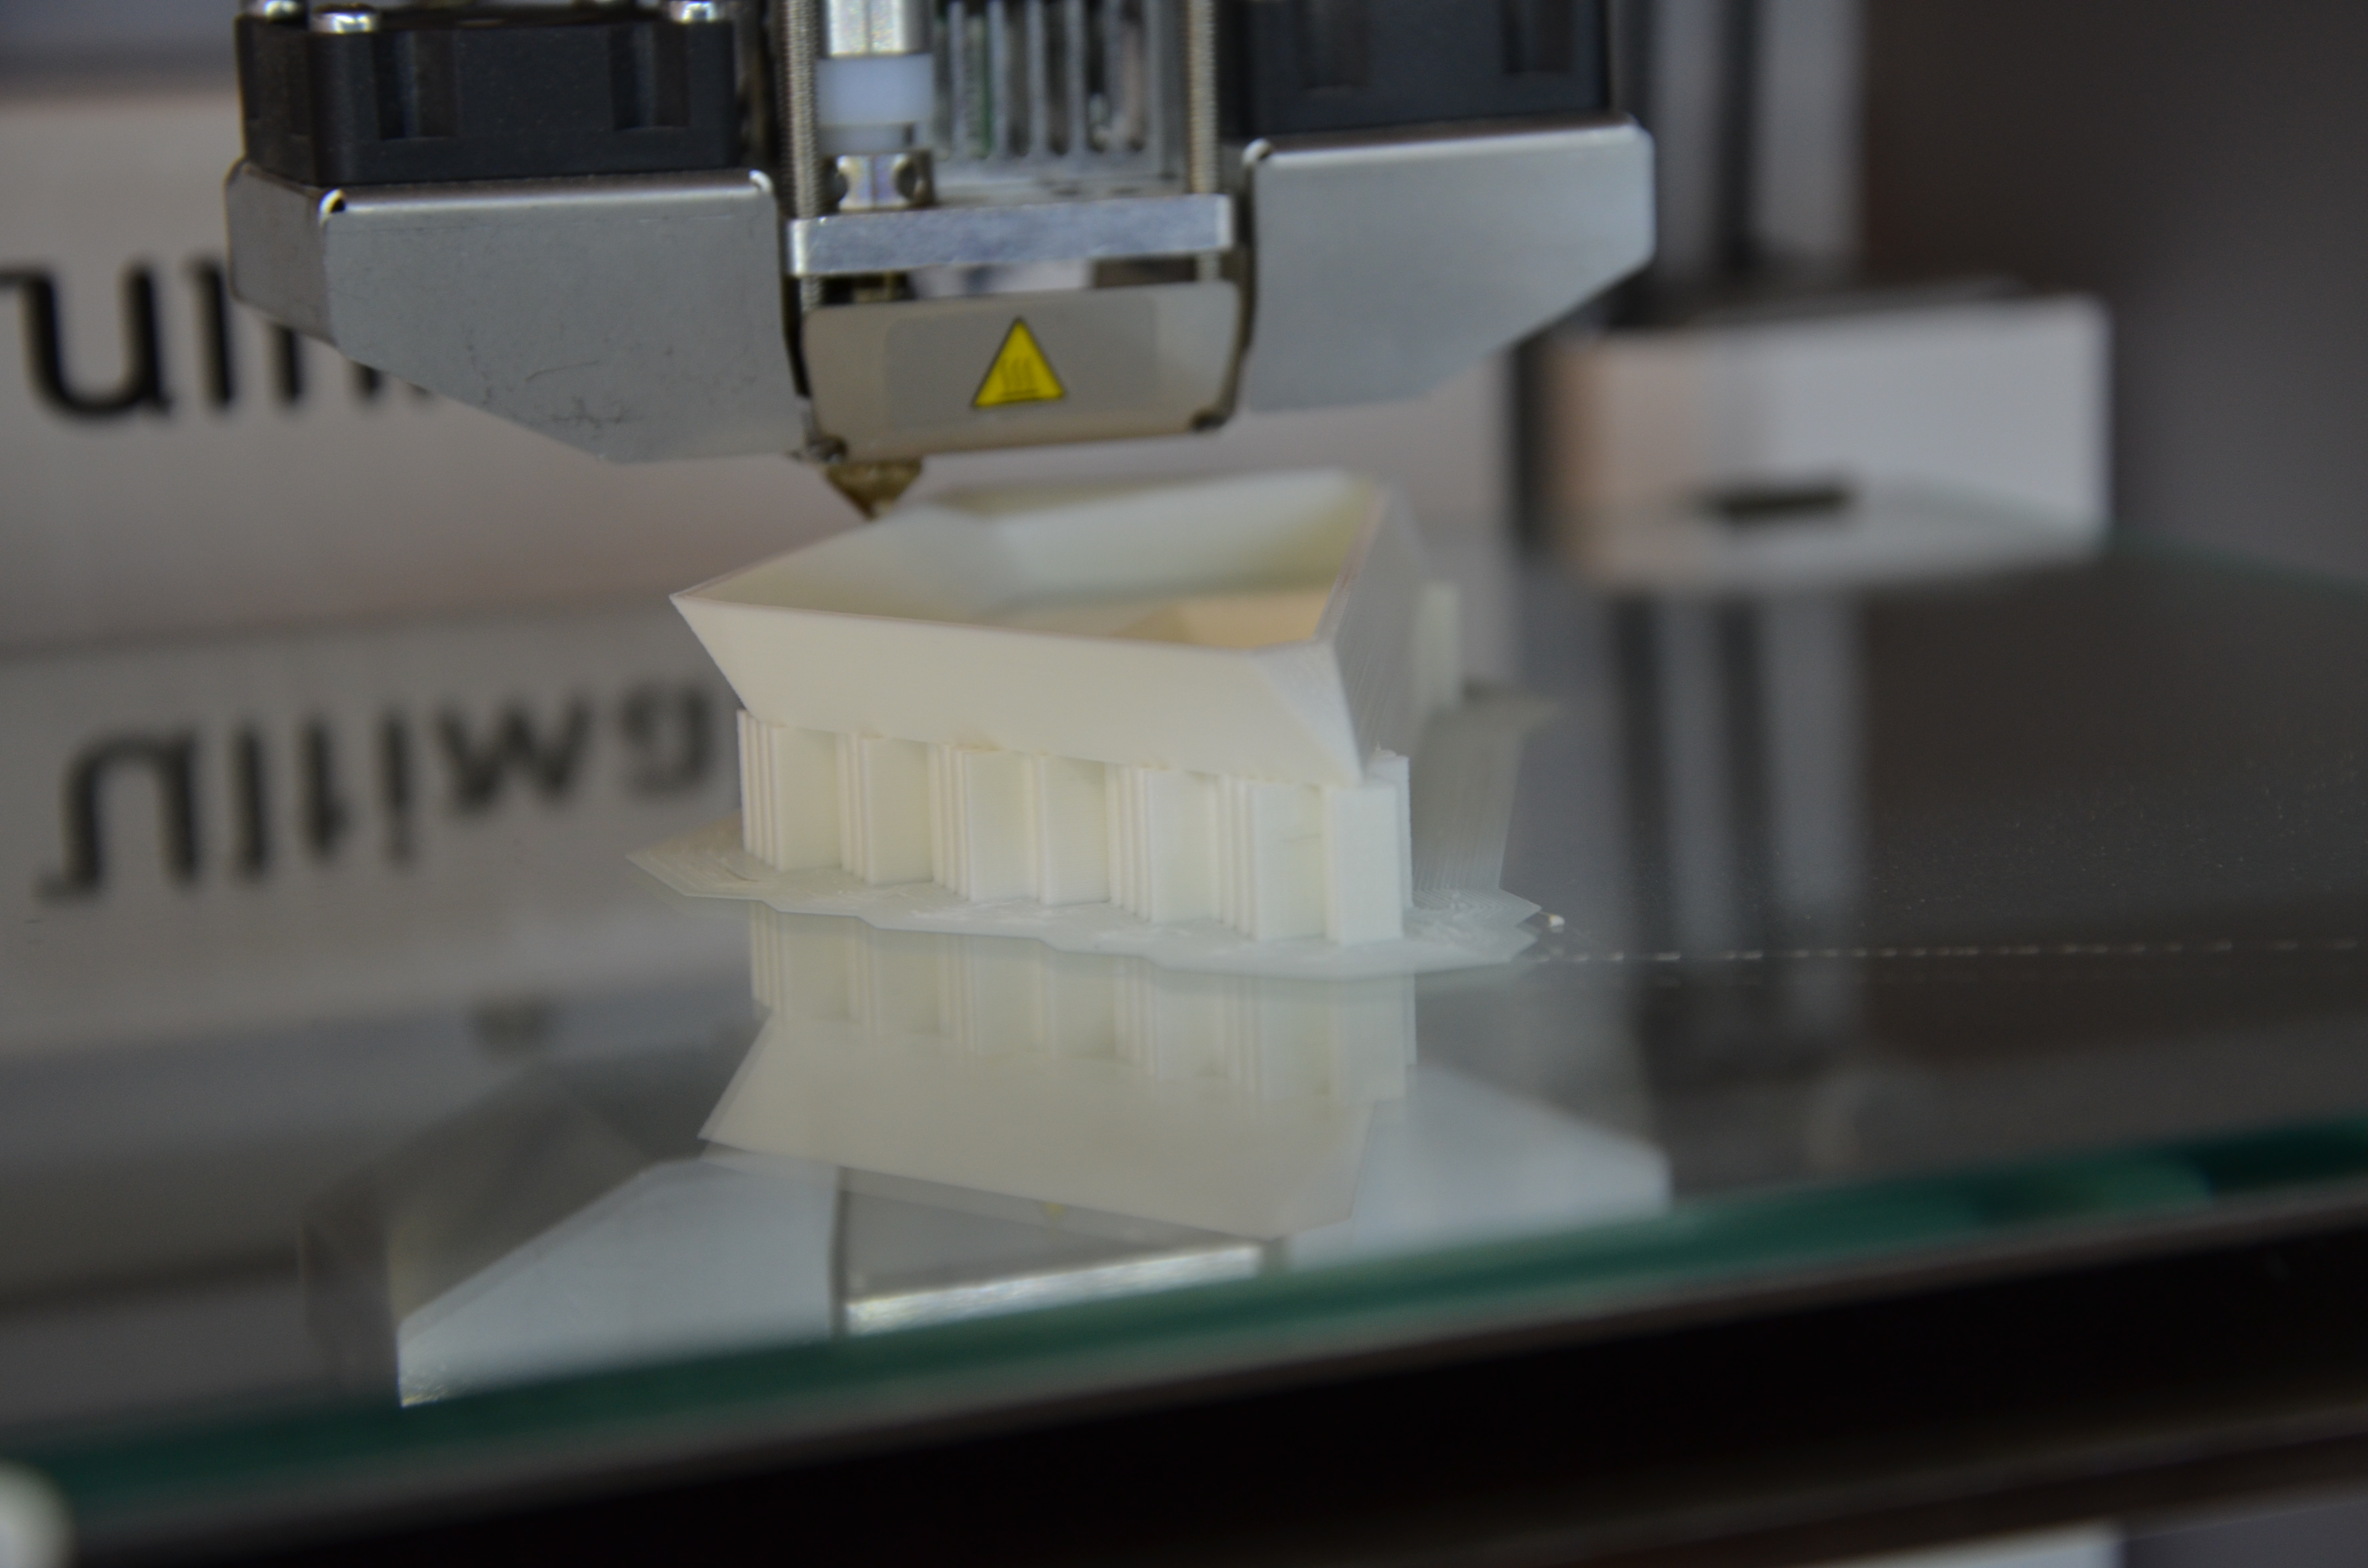
With this method, we save a lot of time on the construction of the shape but lose a lot on the smoothing of it. The accuracy is practically perfect, and the good fit of the parts is pretty much guaranteed.
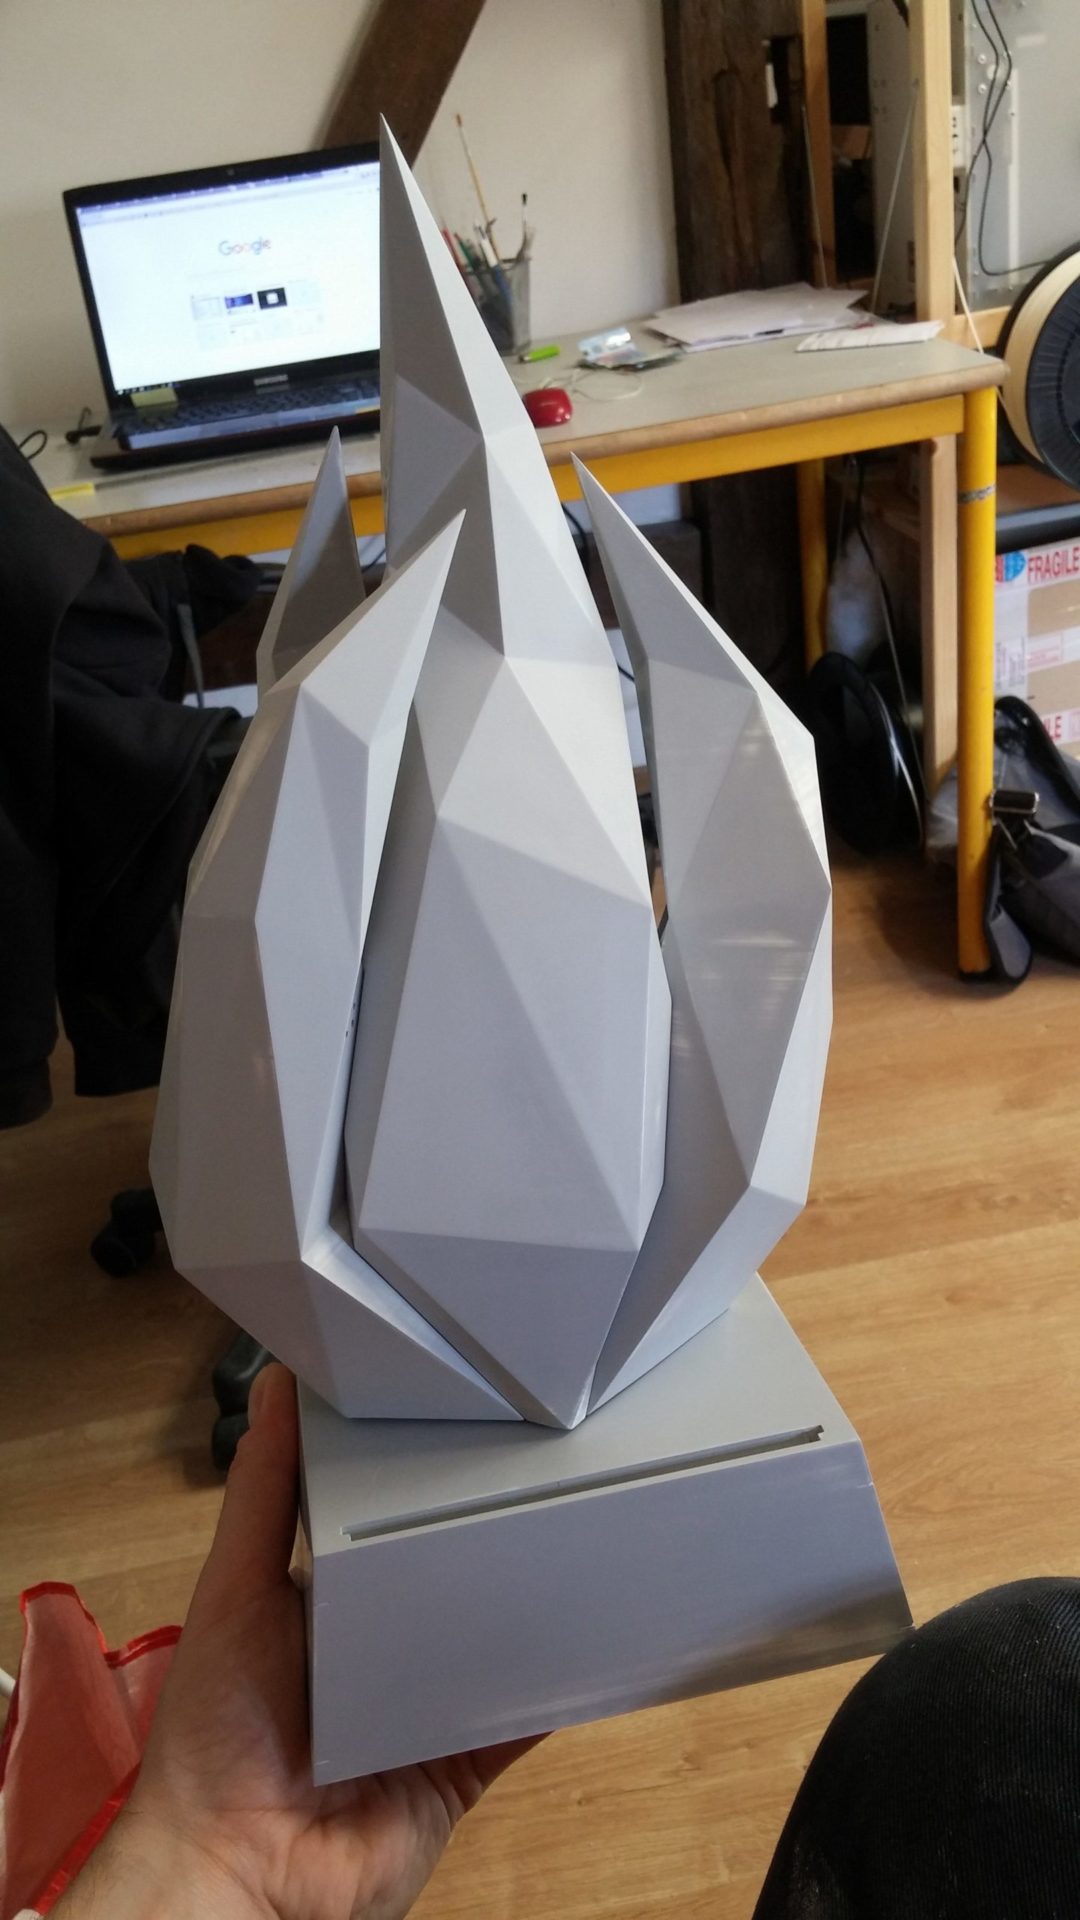
So we printed each flame in two parts (they range from 25 to 33 cm in height), with a thick wall, no fill, and being mindful to leave the top or bottom open, depending on the part.

Our flames fresh out of the printer A perfectly assembled flame
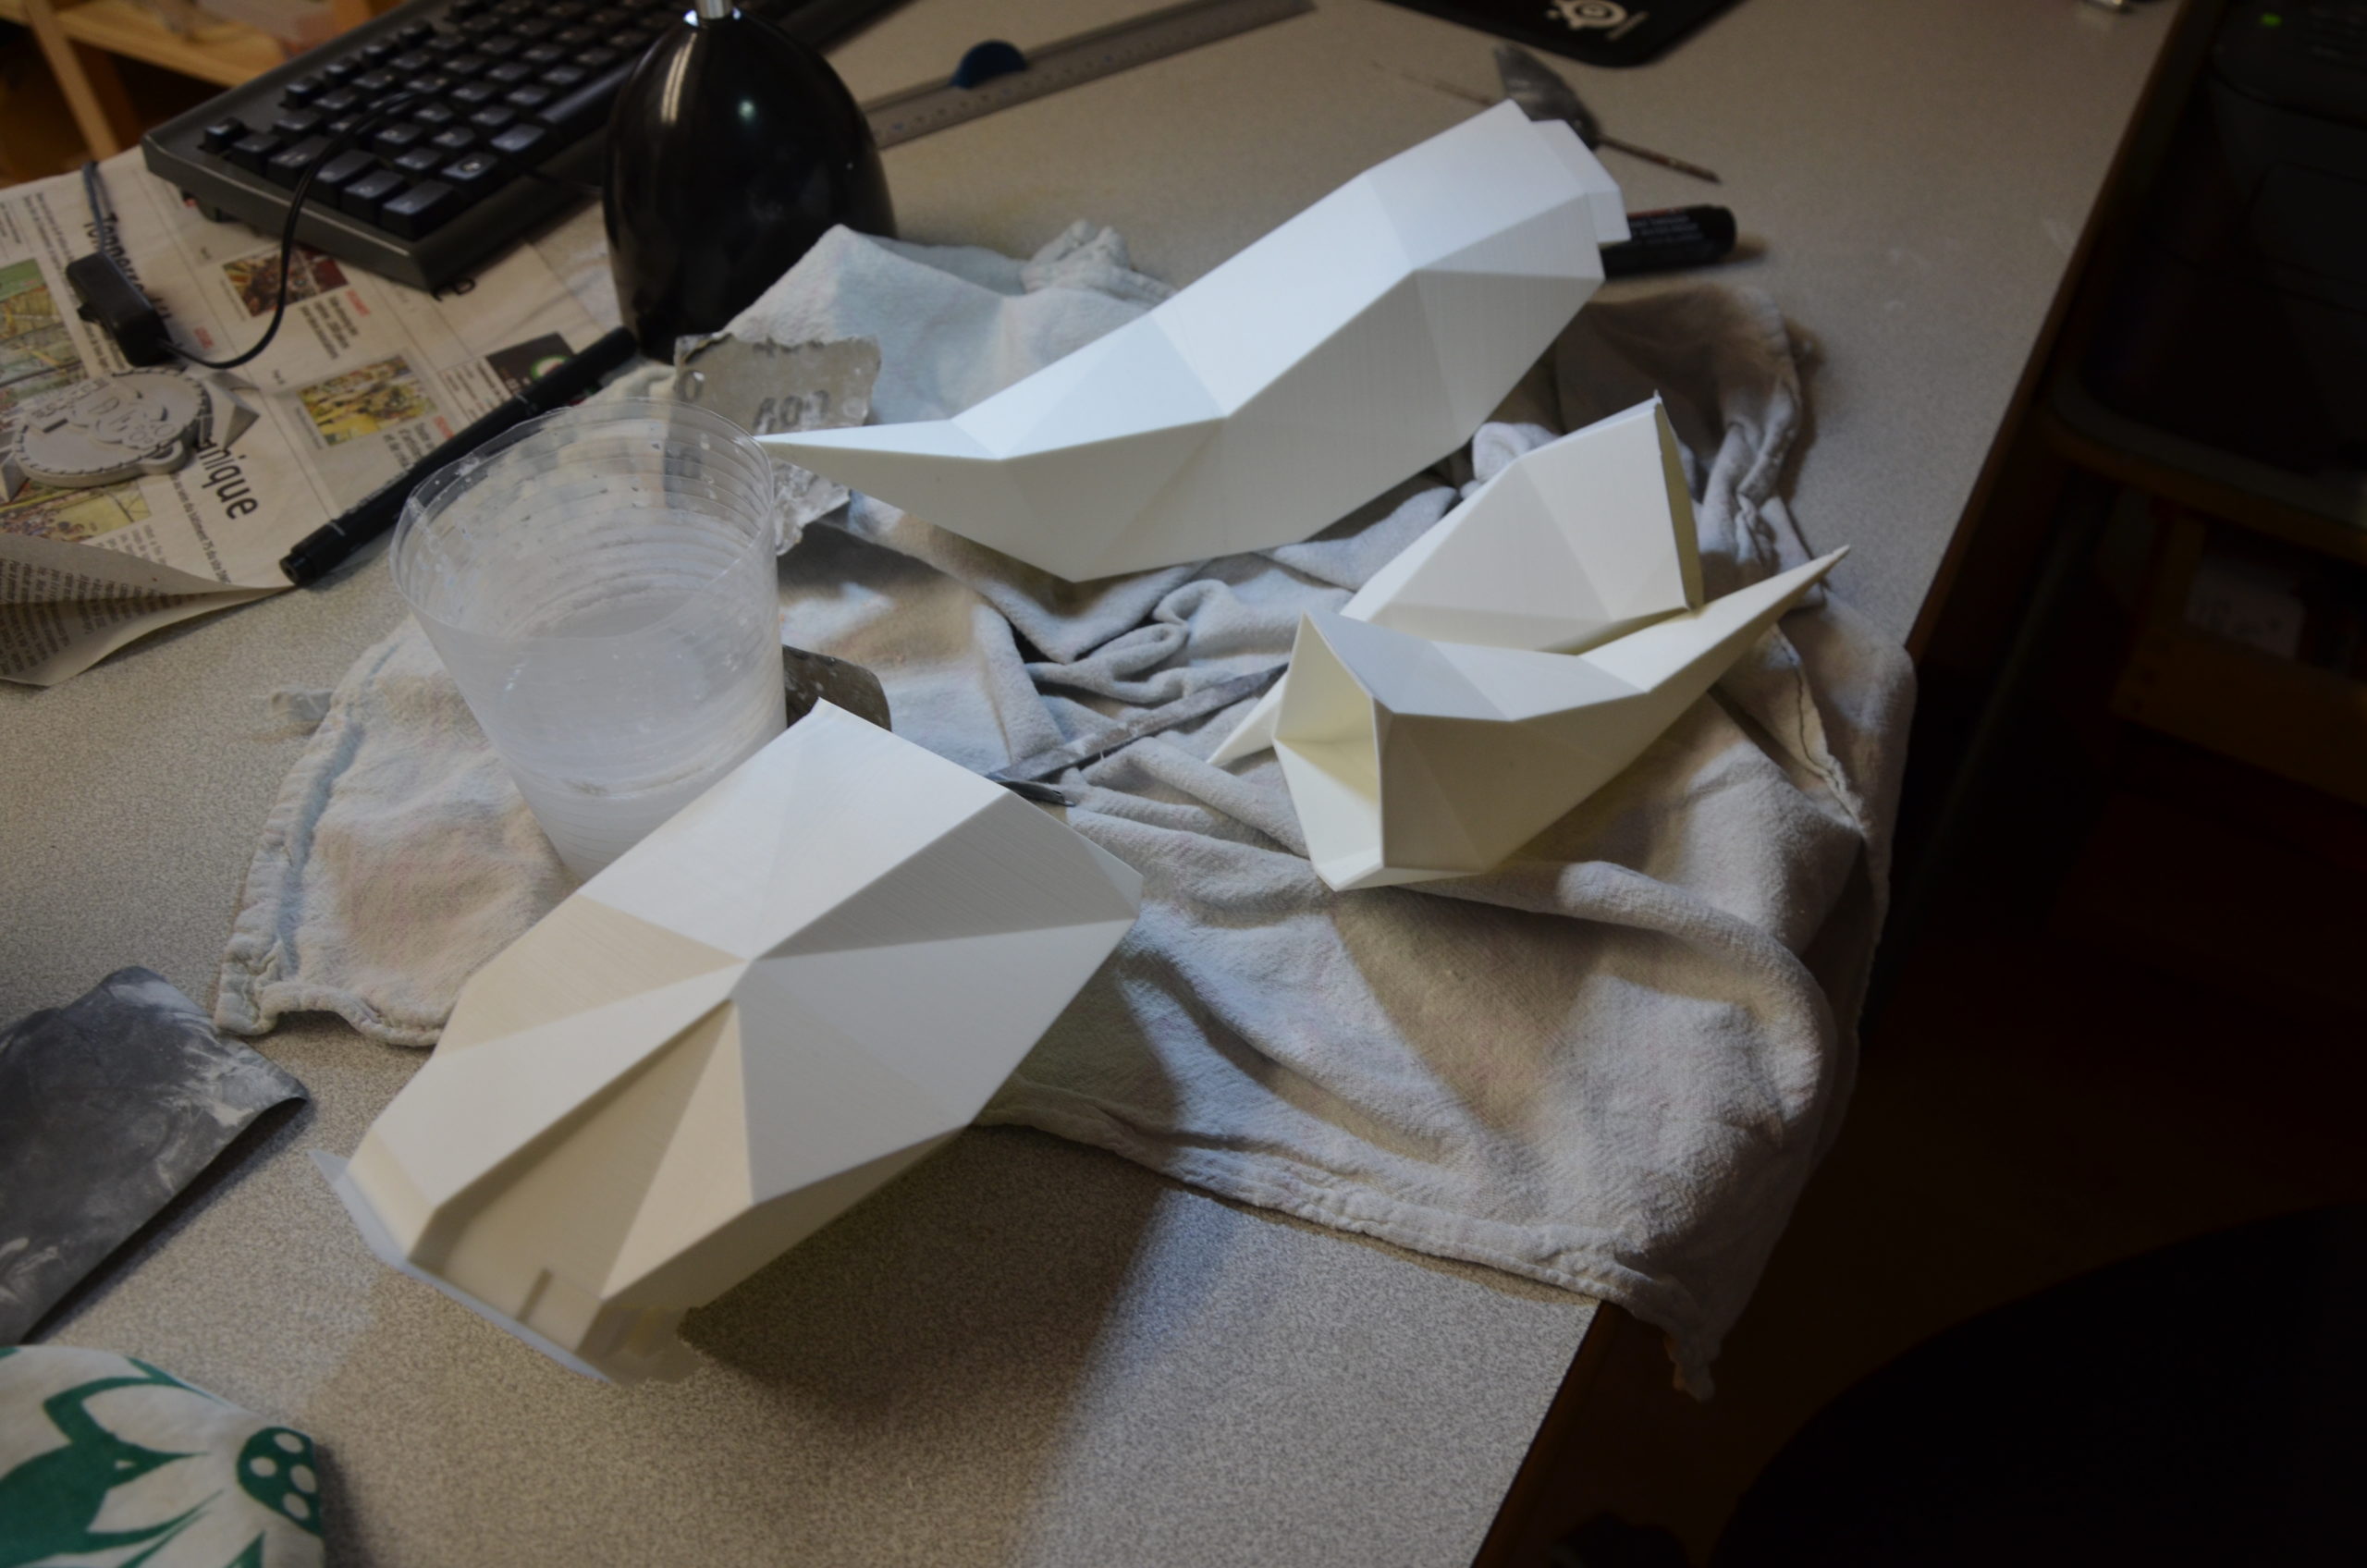

Once printed, the flame parts were glued together with super glue, while carefully aligning the faces. The slightest offset could jeopardize the overall assembly.
Our parts are now ready to undergo to the longest stage.
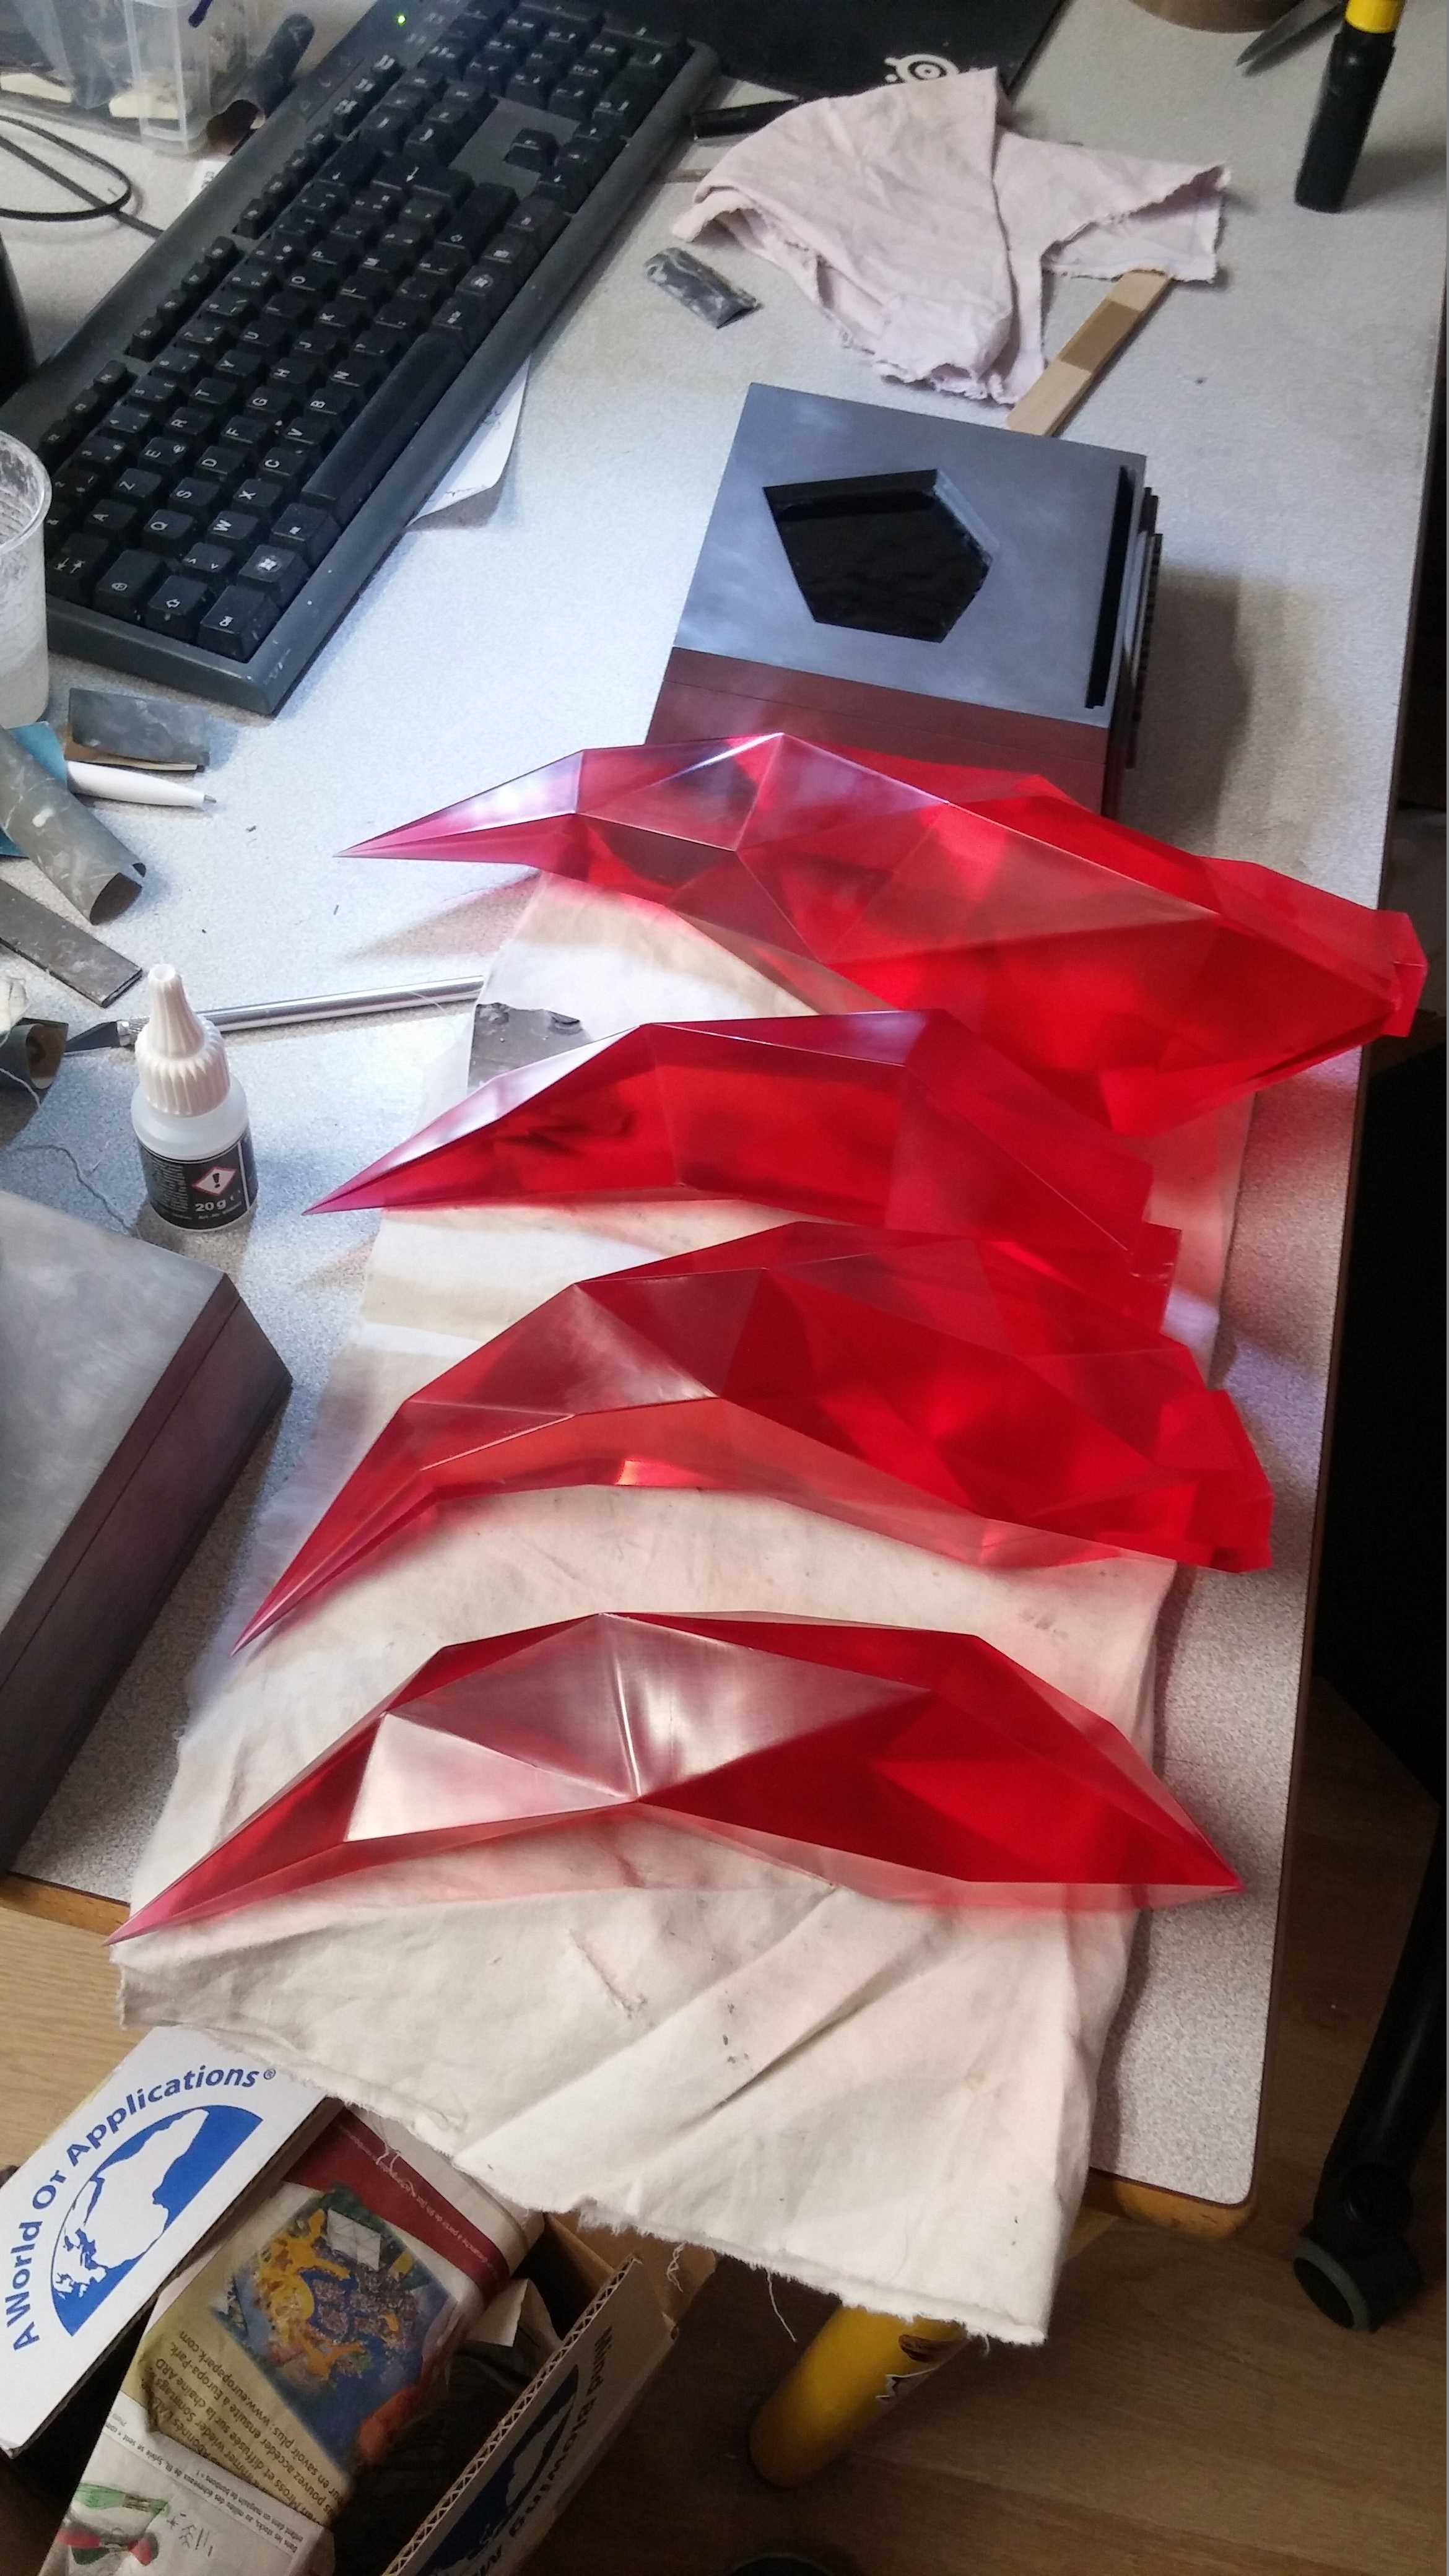
Smoothing
To smooth out a printed piece of PLA, there are not a great deal of options, you have to sand, sand, and sand again.
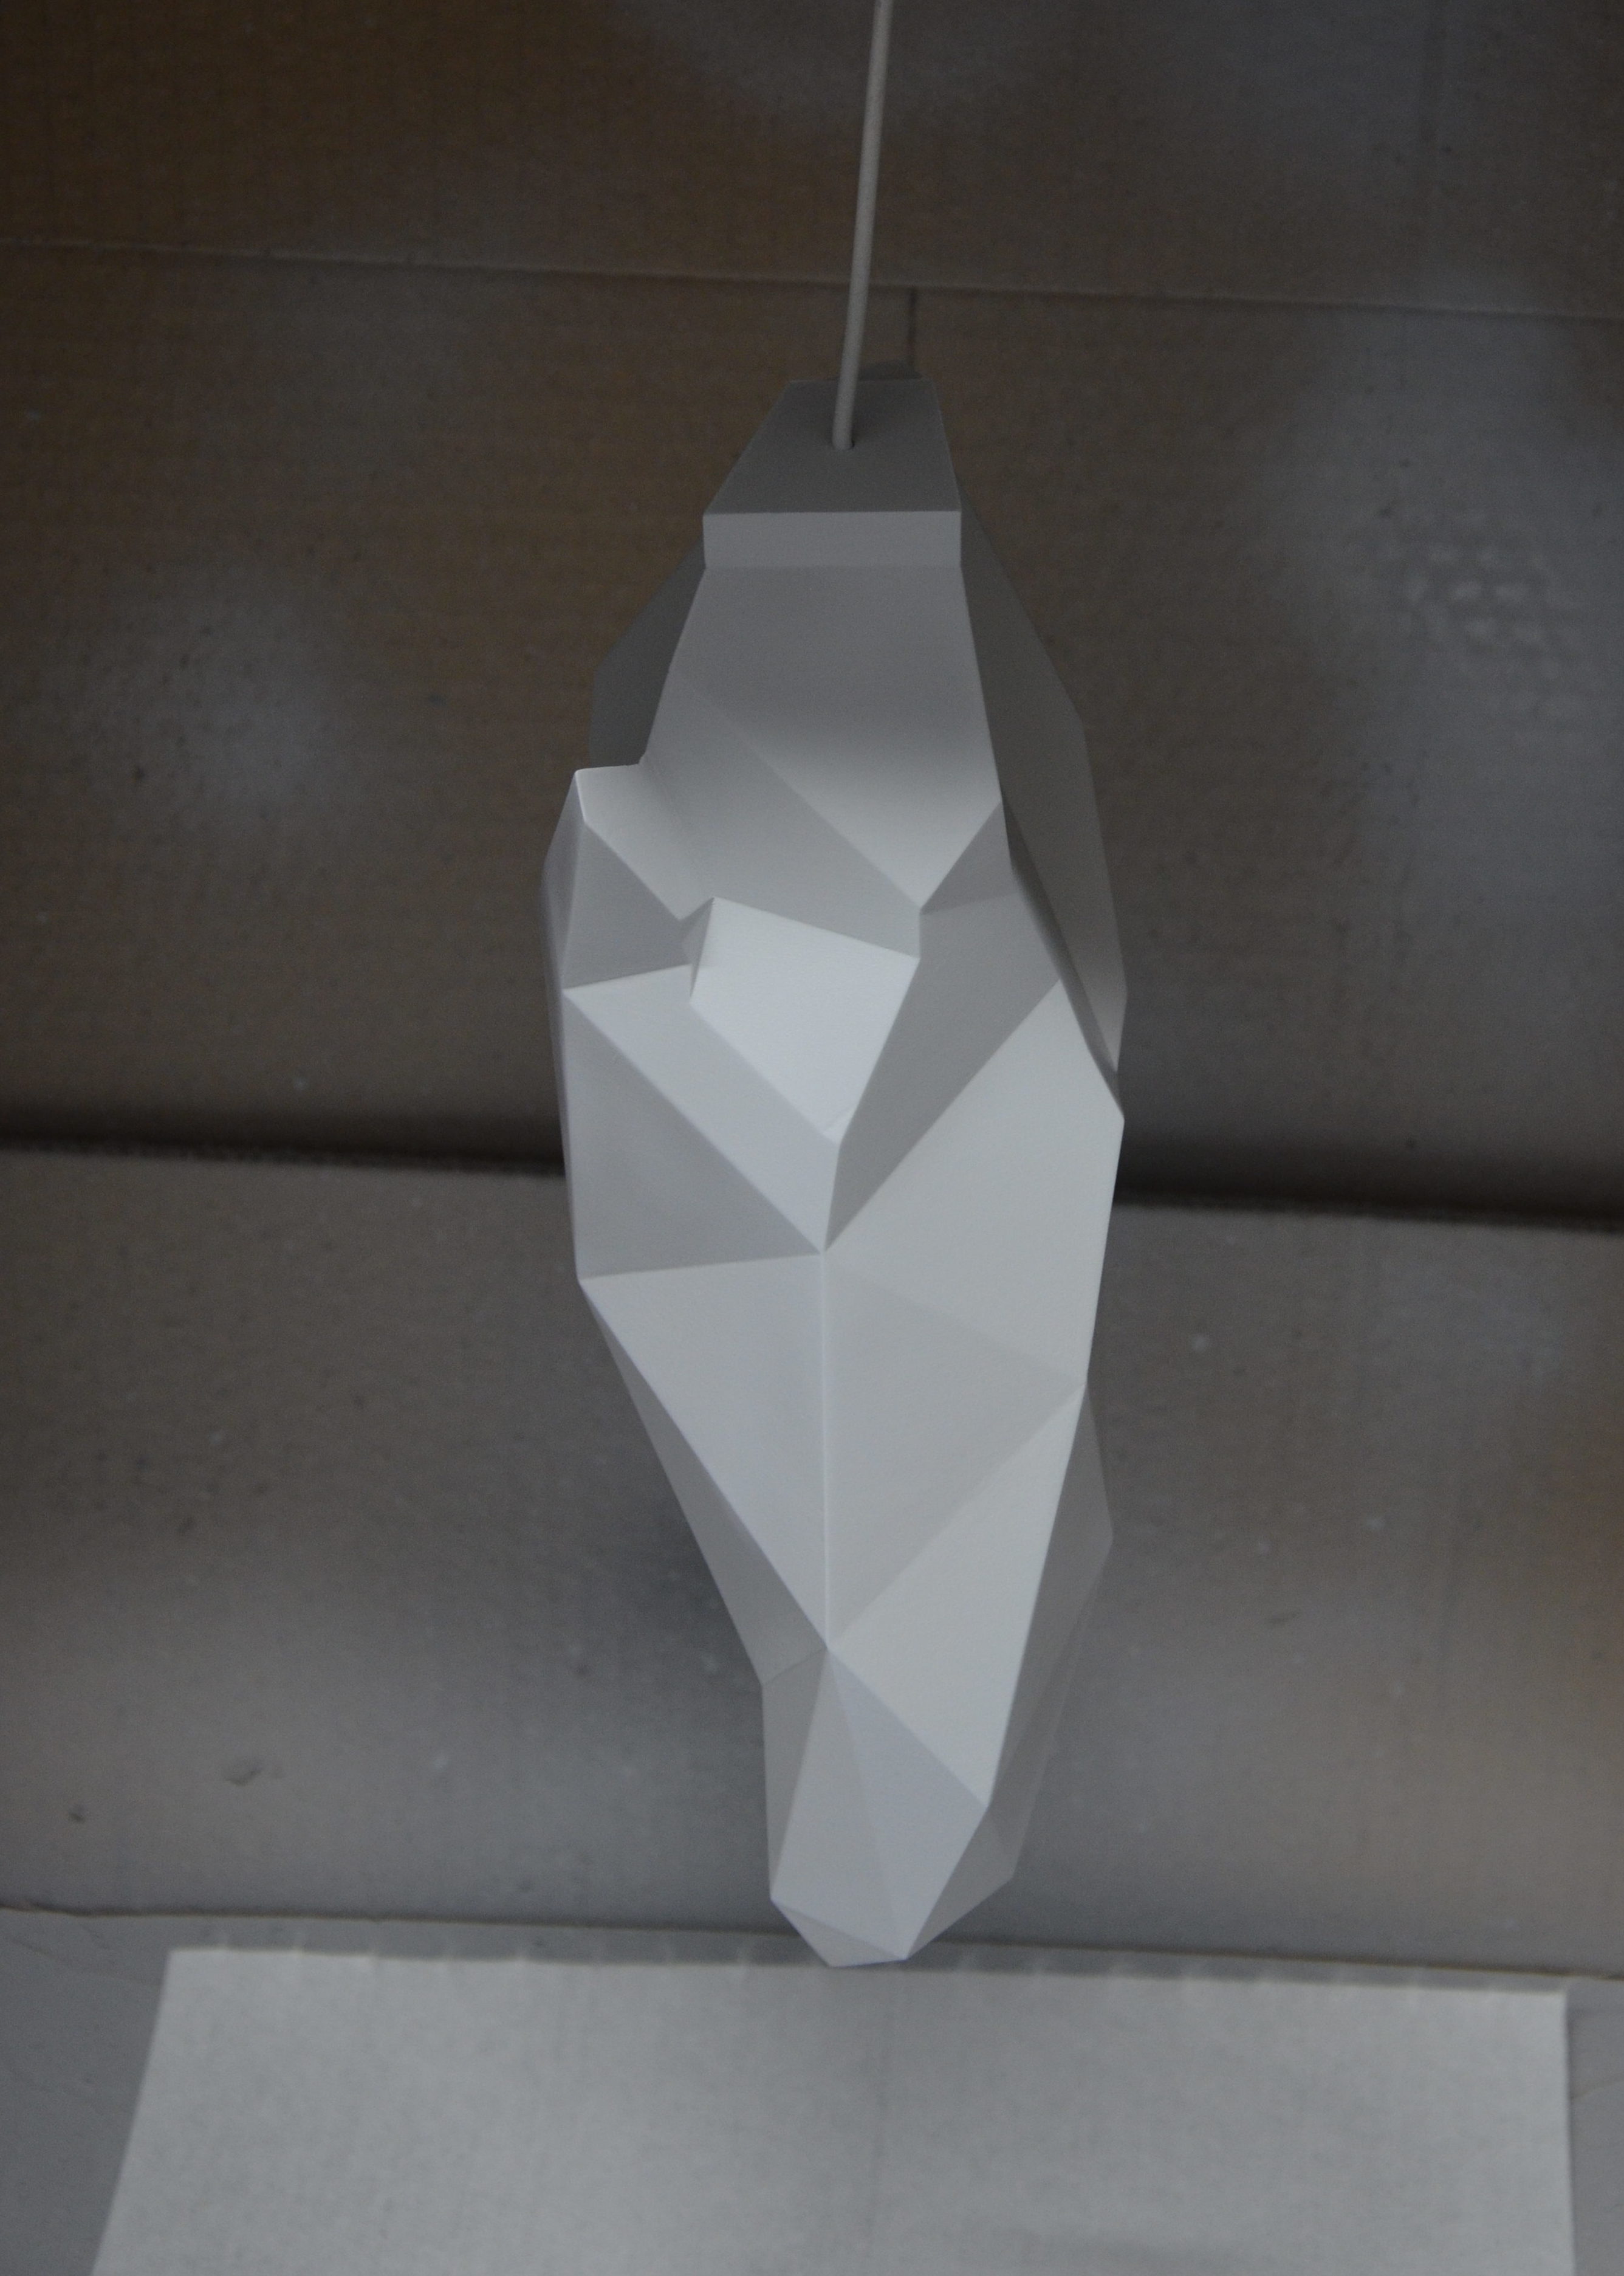
To keep the sharp angles of the flames, Joris used a metal file, which does not bend under the force applied by the hand. Once the surface is leveled, just spray a few layers of bomb putty, and continue sanding with finer and finer paper grain to reach a smooth surface to the touch and to the sight. You have to repeat the process for as long as you see the streaks made by the printer. Tirelessly…
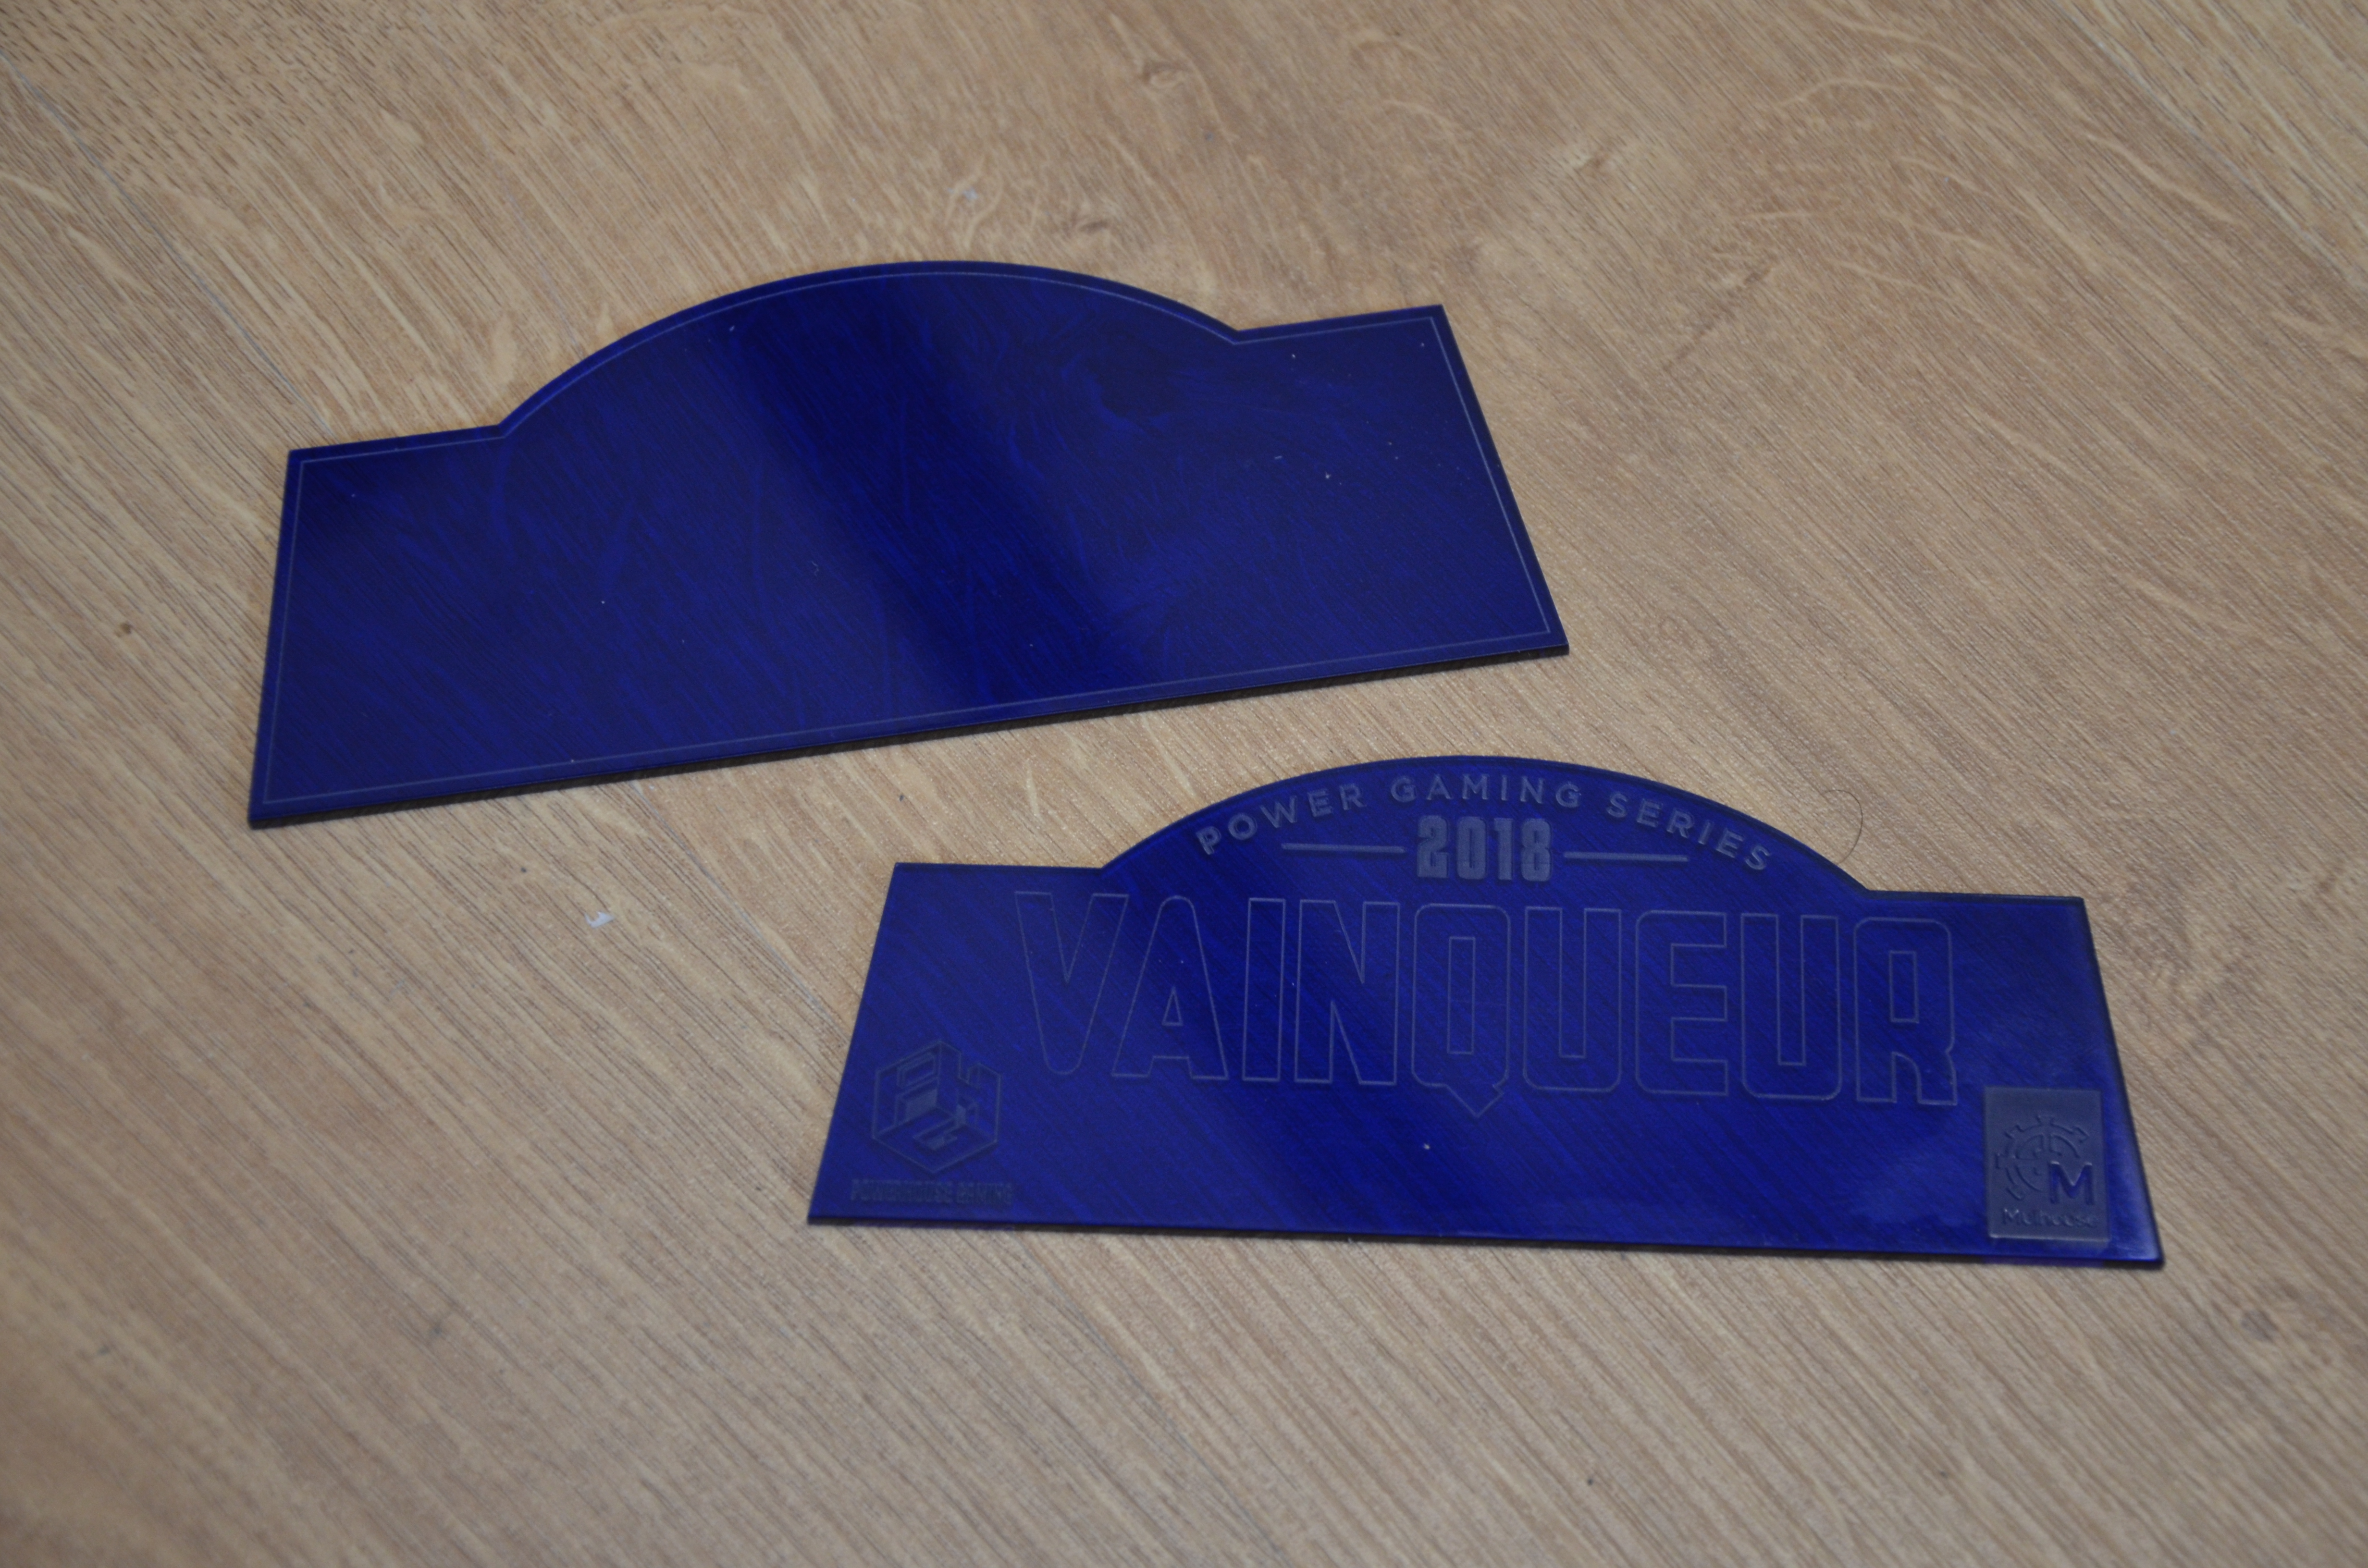
Laser cutting
The prototypes of the plates for the trophy base are made using a great machine: the laser cutter. The same vector drawings used to model the trophy in 3D are used here to cut acrylic plates (transparent plastic). They are then glued on top of each other.
The “game” plate for example is made out of three levels: The first plate at the back, the second, a little smaller, is glued on top to obtain a kind of base where the letters are glued on.
The spots where the elements need to be glued are engraved very lightly on the material for a perfect result, and no unsightly trace ruins the final result.
Assembly
To ensure that the final trophy assembly will go well, we have to test with the prototype first.
A moment of great stress, because if it goes wrong, that means a lot of time lost to find the cause, and how to solve the problem.

First real assembly test The prototype of the trophy fully assembled
Fortunately for us, everything did fit well, and a simple sanding has transformed some narrow margins into well-adjusted margins.
Our master is now finished. We can move on to the next big chunk.
Reproduction
This step will take a footprint of our prototype and enable us to reproduce it in several copies “easily”. For this, we will mold the different parts apart, and use these molds to make copies of these parts.
Molding
We used a tin-cure silicone from Smooth-On, the Mold Max 40, for the entire project, namely:
- The base
- The four game plates
- The PGS logo plate
- The four flames
For the base, a good old block mold did the trick. Given the size of the object, we gave the mold good wall thickness to keep a good shape during the cast.
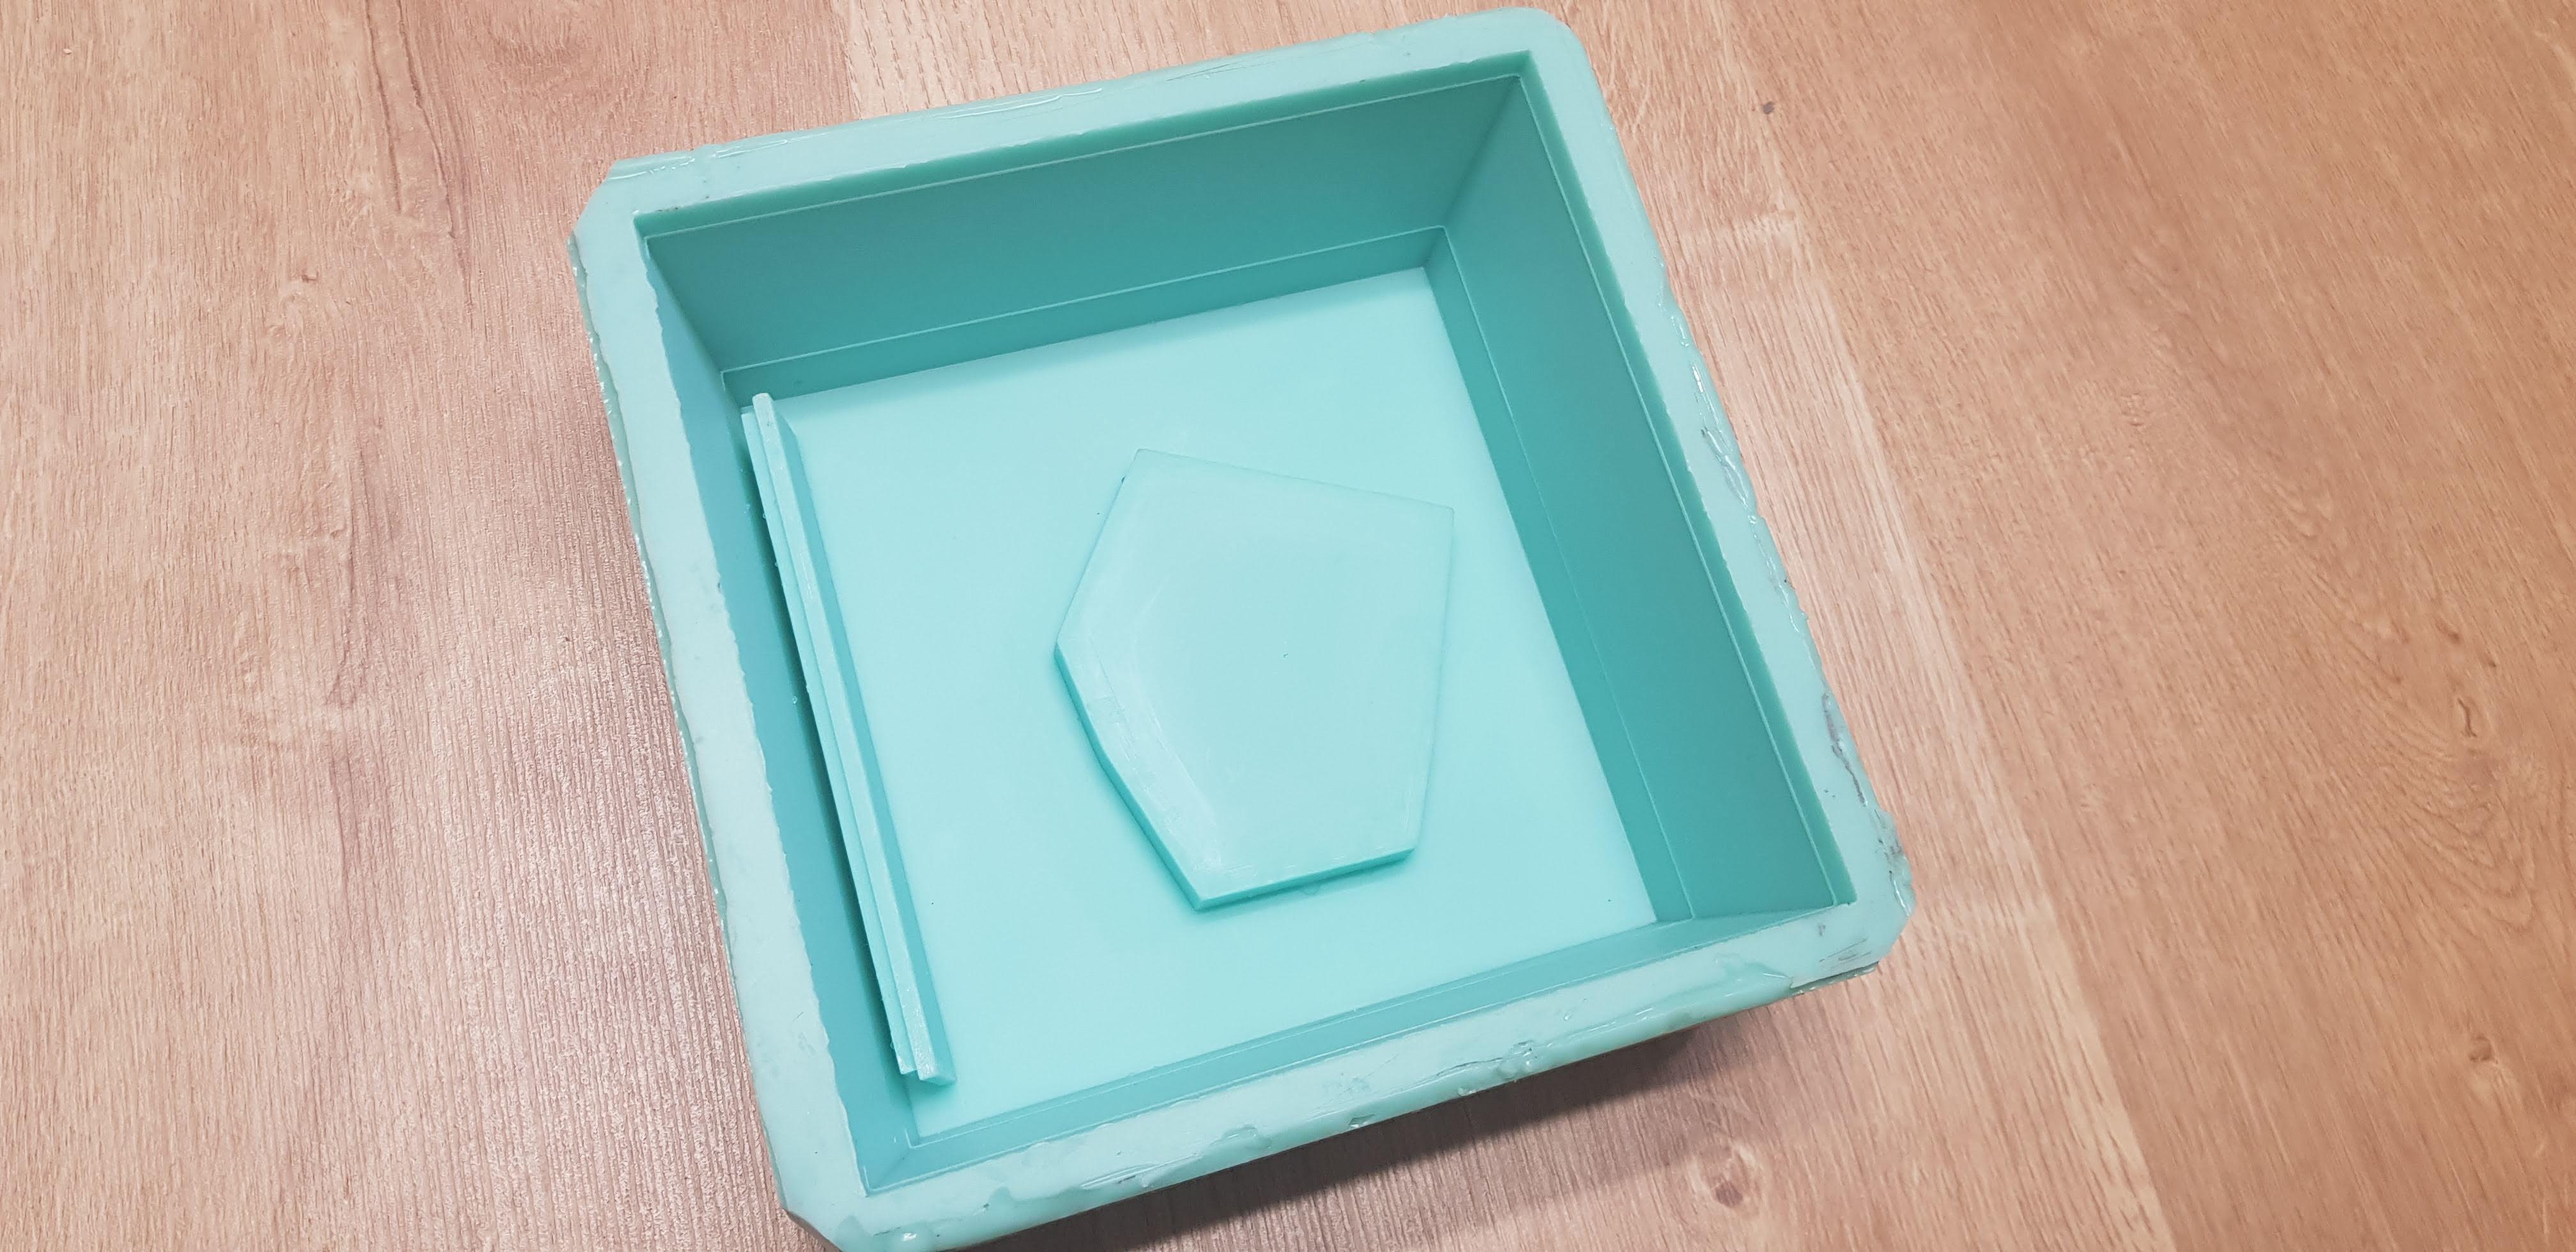
We thought that a mold as basic as this would be easy to use, but we will see in the next part that we were far from the truth!
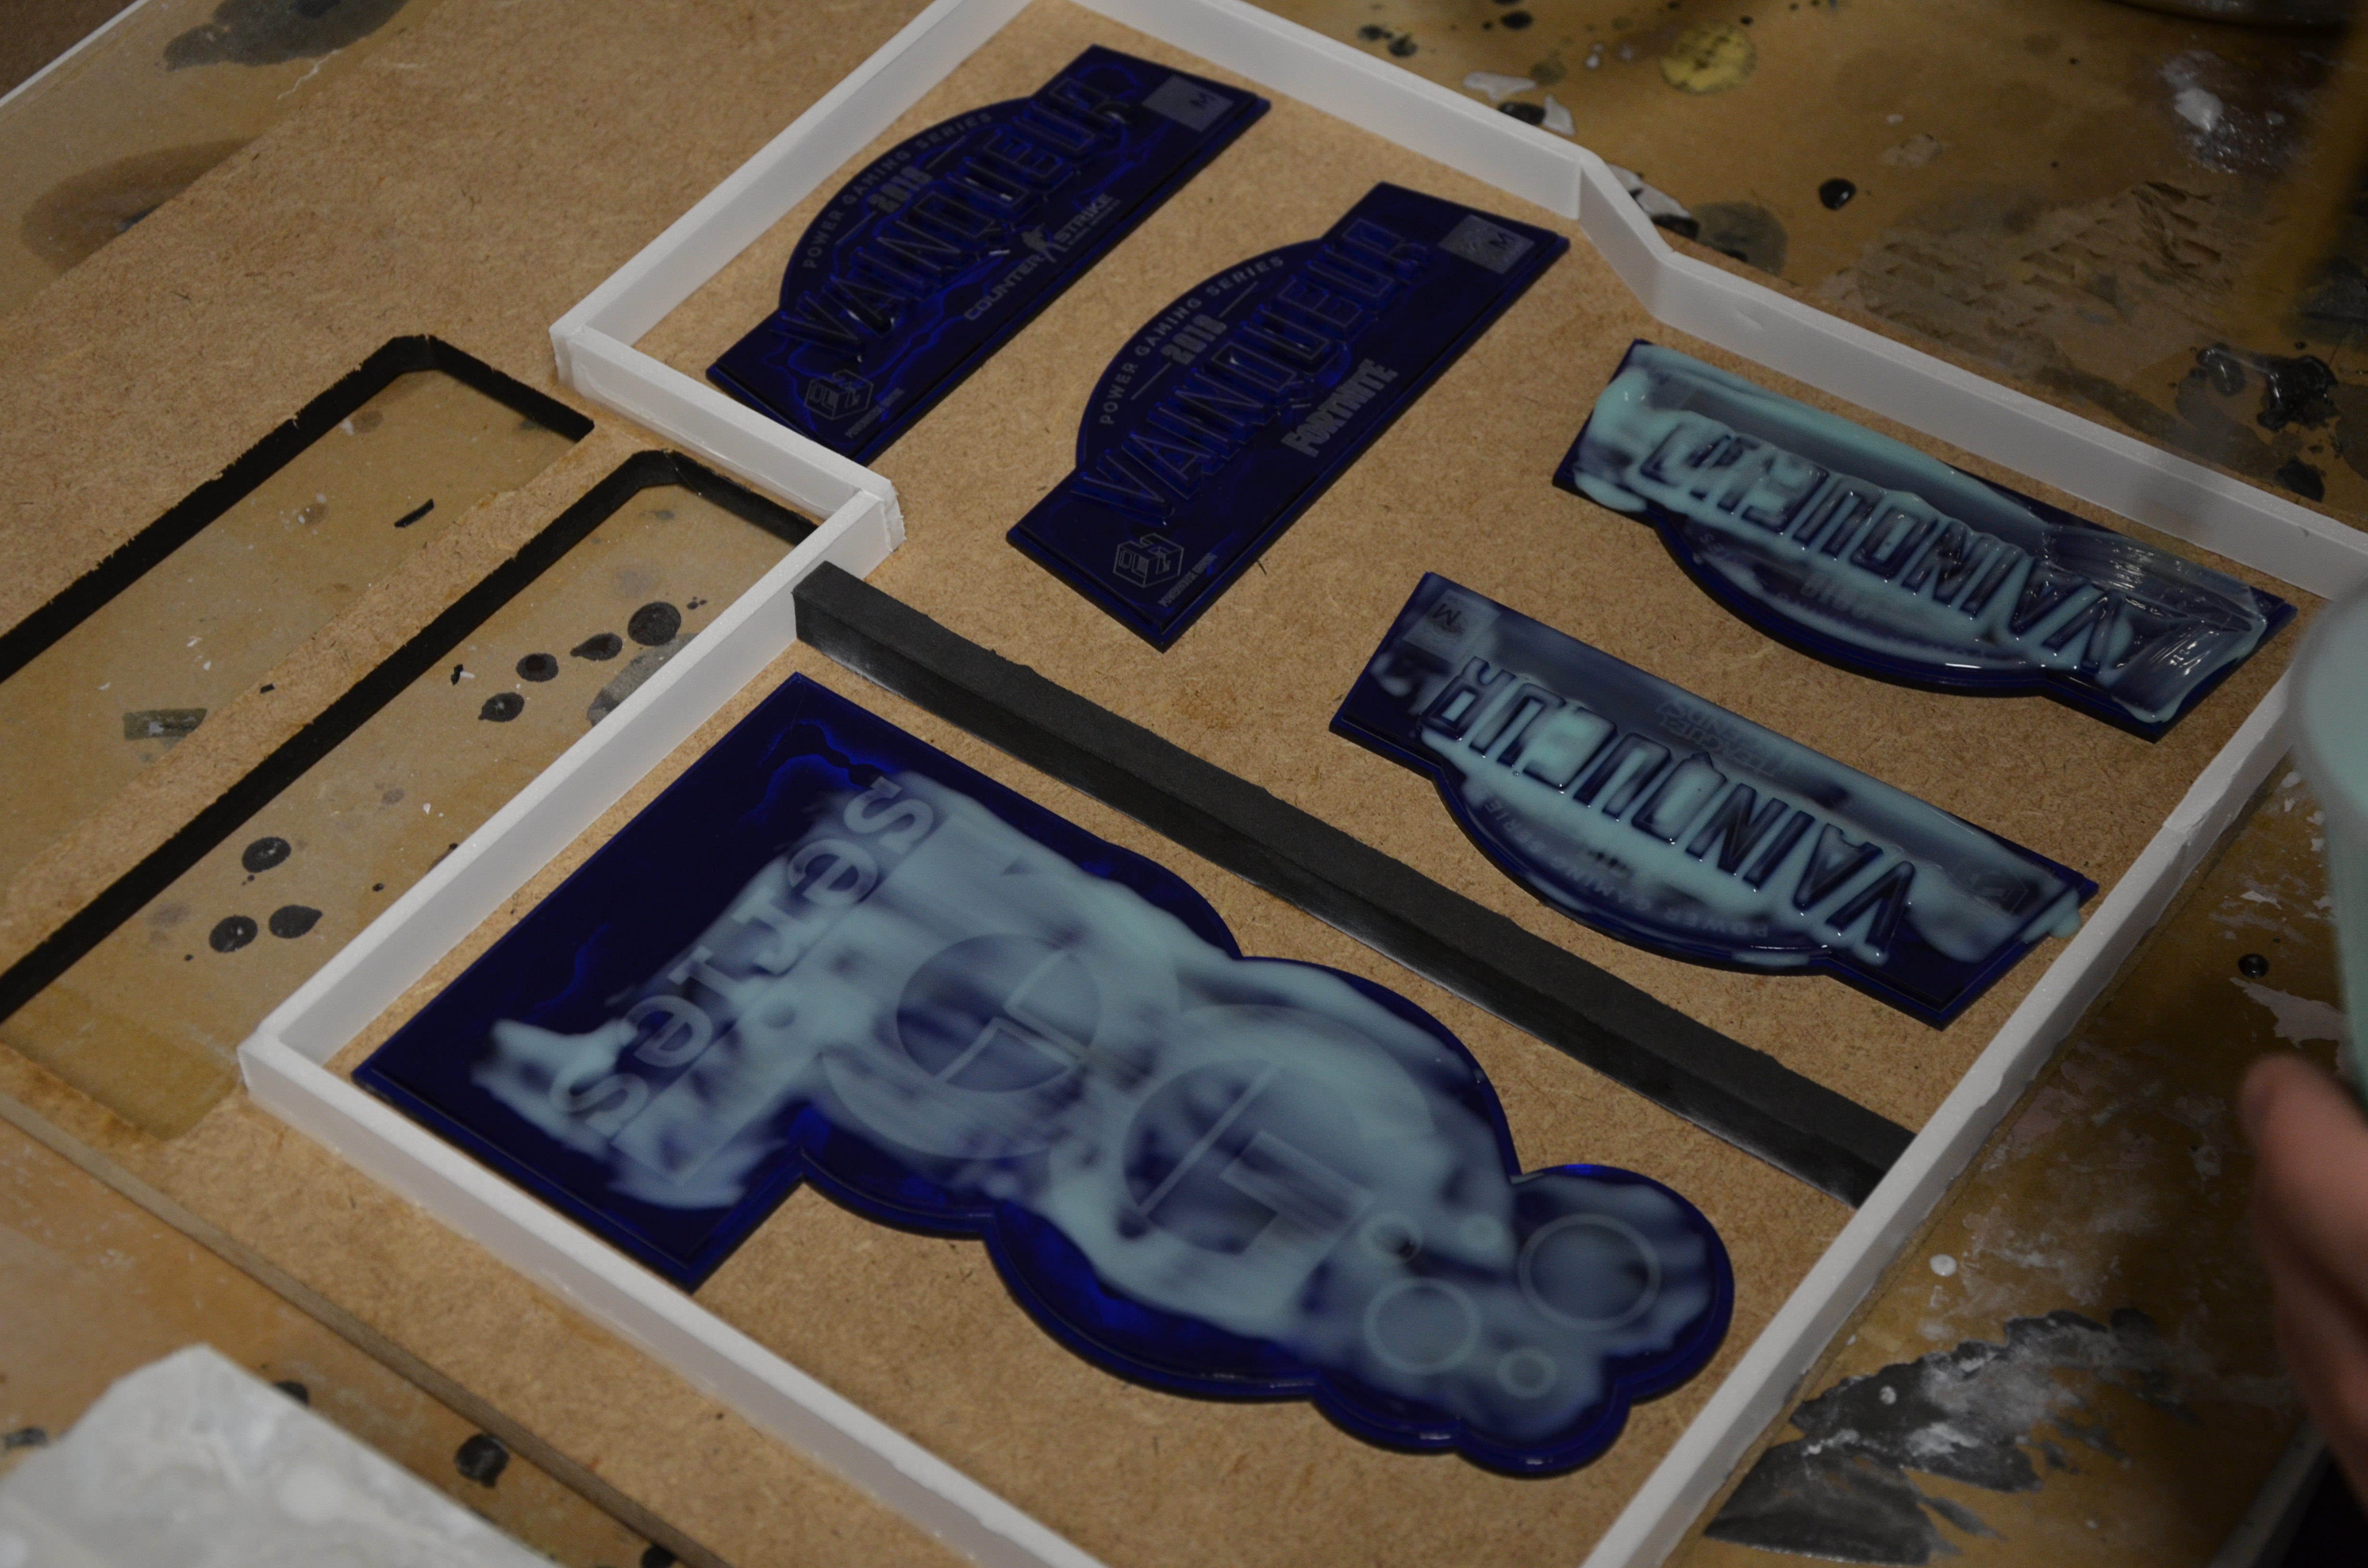
The plates of each game and of the PGS logo were molded at the same time (5 in total). Simply glued on a wooden board, we poured the silicone over them, and once polymerized, unmolded the large plate and cut each mold apart.
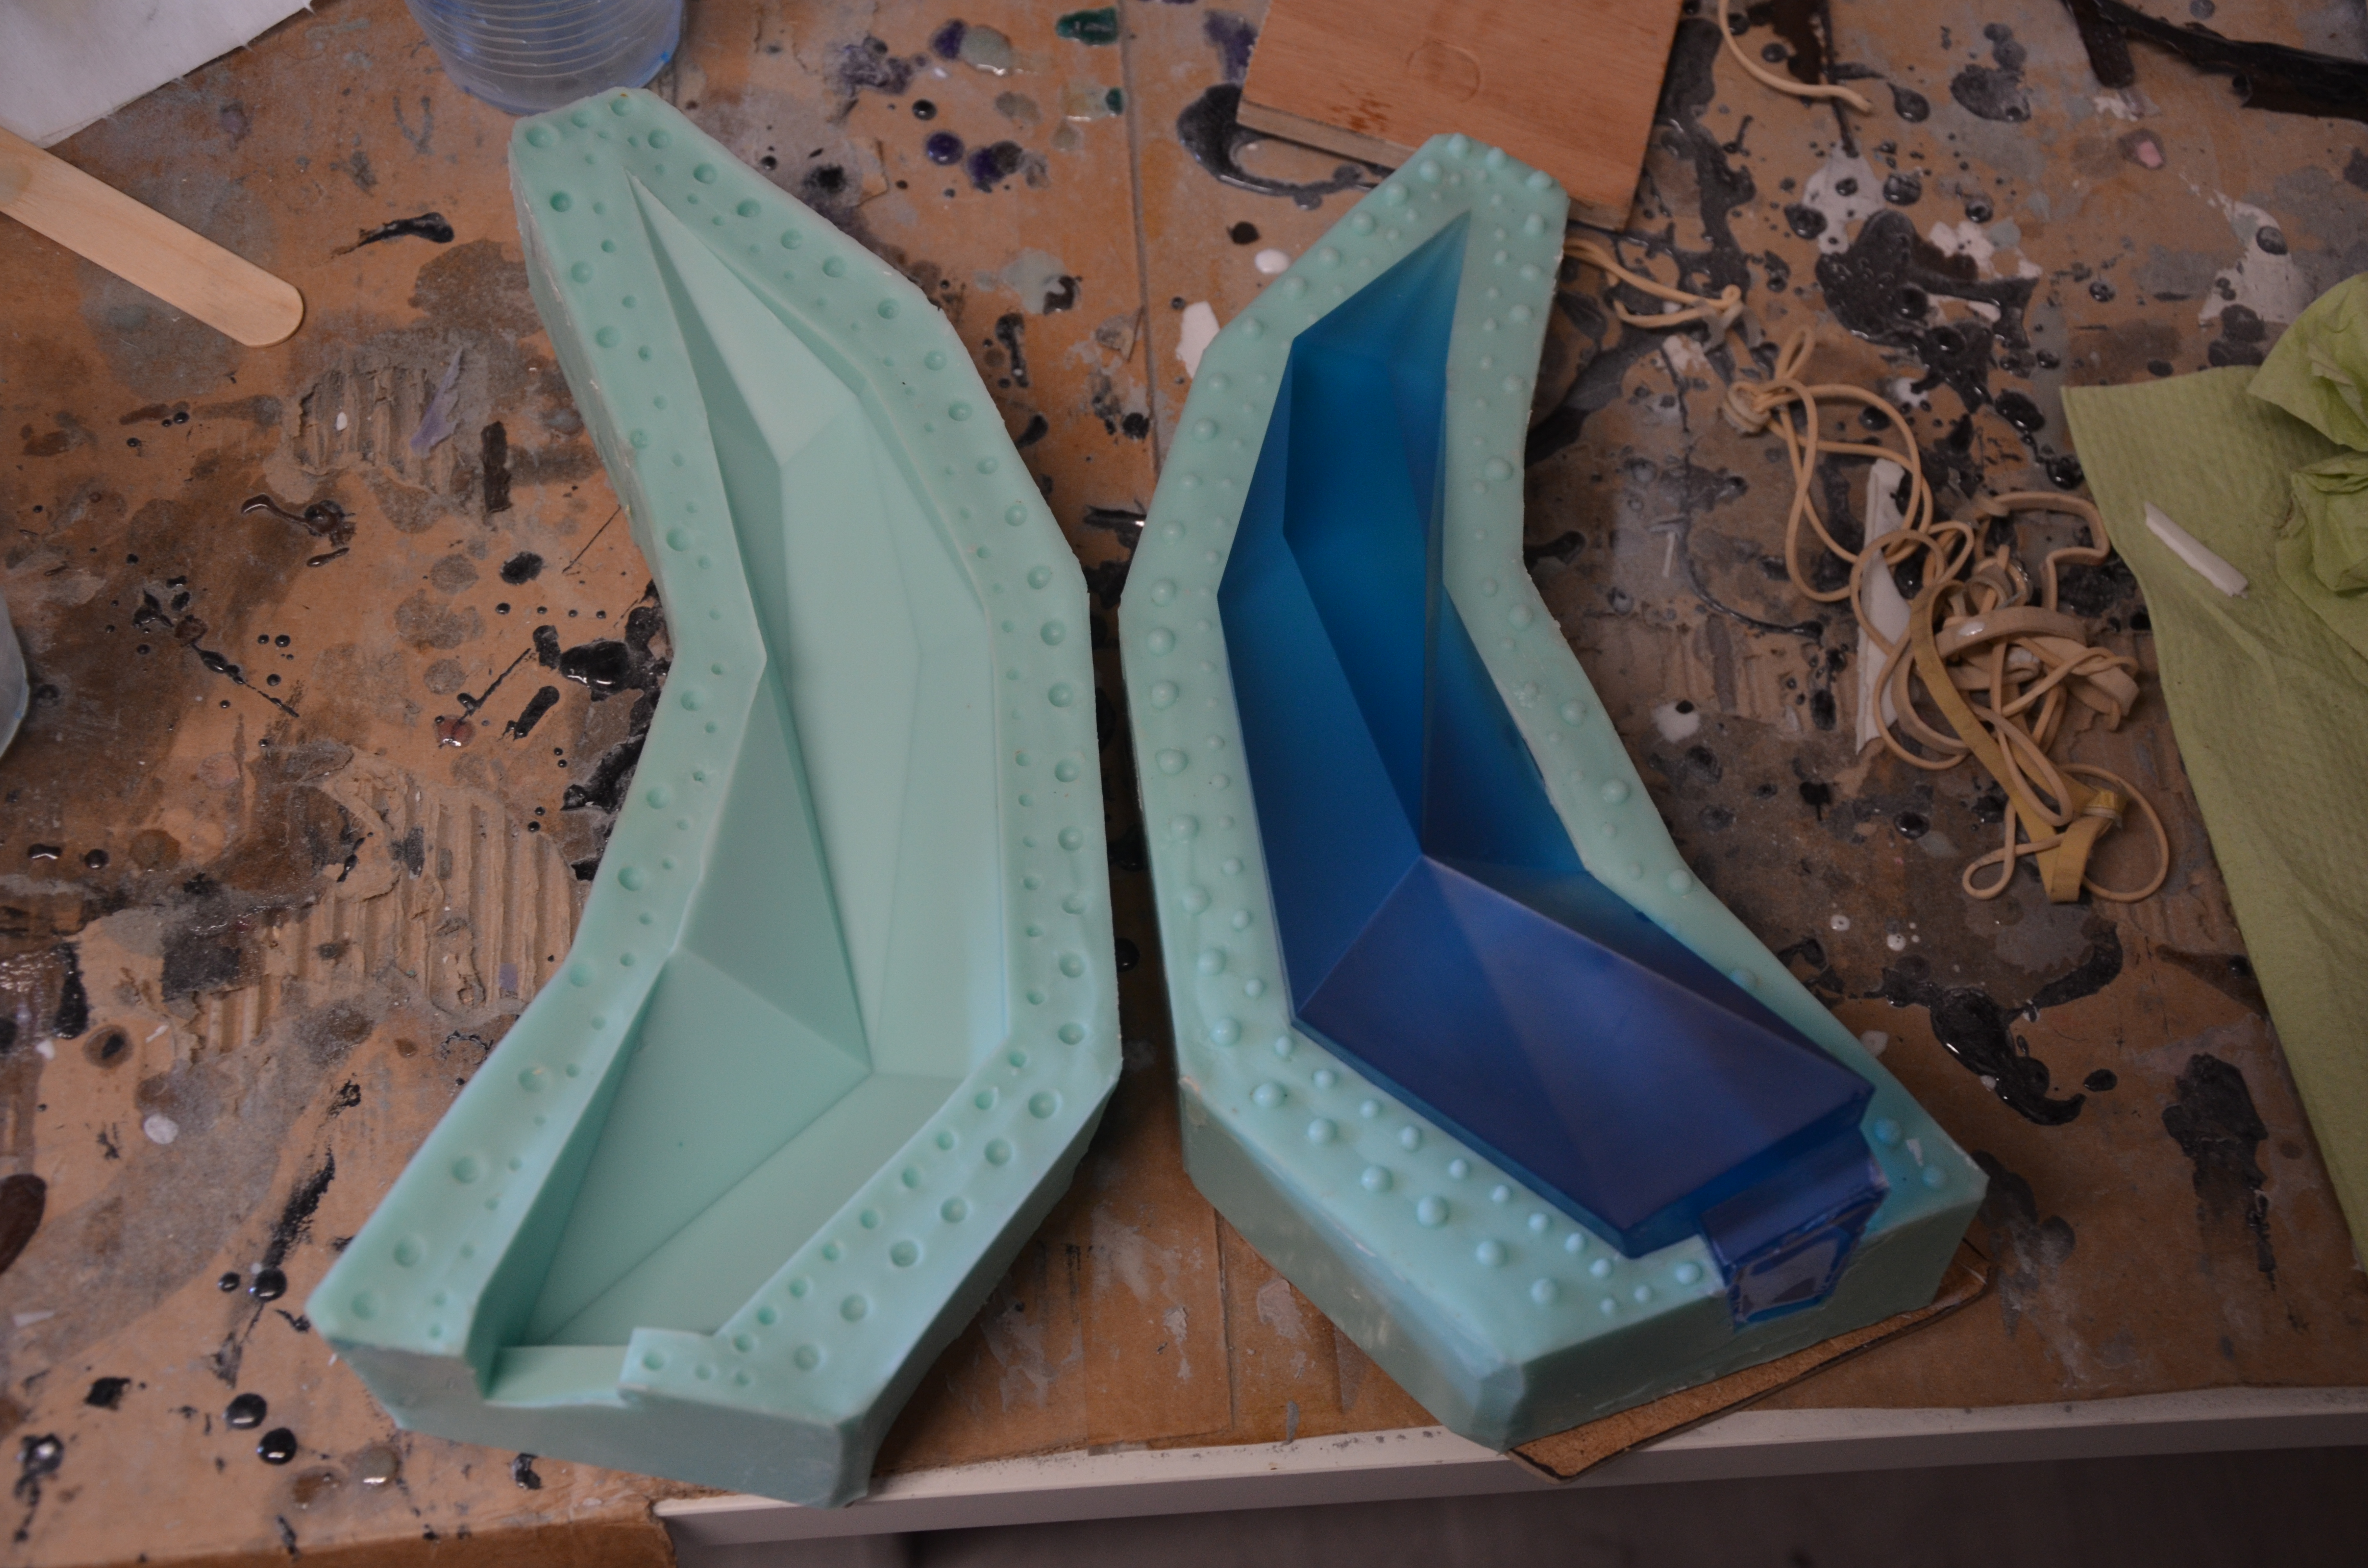
Now the flames, they each required a bit of preparation.
It was first necessary to determine the correct profile of each flame in order to use as little silicone as possible. Indeed, placing the flame in a non-optimal direction could have made us use up to twice as much material, and silicone is rather expensive! So a little optimization work was not superfluous.
This allowed us to print a sheet that would show us where to build the walls around for the mold so they have just the right thickness to get an adequately stiff mold.
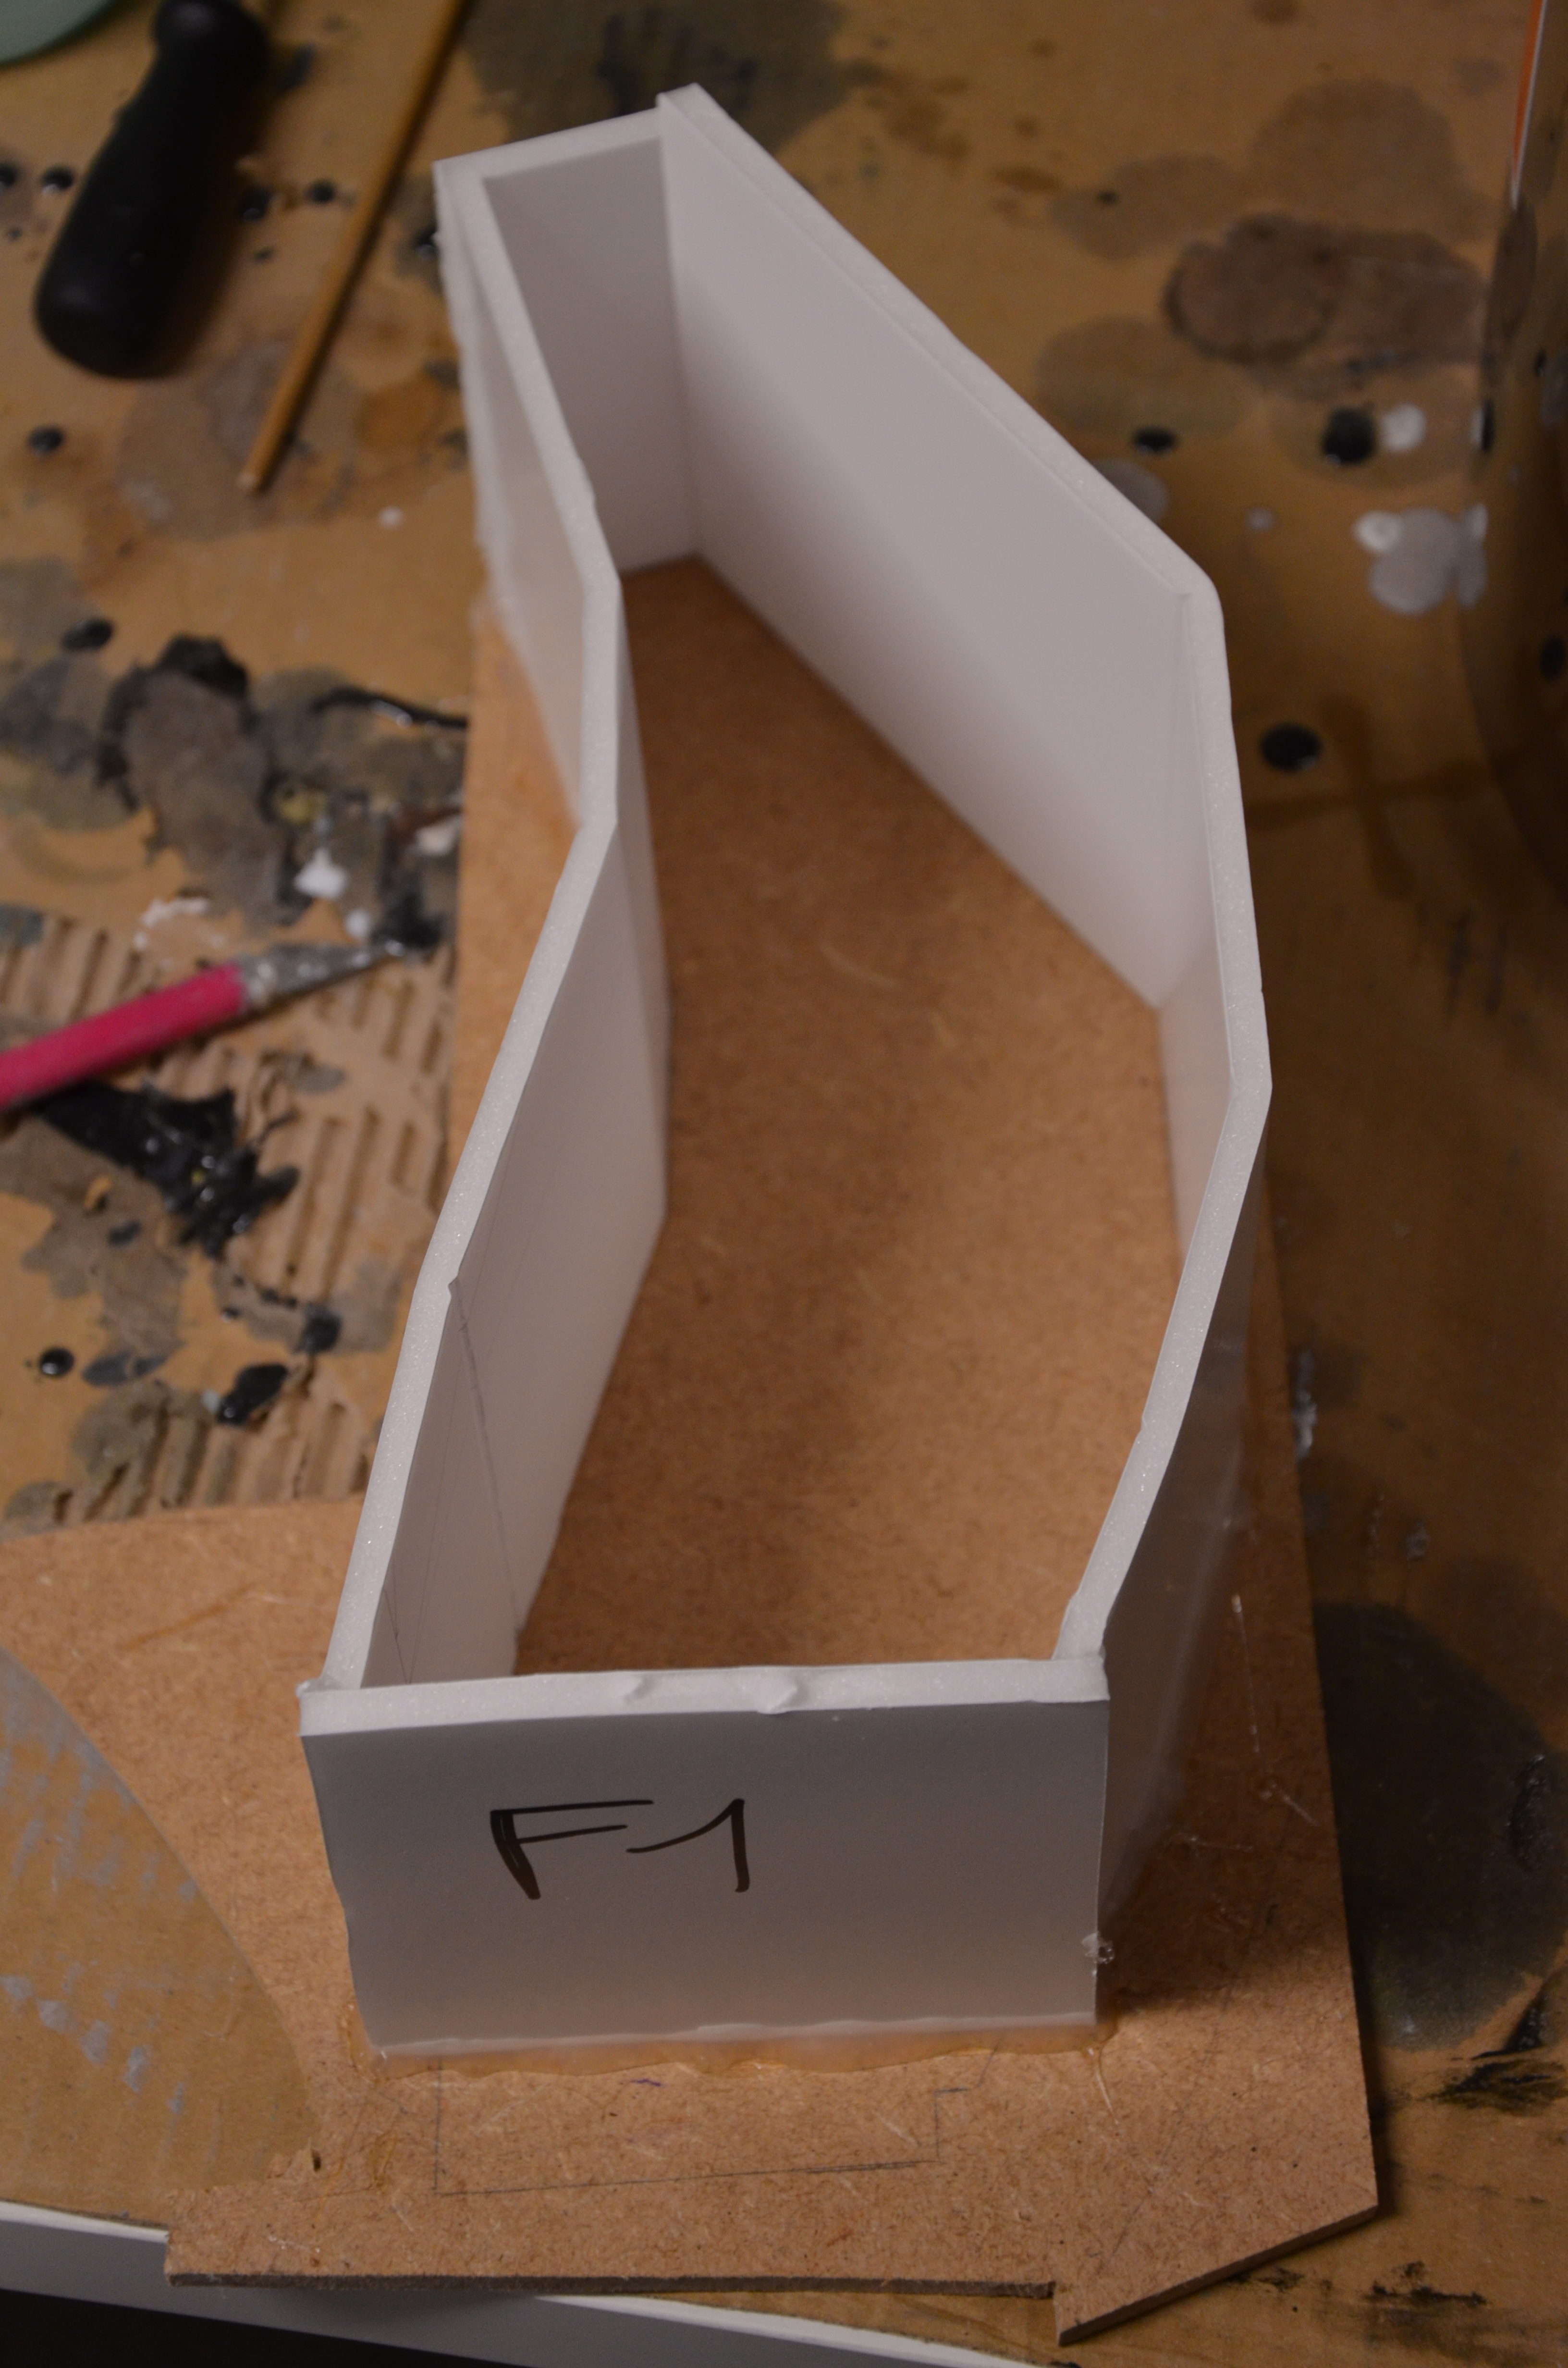
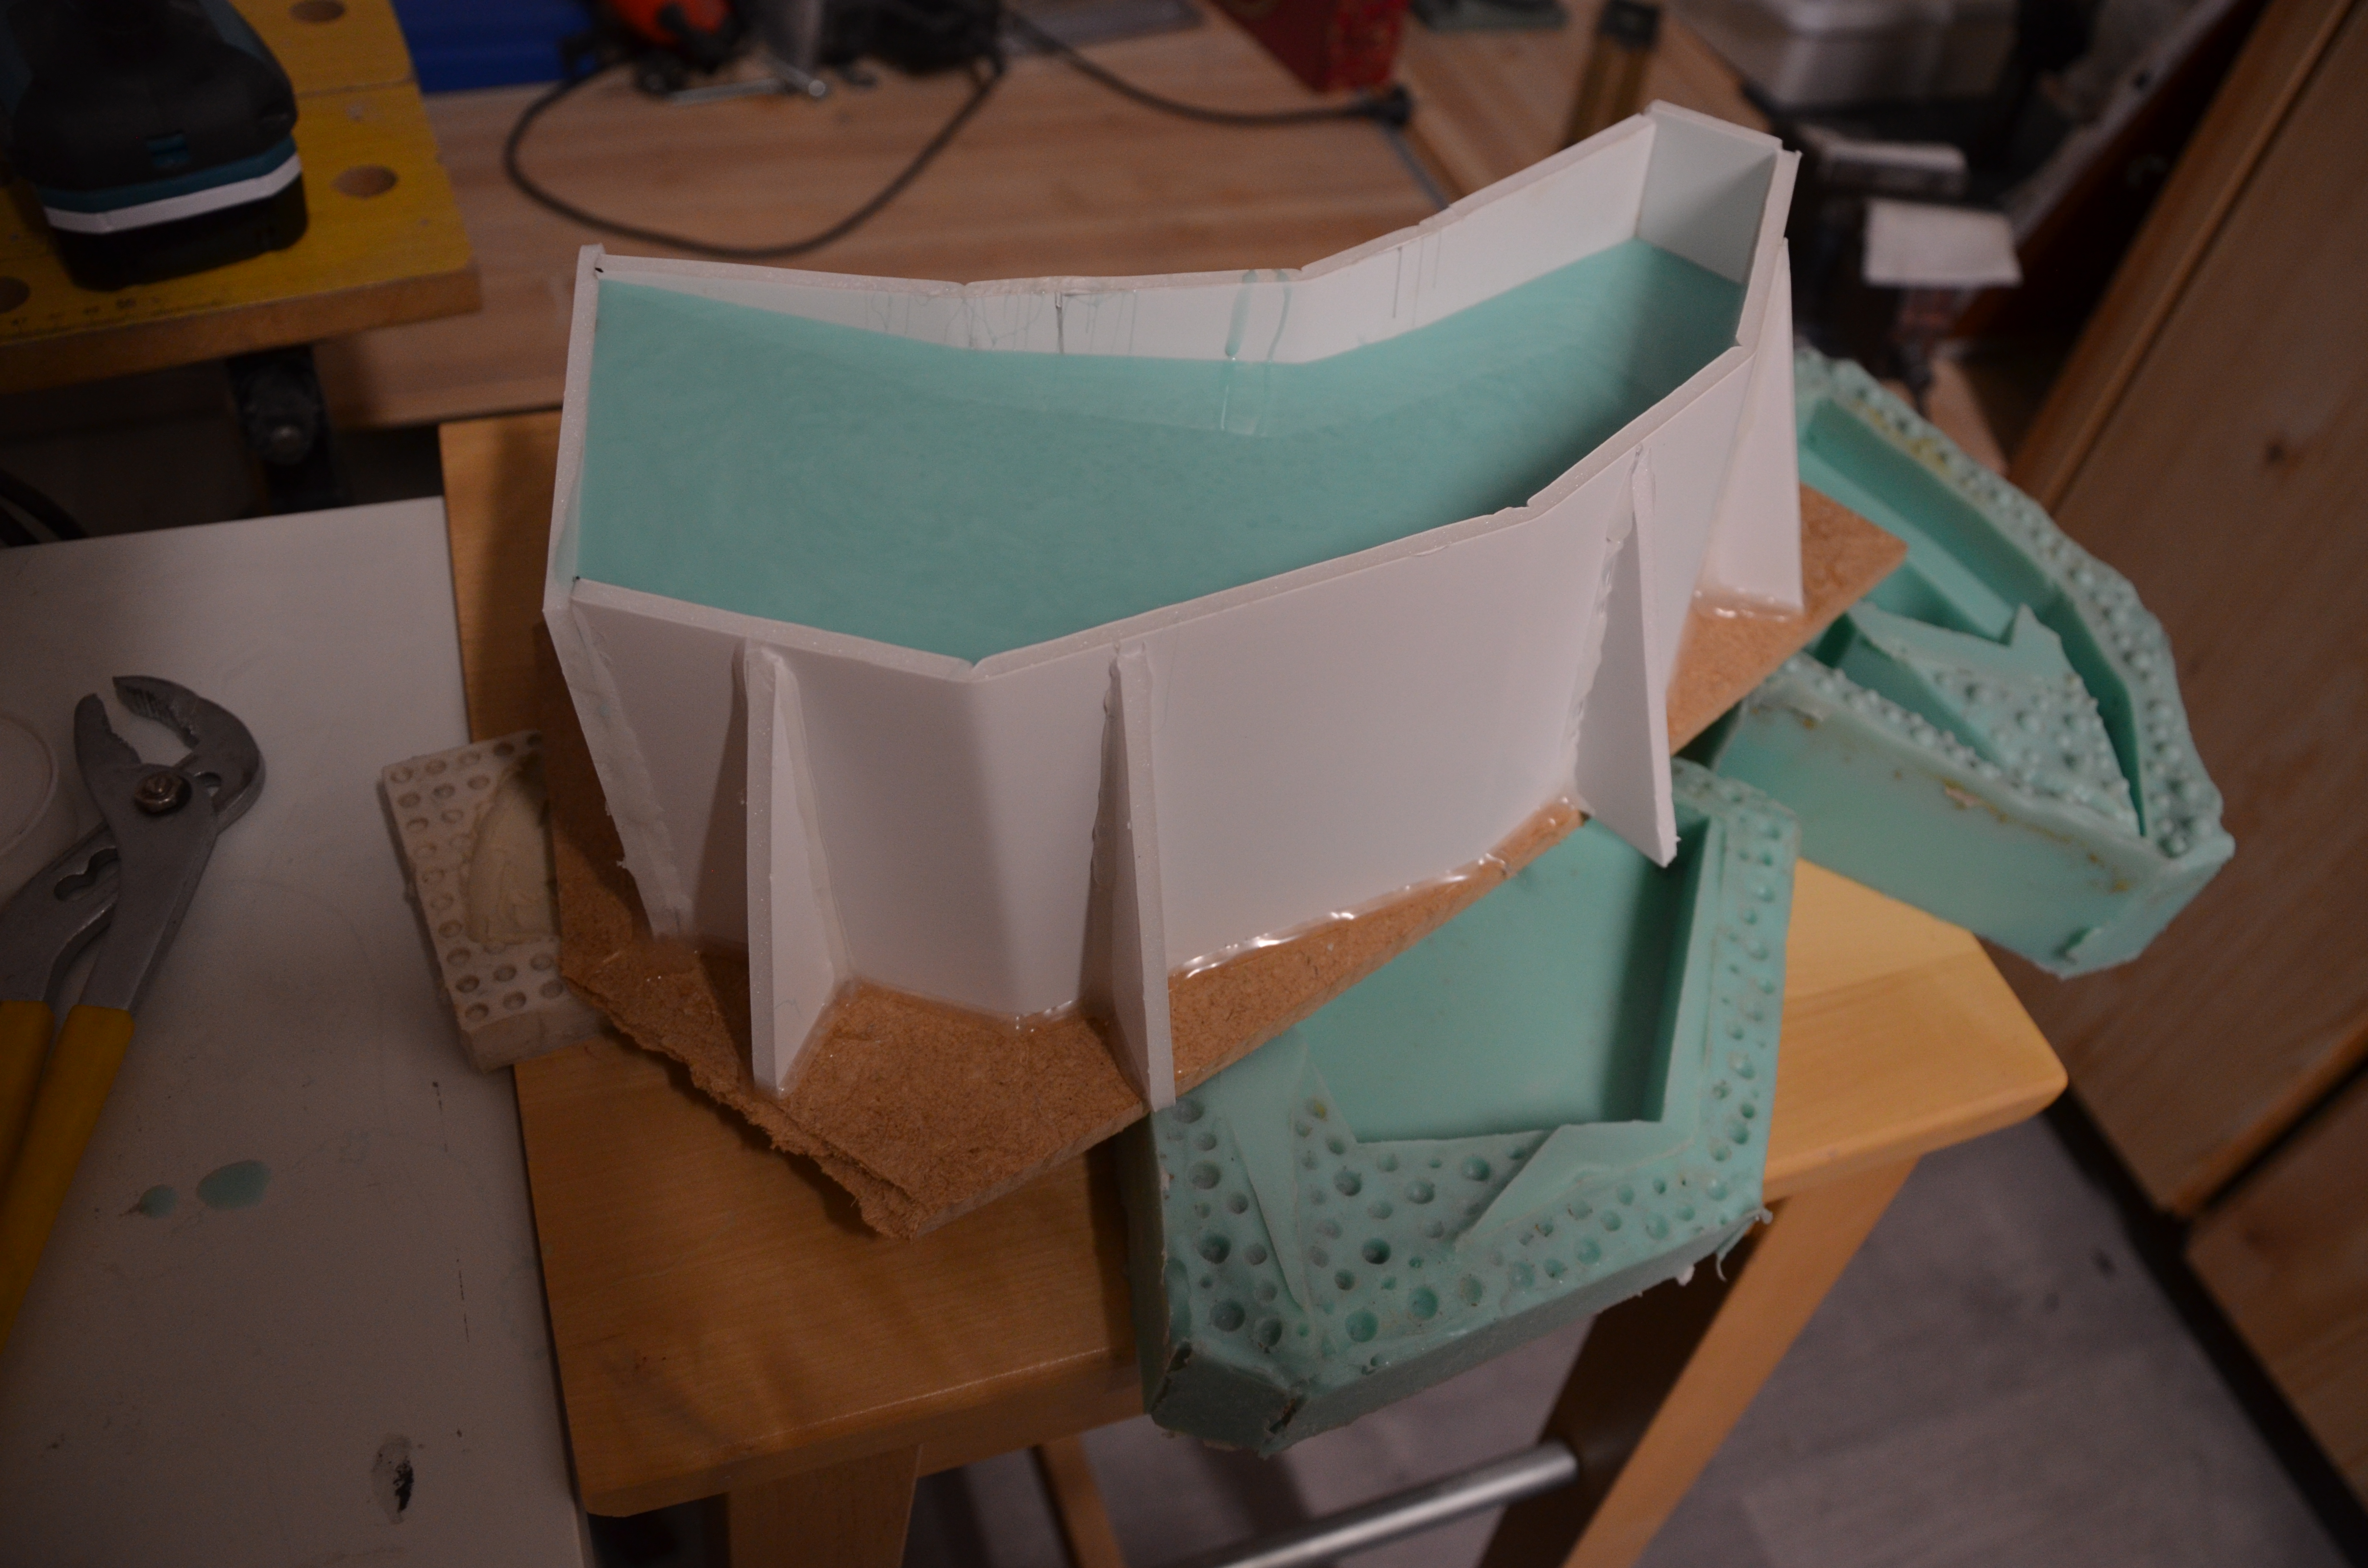
Once the cardboard-foam walls are well glued to our wooden base, we “just” have to follow the steps to make a mold in two parts, by placing the flame inside and by filling one half of the flame with clay. The shape of the flames makes the task a bit complicated but it is one of those situations that we learn to manage quickly when we make molds regularly (we curse a bit while breaking-off half of the walls to reach the areas that we can’t reach otherwise…)
When the keys are made, the clay is in place and we have made sure that the mold is perfectly clean, we pour the silicone in. Once again for the sake of not wasting material, we tilted the mold so that the silicone does not accumulate in a corner unnecessarily but is distributed well on all the height of the crystal.
Twenty-four hours later, the first side is polymerized. We turn our construction, remove the base and the clay, we clean everything well, pass a shot of Vaseline everywhere and pour the second part of silicone, again tilting the mold to distribute the material.
Once finished, we just have to disassemble and remove the master of our mold to keep only the silicone part!
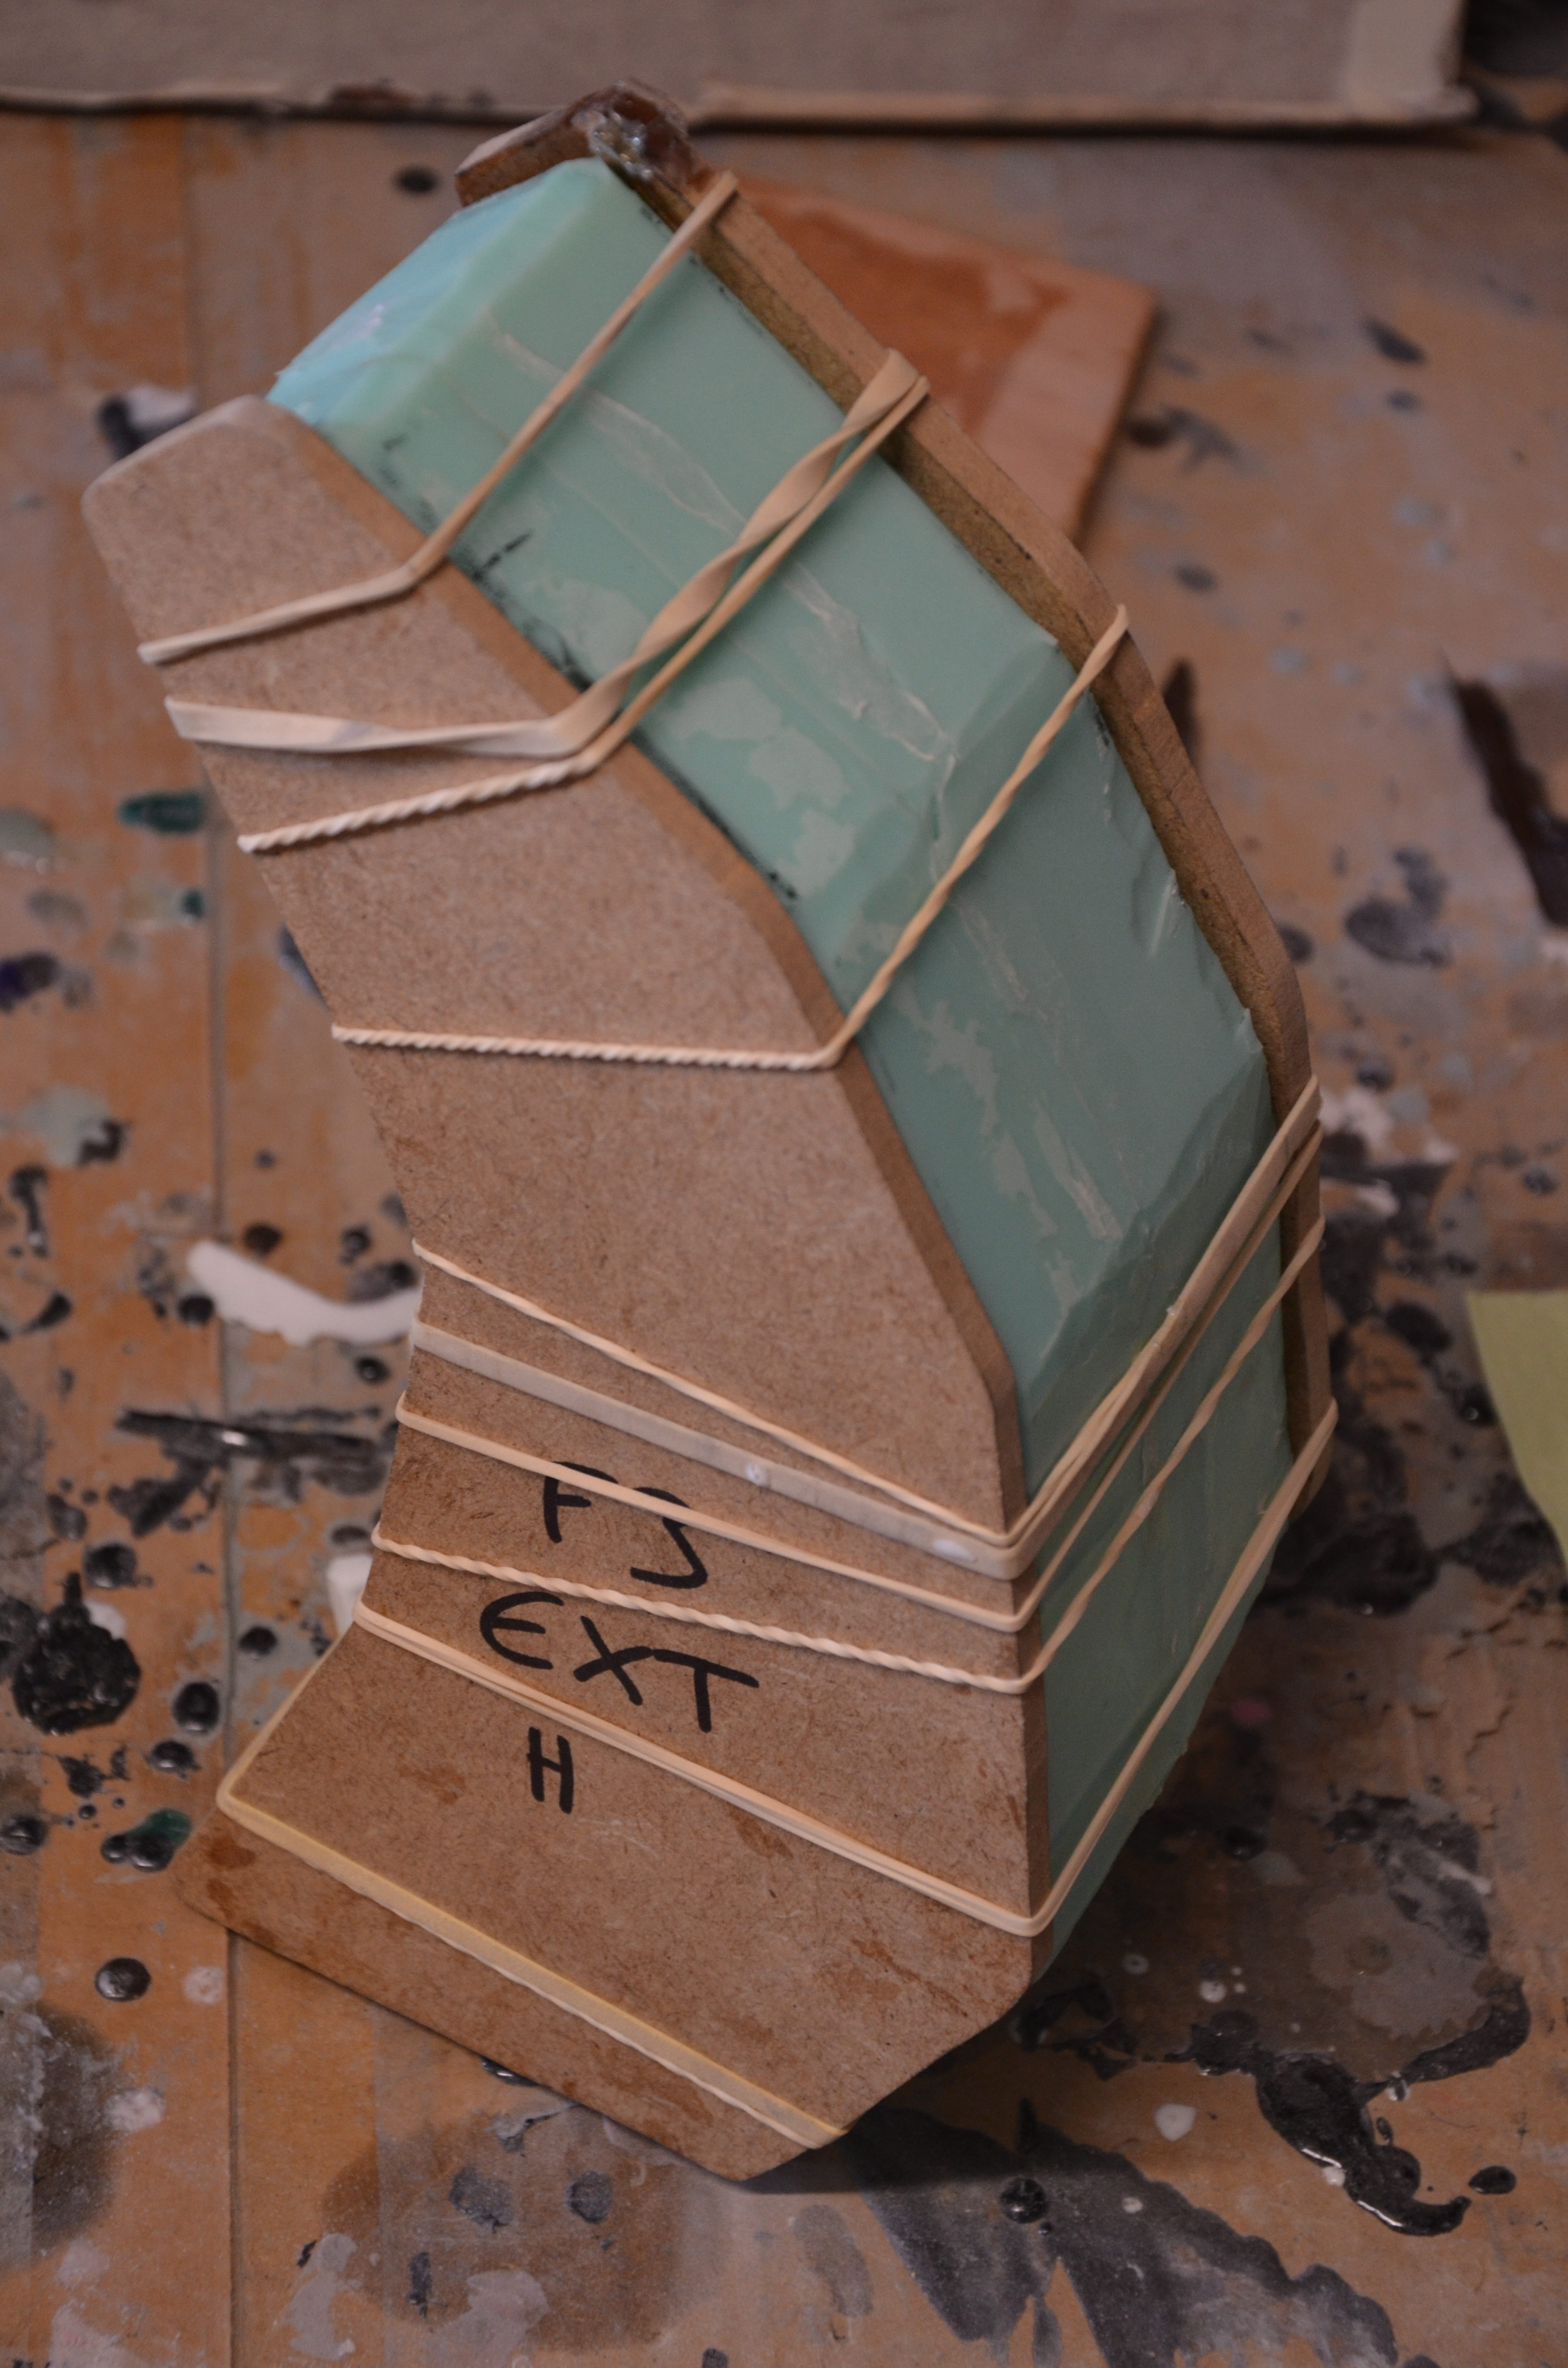
To hold the mold still during the casting, we cut wooden boards in the shape of the molds. They will surround our mold and keep it closed by elastics all the way up.
Casting
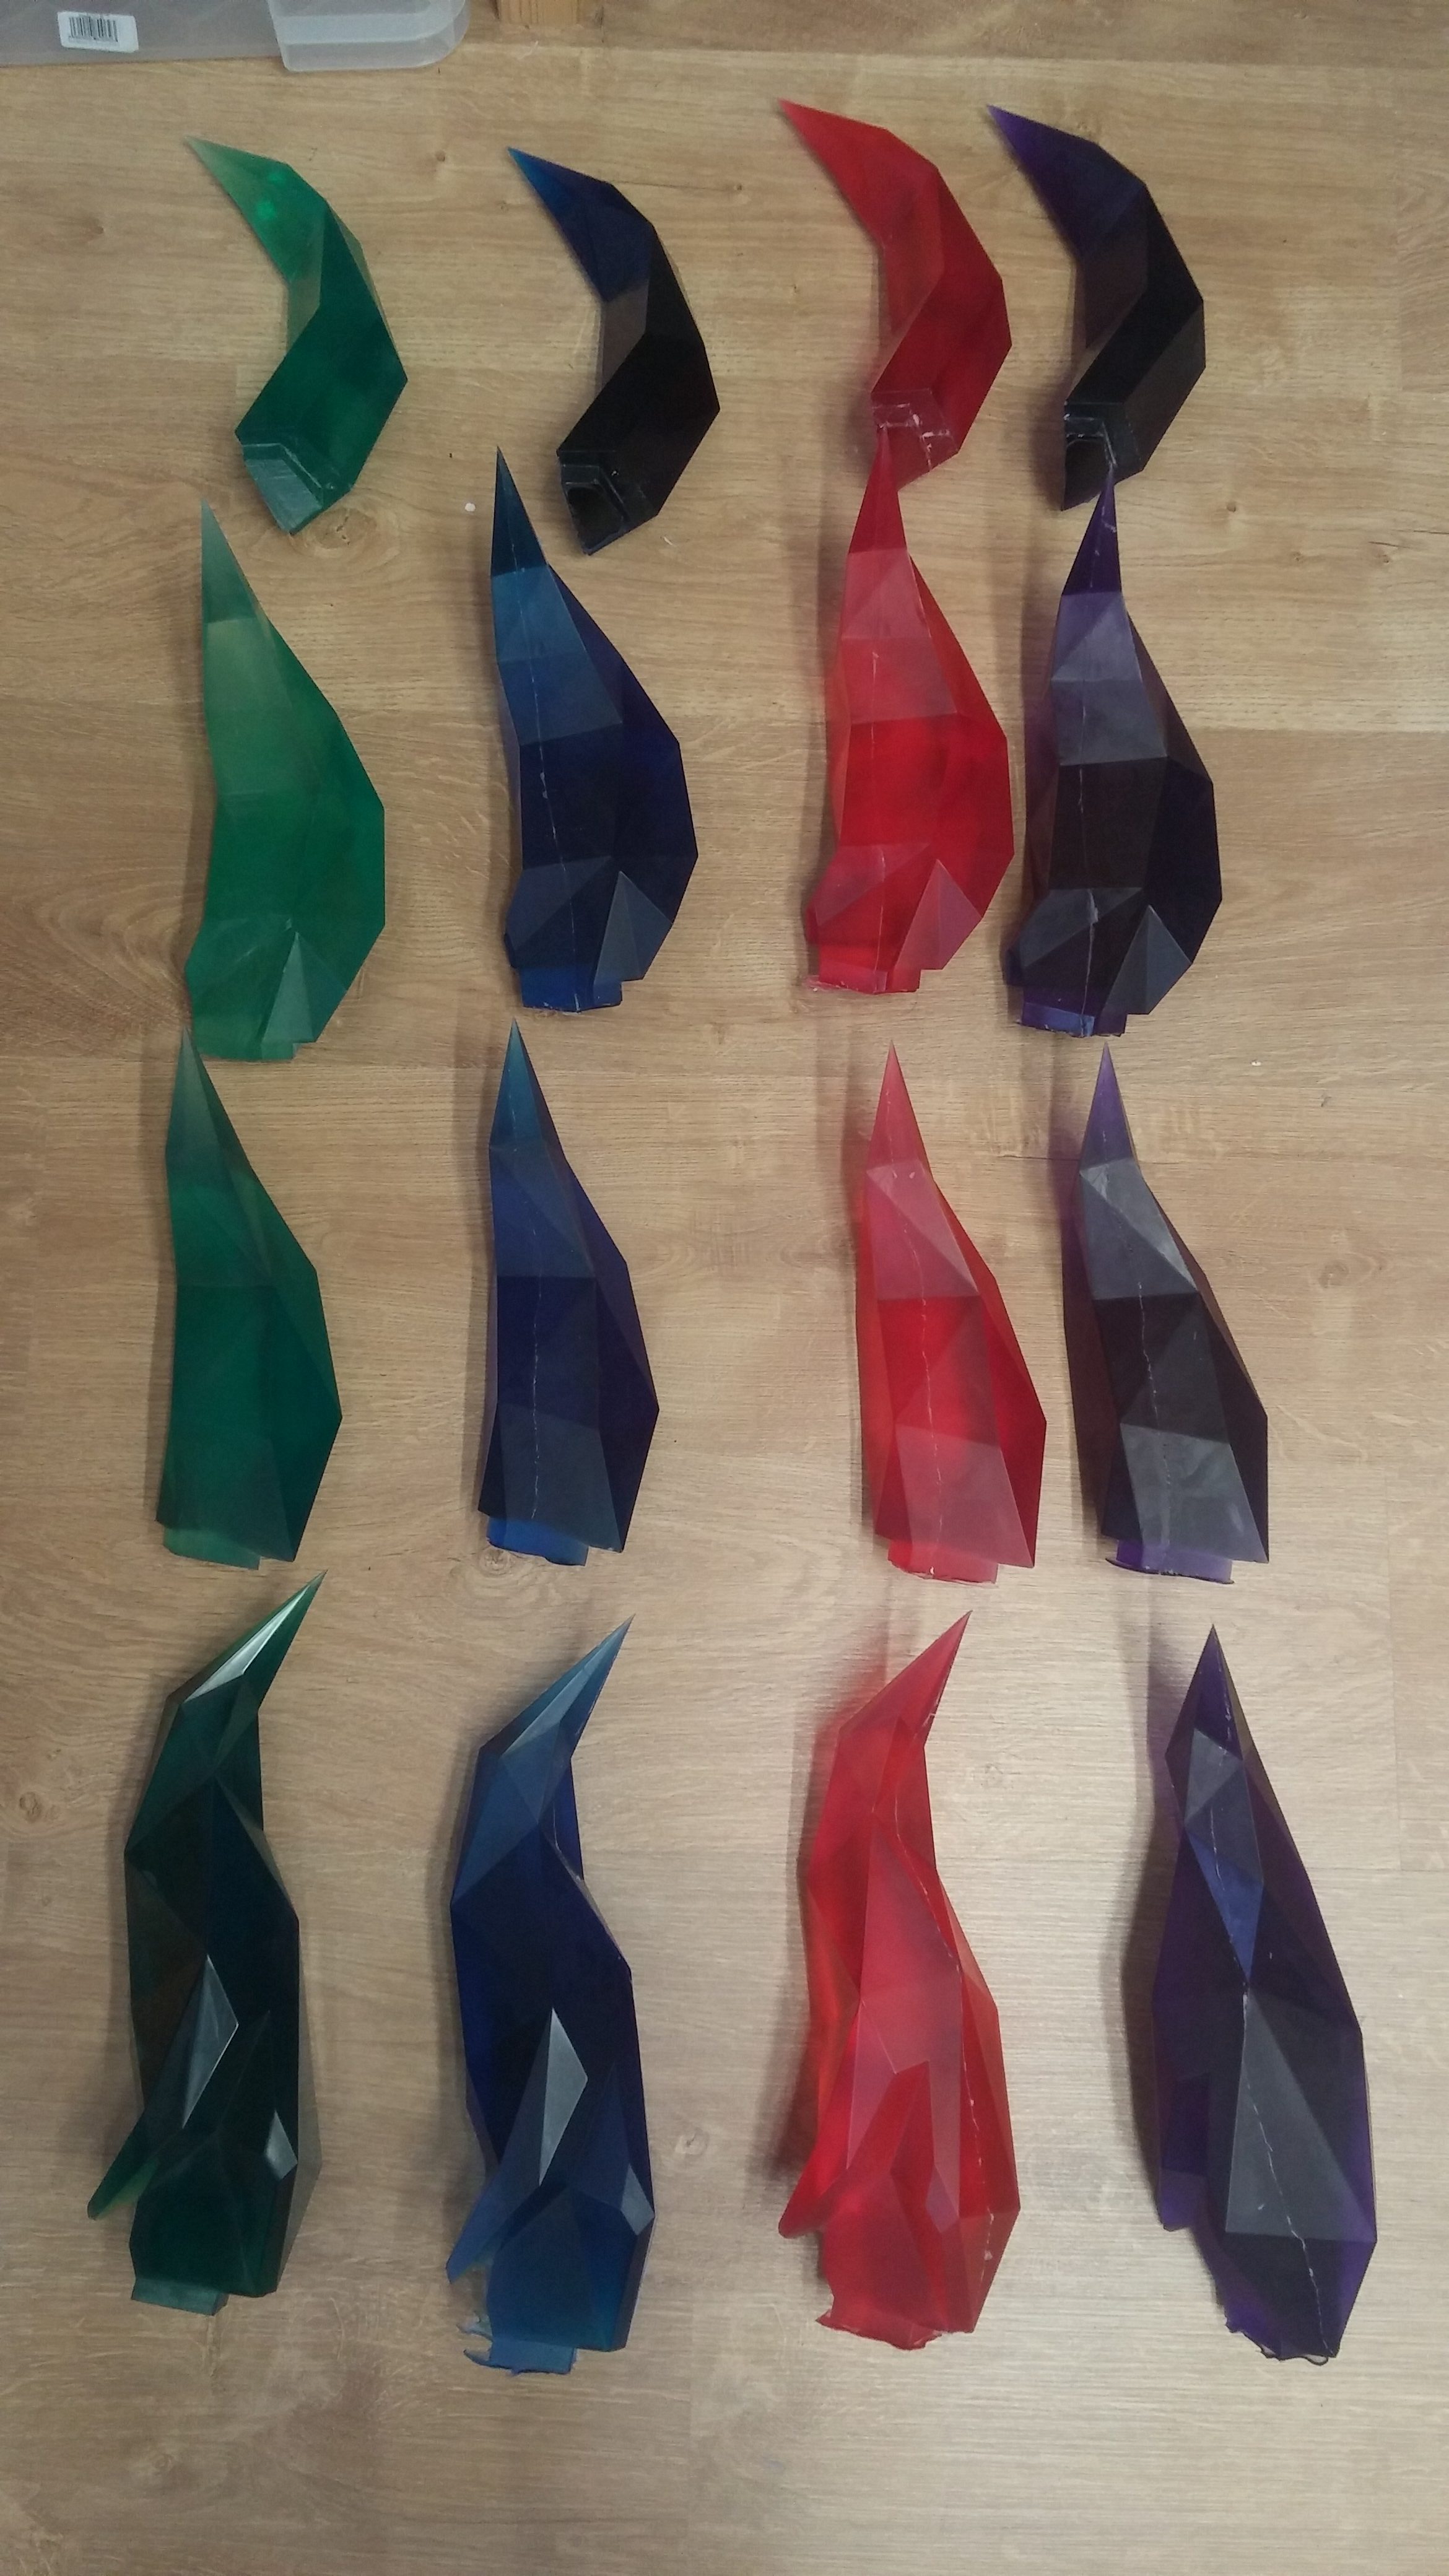
So we need to make four flames of different sizes but of identical color for each trophy. For this we use products from Smooth-On, namely the transparent resin Smooth-Cast 326 EU and the So-Strong pigments for tinting the resin.
The process seems simple enough: Take a good amount of resin, mix’n’put the stuff into the mold and voila! That’s right, but there’s more to it…
First, we need to pour the B part of the resin gently into the cup to avoid bubbles, and add the right dose of dye to get a color that is neither too light nor too dark. Then mix for a good while to avoid dye fillets that can stay in the cup and break the consistency of the final color. This precaution is also required later, when mixing with Part A, which requires both speed and delicacy, because once poured, catalysis begins immediately and no bubbles must appear!
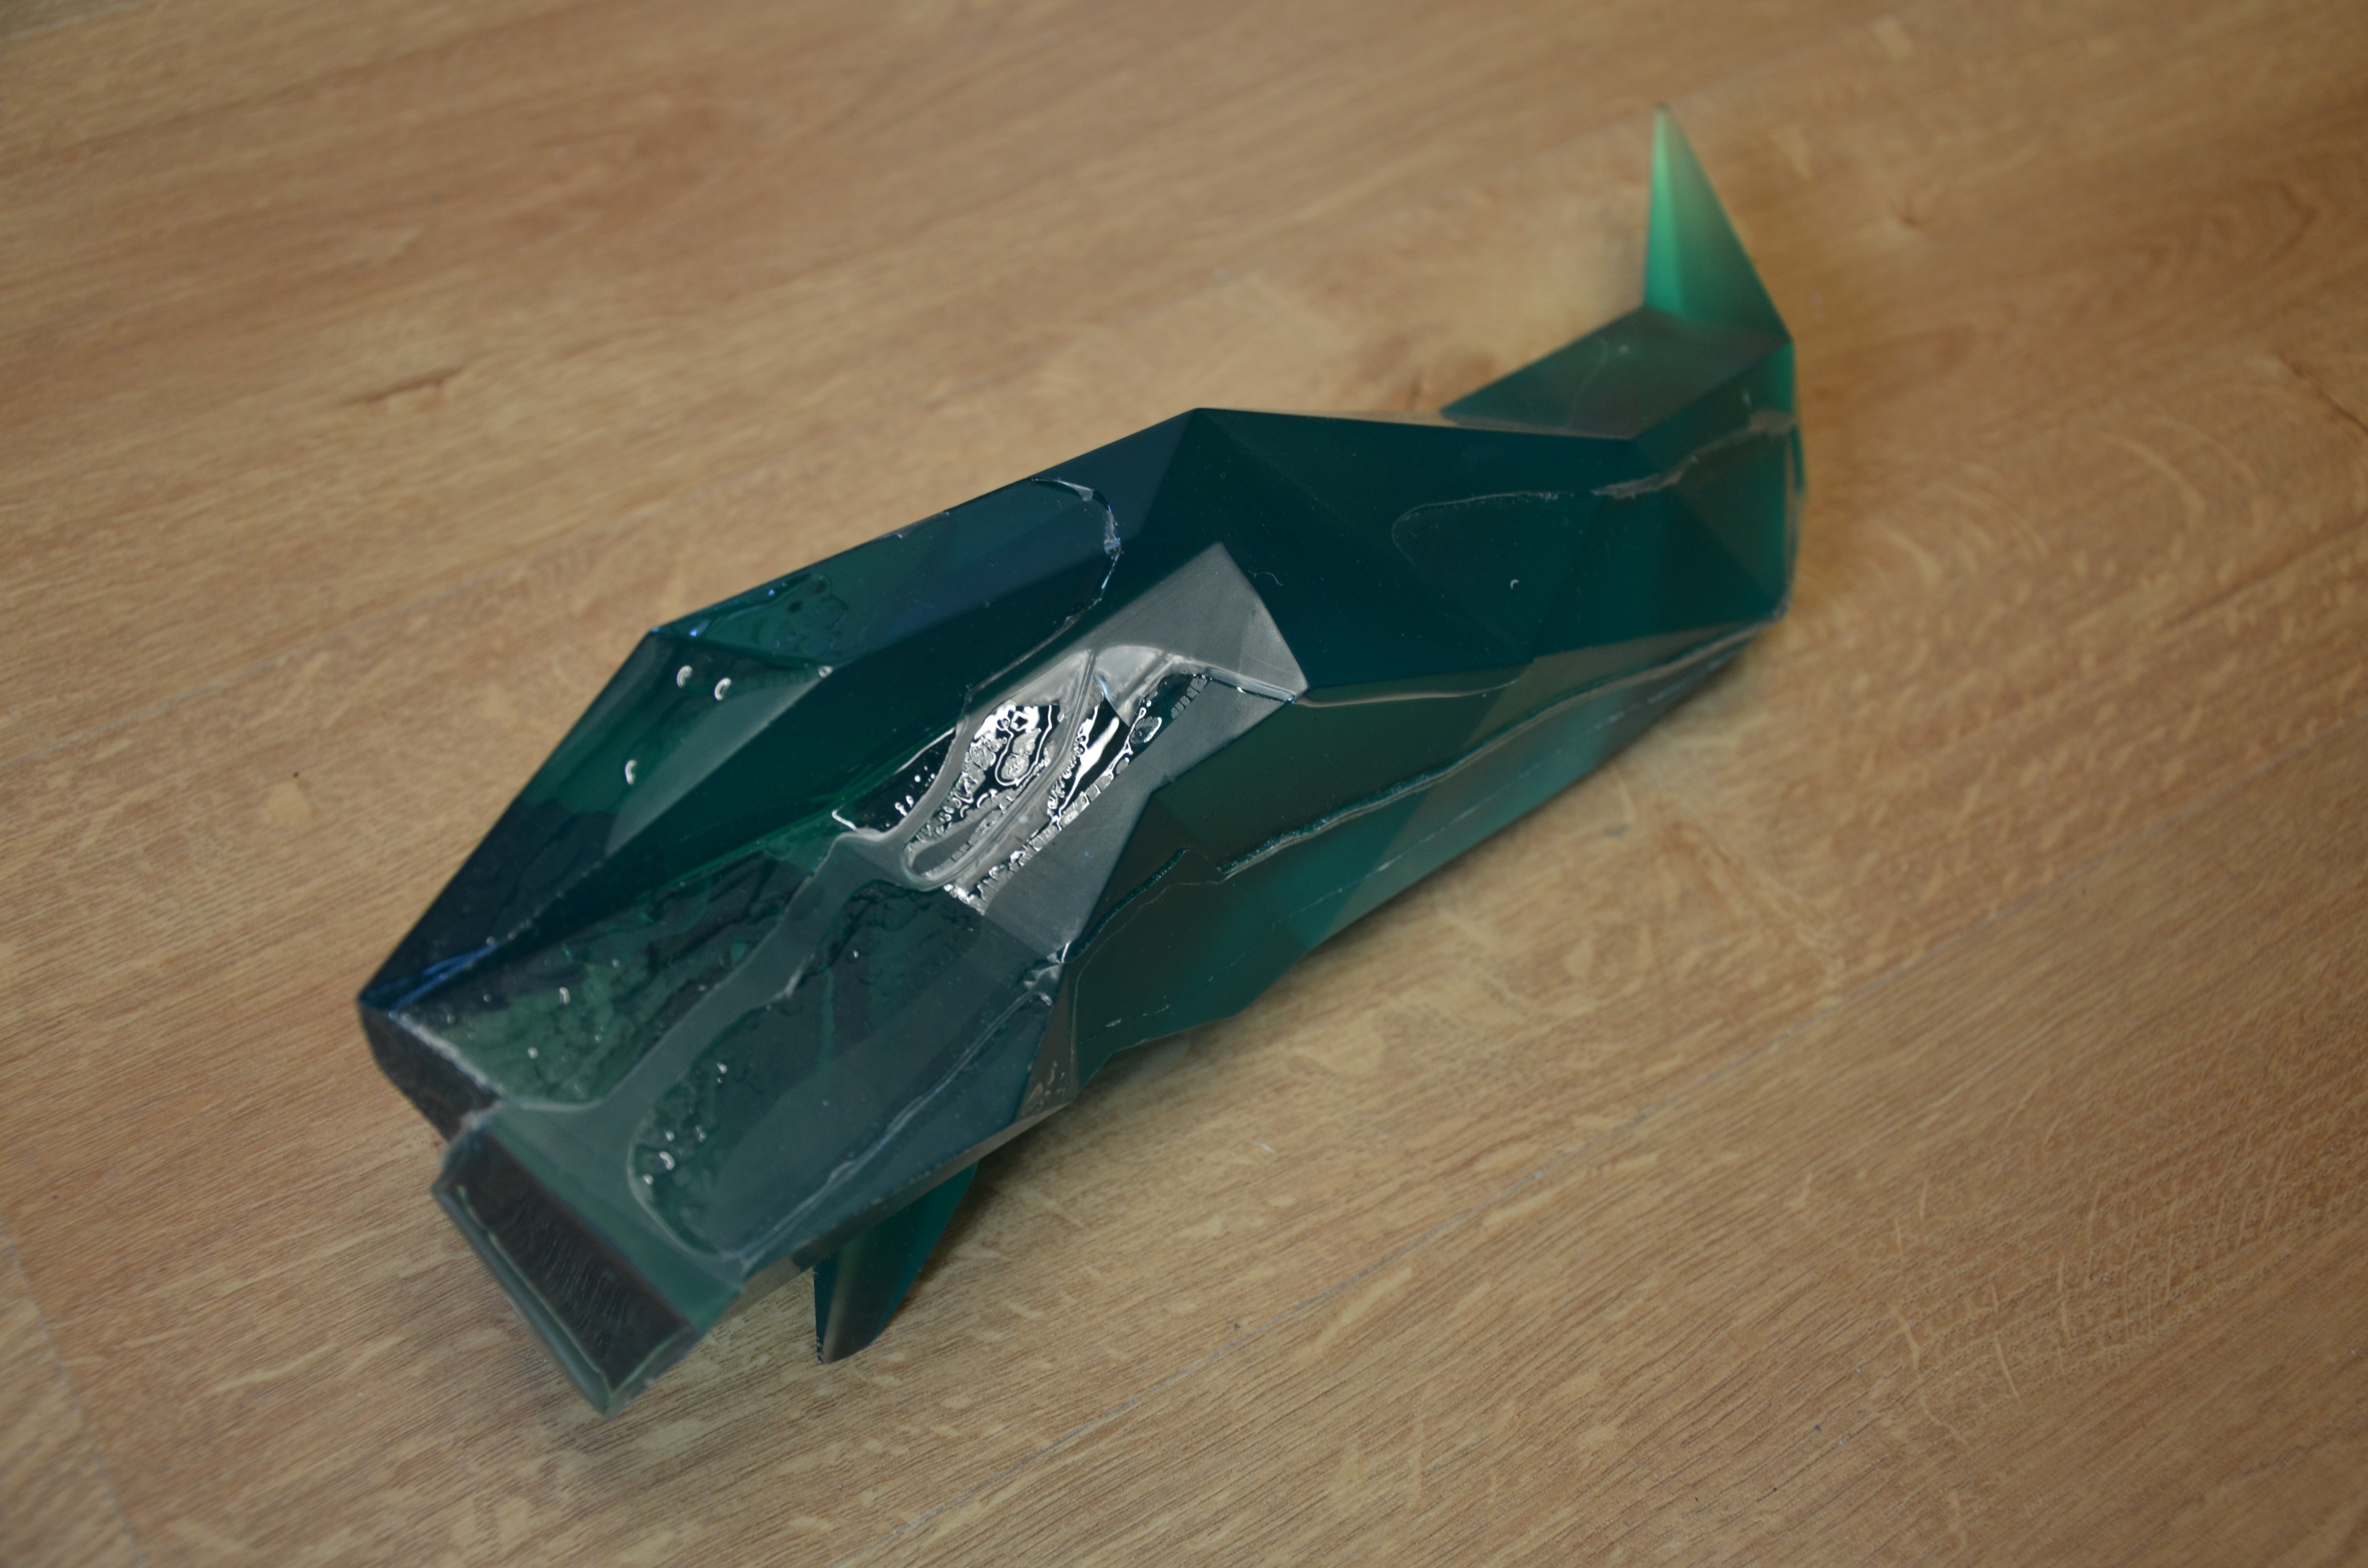
With our cups full of resin, we must now lean the mold and pour the resin gently into it so that the liquid flows along the wall and produces no bubbles. We then lean the mold in the other direction to prevent a large bubble from being trapped in the base of the flame. We complete the filling with the mold held straight.
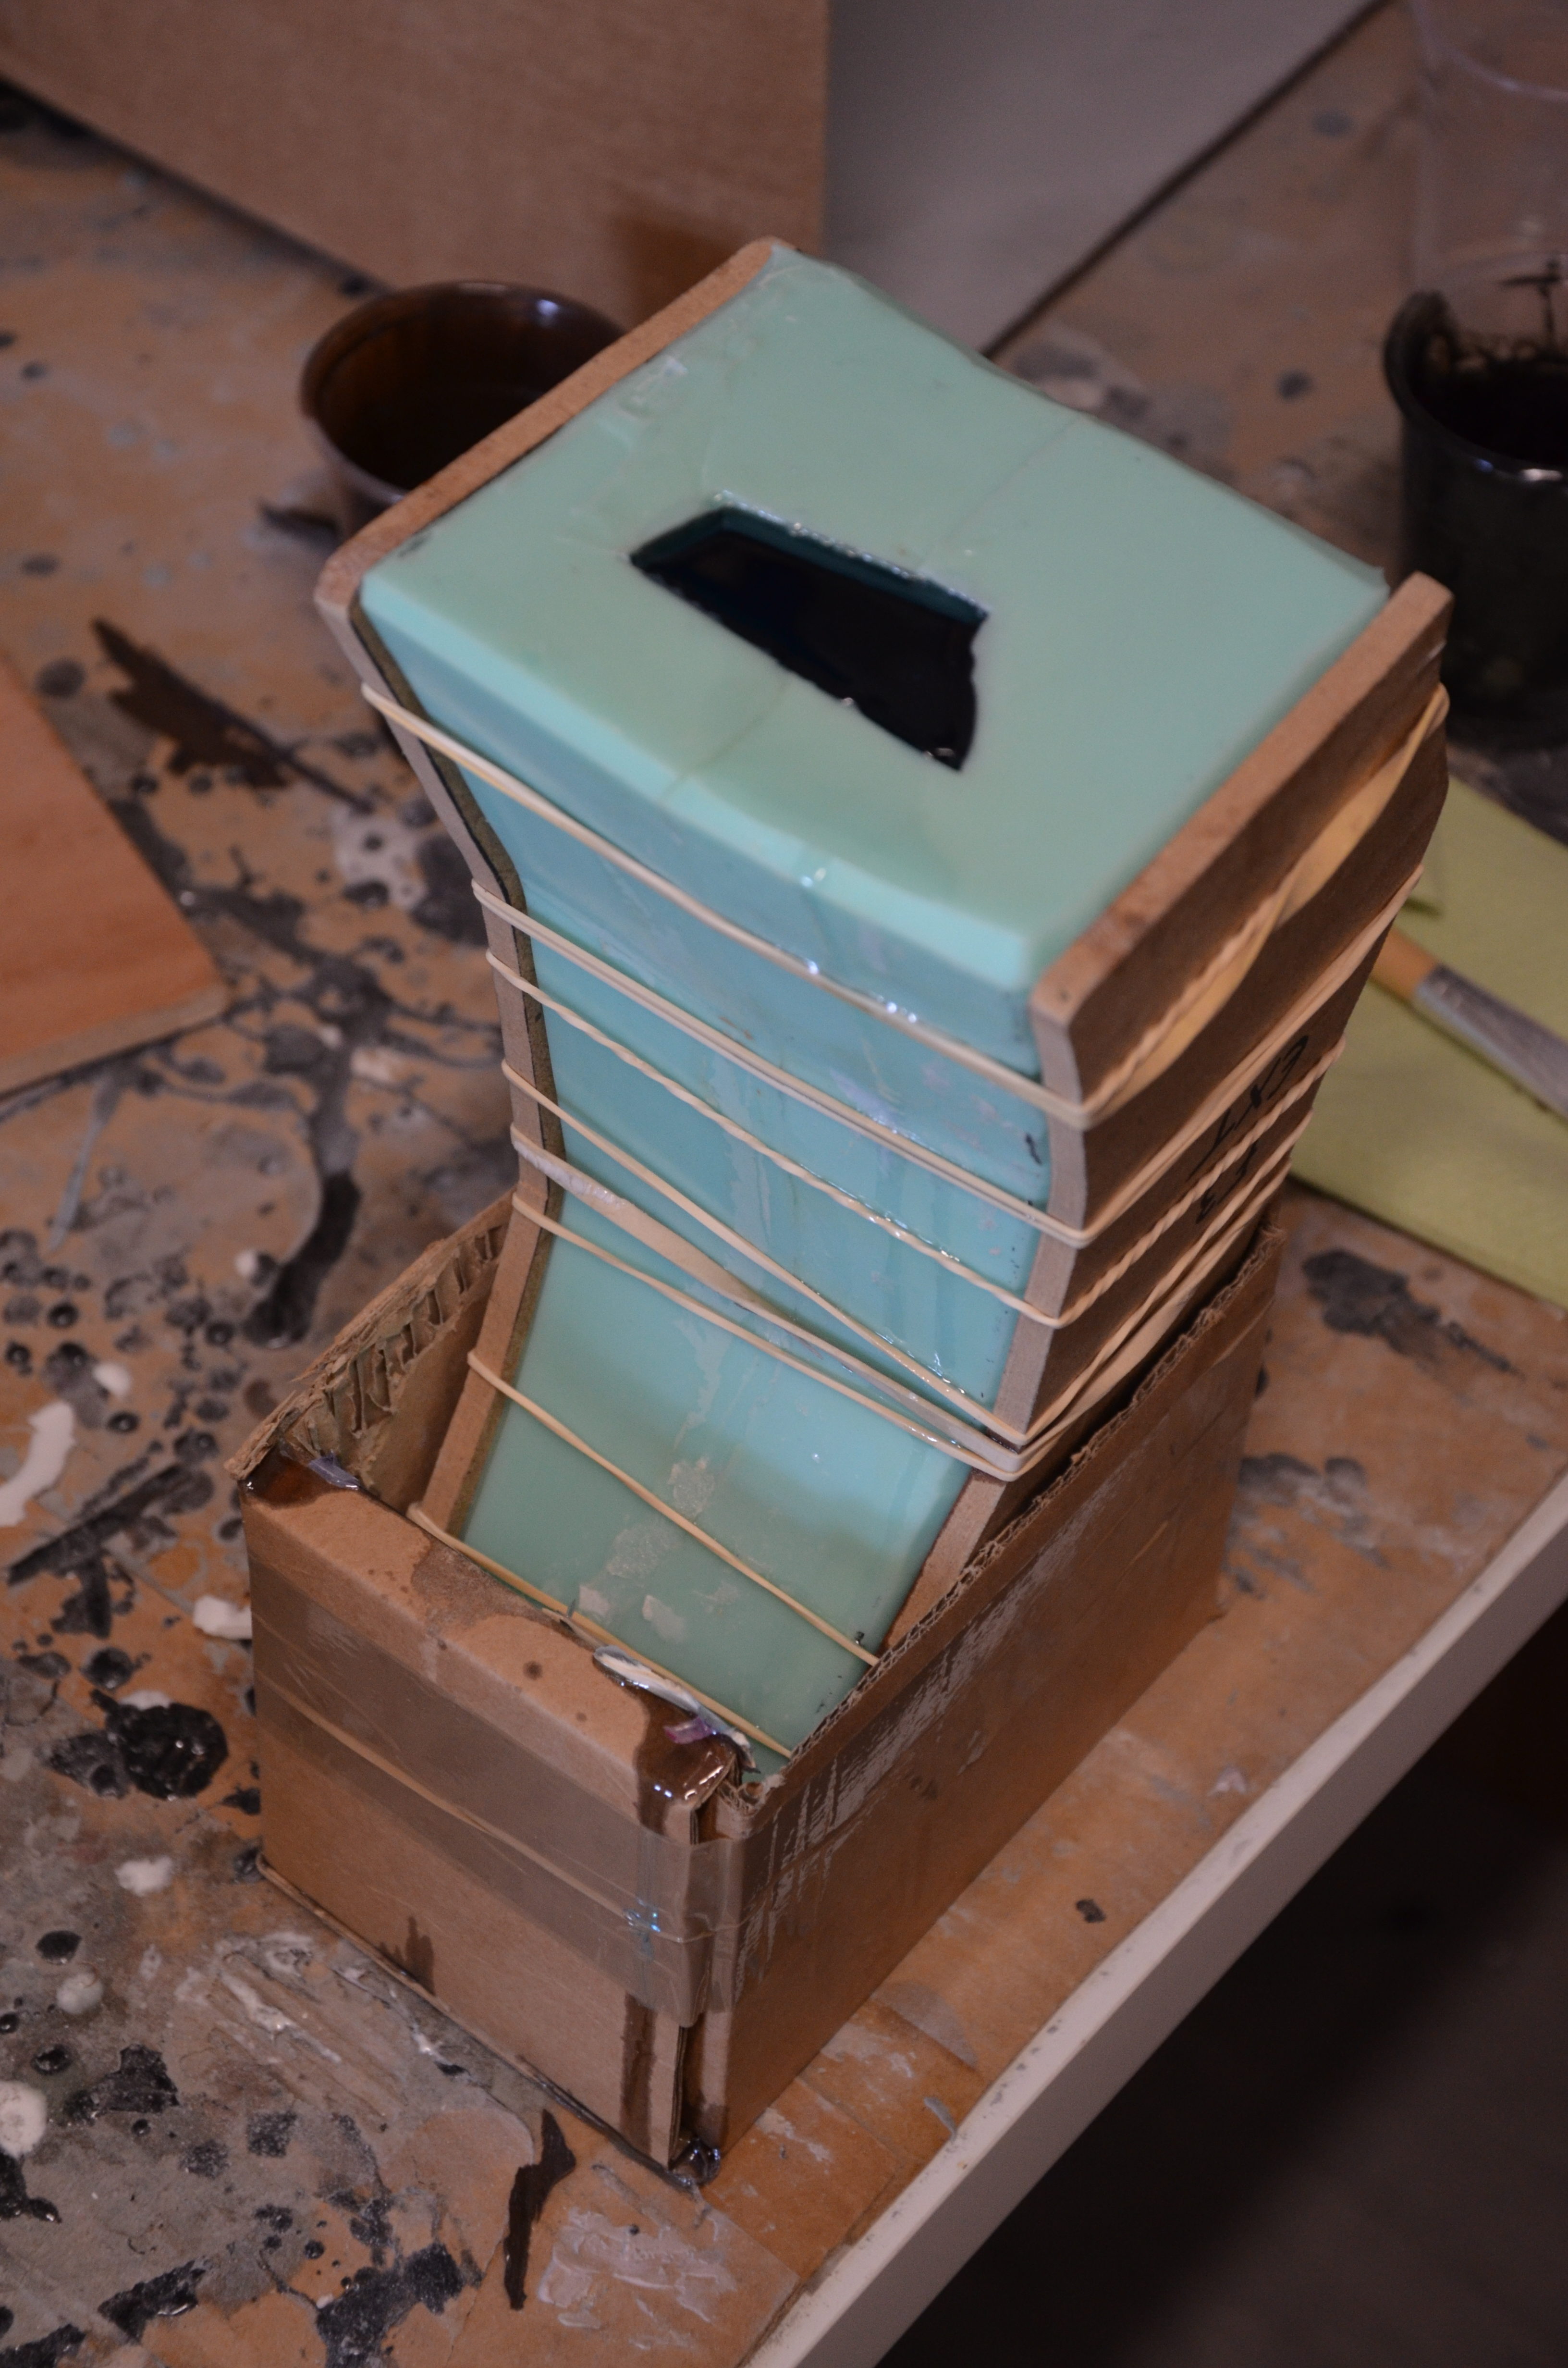
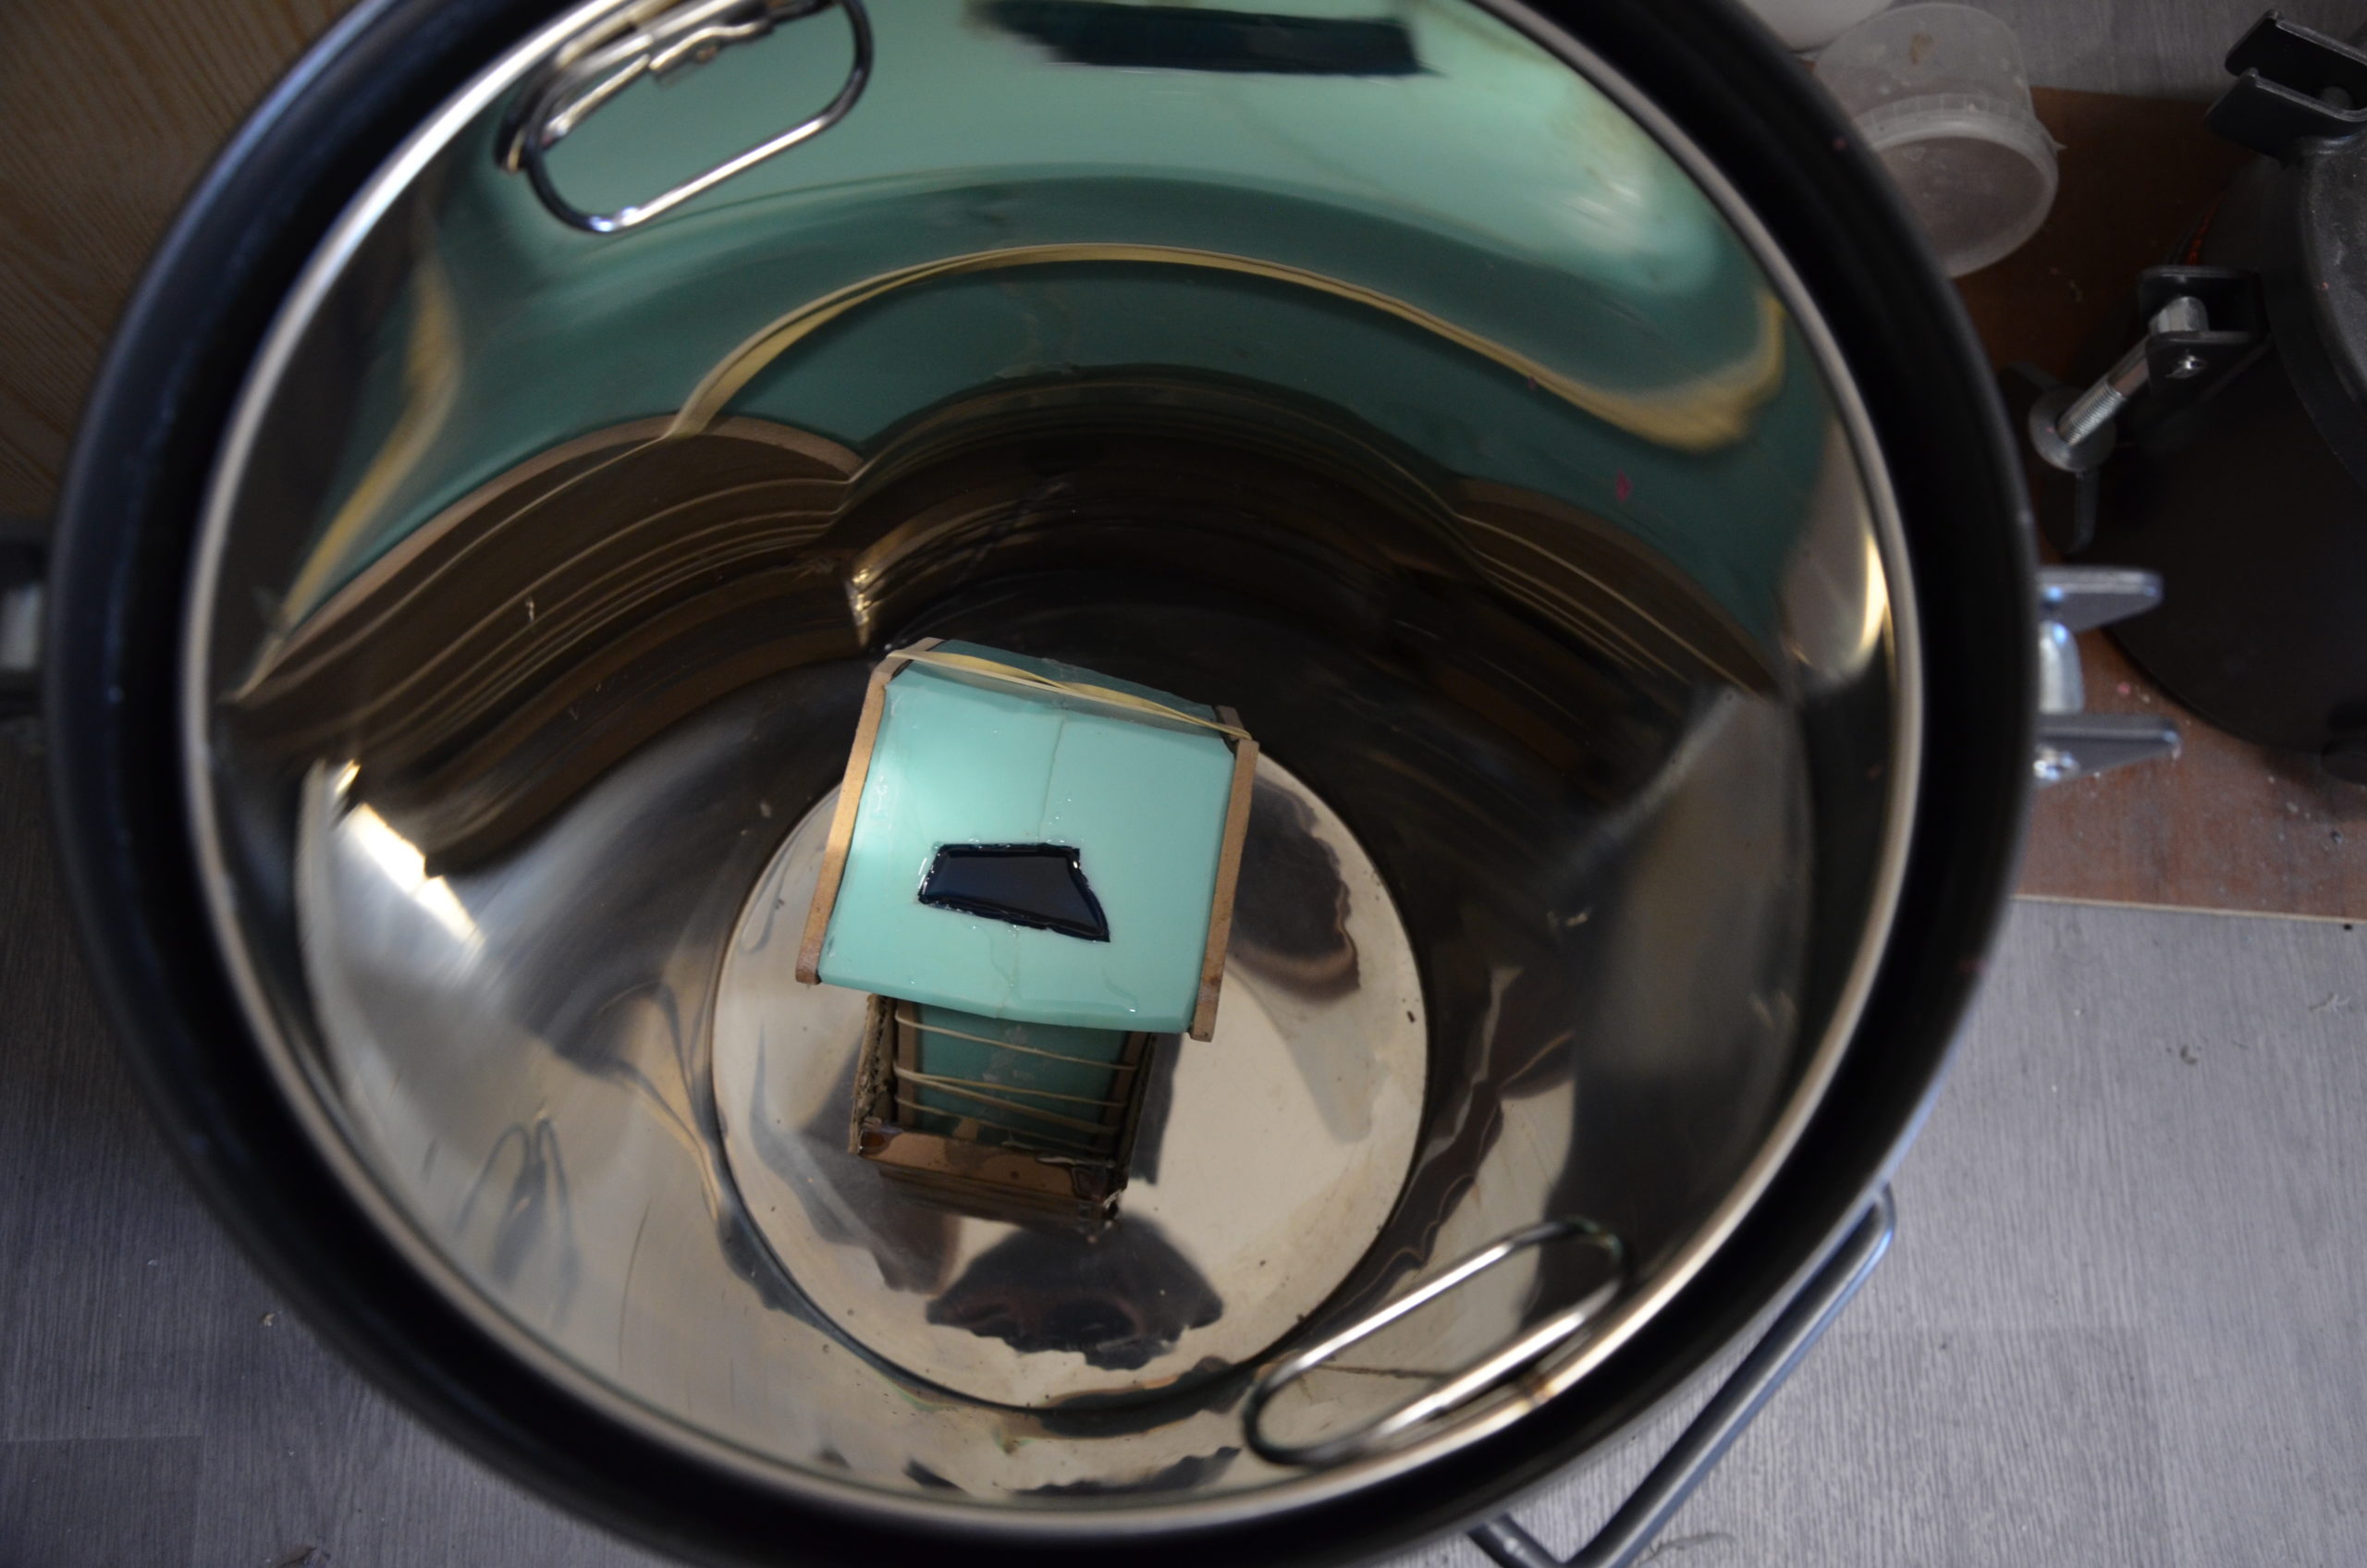
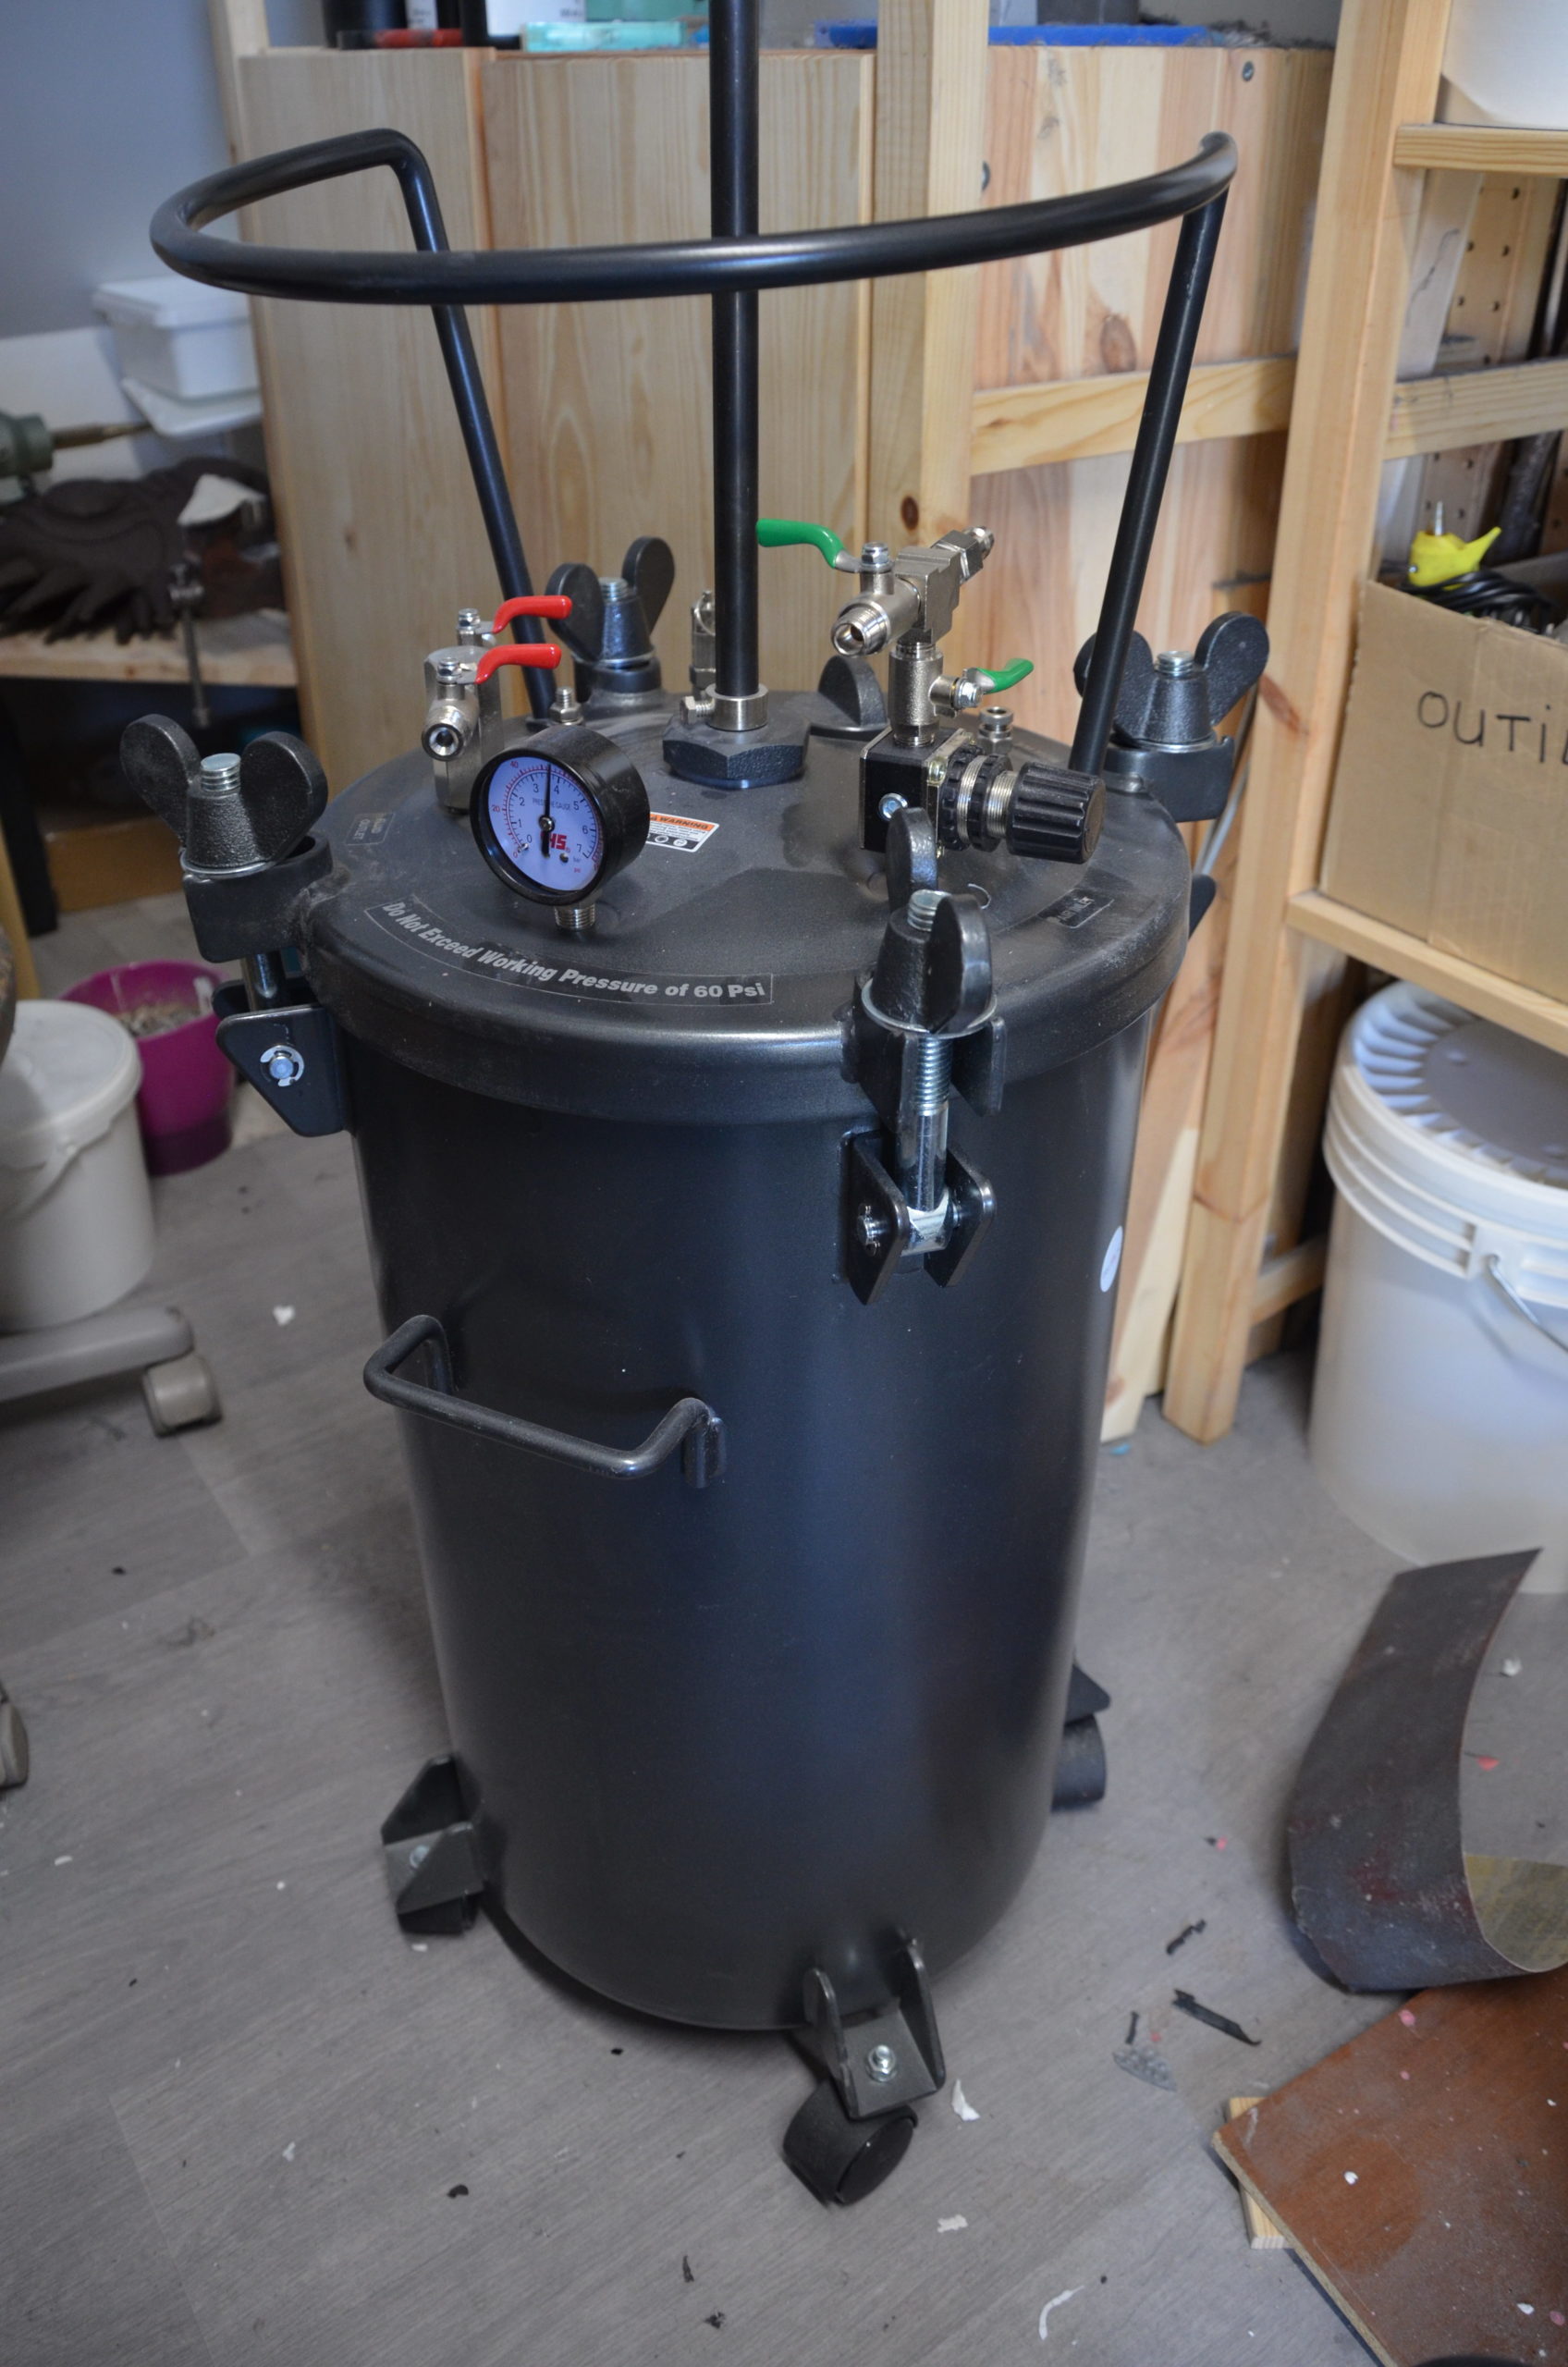
Once filled and placed in a small cardboard stabilizer, everything is gently deposited at the bottom of a pressure pot (here 40L). Once closed and put under 4 bar of pressure, the bubbles that were inevitably contained in our resin were crushed under the effect of pressure to become almost invisible to the naked eye.
The flame is ready to be pressurized 
Our 40L pressure pot under 4Bar of pressure
After one hour of catalysis, the resin is solid and ready to leave the mold. We must also be careful during this process because it can reach impressive temperatures, and you can burn your fingers!
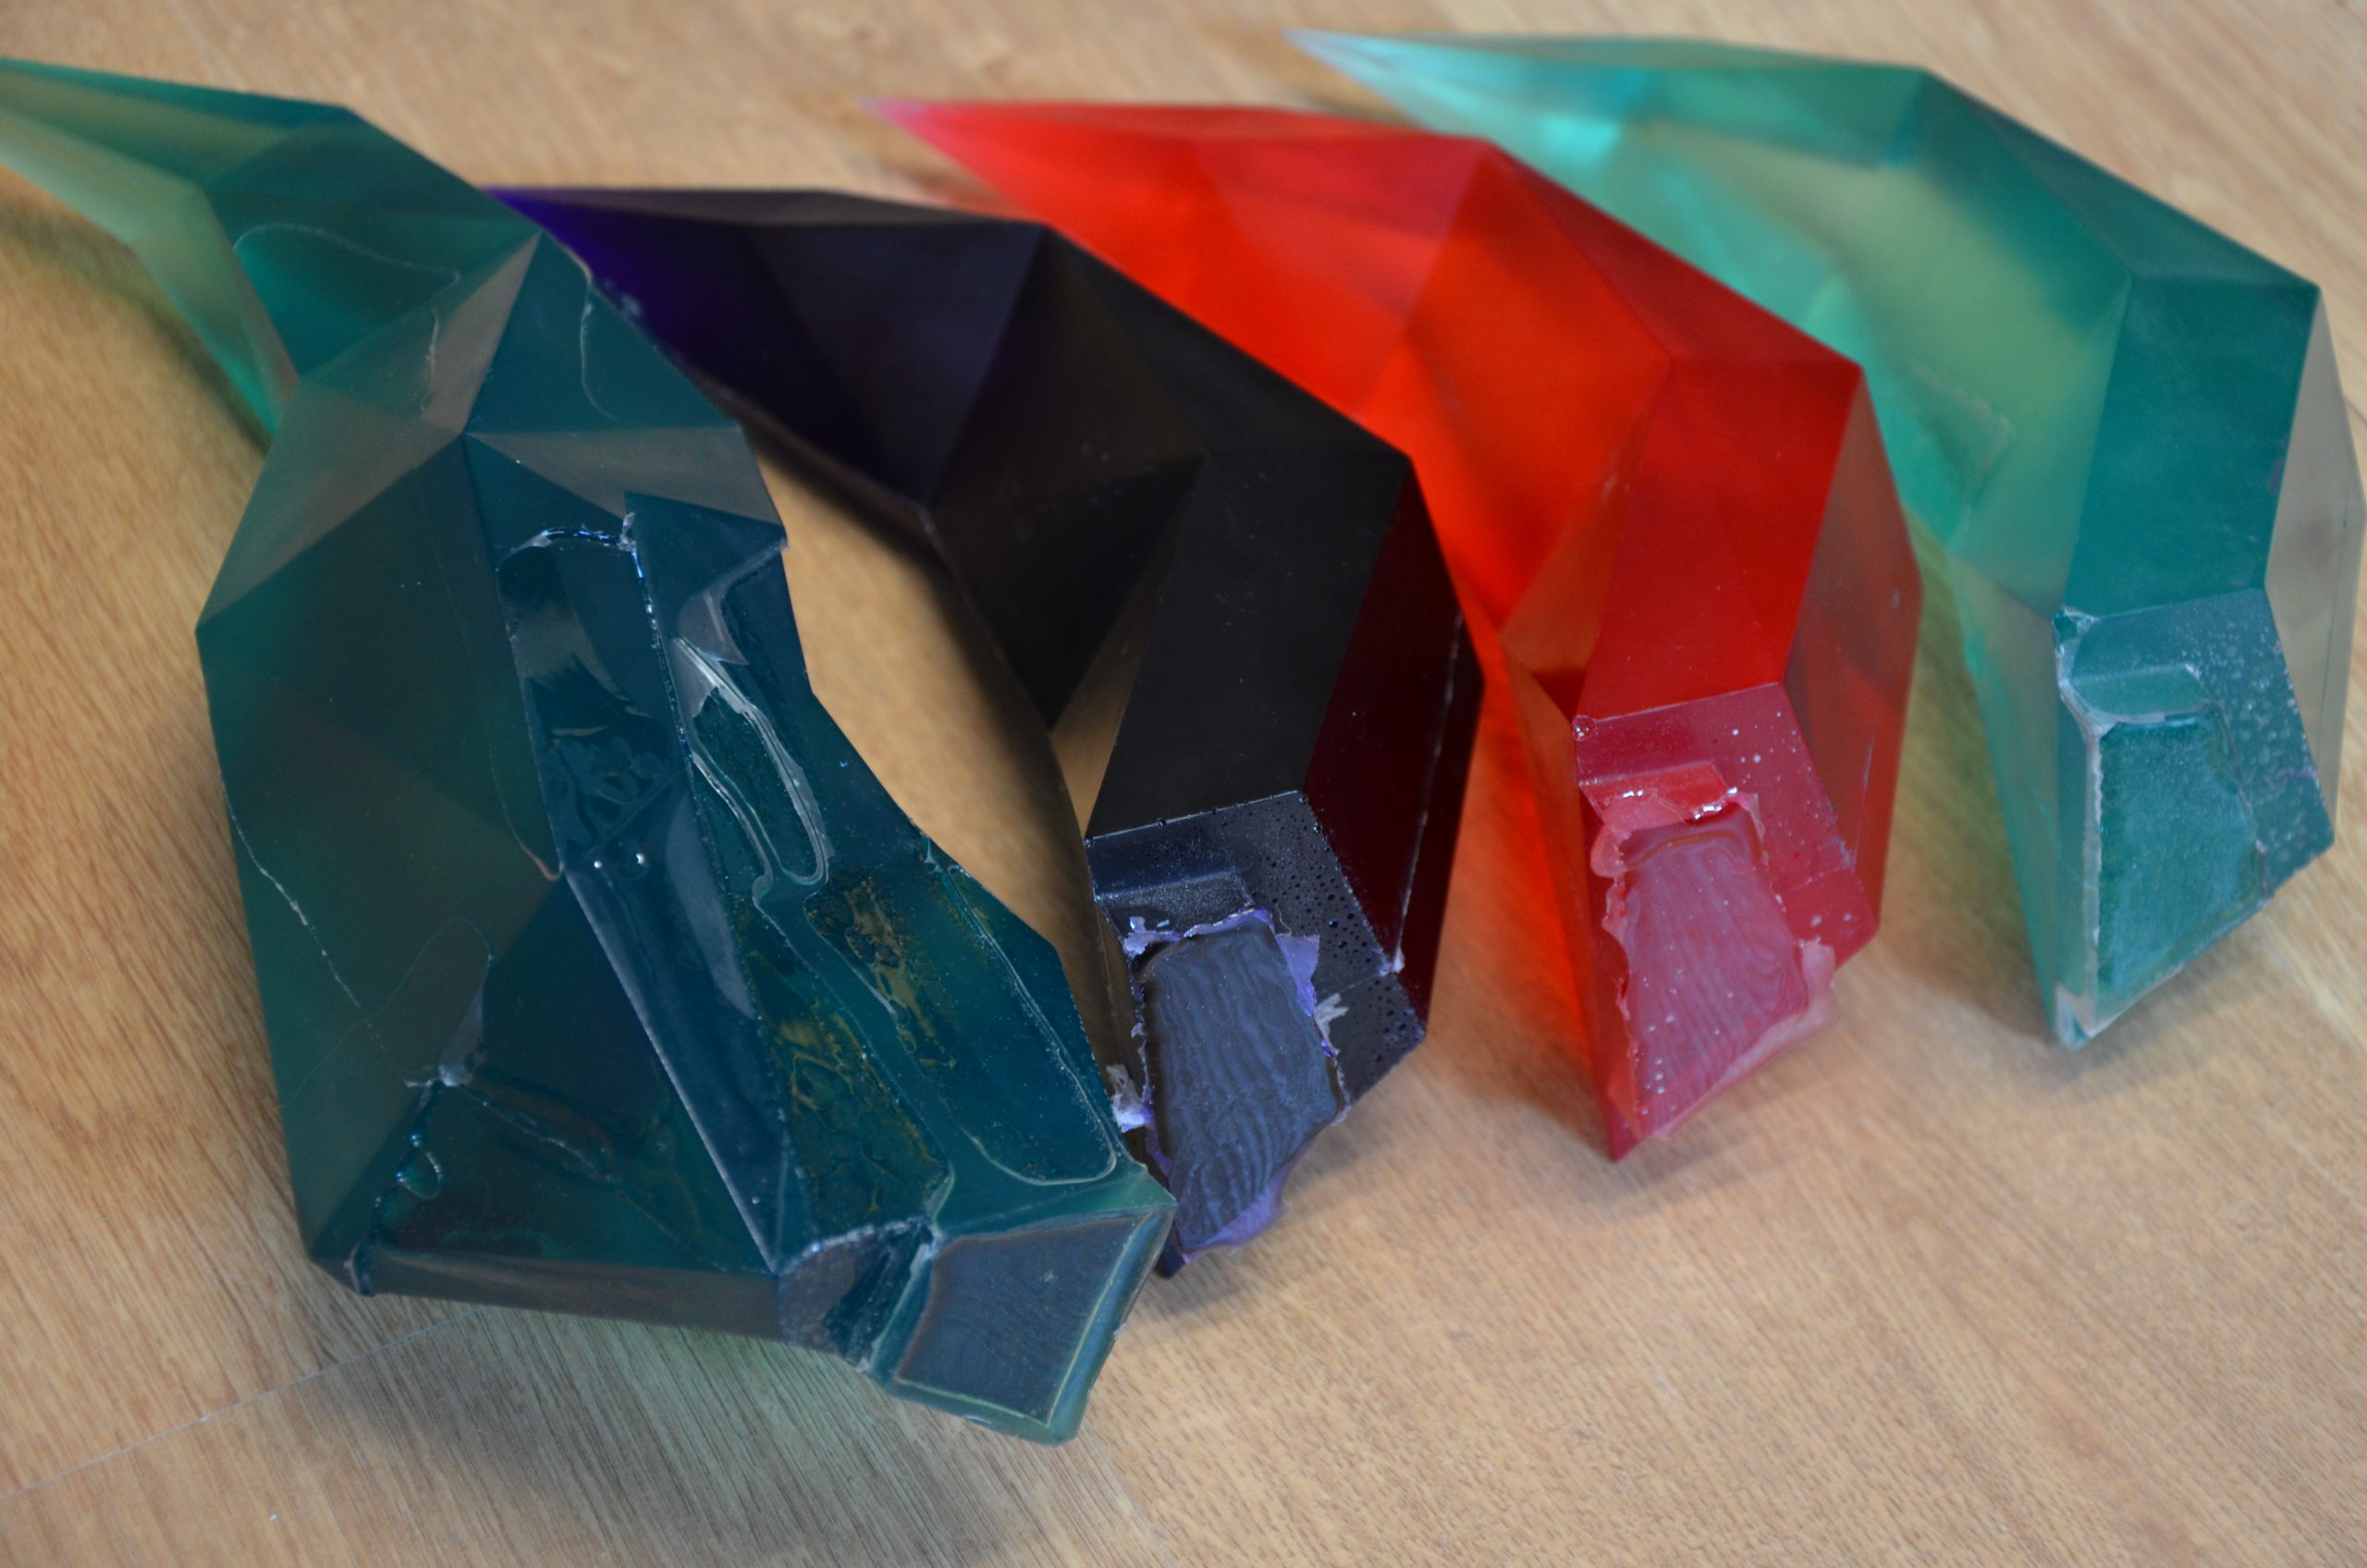
We repeat this process three times, to get our four flames of the same color, and we now take care of the base of the trophy.
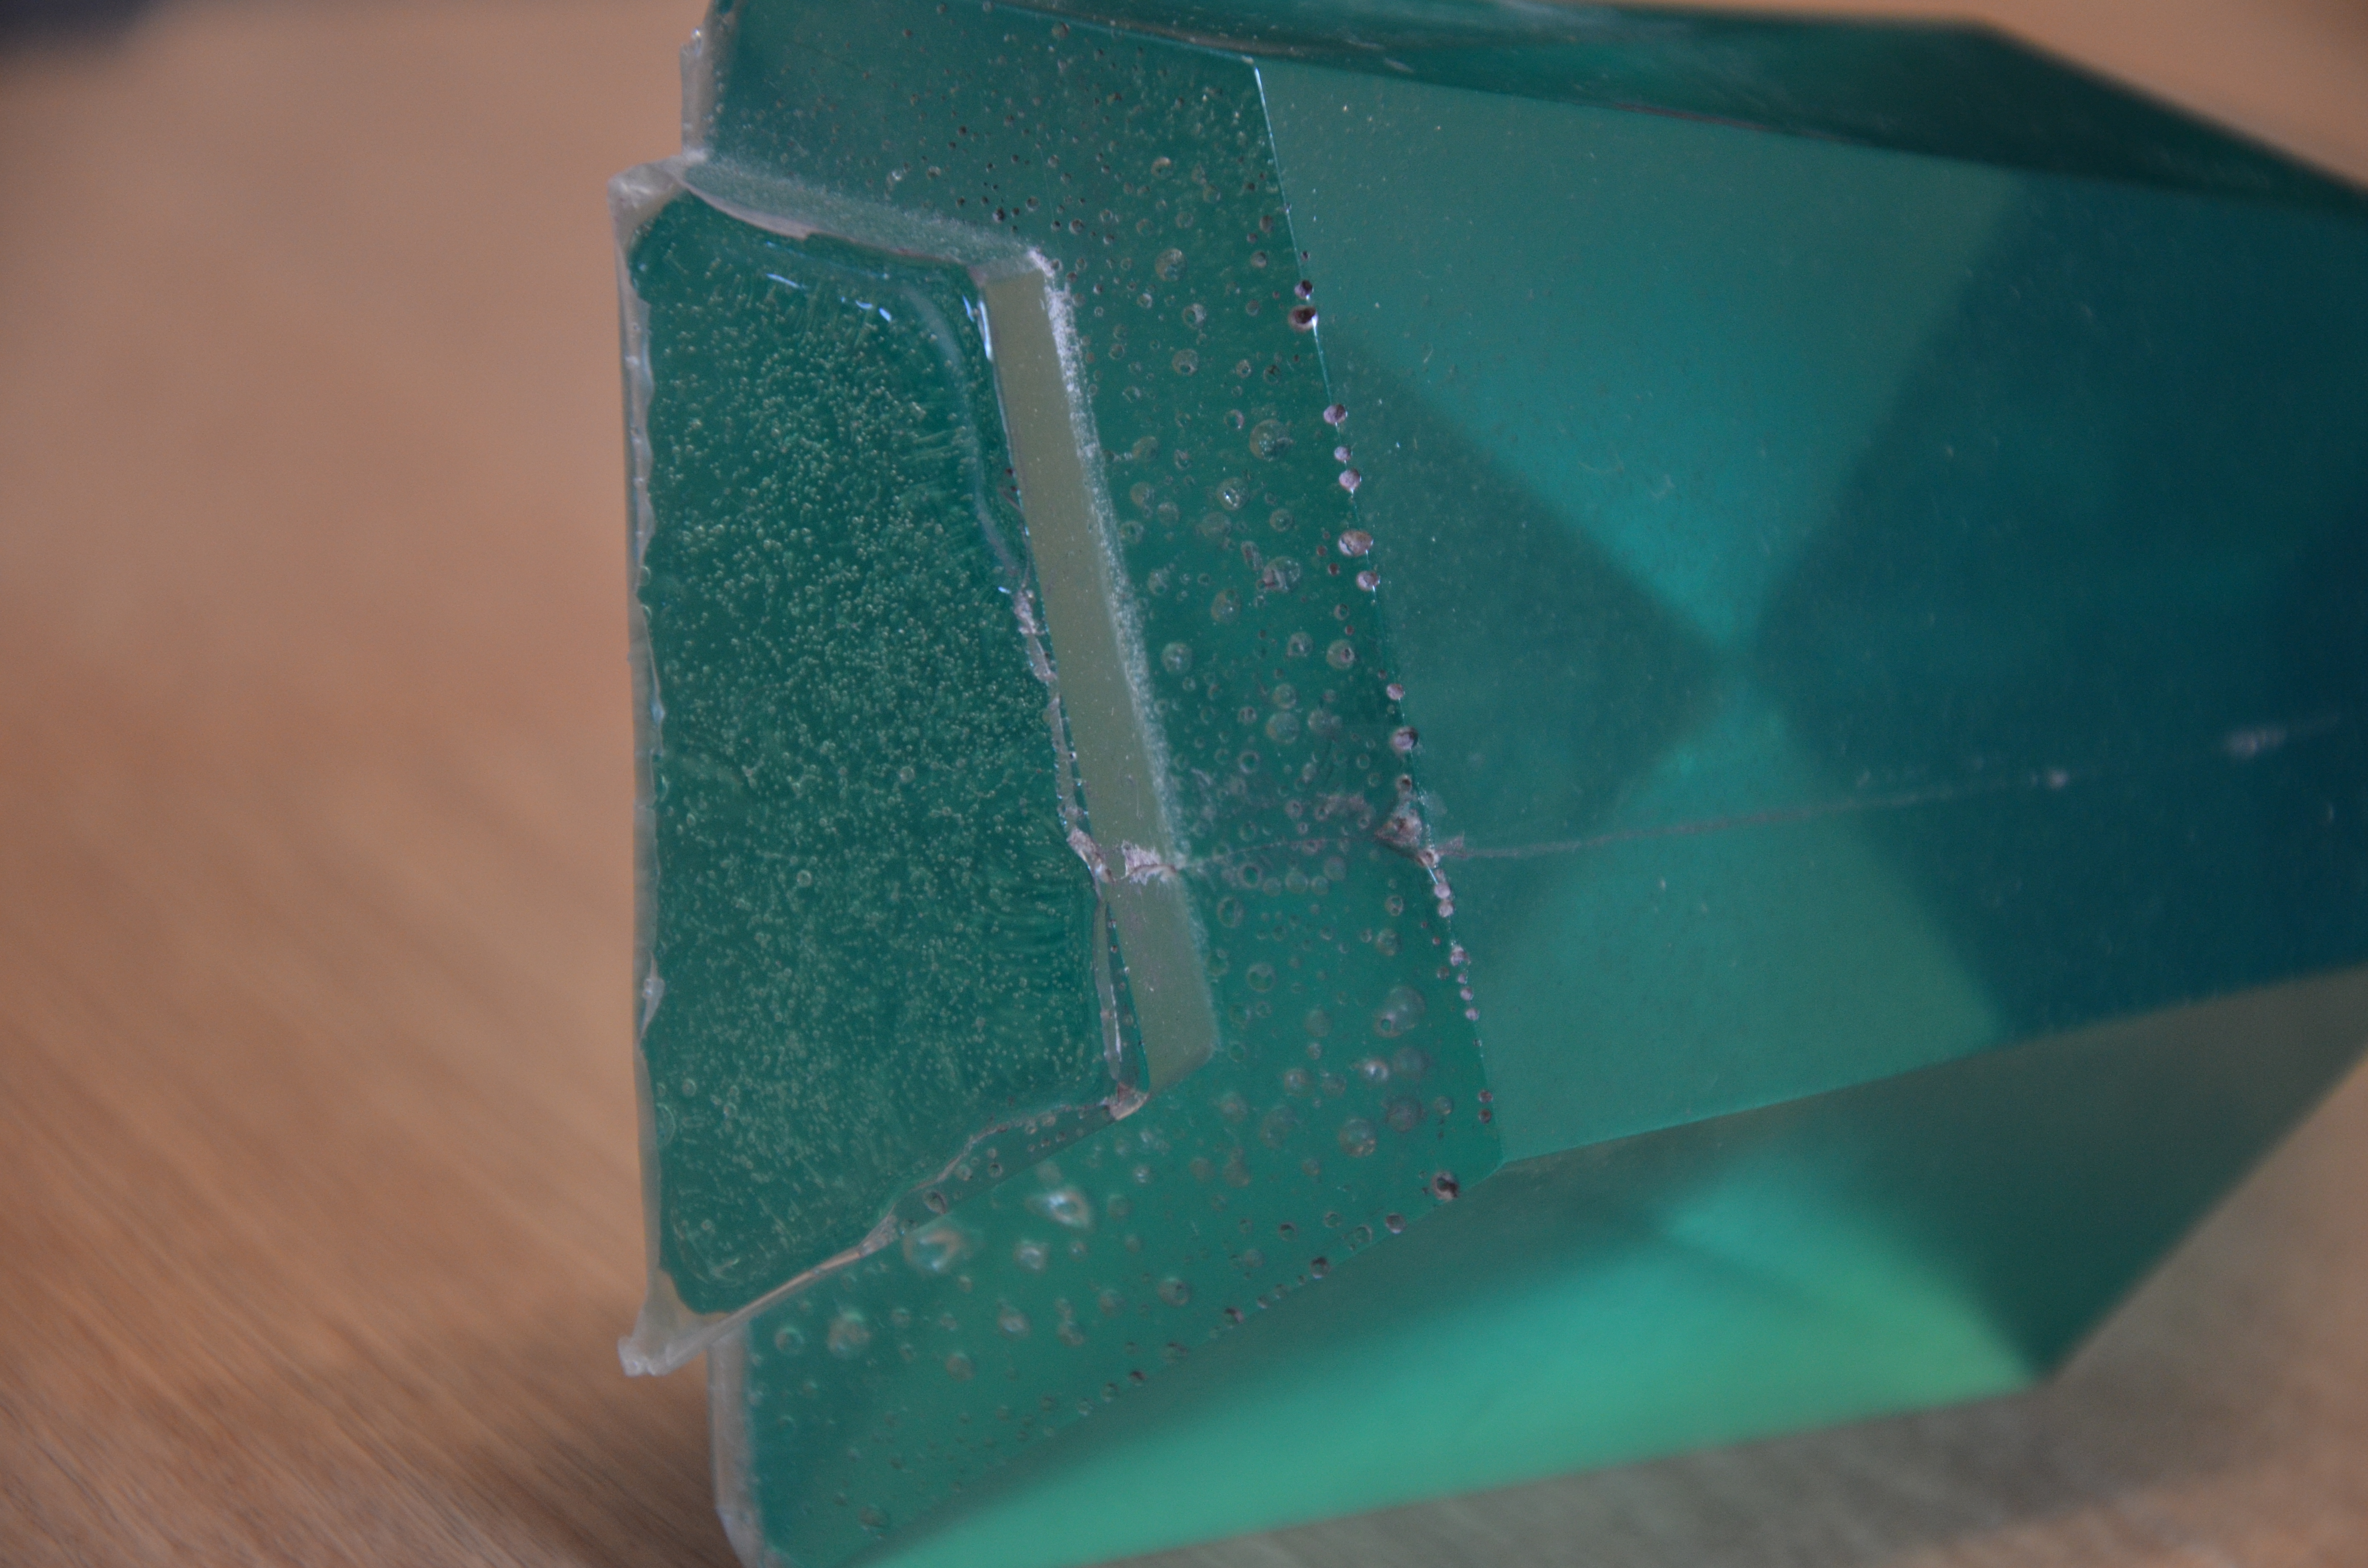
As explained previously, this one proved more troublesome than expected. Indeed, the idea was to coat the inside with aluminum powder and pour a glass of resin and bye-bye. But in fact our resin catalyzed too quickly and produced unsightly bubbles on the surface, and we can’t see that before we demold the object. And obviously, we cannot demount until it is fully finished…
So we ended up with 4 perfectly useless and expensive resin blocks, and each new attempt was accompanied by various prayers to the deities of our choice. Fortunately we finally got the hang of it and cast four usable bases.
We wrap up the castings with the game and logo plates, really easy to achieve this time. The only trick was to use a different resin to put them under air pressure to avoid the retention of bubbles.
Clean-up
By cleaning, we mean here the removal of surplus resin that inevitably occurs during the casting. This can be burrs, reinforcements, tapholes, joint planes, etc. They are removed using a sanding table for the coarsest places, and a precision cutter, file and a set of abrasive paper for the finer details.
This step is the fastest to describe but the longest to achieve. Each small imperfection in the resin must be erased as best as possible so that the result is perfect. And it can take a lot of time if these are deep.
Once cleaned (ie at least three months later!) We are ready to polish.
Polishing
Mael takes care of this part, using our drill press equipped with different brushes and different polishing pastes. The successive passage of these products makes the crystals a little smoother and shinier after each step, until we finally get a surface so smooth that it gives the impression of holding a real gem in our hands.
Here’s a video showing off the results:
Sweet Shiny gems!
The plates undergo the same treatment, to get a better than nature metallic effect.
Result
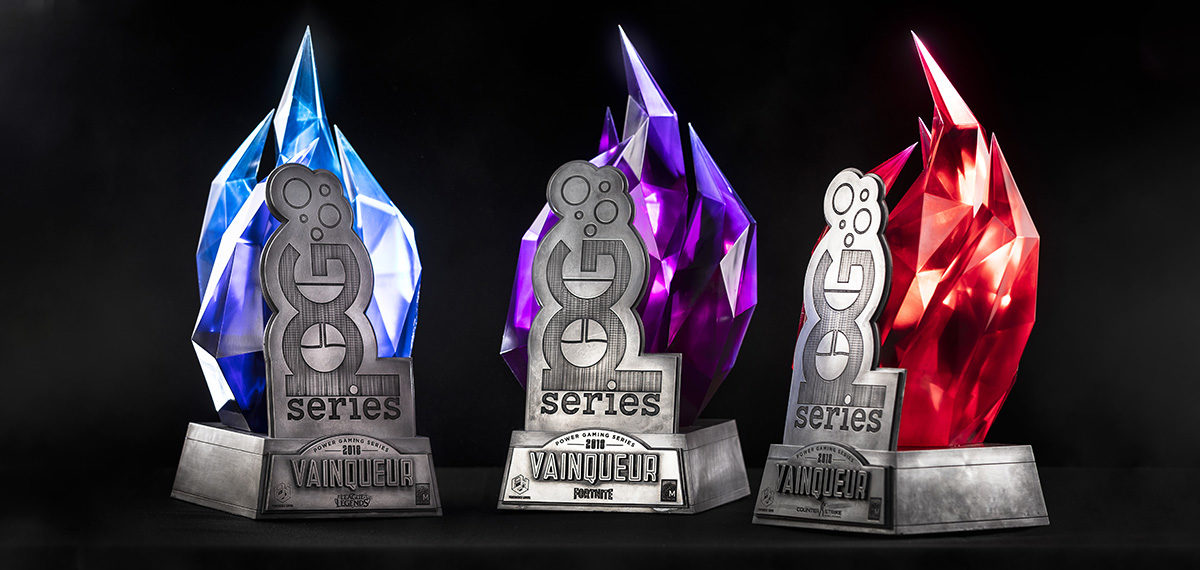
Finally, you’ve seen it atop this page but here it is again, the result of this long journey:
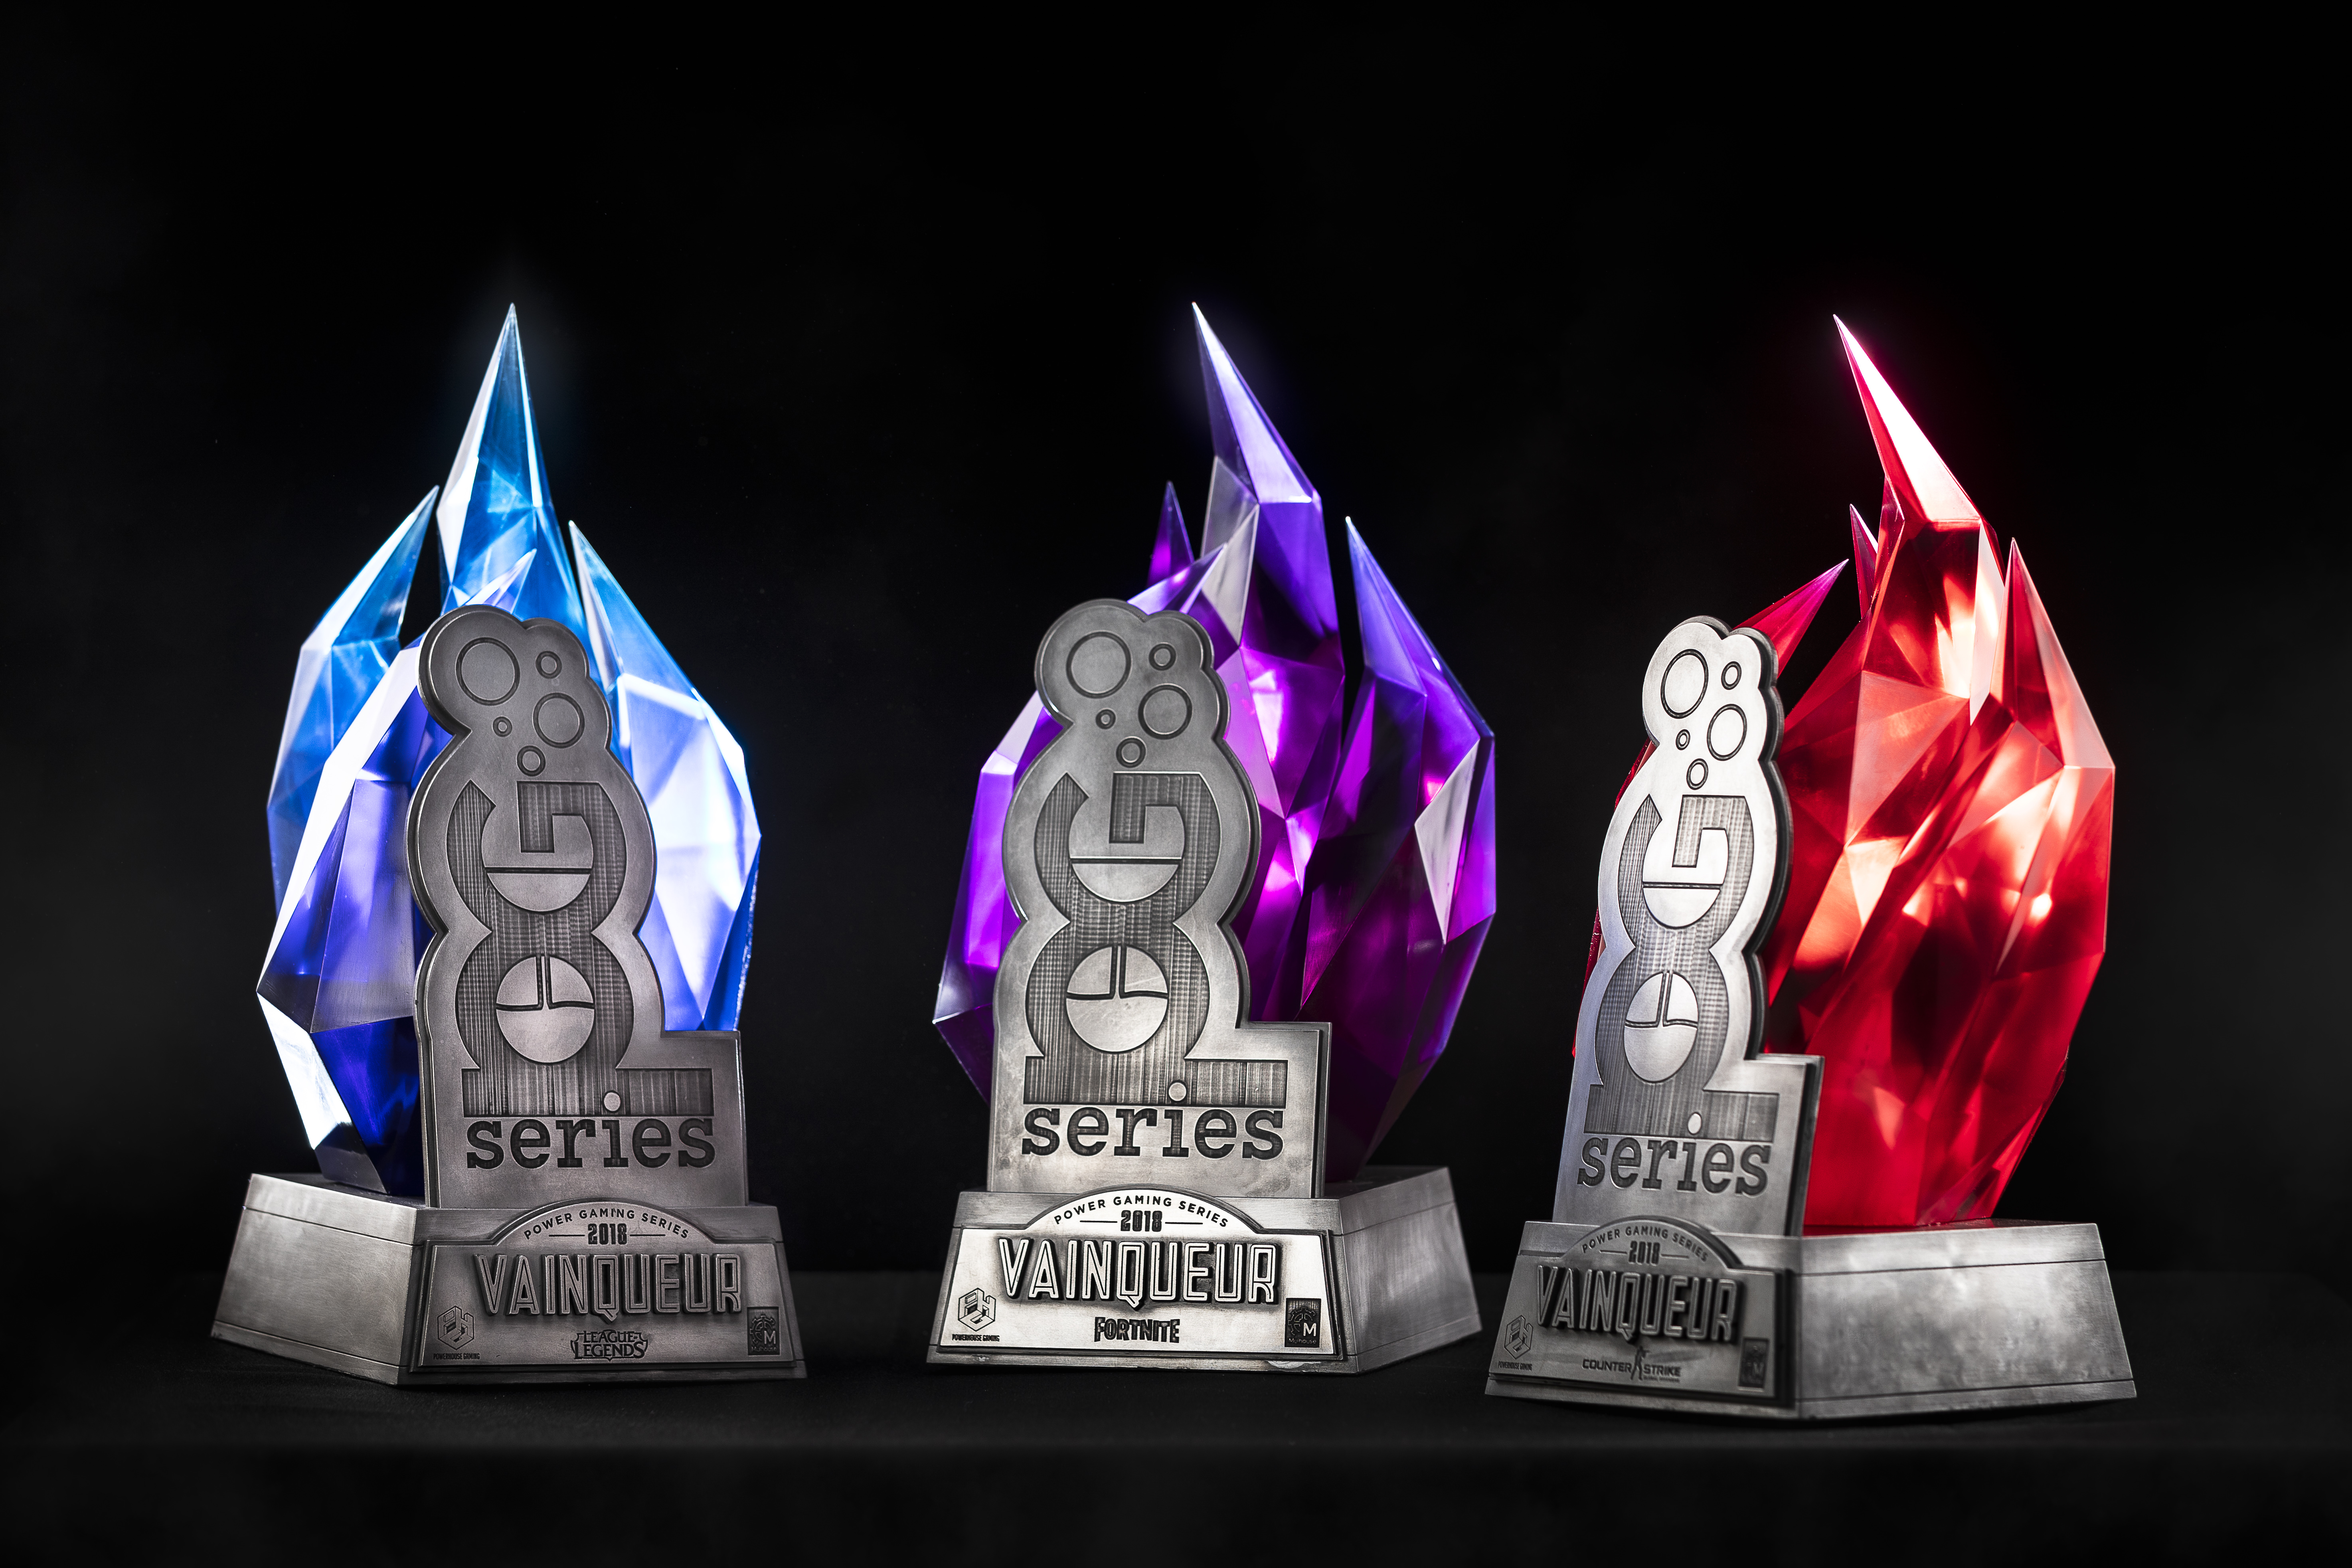
It looks almost perfectly identical to our 3D renders and matches both our expectations and those of our client, which means a perfectly accomplished goal and lots of hearts filled with joy.
Conclusion
All in all, this project went on for a little more than two months, and brought us an enormous quantity of experience in casting resin objects. We are particularly proud of the result we obtained.
While we have had some setbacks on the way, sometimes costly, these were setbacks that pushed us to refine our techniques and expand our crafting expertise.
We invested in new machines and tools (pressure pots, polishing brushes, etc.) and thanks to them we are now equipped to tackle even bigger challenges in the future!
Comments (0)