Warsong Commander: Making-of
I fell in love with Wei Wang’s Warsong Commander artwork as soon as I got my beta key for Hearthstone: Heroes of Warcraft. And when we finally decided to go to Blizzcon 2015, I immediately thought about making a cosplay of this character.
Well, one month before Blizzcon, Warsong Commander was soooo nerfed that she became useless as possible (as people often tell me «RIP Warsong Commander»).
Anyway, I’m really proud with how this costume turned out, as it took at least 500 hours of work…
Ref pics
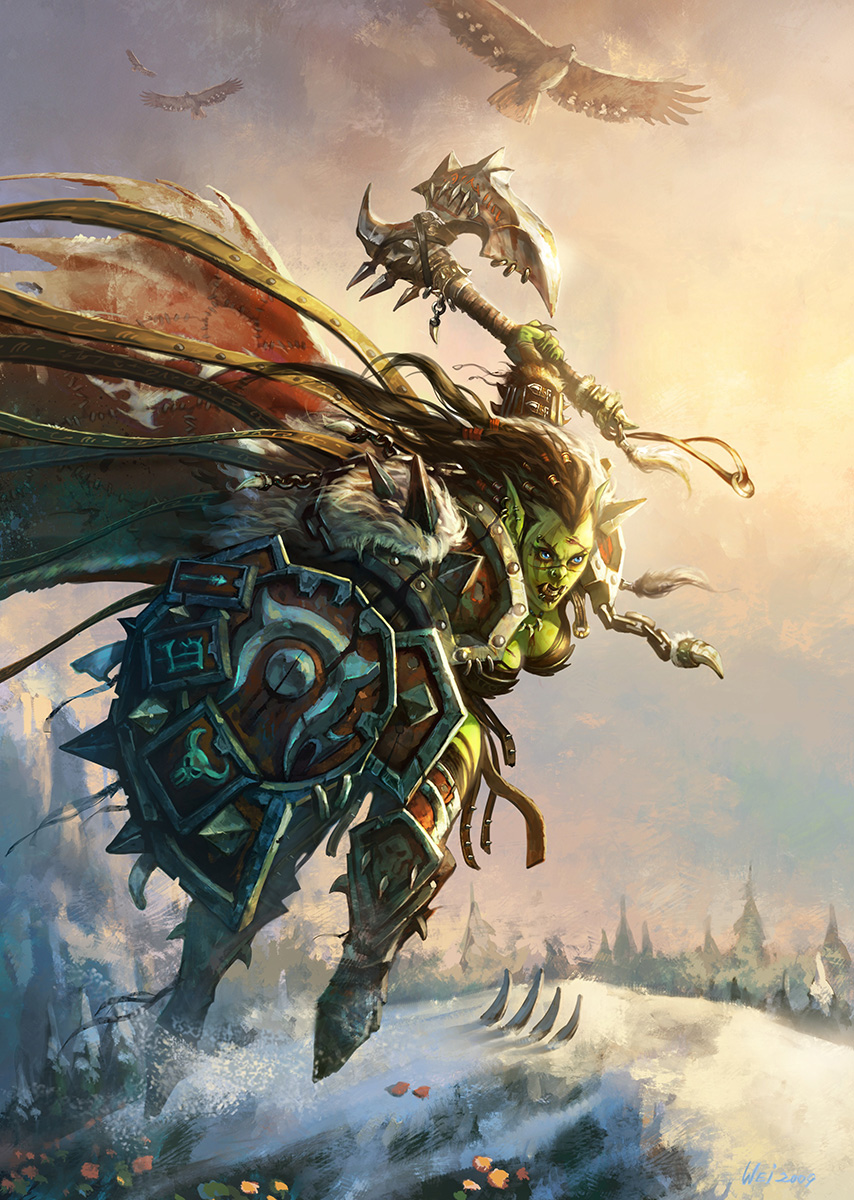
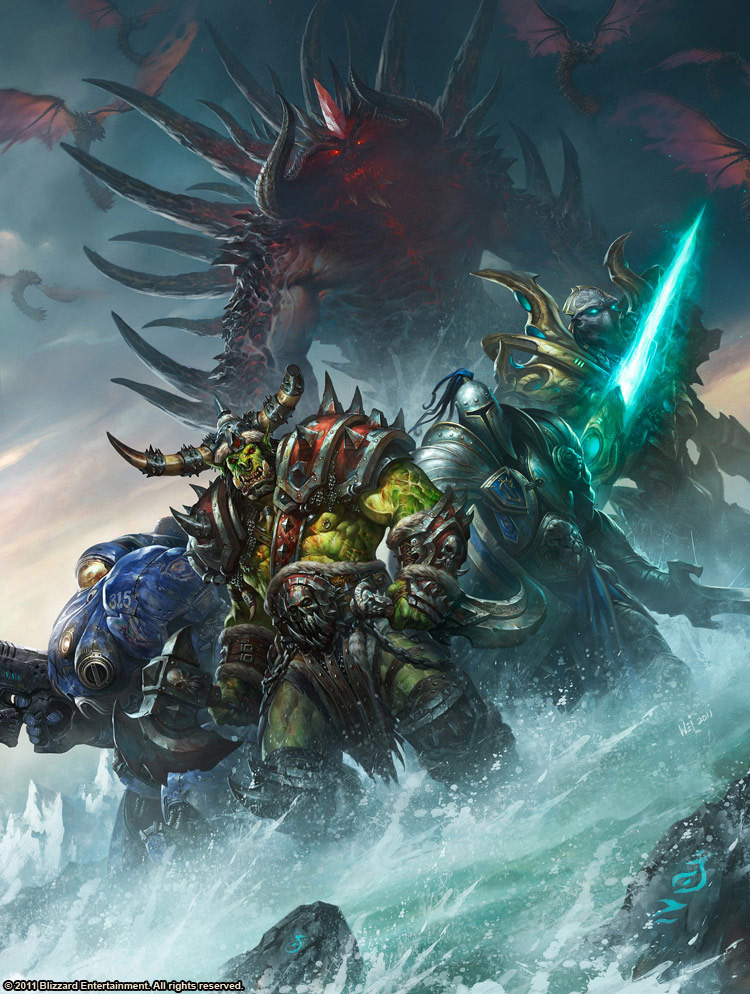
I first used Wei Wang’s original artwork as a reference, of course. But, as the shield covers the main part of this costume, I had to imagine missing elements. An other Wei Wang’s illustration inspired me a lot. This is the one that appears on the cover of «The Art of Blizzard» (I asked Santa Claus for this book afterwards).

Warsong Commander original artwork by Wei Wang 
«The Art of Blizzard» cover by Wei Wang 
Re-drawn model
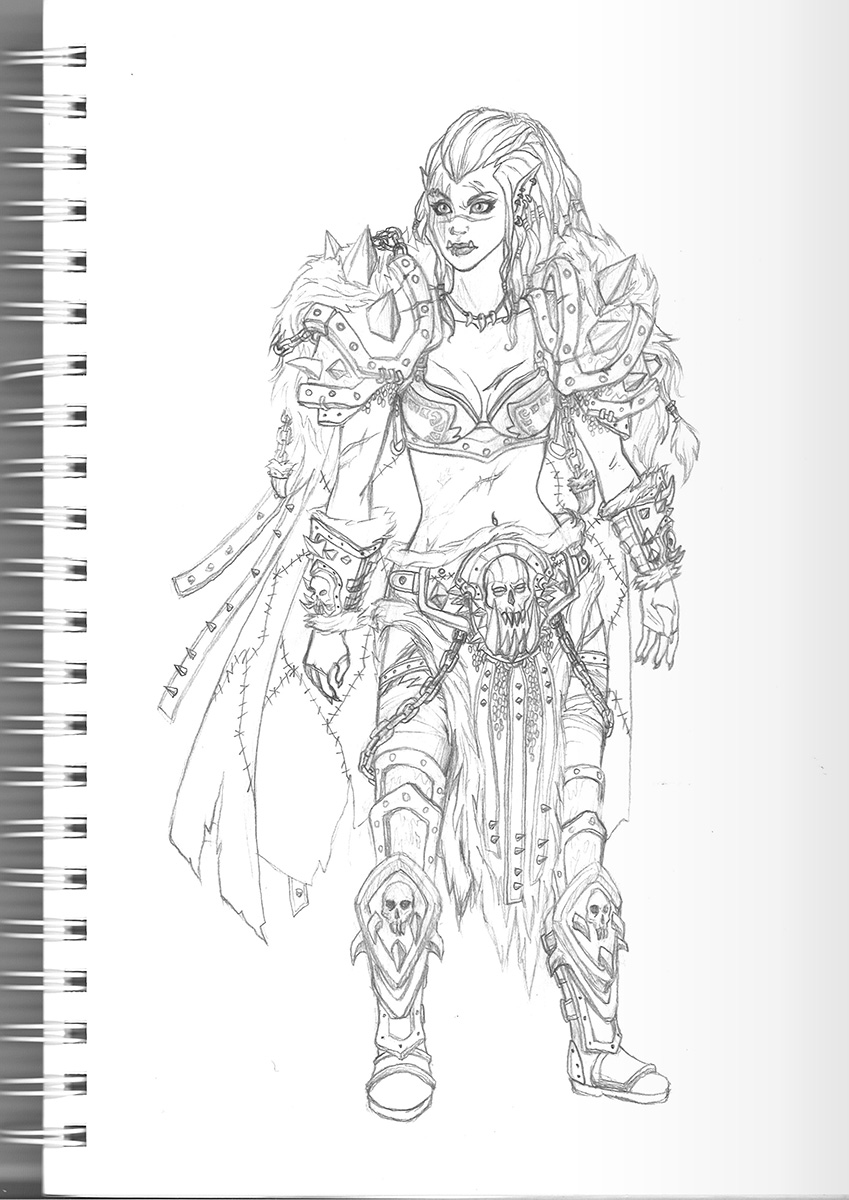
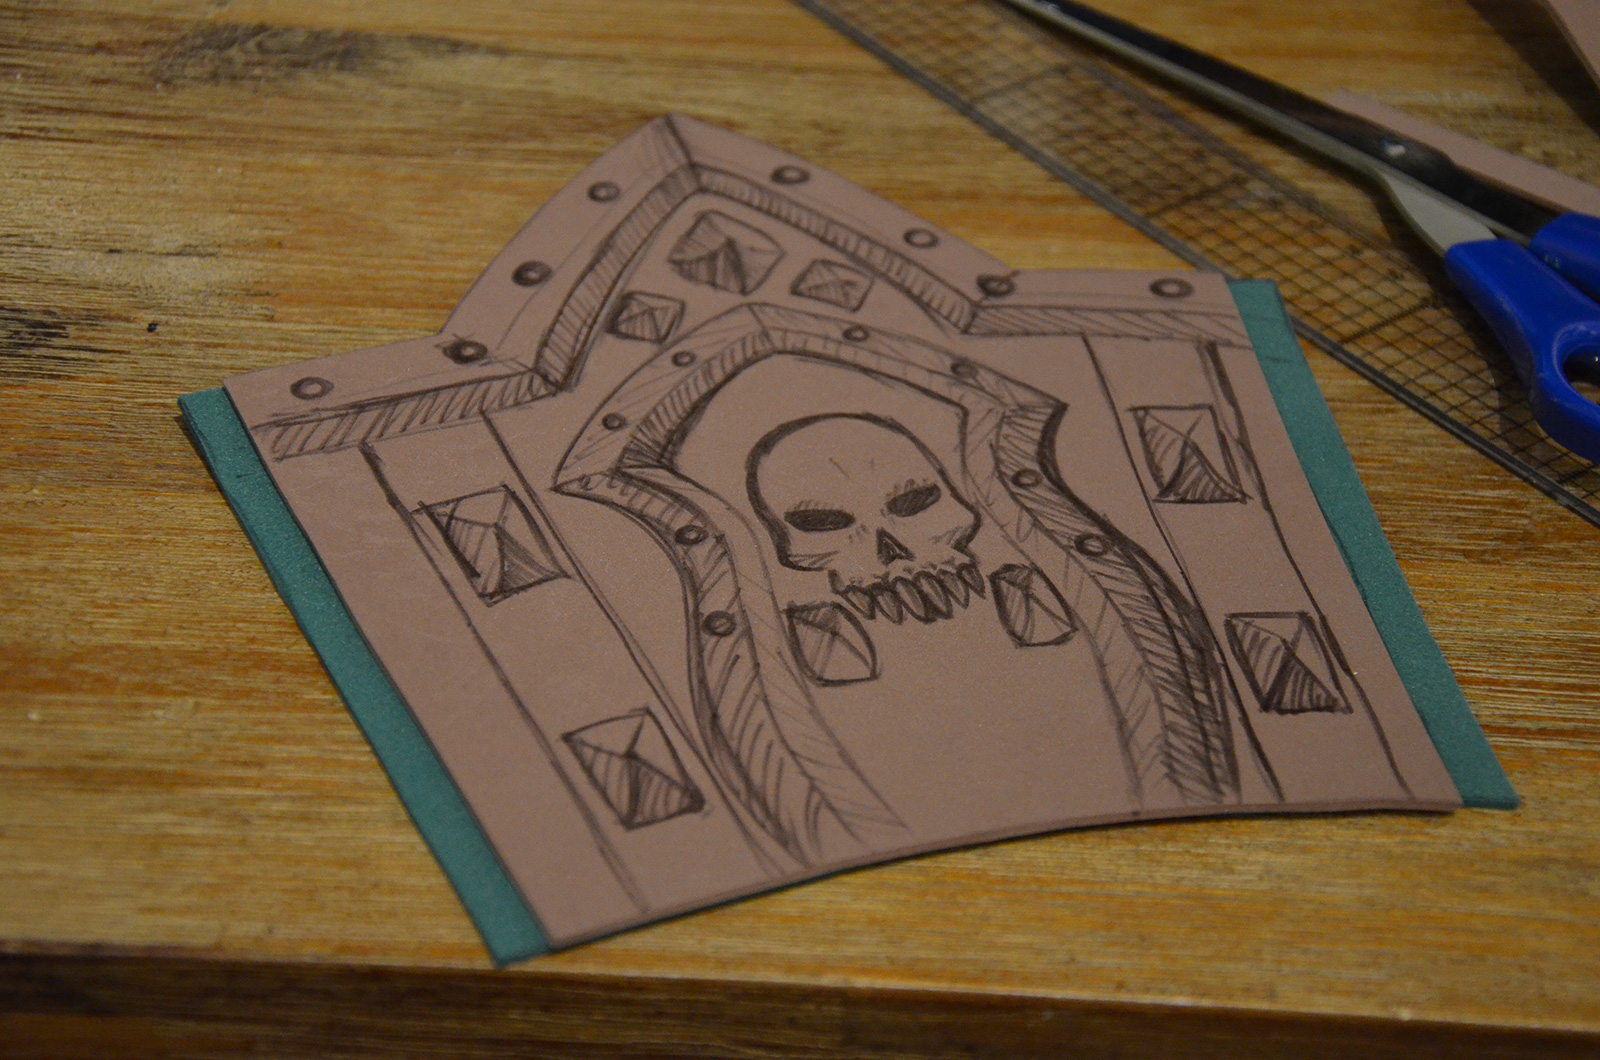
According to these ref pics, I drew my own sketch to make a clear idea of how my costume would look like.
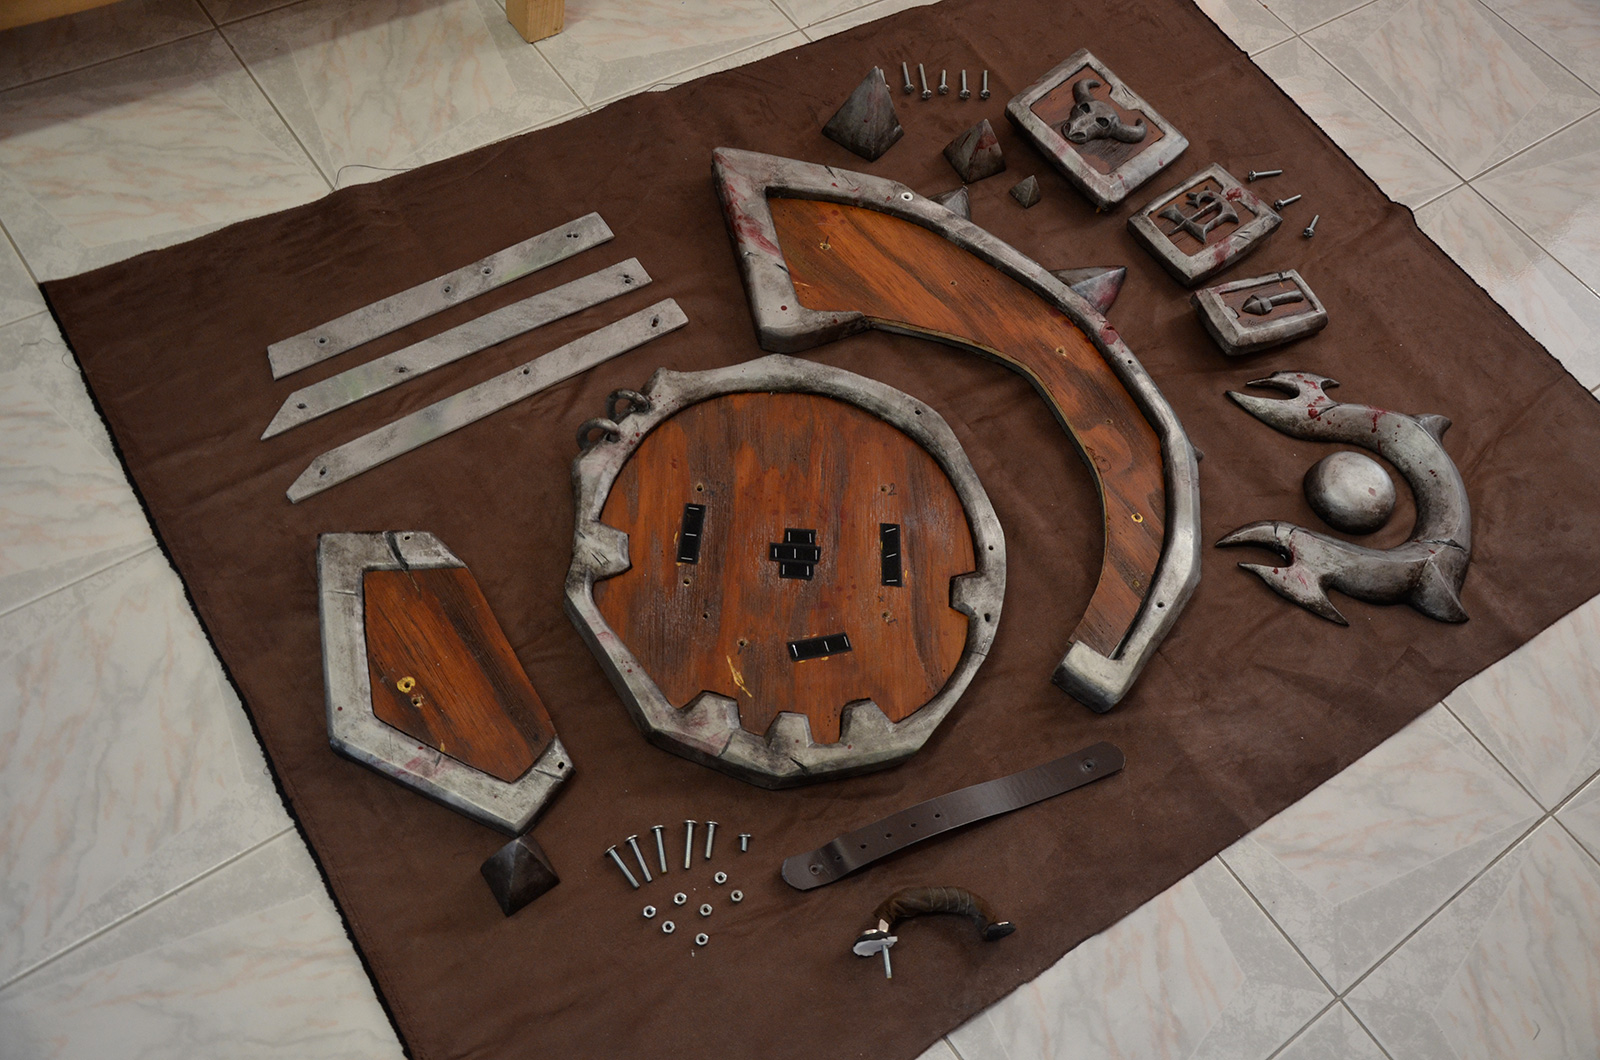
Axe and shield were simply re-drawn flat. An effective method to see the different parts that compose the whole thing (especially for the shield, as it appears to have an intricate assembly).
To avoid writing a too long article, I detail axe and shield making-ofs in 2 distinct posts (see links below).

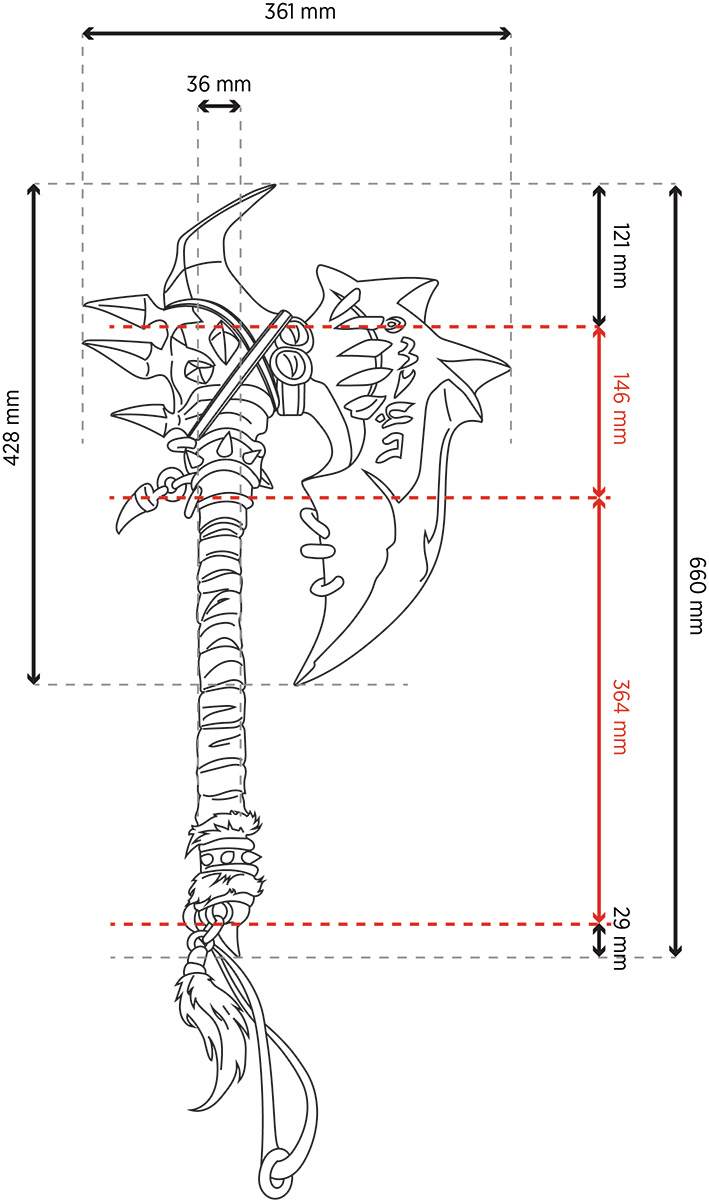
Axe blueprint 
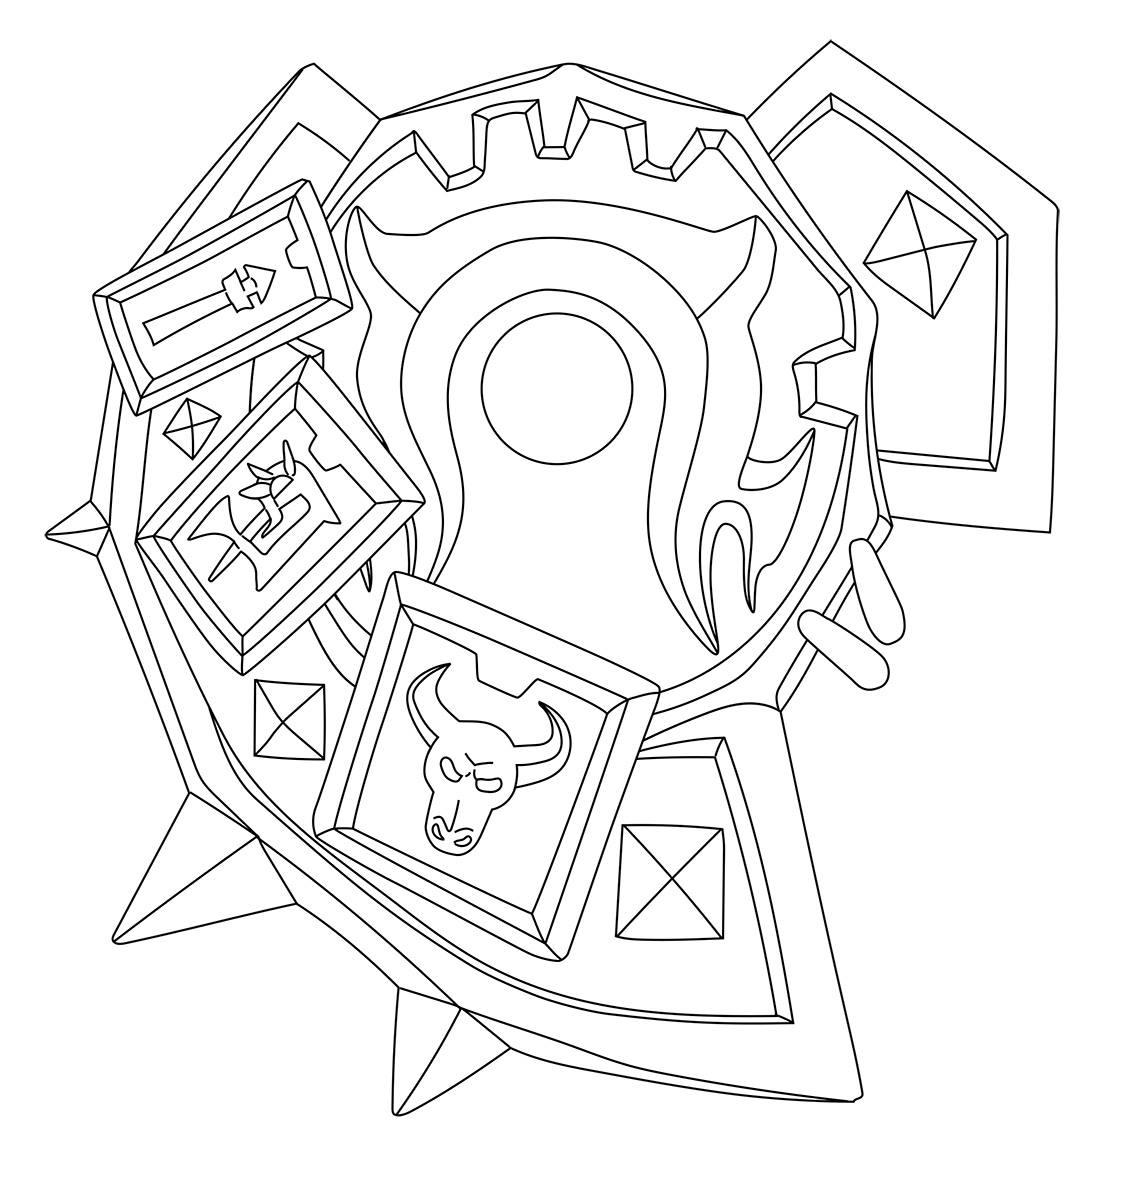
Shield blueprint
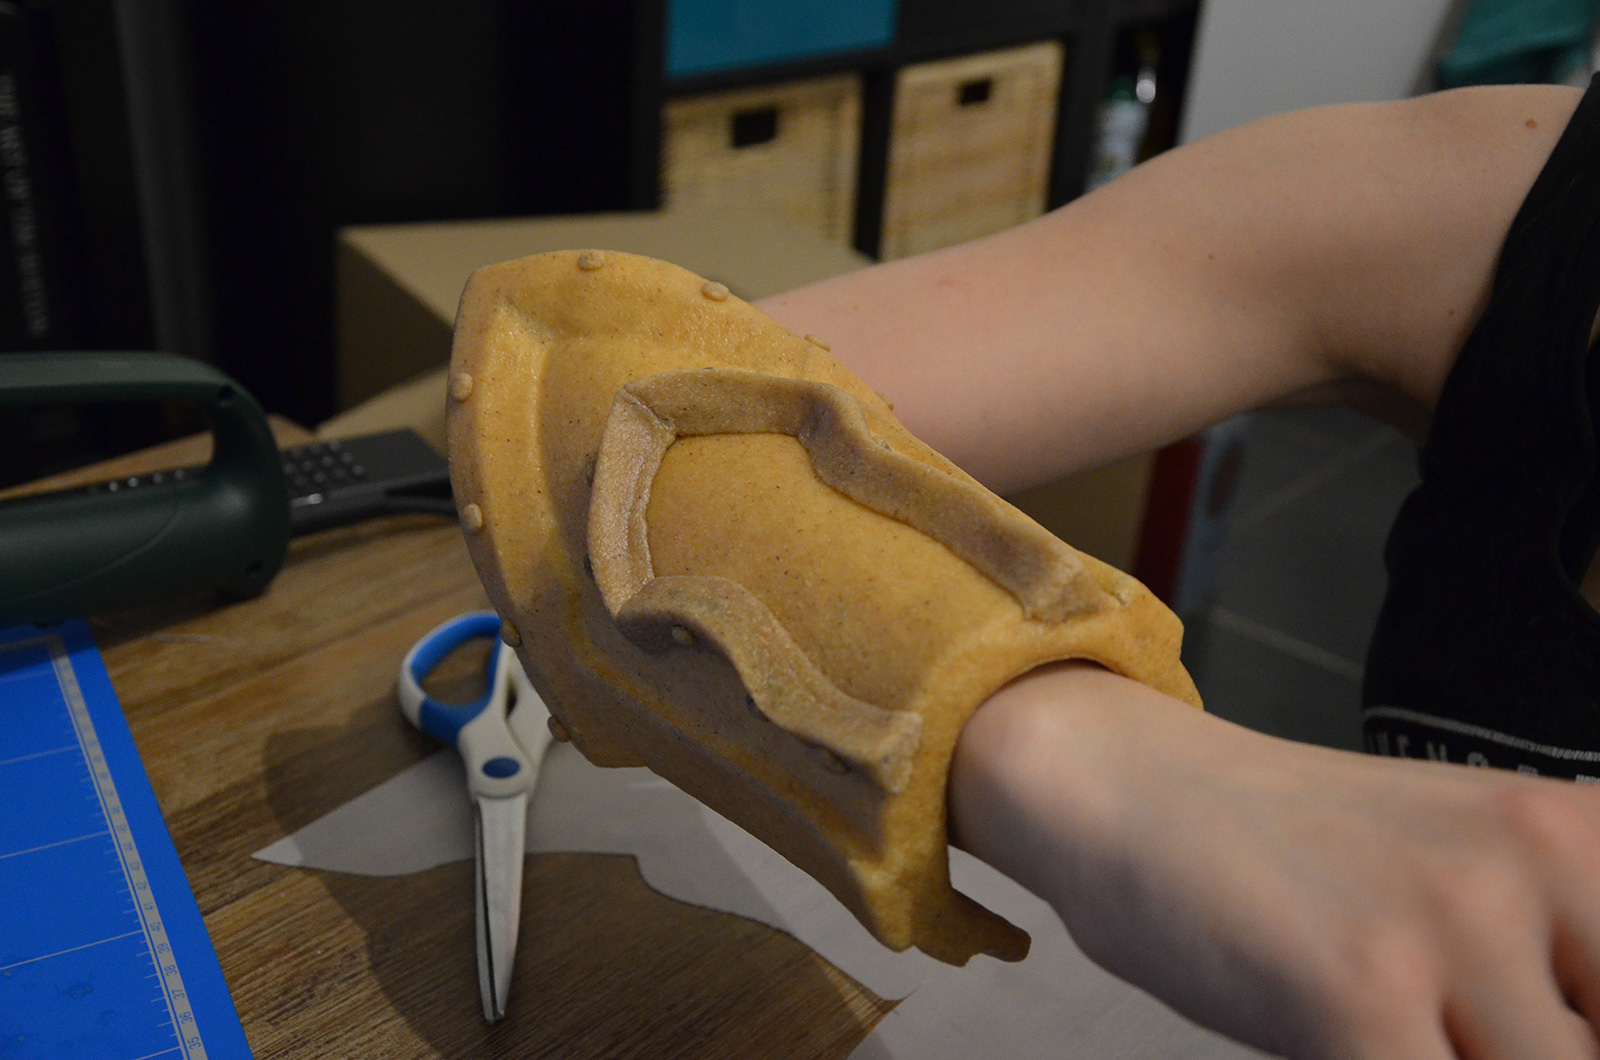
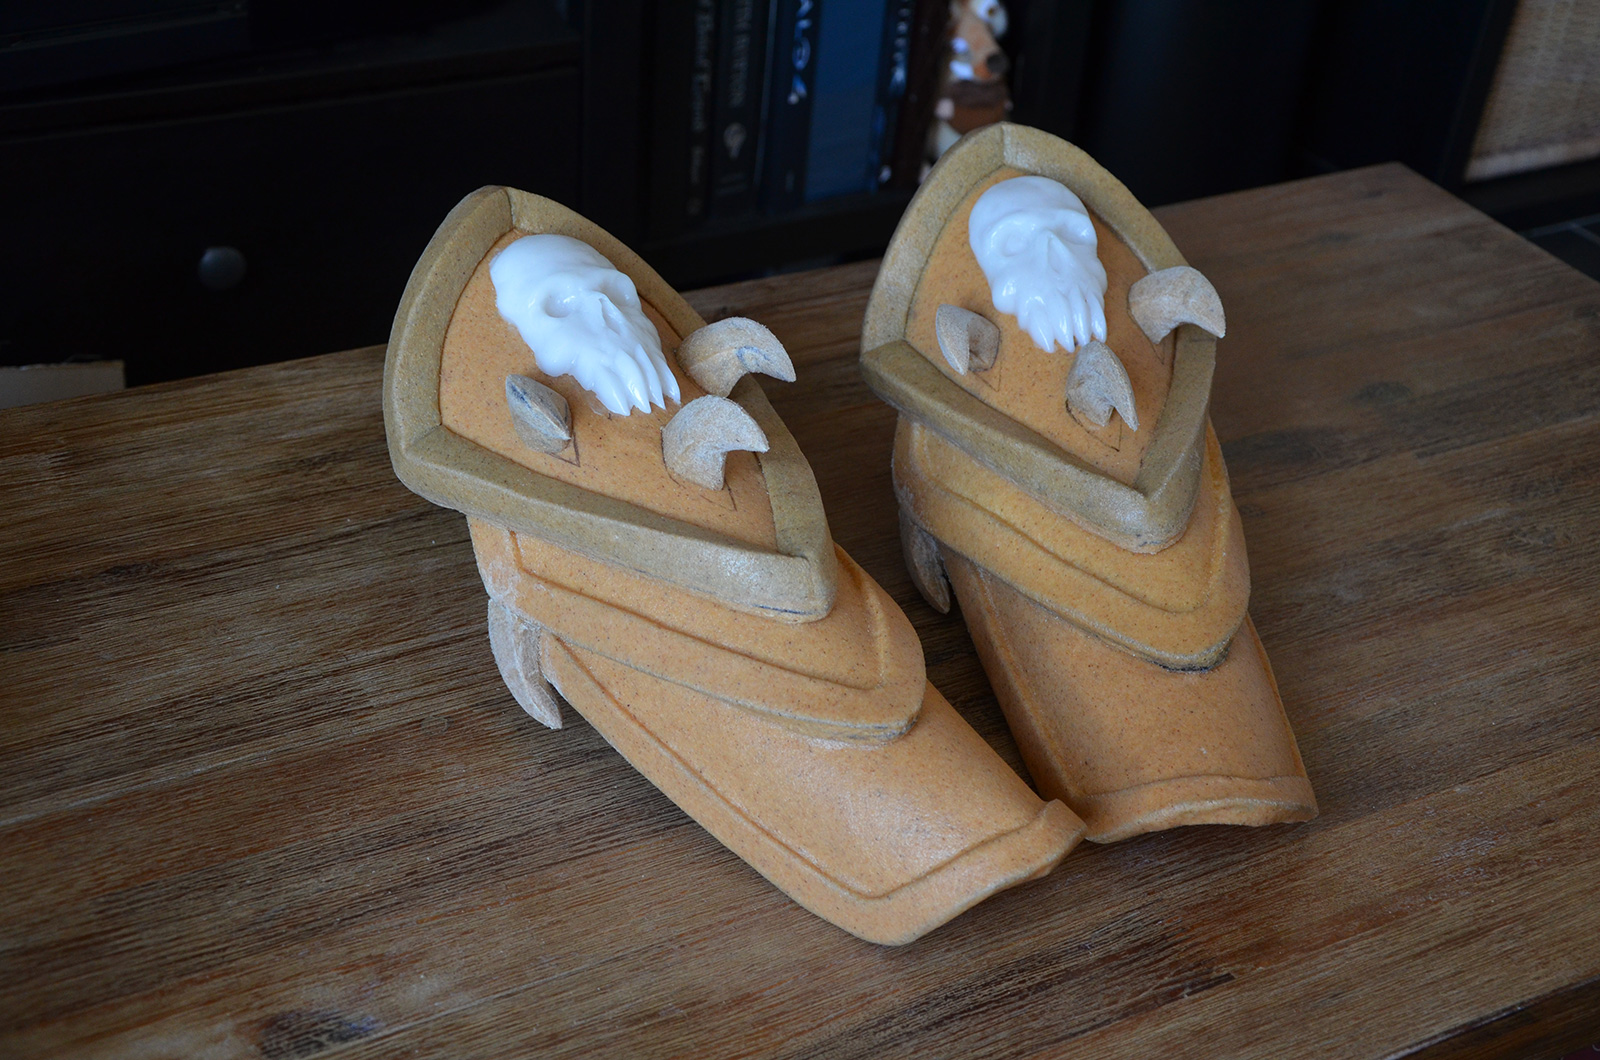
Armor pieces
1. Patterns
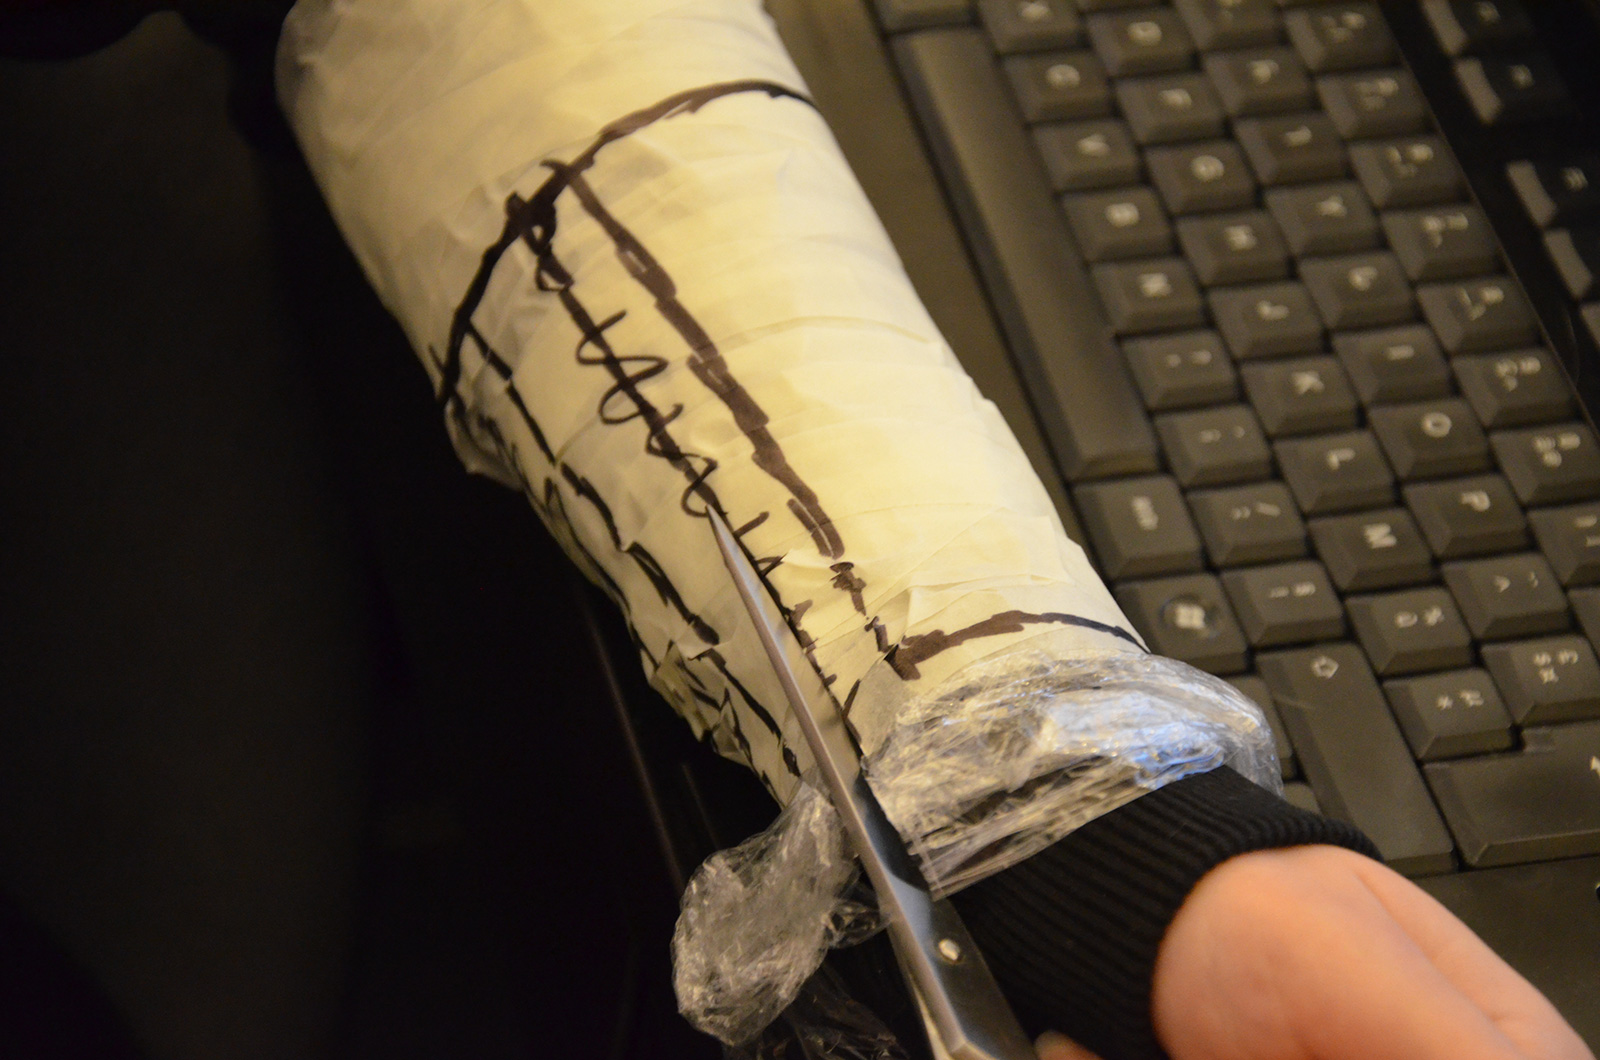
To get pieces that fit to me, we chose to wrap body parts with tape in order to get patterns (as we do for sewing).

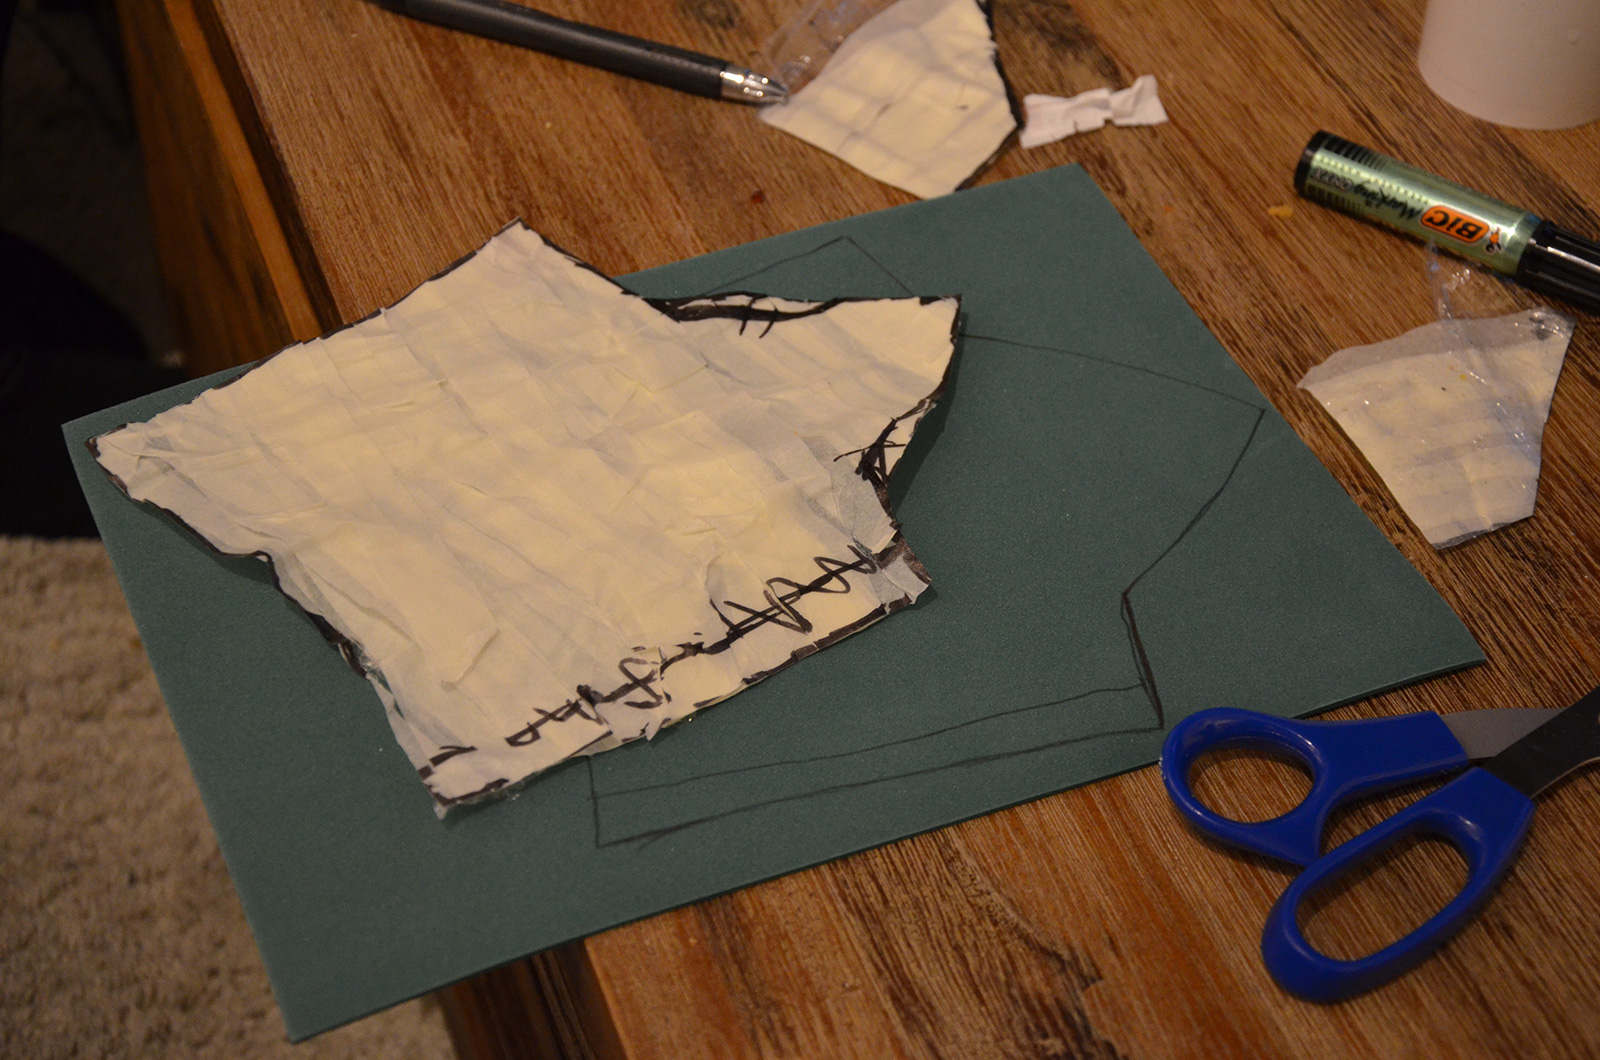
Gauntlet drawing on masking tape Transfer on the foam sheet Foam pattern
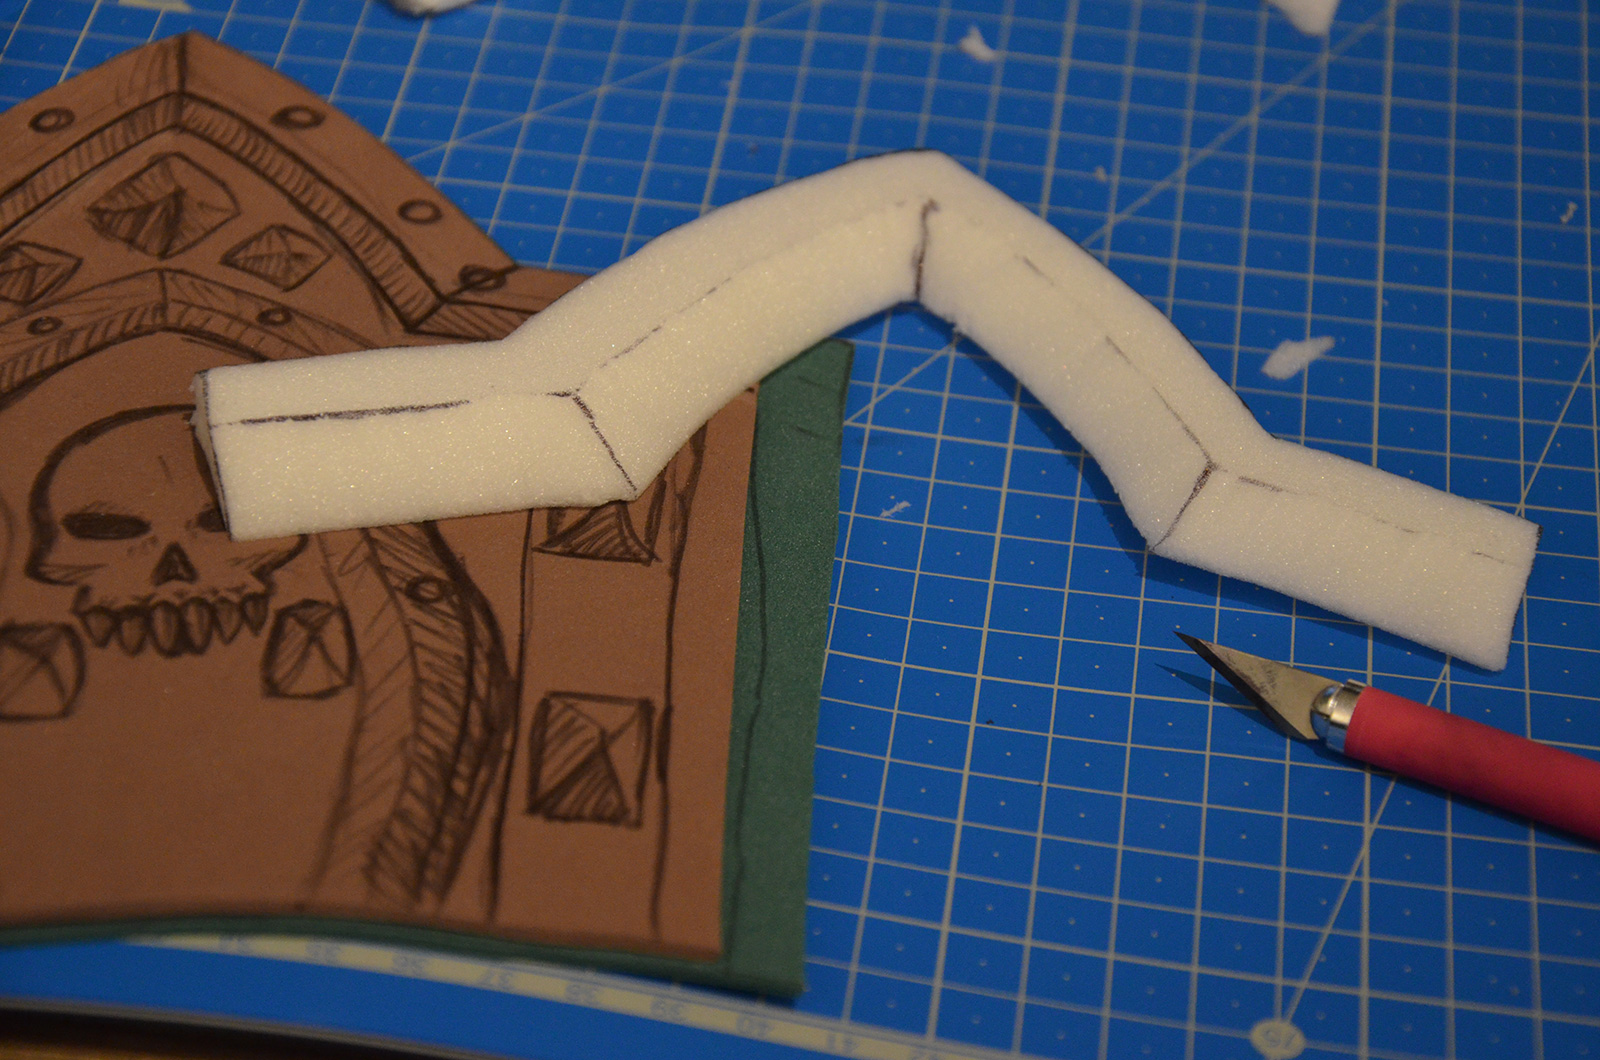
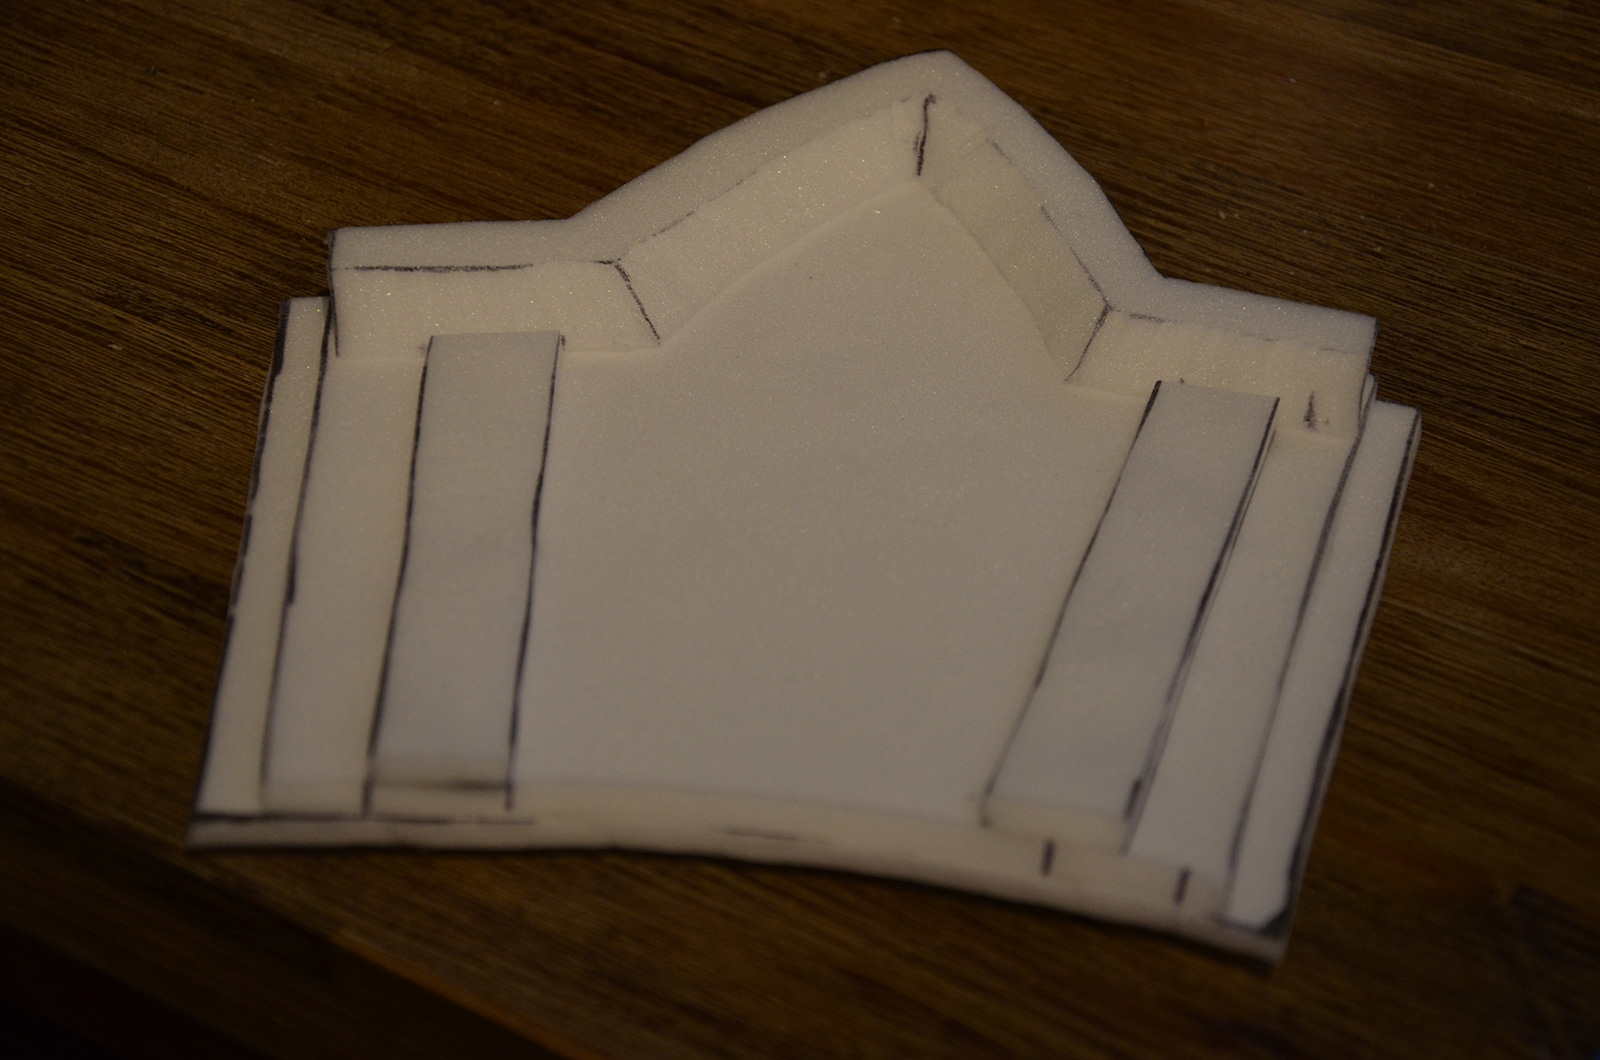
2. Foam
Once the shape is drawn and cut, we transfer it on the foam and add parts of details with a glue gun.
Border cutting Gauntlet foam basis
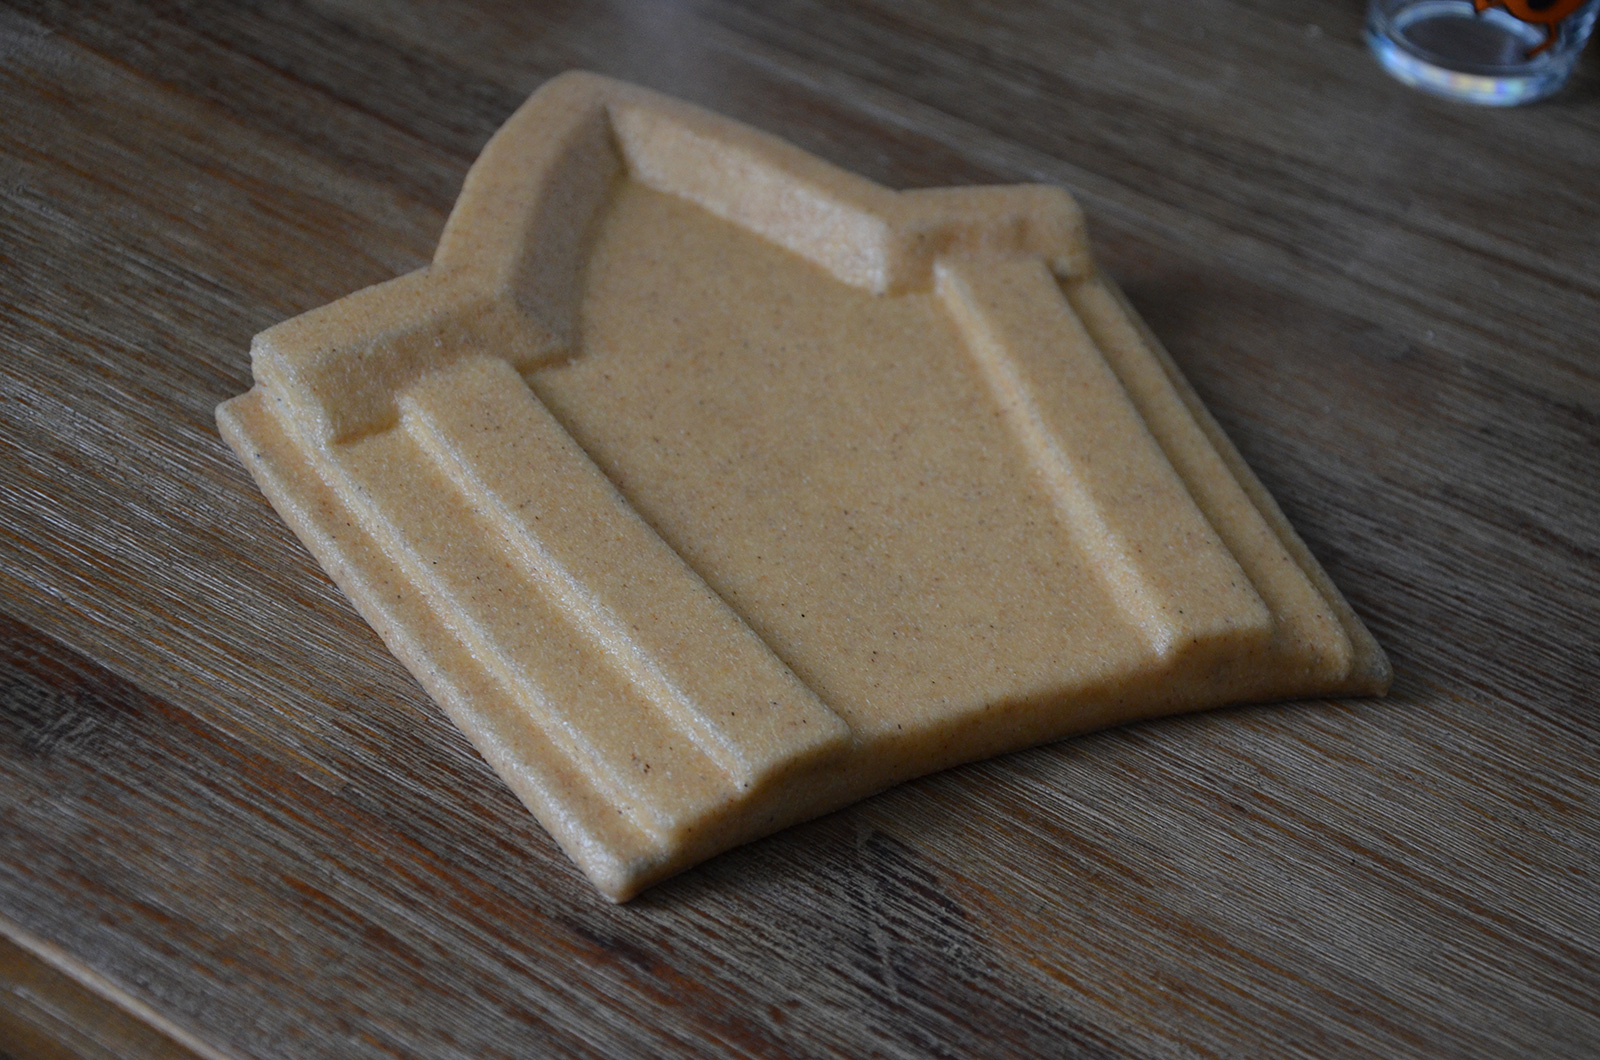
3. Worbla
When the basis is done, we apply Worbla (thermoplastic sheet) to harden the piece and get the right curve (around my wrist ie).
We apply Worbla on the foam basis Basis is done It takes the shape of my wrist

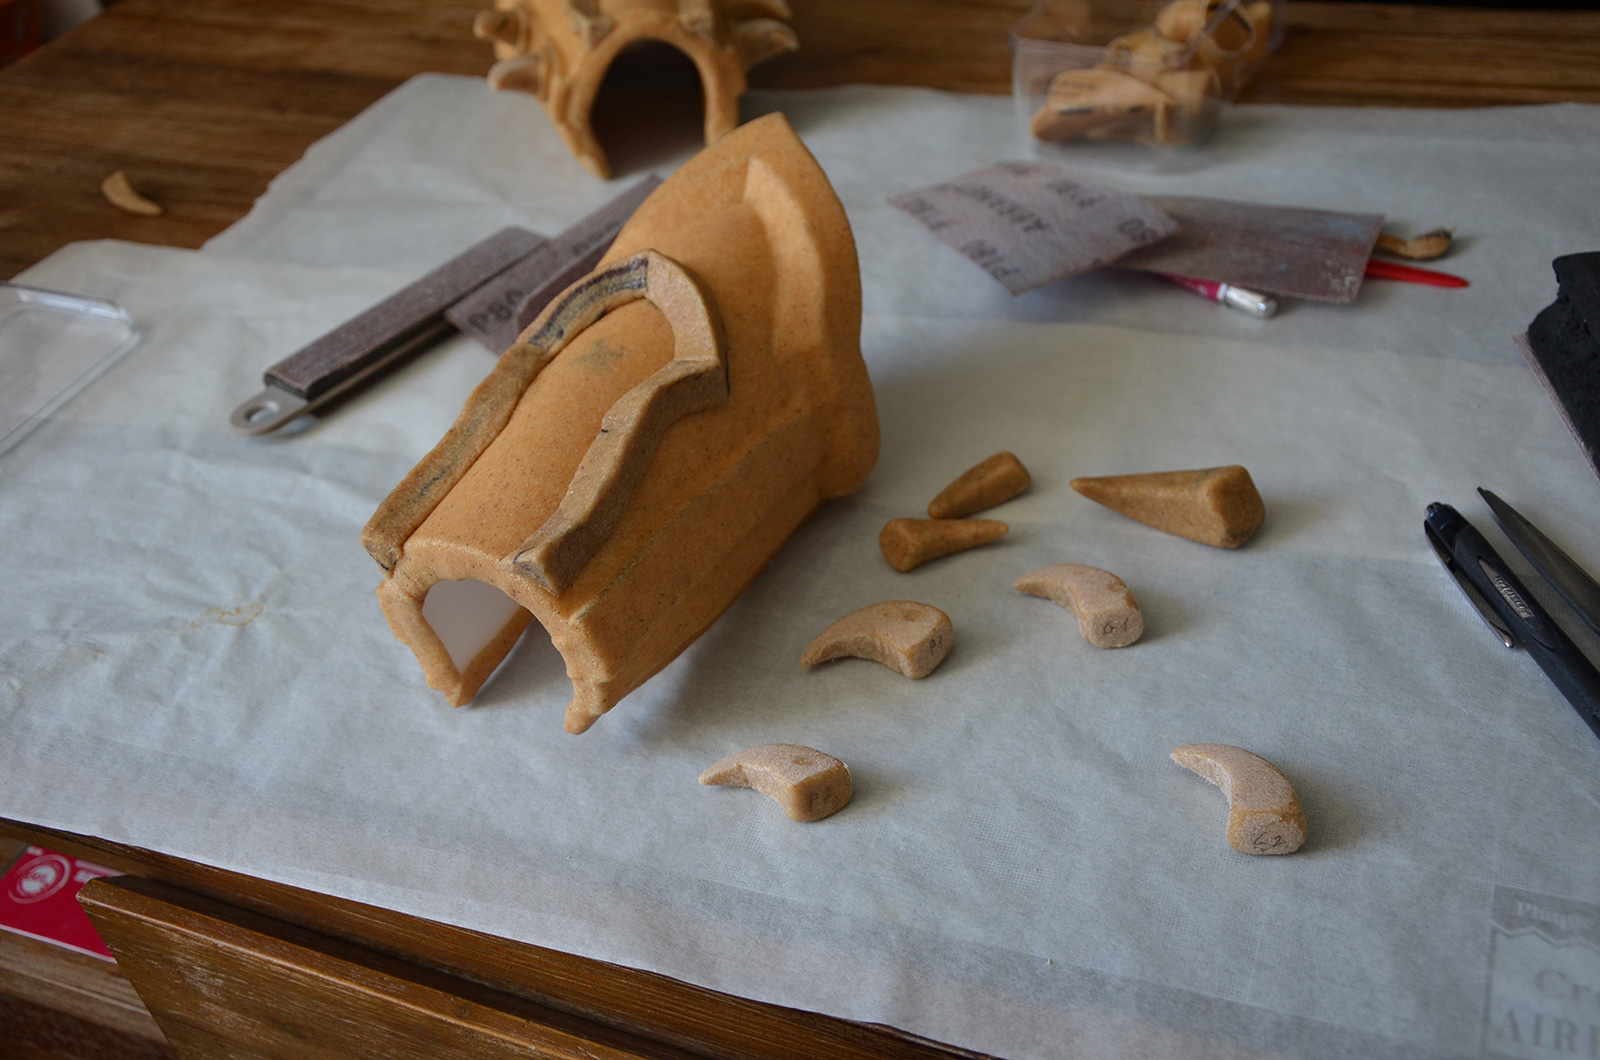
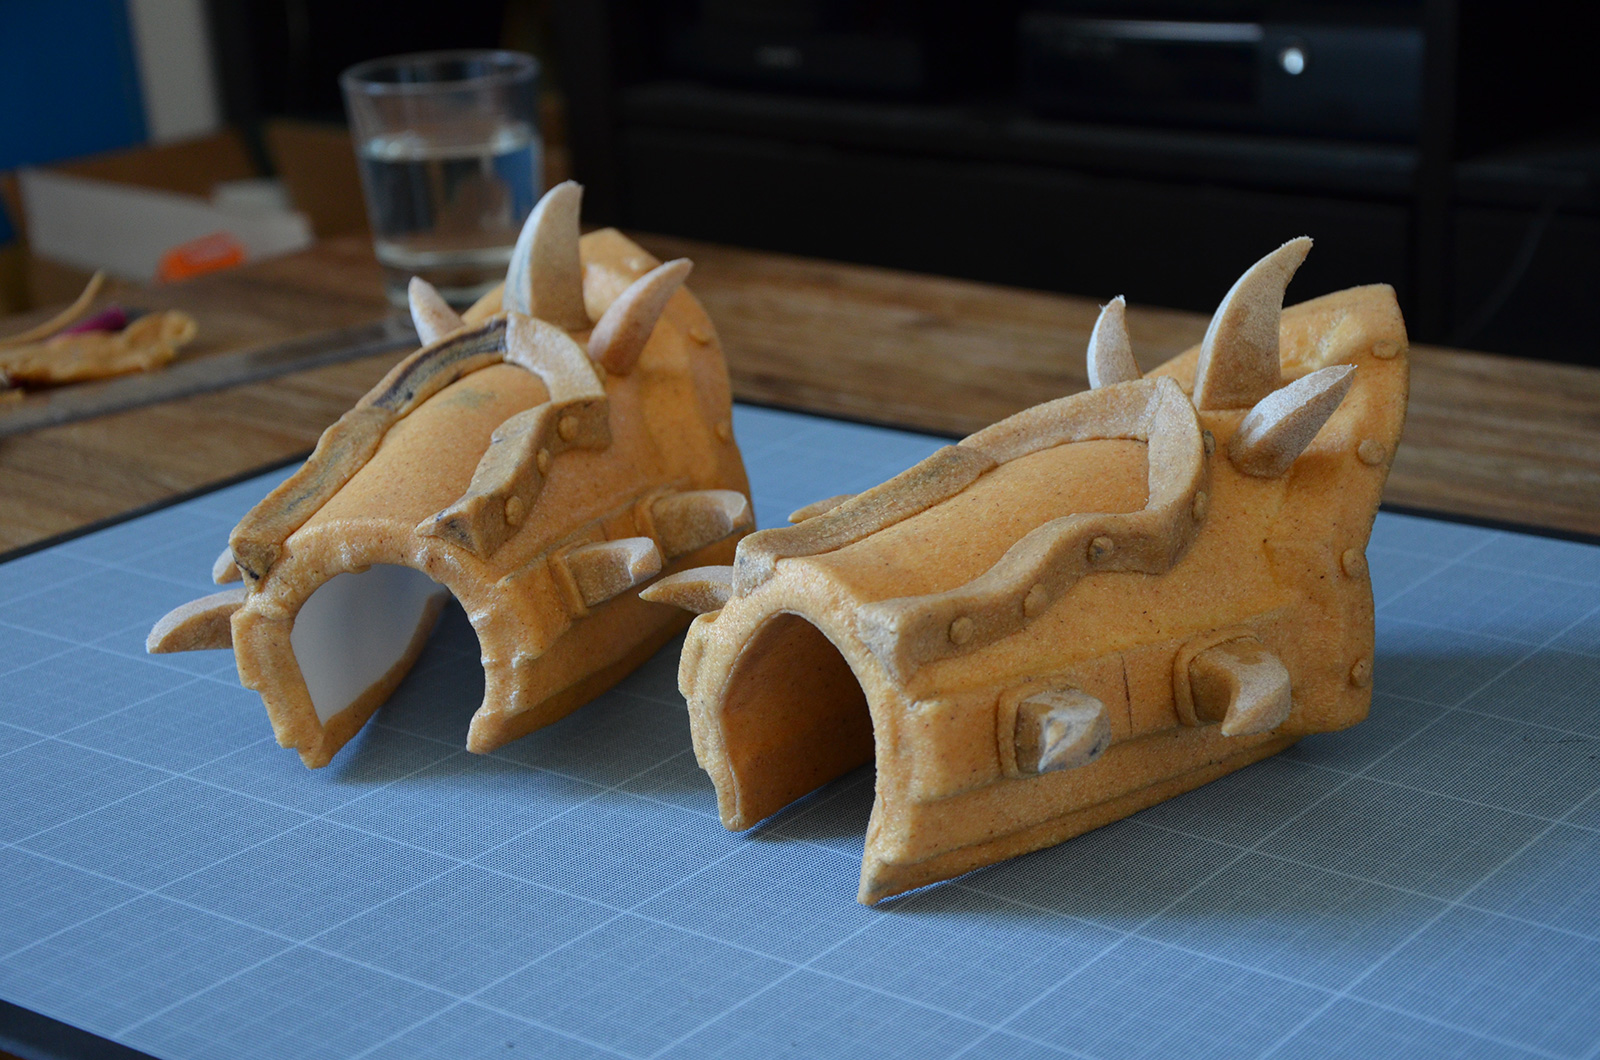
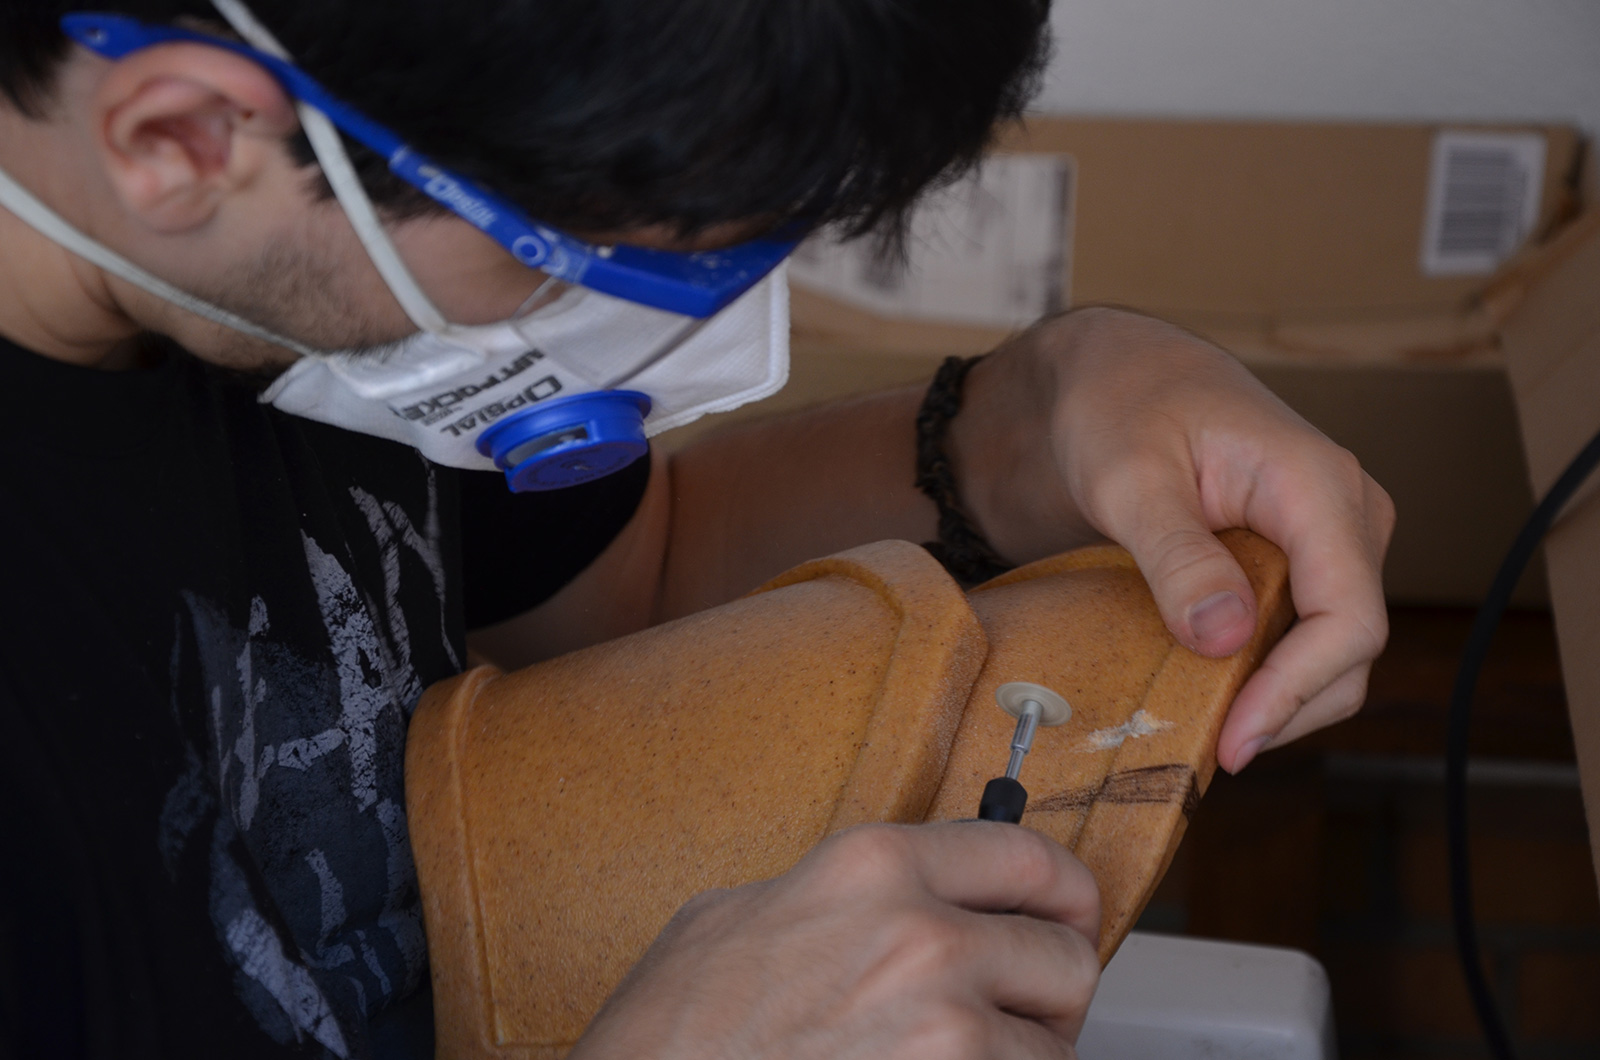
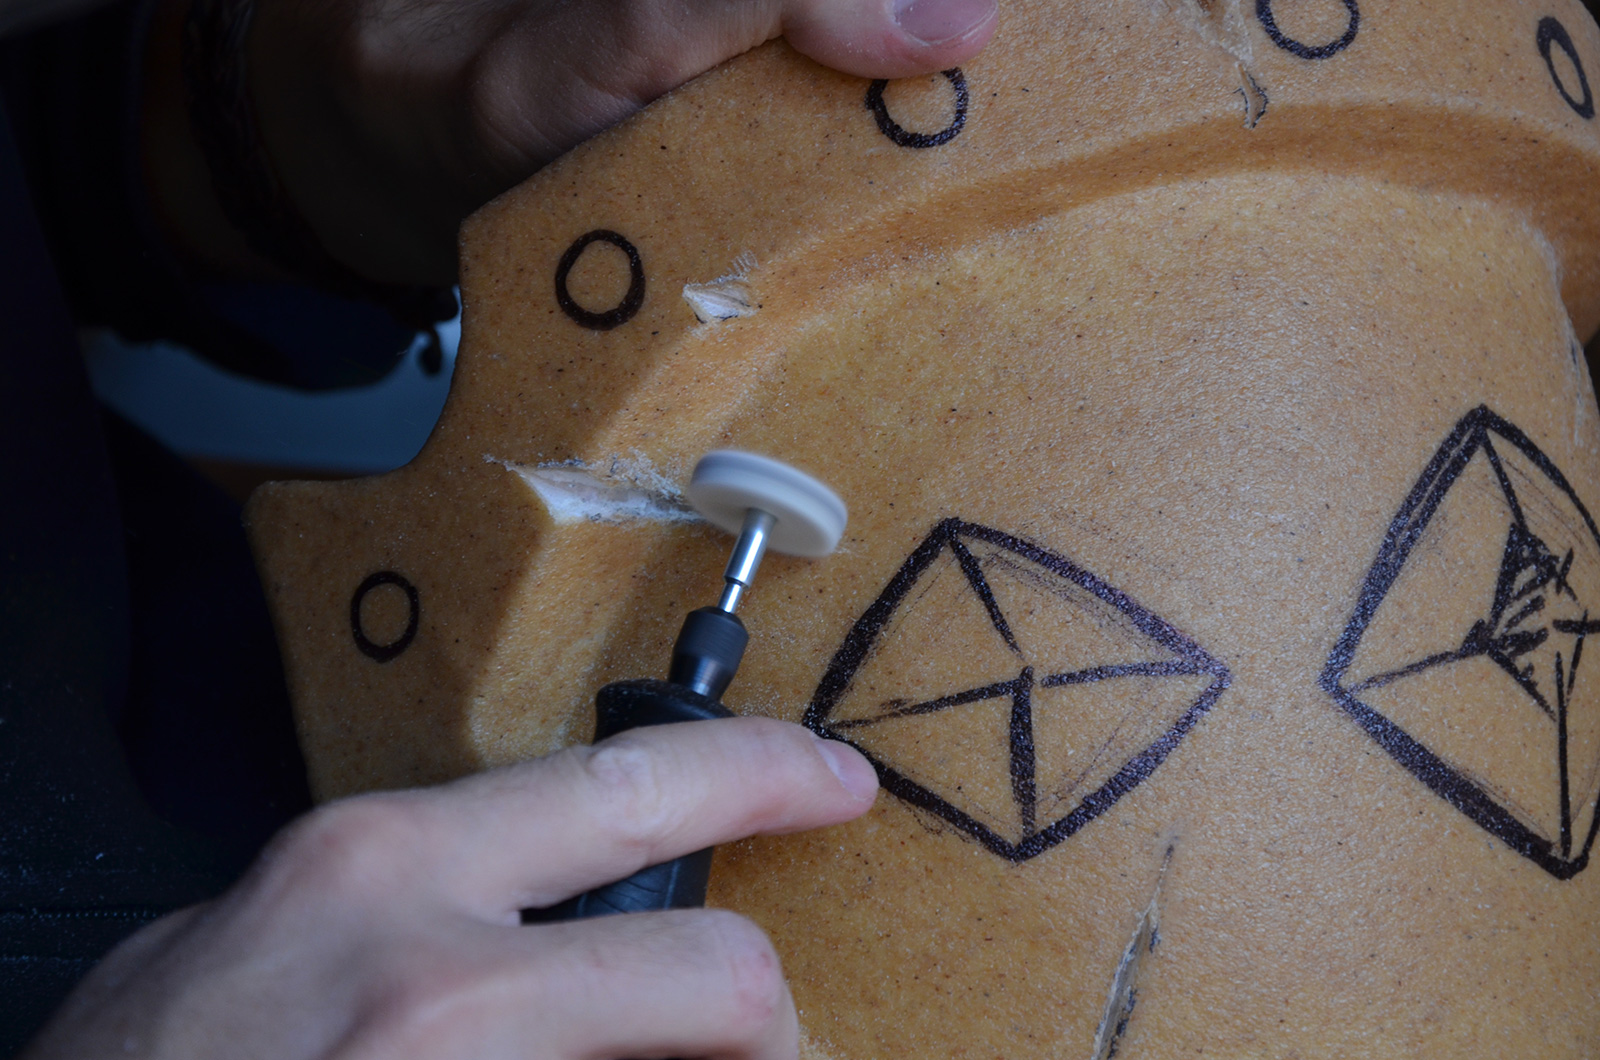
4. Details (Worbla / Deco art / Dremel)
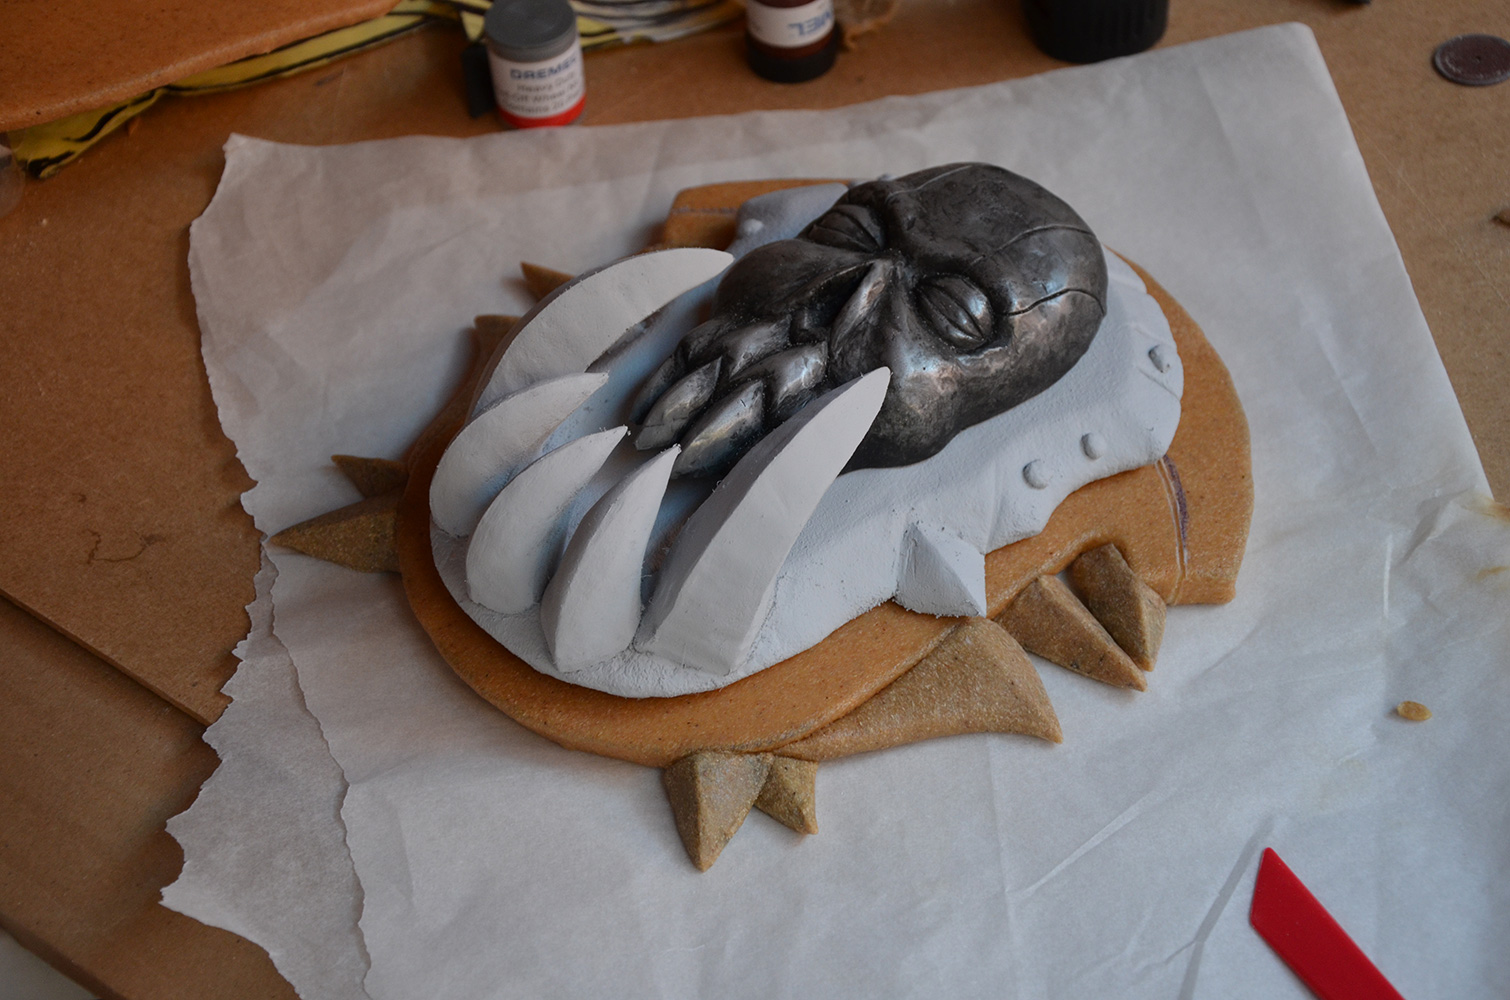
Once we have pieces with the right shape, we add some details. Some are made with Worbla, as for pikes that we shaped using scraps, and that we sanded to make them cleaner and sharper.
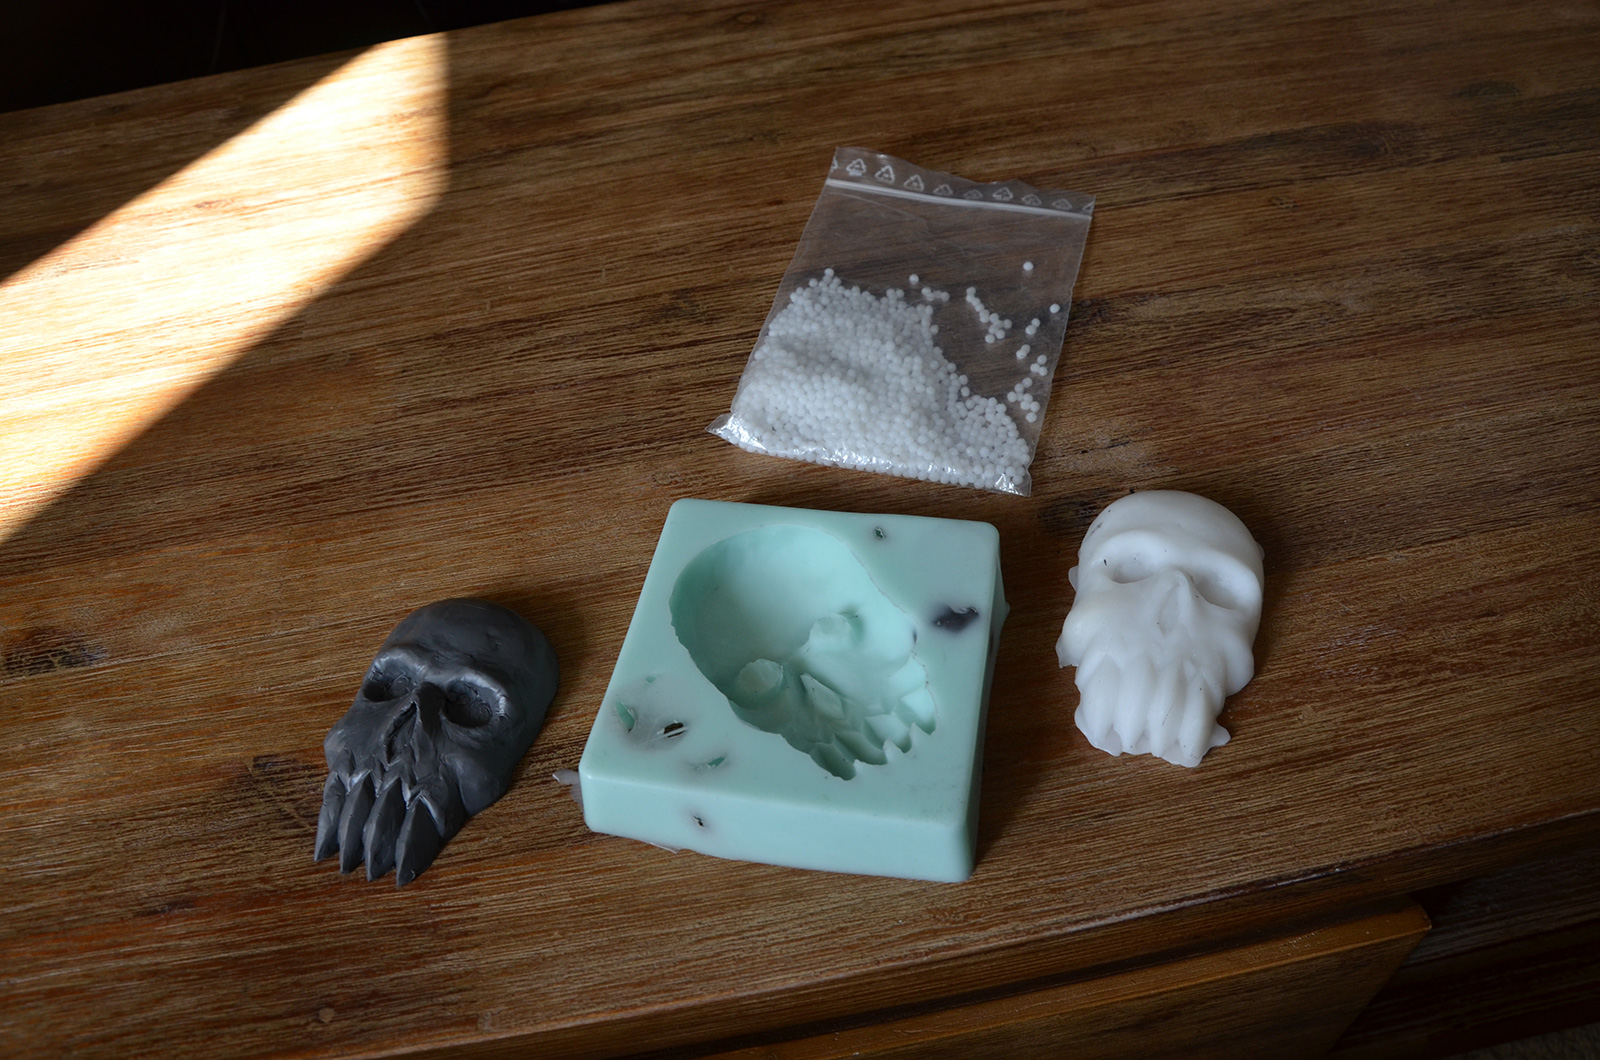
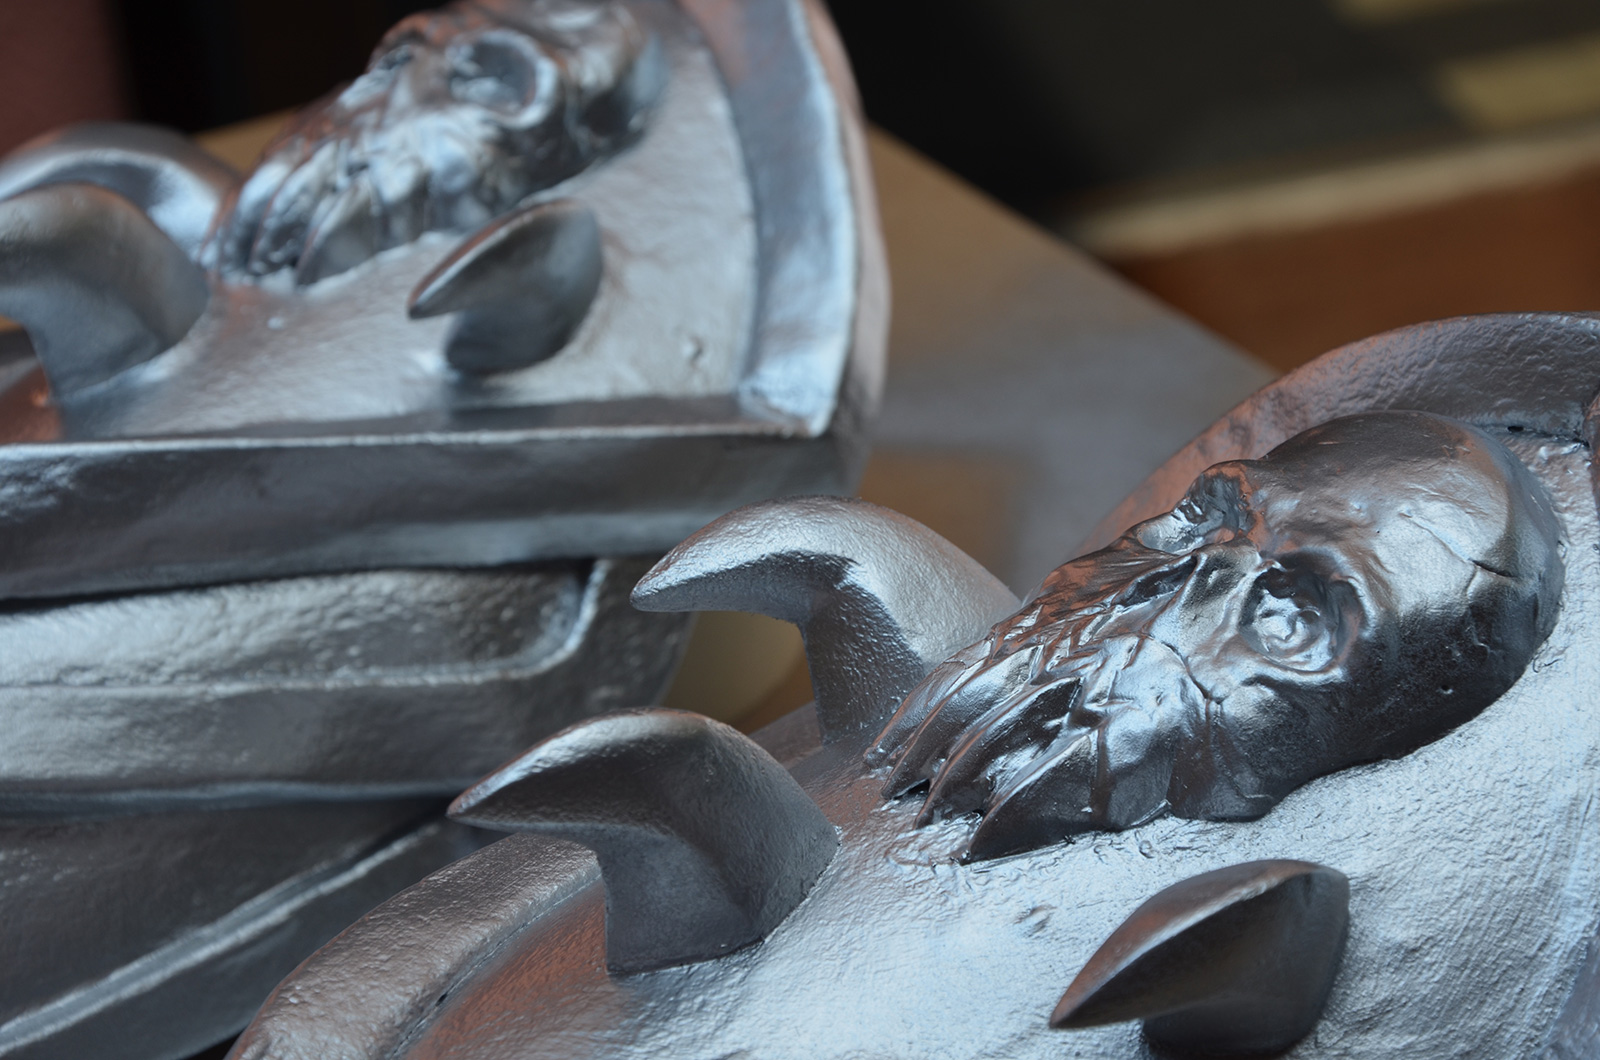
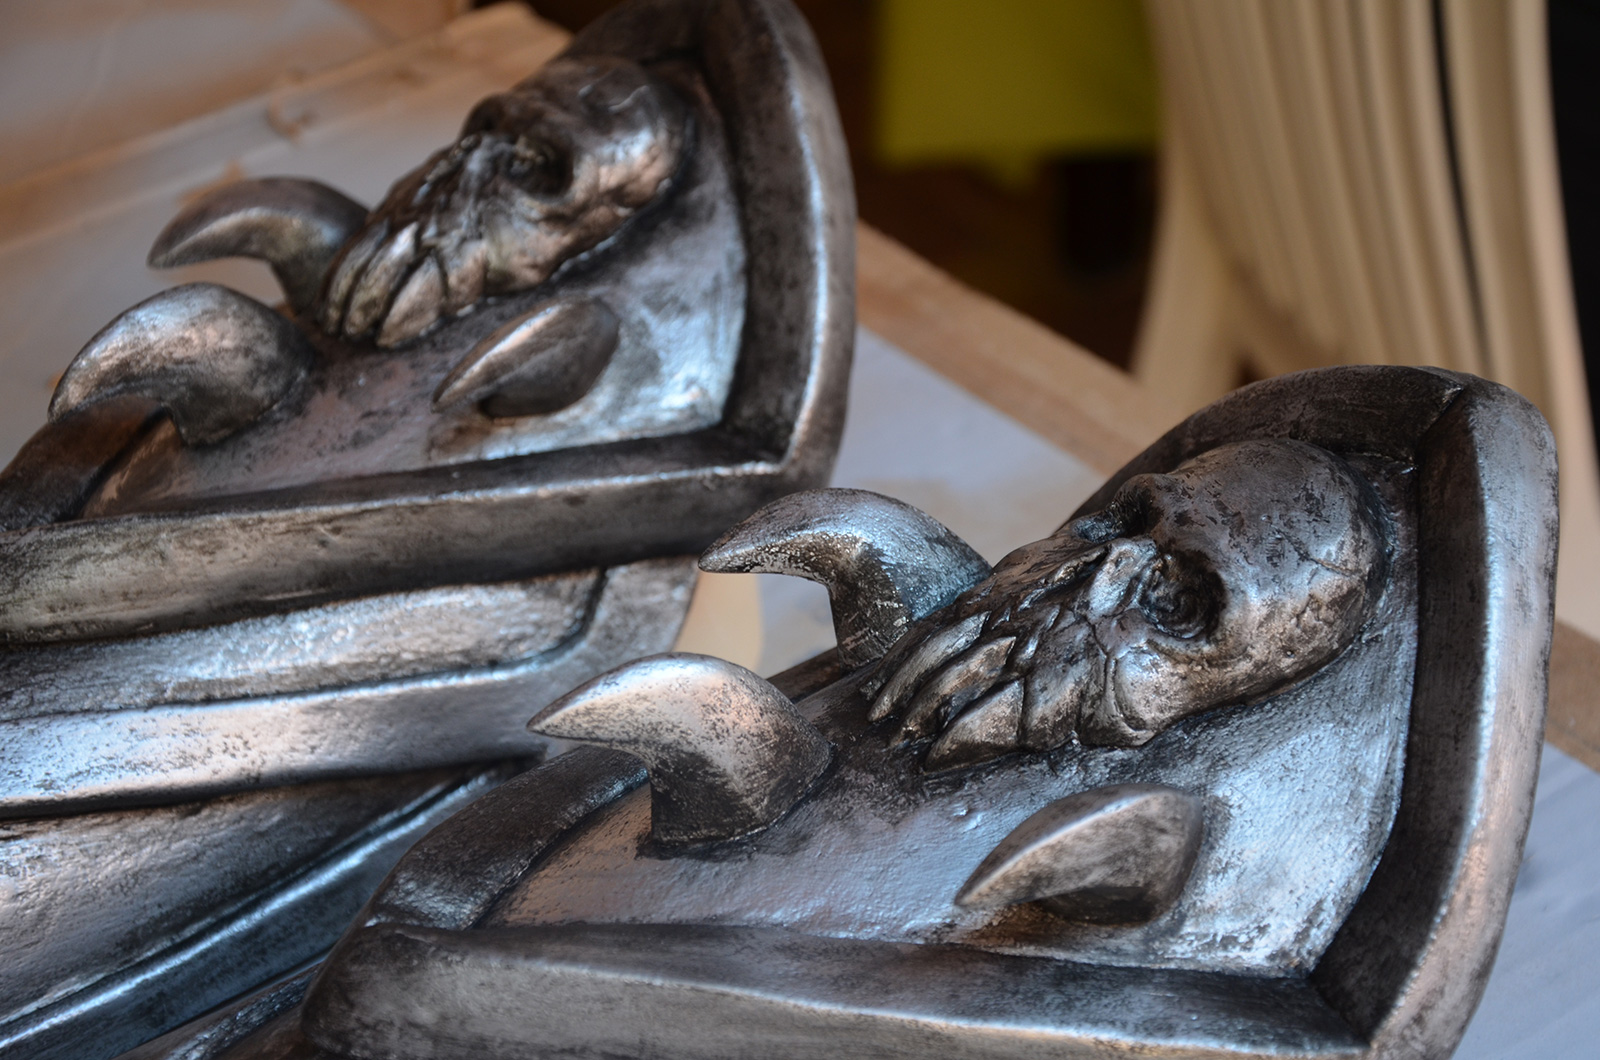
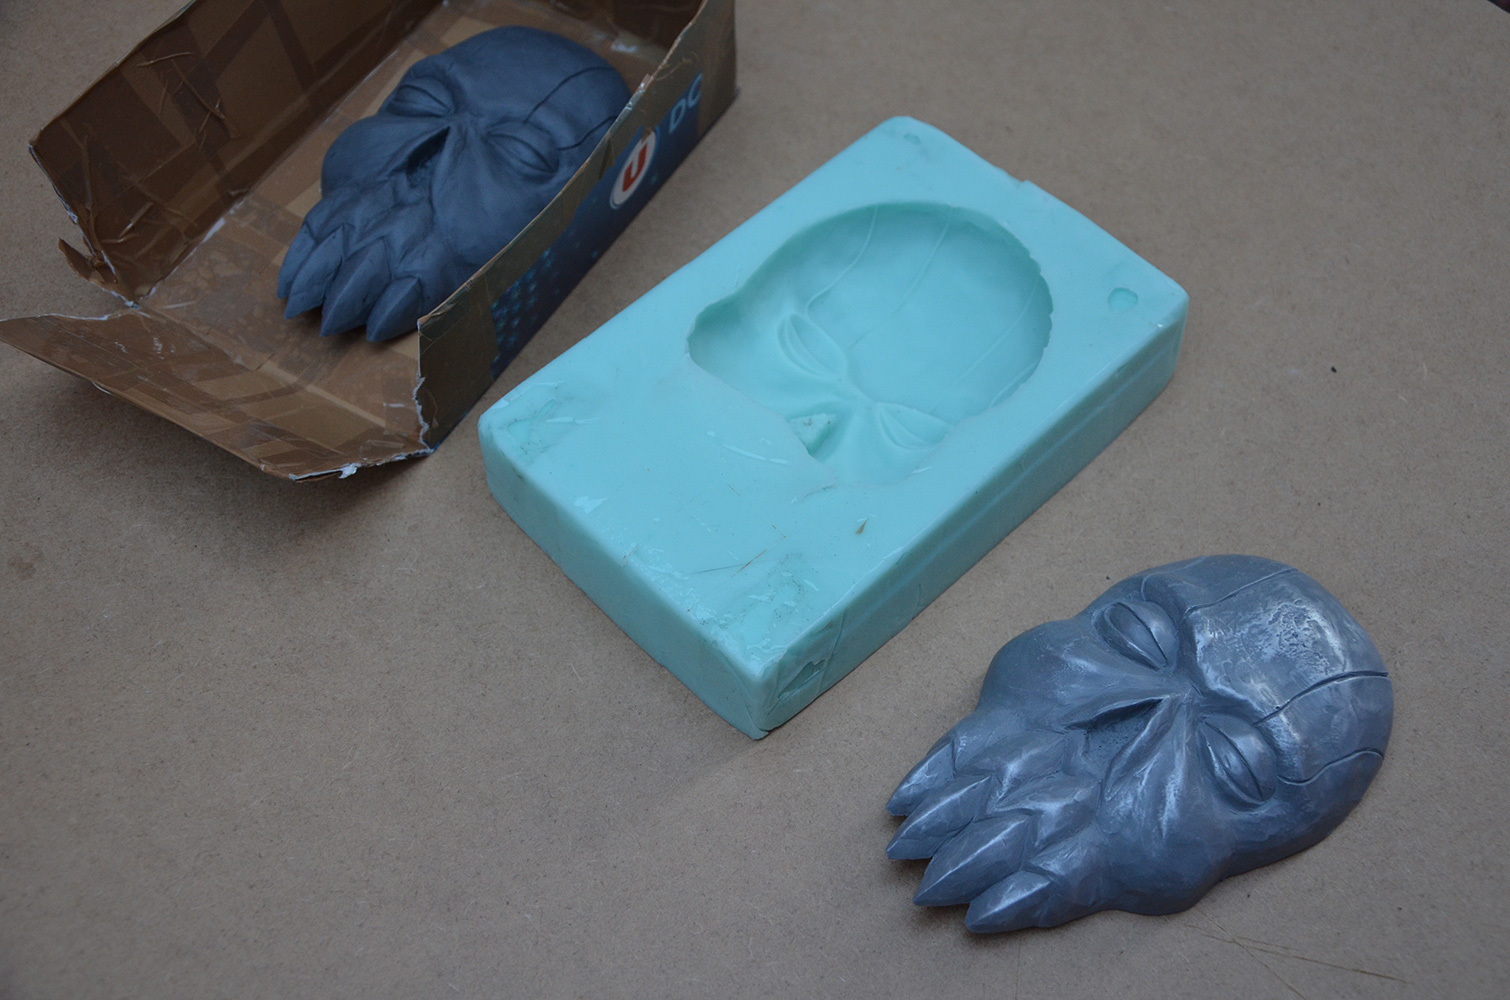
We also use an other type of thermoplastic, called Worbla’s Deco Art (small white balls). For the skulls, I first sculpted a Plastiline model (sort of clay, you can see the review there –> https://www.blackowlstudio.com/en/material-plastiline/), then we made a silicone mold out of it. We tried to make a cast using Worbla’s Deco Art, this was first just a test, but we are quite satisfied with this result! 🙂
Maël also added some notches to most of my armor parts with a Dremel.
Pikes: shaping and sanding Worbla gauntlets Skull molding with Worbla’s Deco Art Worbla leg plates Notches added with Dremel Cleaning of the borders with a felt polishing wheel
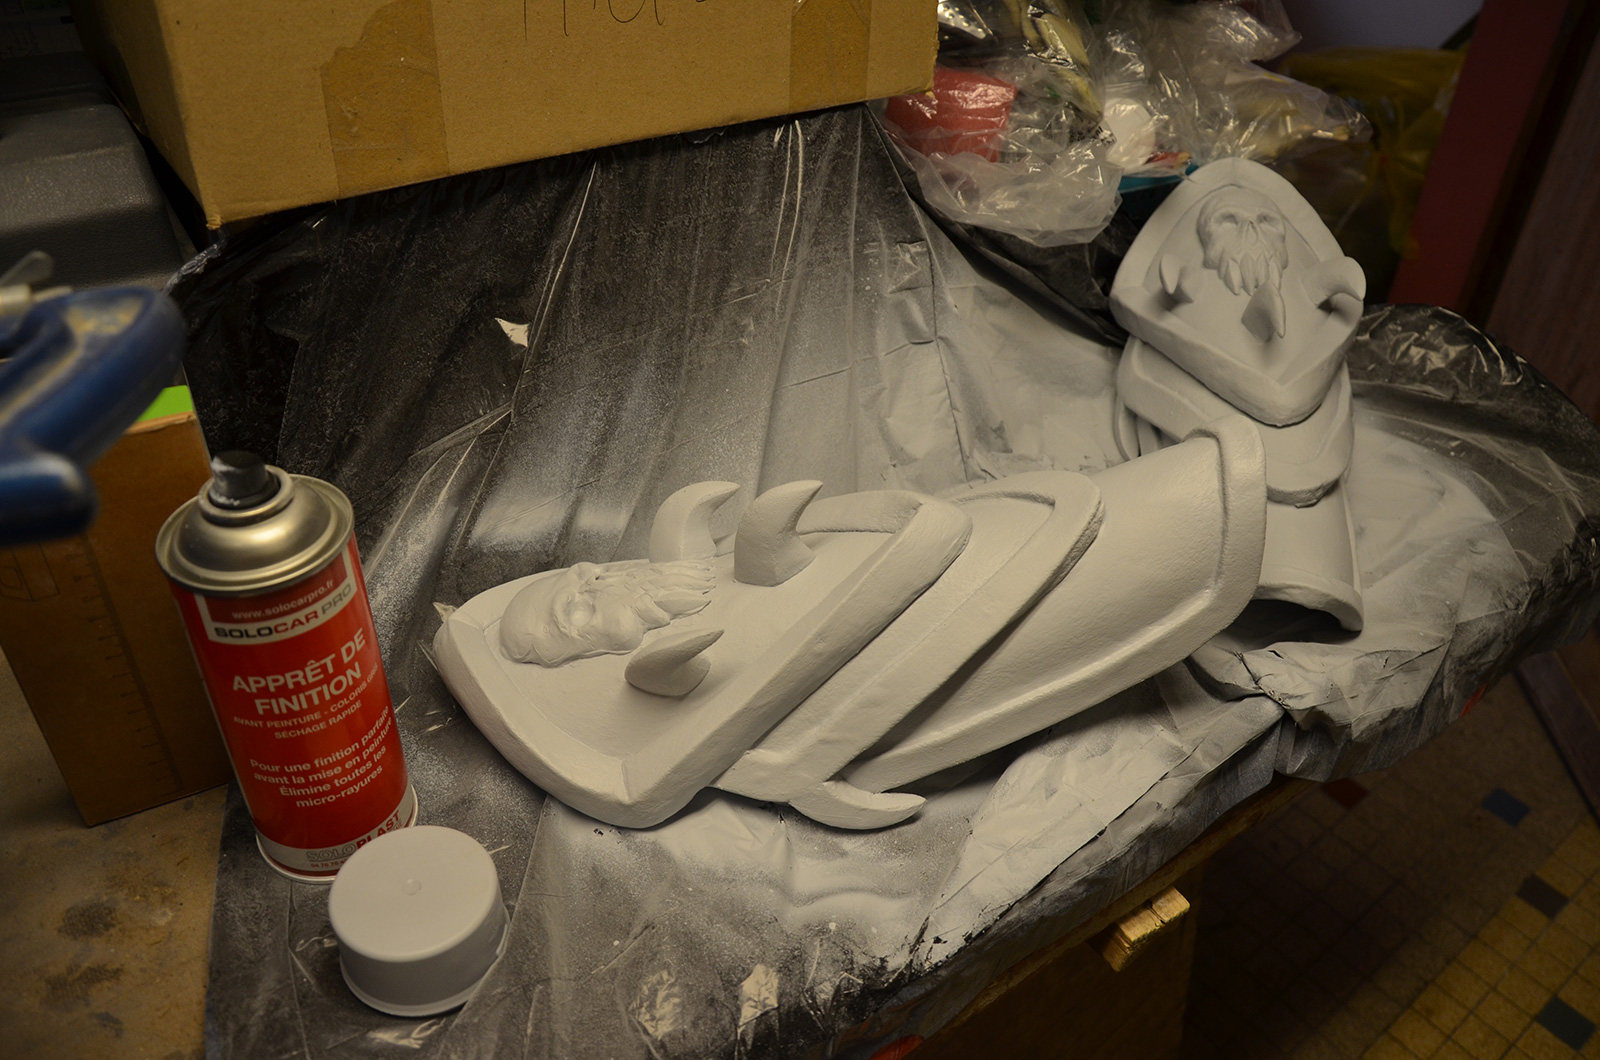
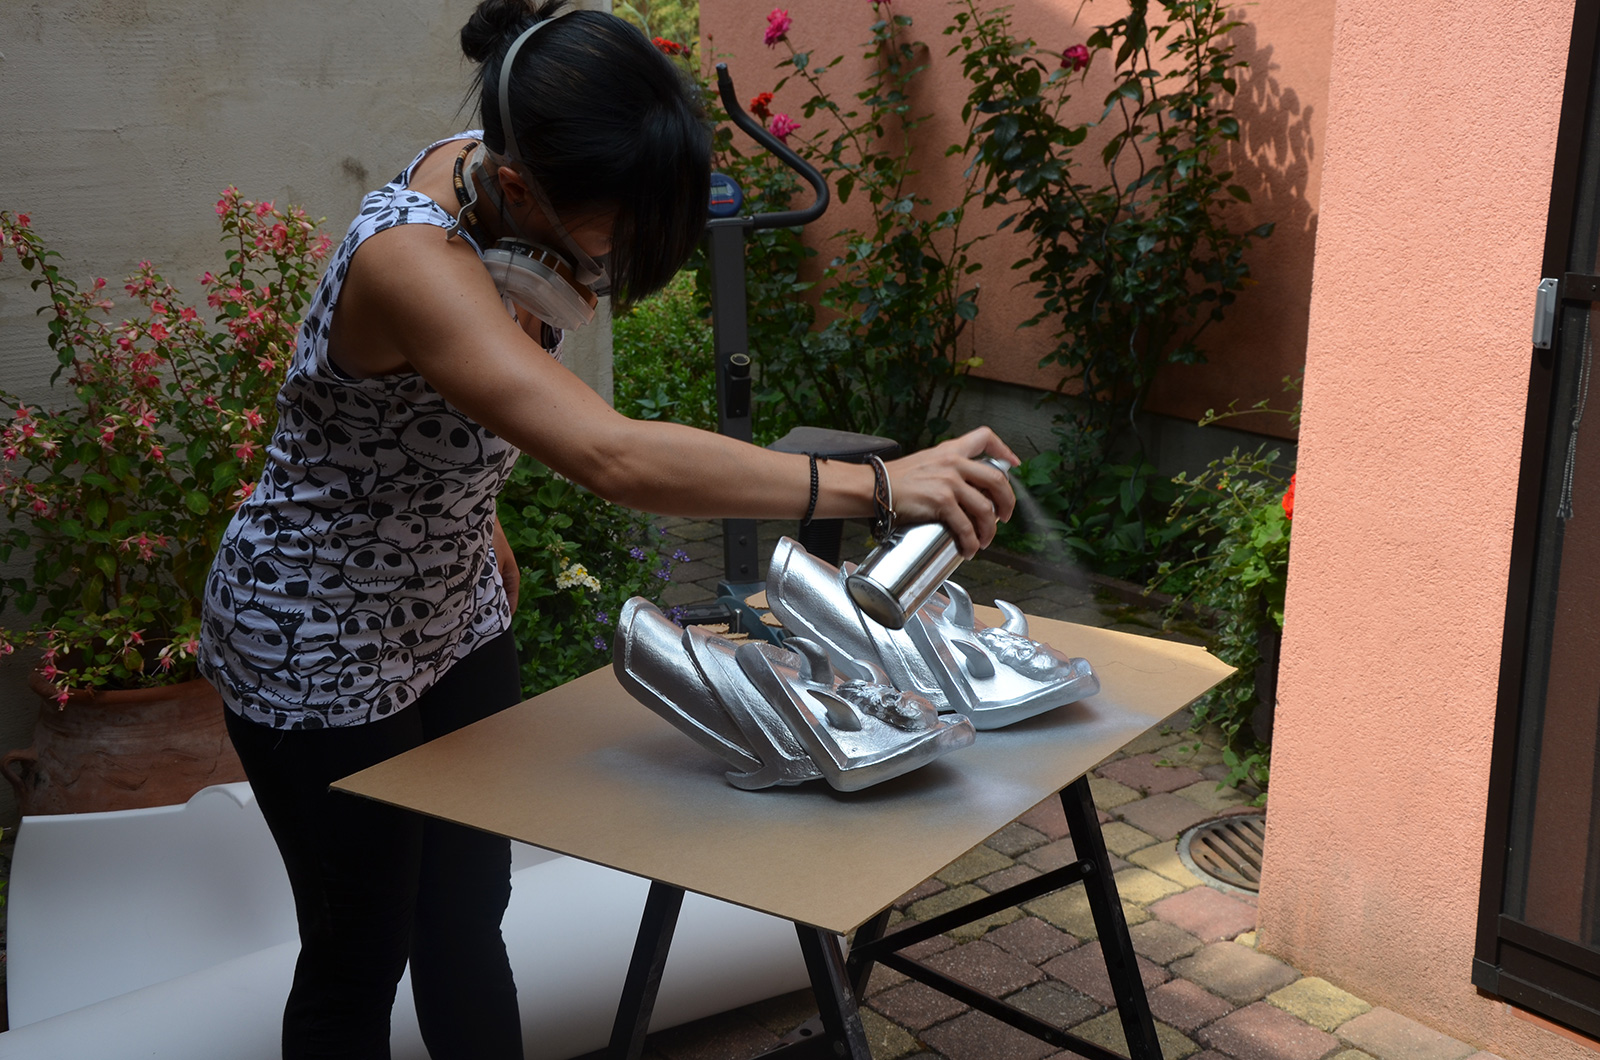
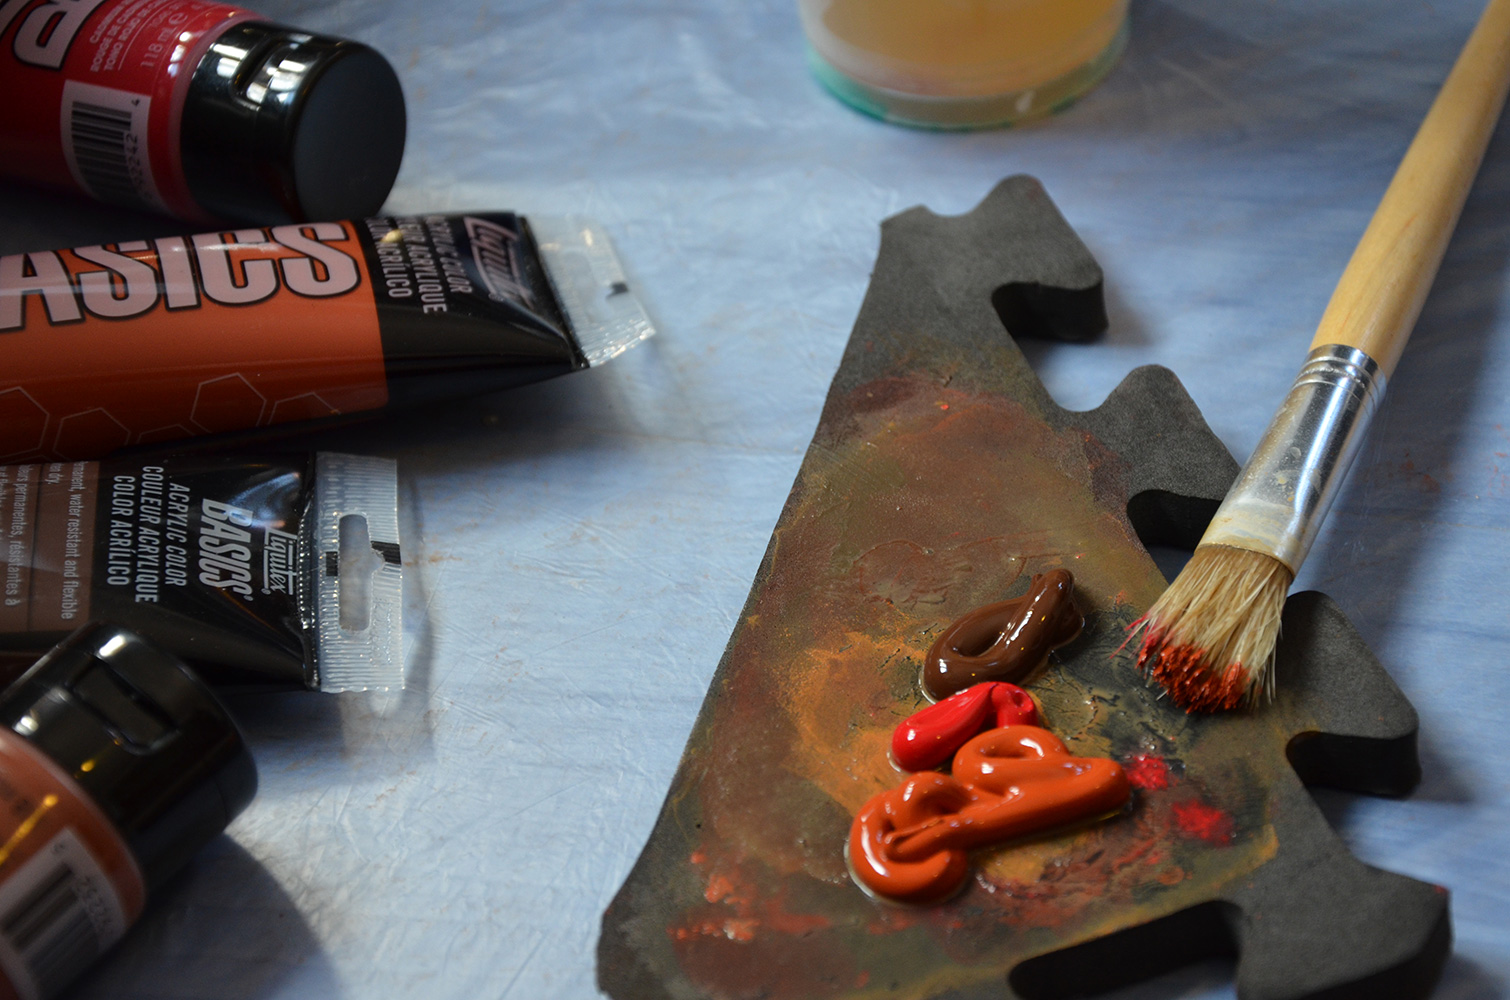
5. Painting
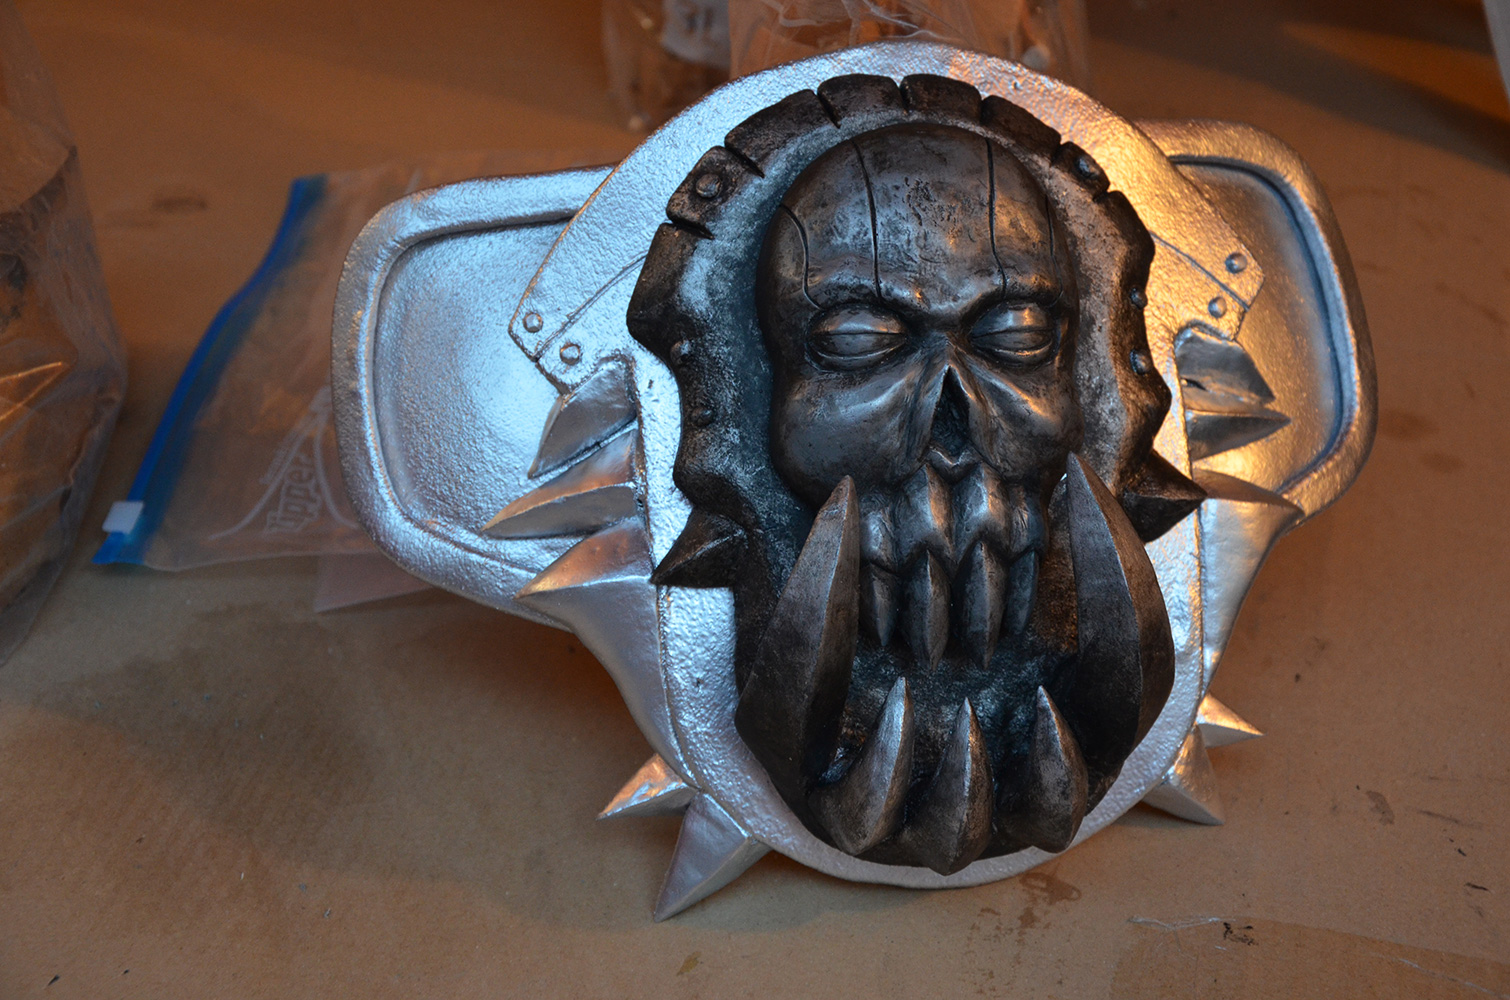
When the pieces are finished, we have to smooth them (Worbla has a rough texture). In this aim, we apply several layers of primer, that we sand each time a bit finer. The number of layers depends of the degree of «smoothness» that you want at the end.
For my armor pieces, we chose to apply a silver spray undercoat on the whole surface. Next, I added other colors with a brush, firstly black to give pieces a more natural look, then a few tints between red and brown to color them.
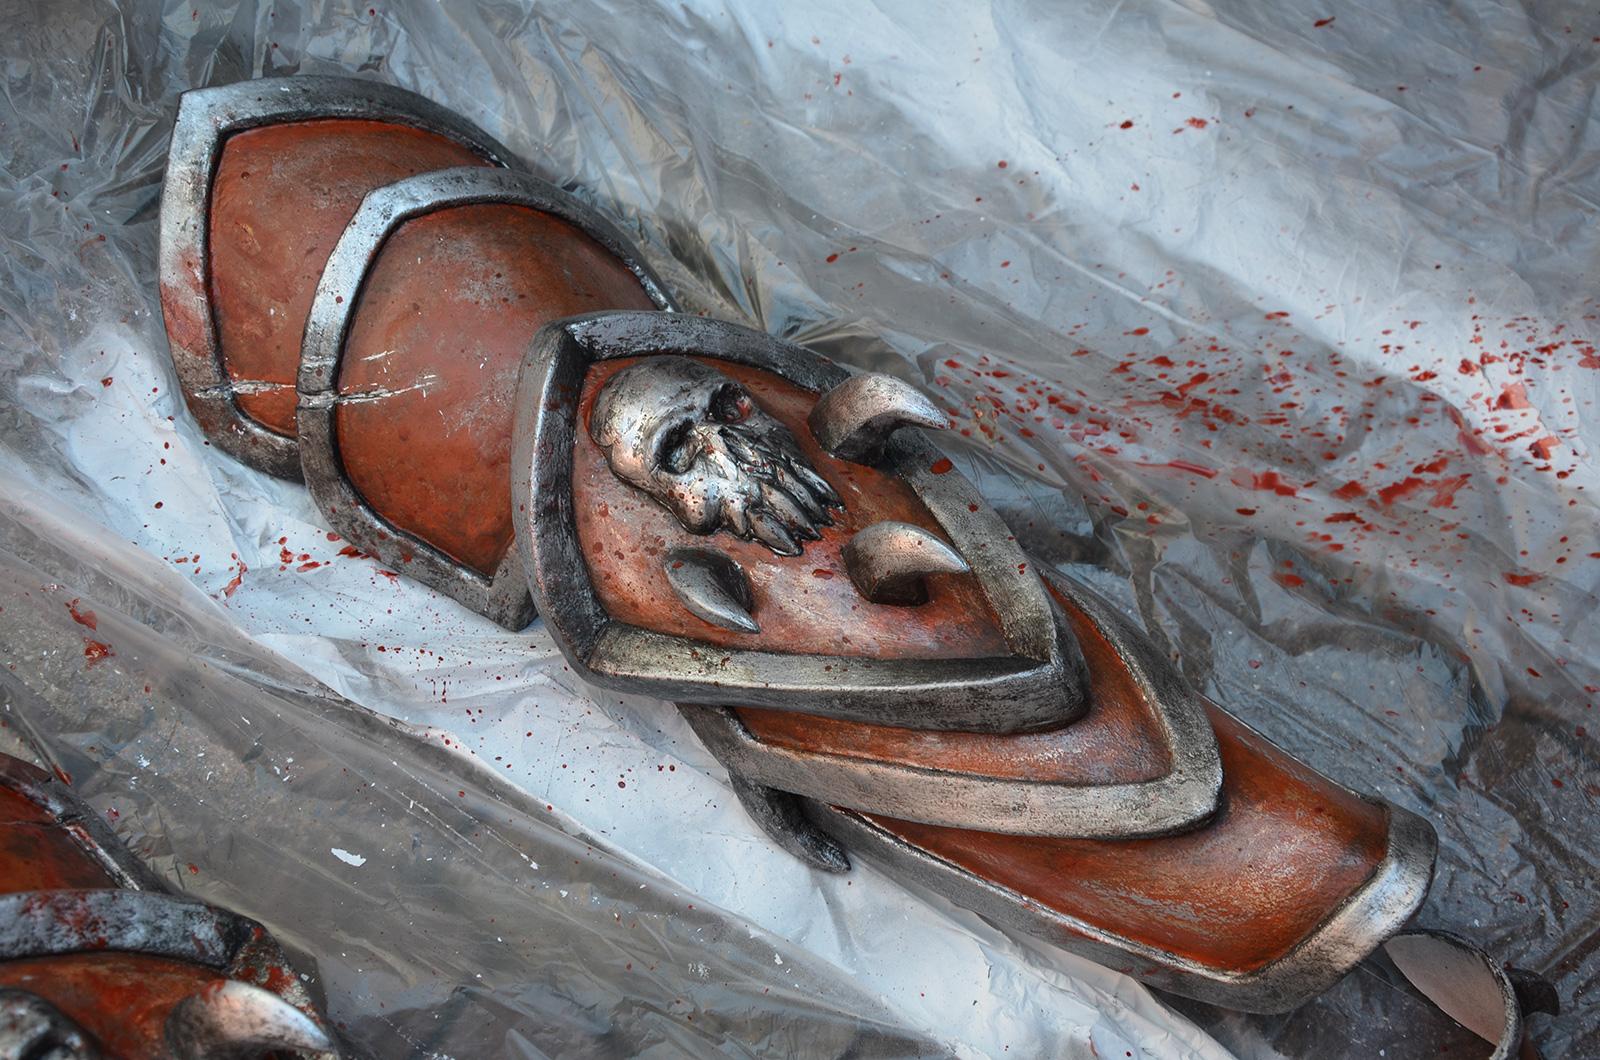
Lastly, I added some watered-thinned red paint squirts by shaking a big brush over my armor pieces. Be sure to protect everything around with a tarp to avoid repainting the walls 😛
Priming Silver spray painting Leg plates – silver paint Leg plates – silver + black paint Red-brown painting There’s gonna be blood!

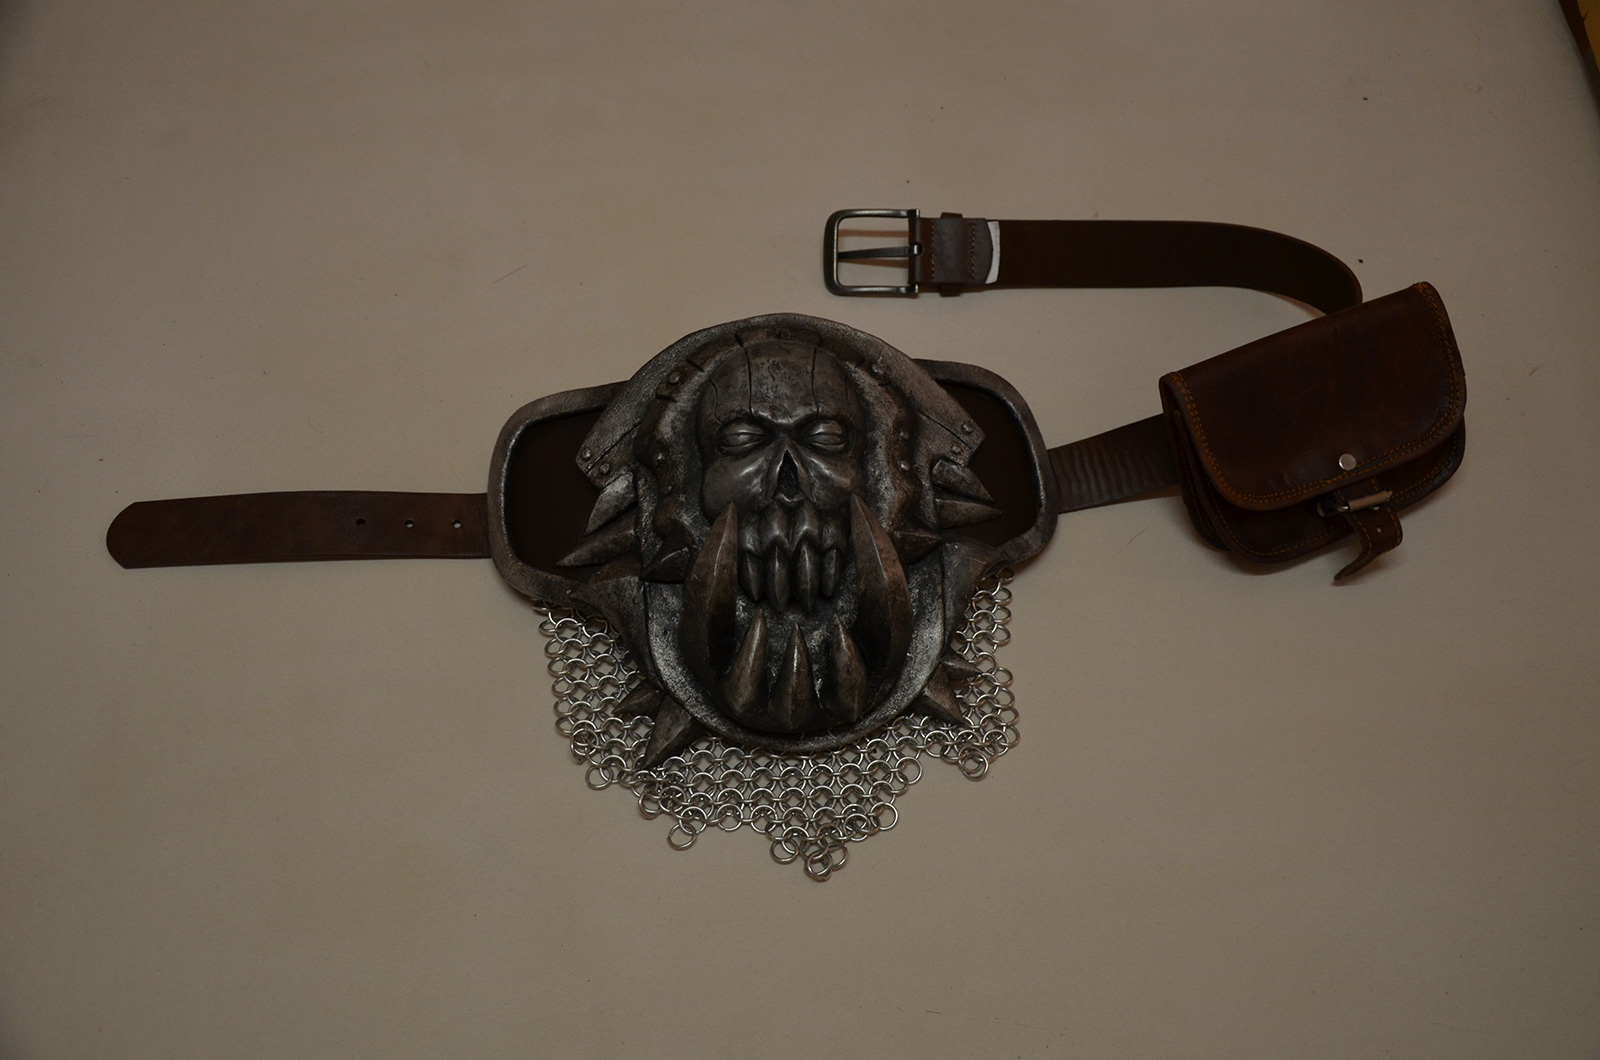
Belt
This single piece took us several days of work… I began by sculpting of the central Plastiline skull while Maël prepared the Worbla basis.
Then, we molded the skull with silicone, and made a cold cast out of it (polyurethane resin + aluminum powder). We use this aluminum powder mixed with resin and also to coat the mold, this gives a metallic look to the piece when sanding it with steel wool.
Maël also had to work a lot on the basis, especially on the teeth which needed to be sanded a looooong time…
As for the other pieces, we first primed the belt, then applied silver spray paint (only on the basis, as the skull already has a metallic look).
Resin doesn’t stick to Worbla, so we had to screw the skull on the basis.
For the painting, I just added a bit of black to give the silver an older aspect, and painted a part of the belt in brown (burnt umber).

From left to right: Plastiline sculpt, silicone mold, cold cast 
Assembly test Black paint over silver parts Finished painting

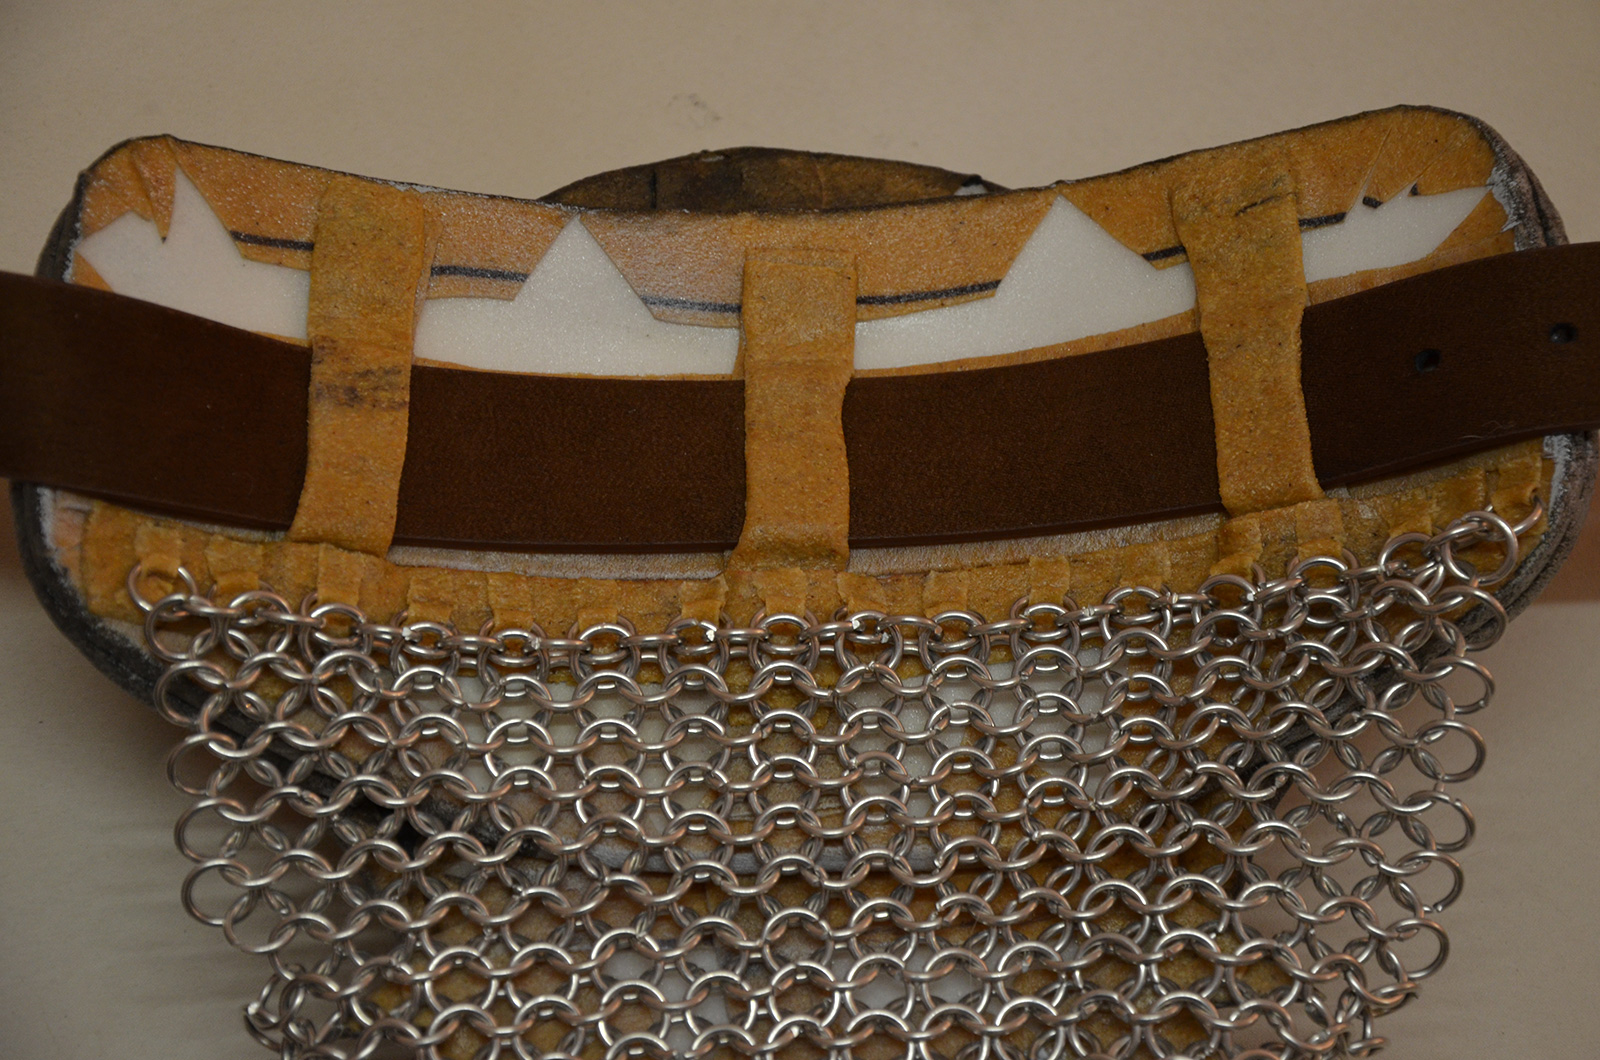
Behind the piece, we placed Worbla loops to pass the leather belt through and attached the chain mail.
To make your own chain mail, see tutorial here (https://www.blackowlstudio.com/en/tutorial-chain-mail/)
Studded straps and faux-fur are missing here, but unfortunately I don’t have any picture for these steps.
Belt loops and chain mail Belt (front)
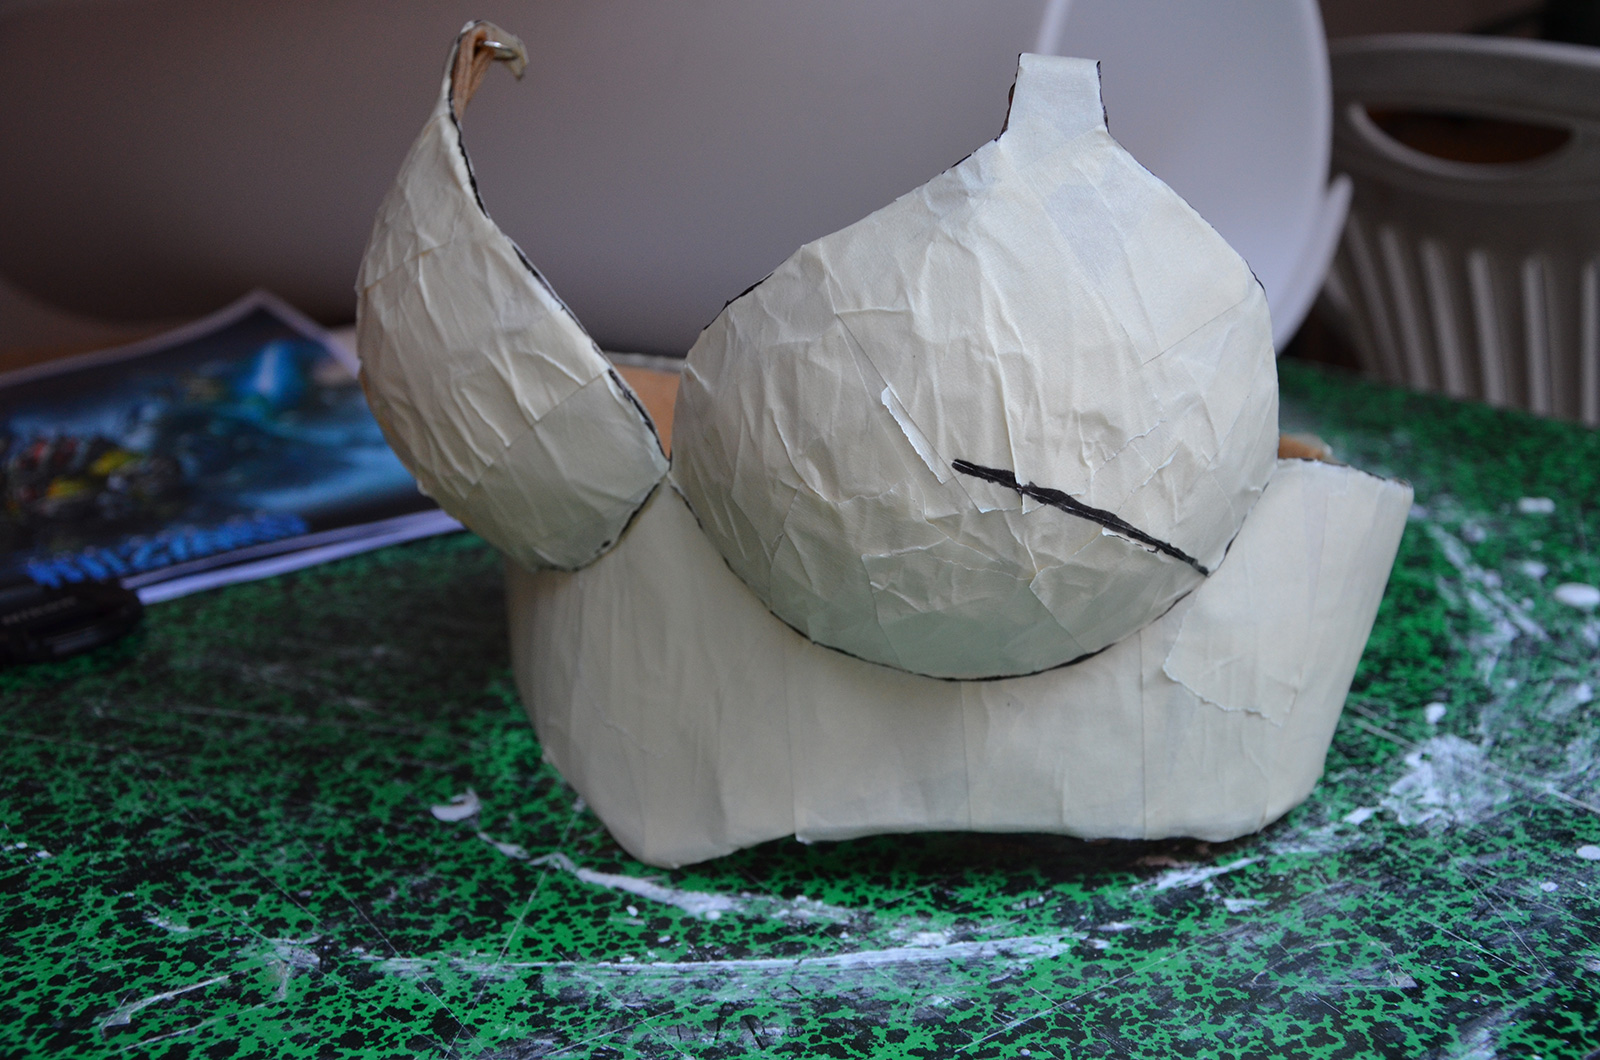
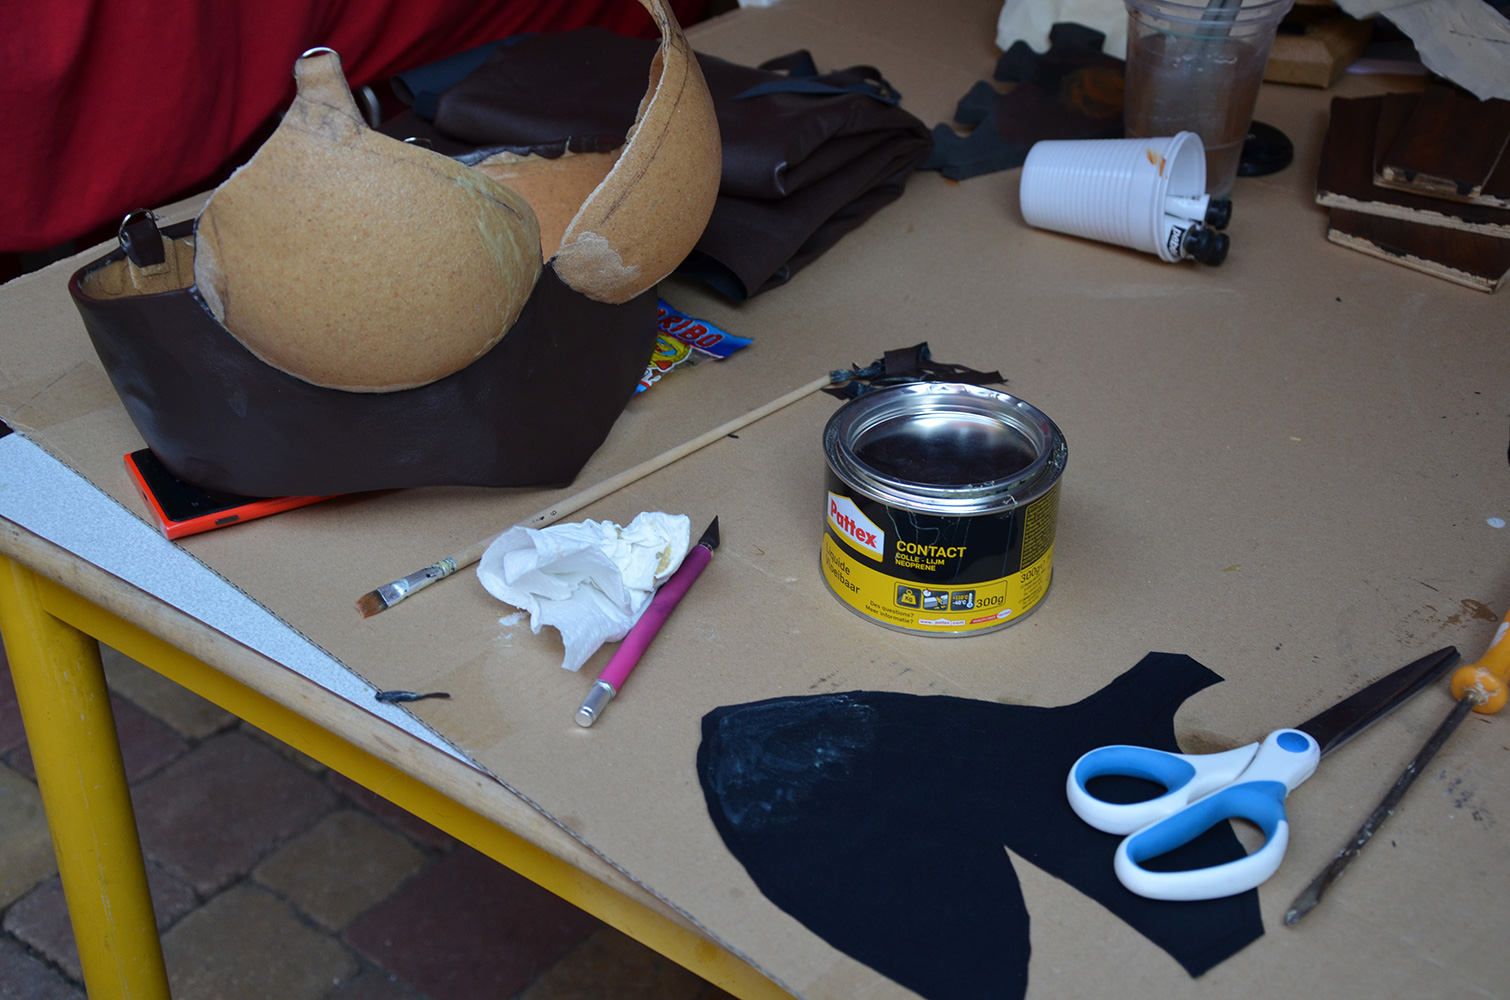
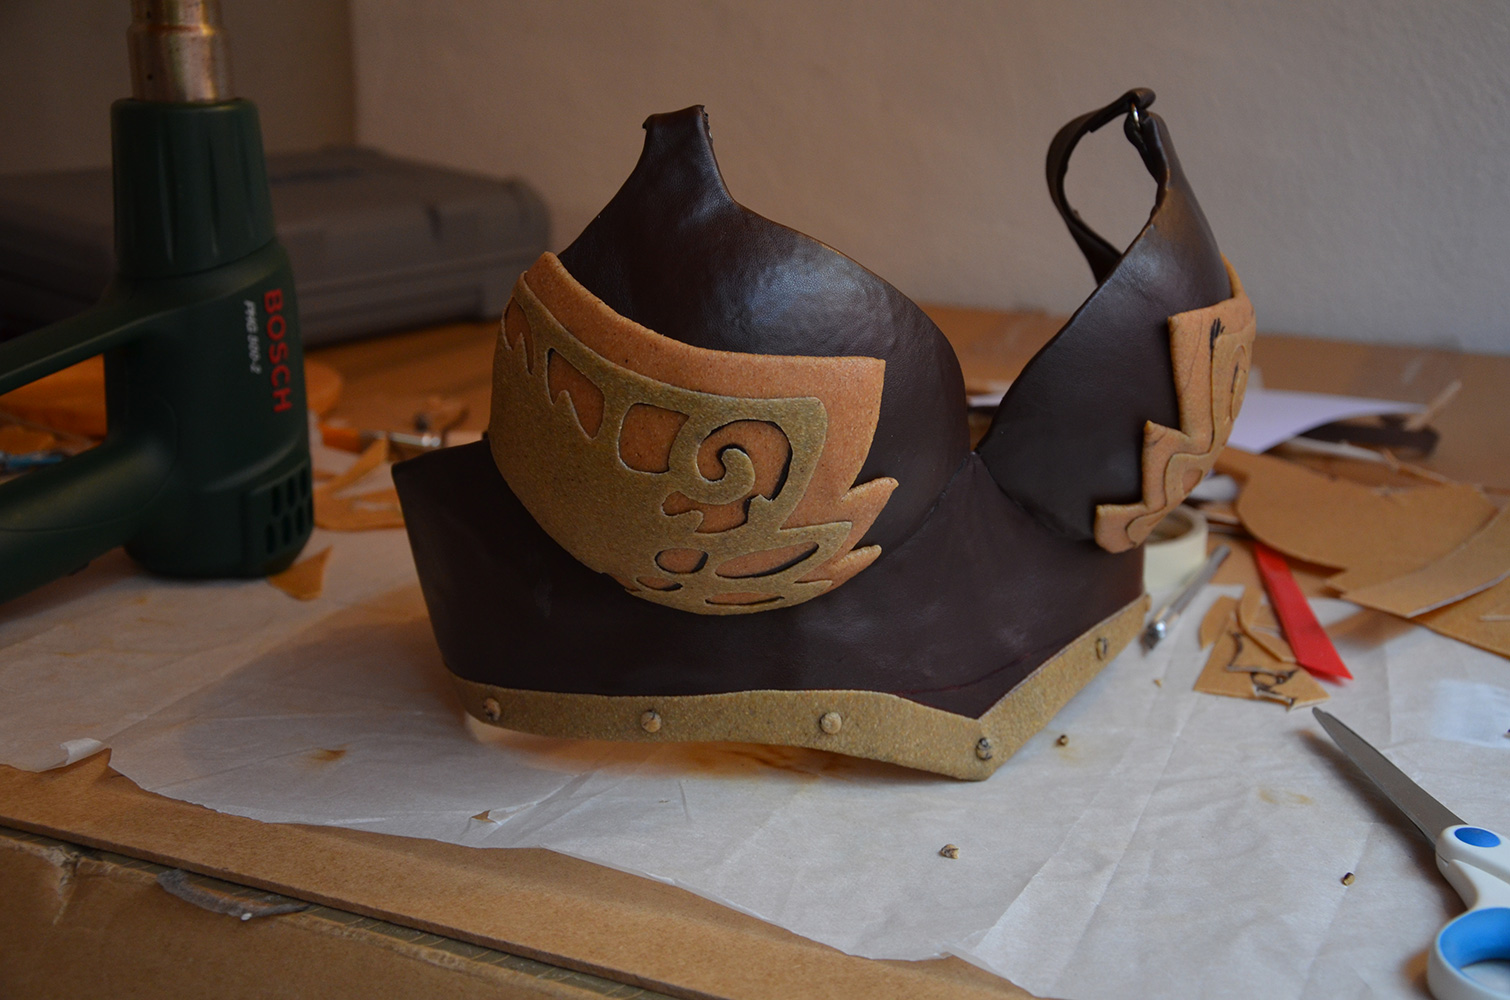
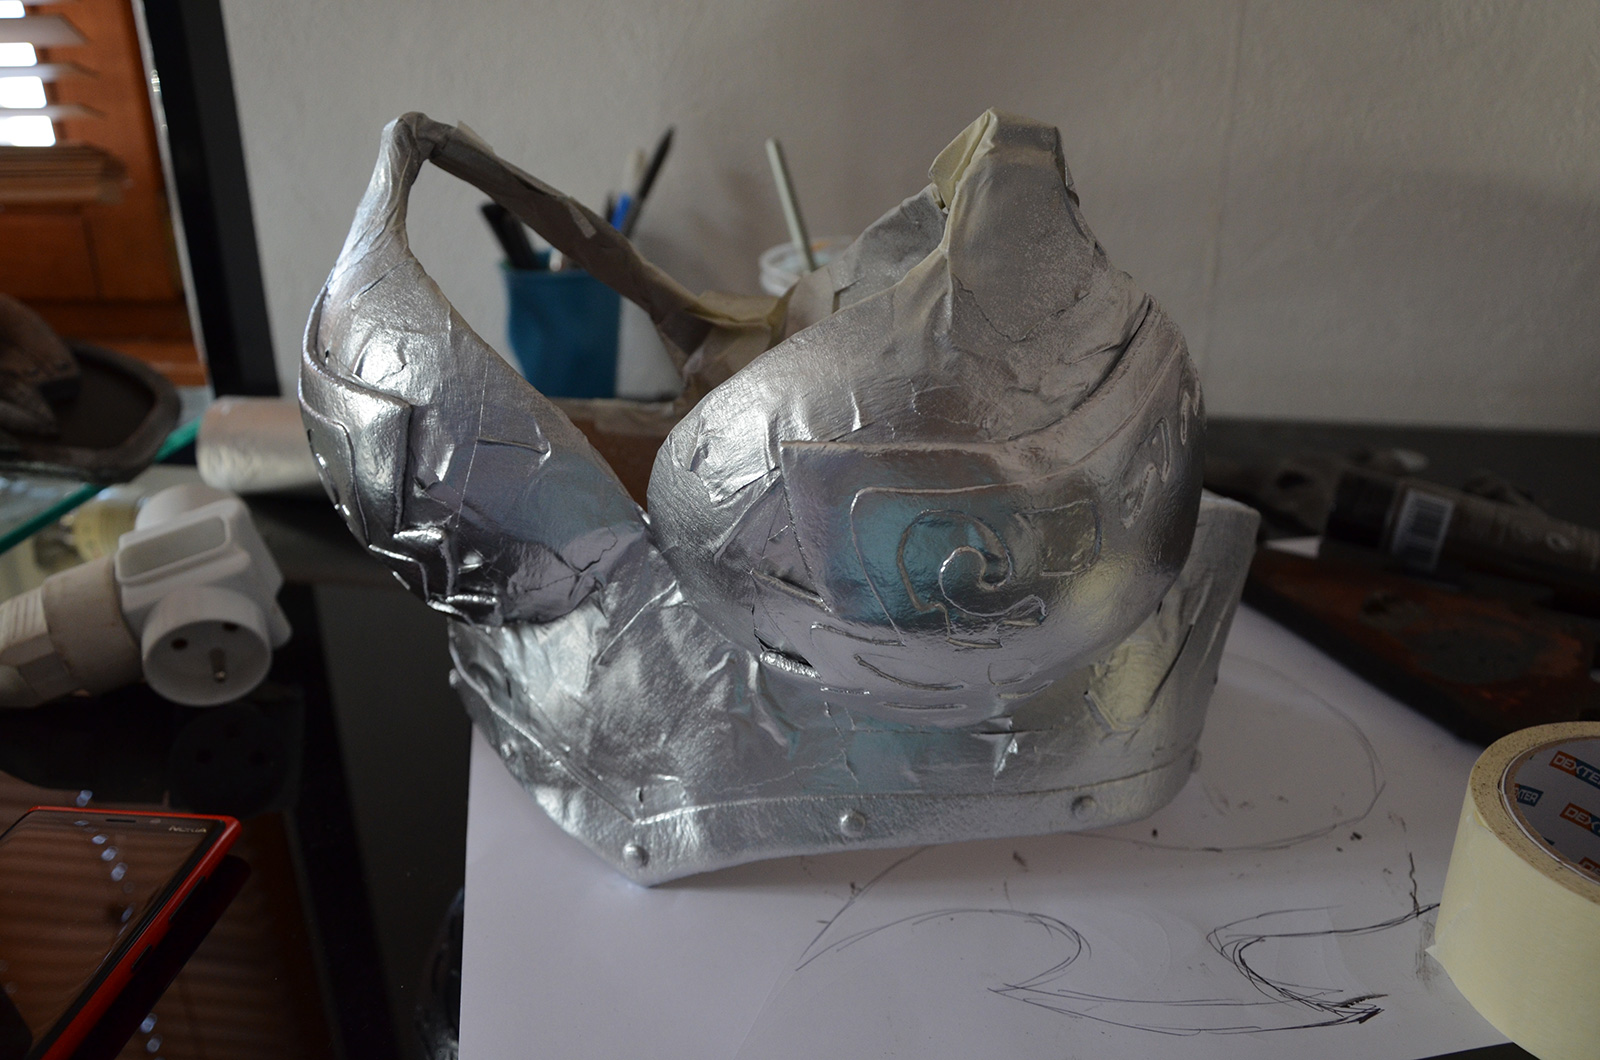
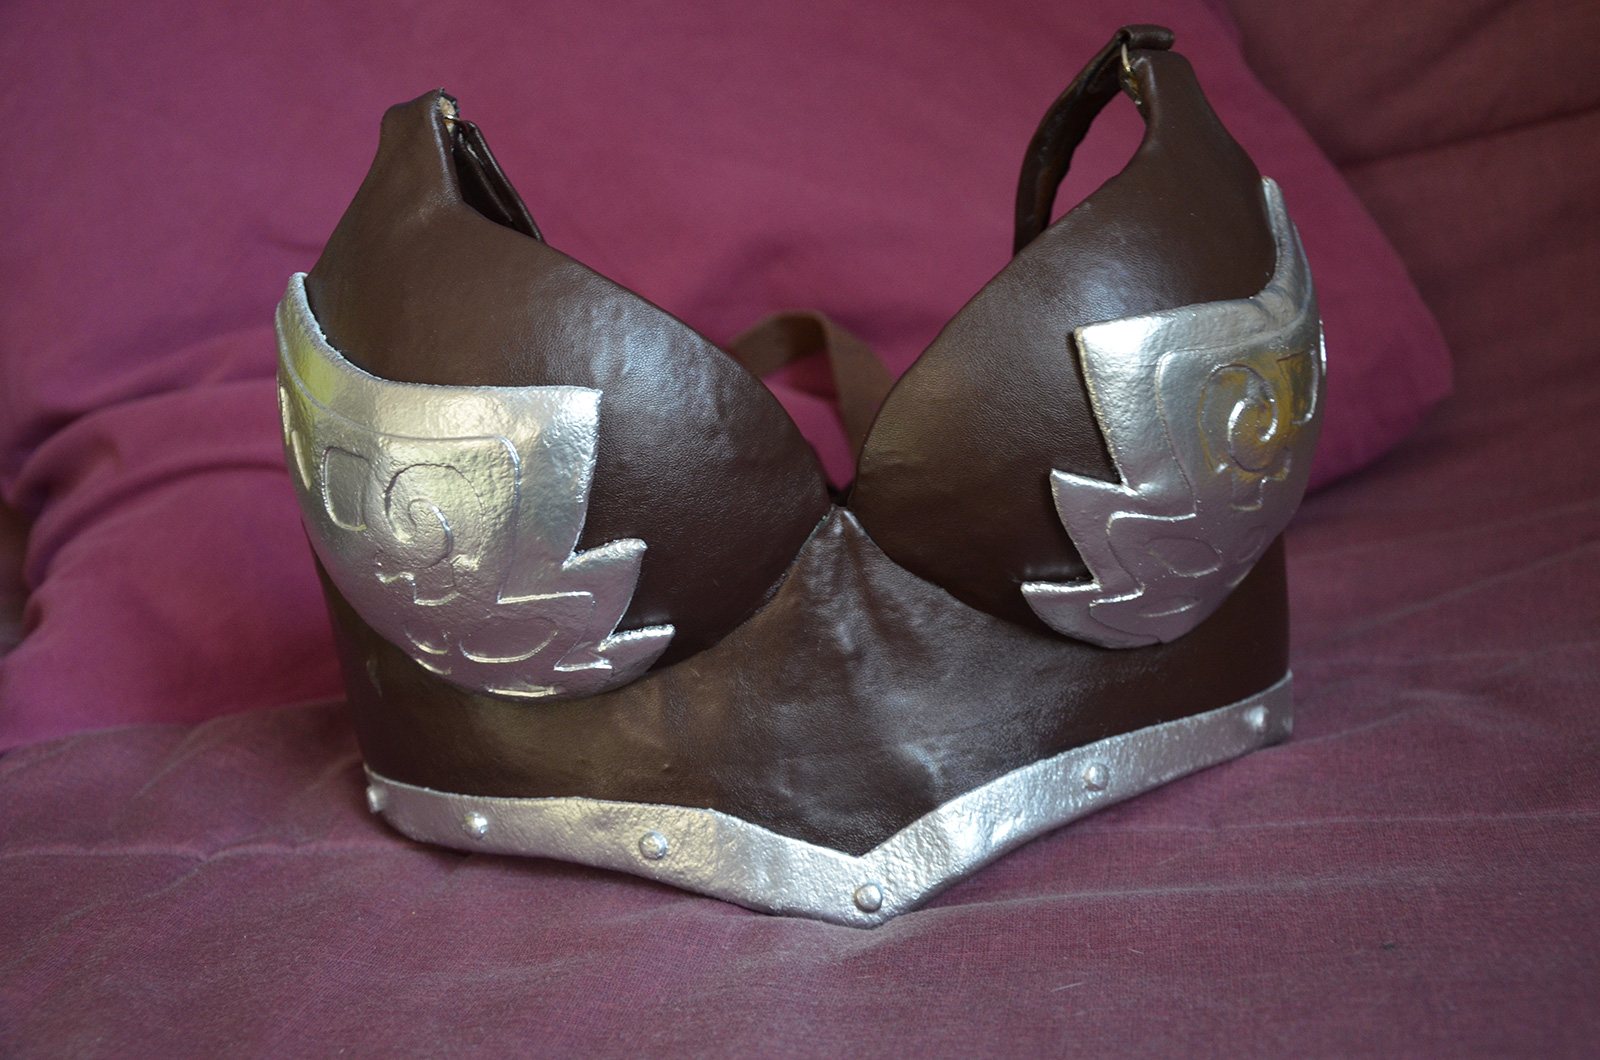
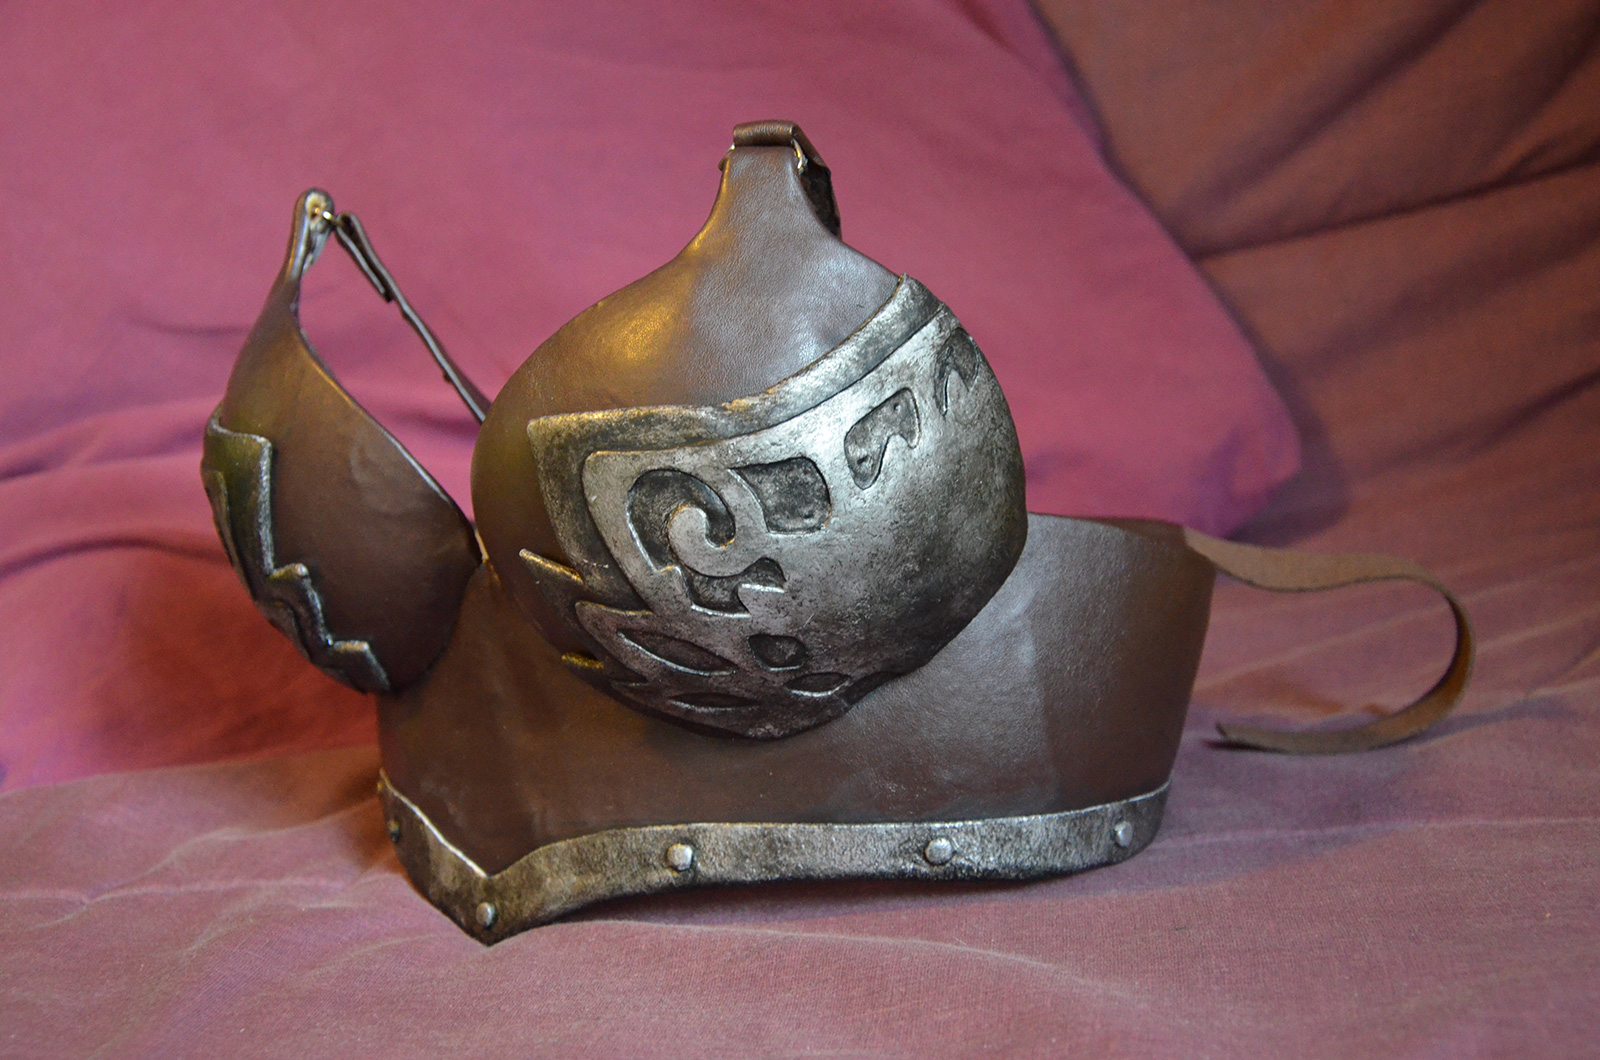
Breastplate
After Worbla breastplate basis was done, I made a pattern with masking tape. Once the patterns were done, I transfered them on fake leather and glued these pieces on Worbla using neoprene.
When I was sure that the fabric sticked totally to my breastplate basis, I glued Worbla armor parts with neoprene (again), and added some details over them.
Before priming and spray painting, I had to cover fake leather with masking tape to keep it clean.
As previously, I add black paint with a brush on silver parts.
Tape patterns Glueing fake leather with neoprene Worbla add-ons Silver painting Removing masking tape Finished painting
Cloak
1. Dyeing
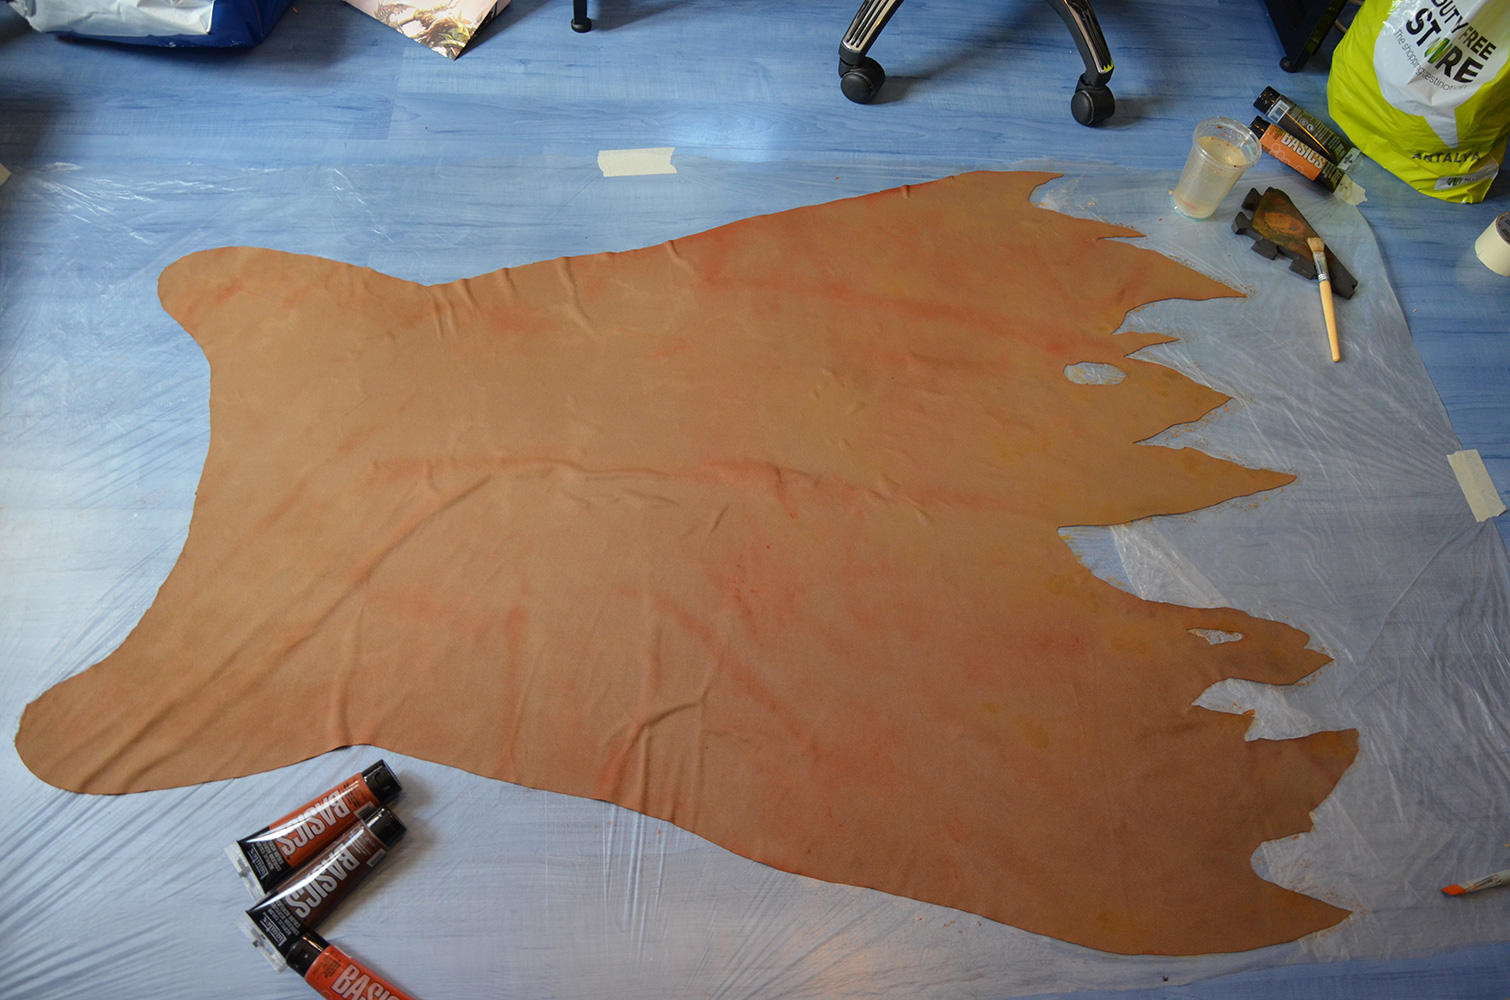
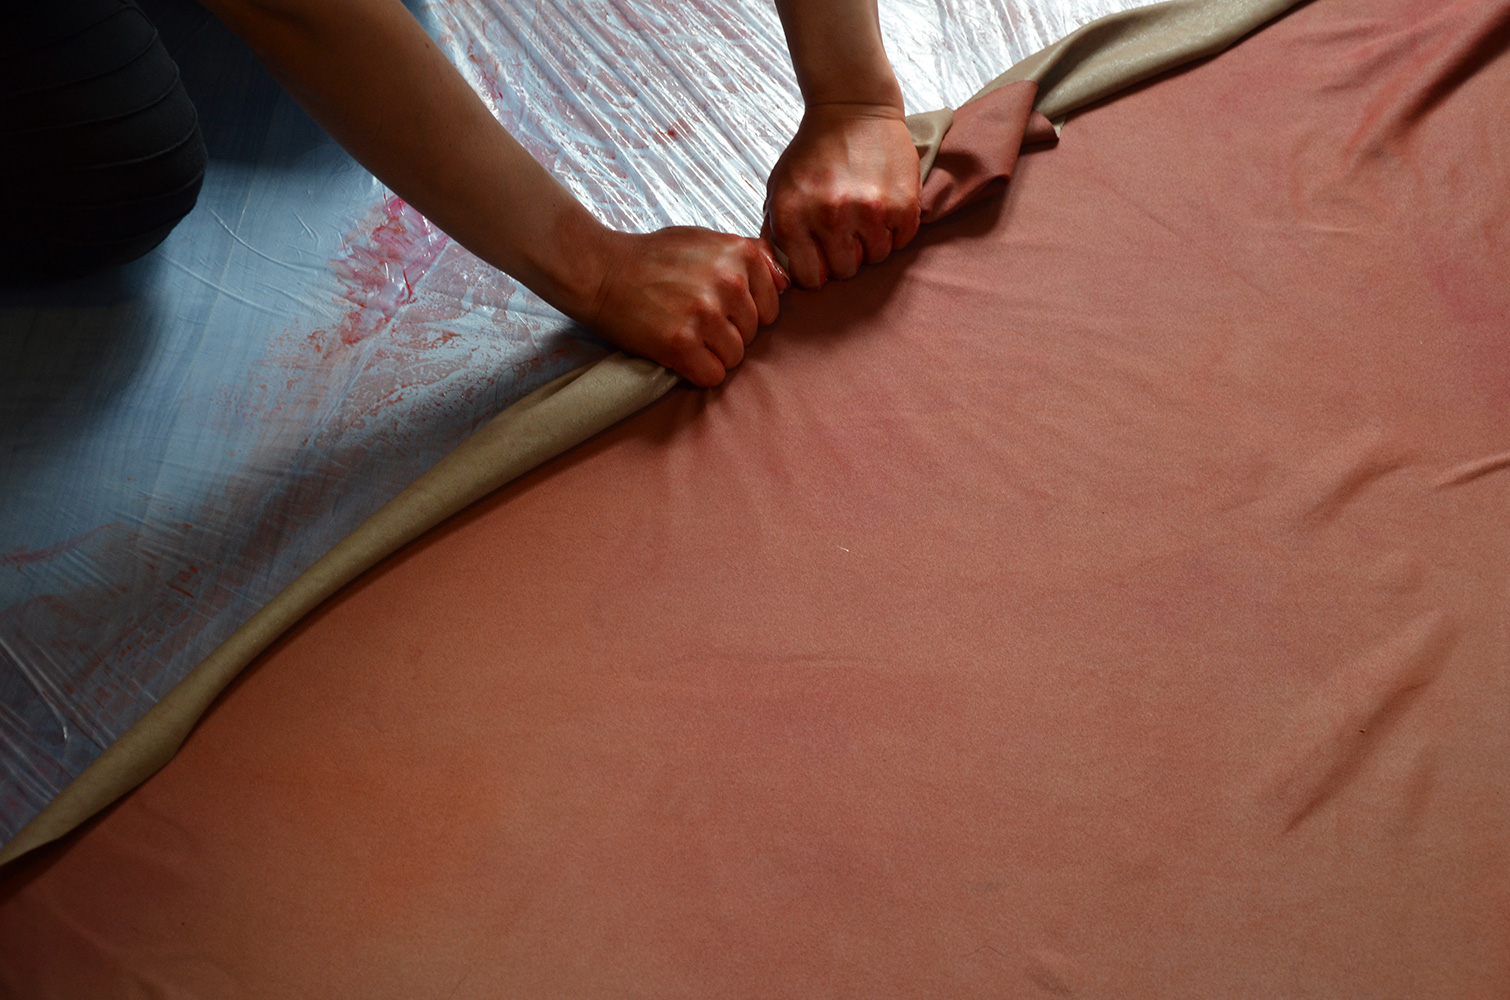
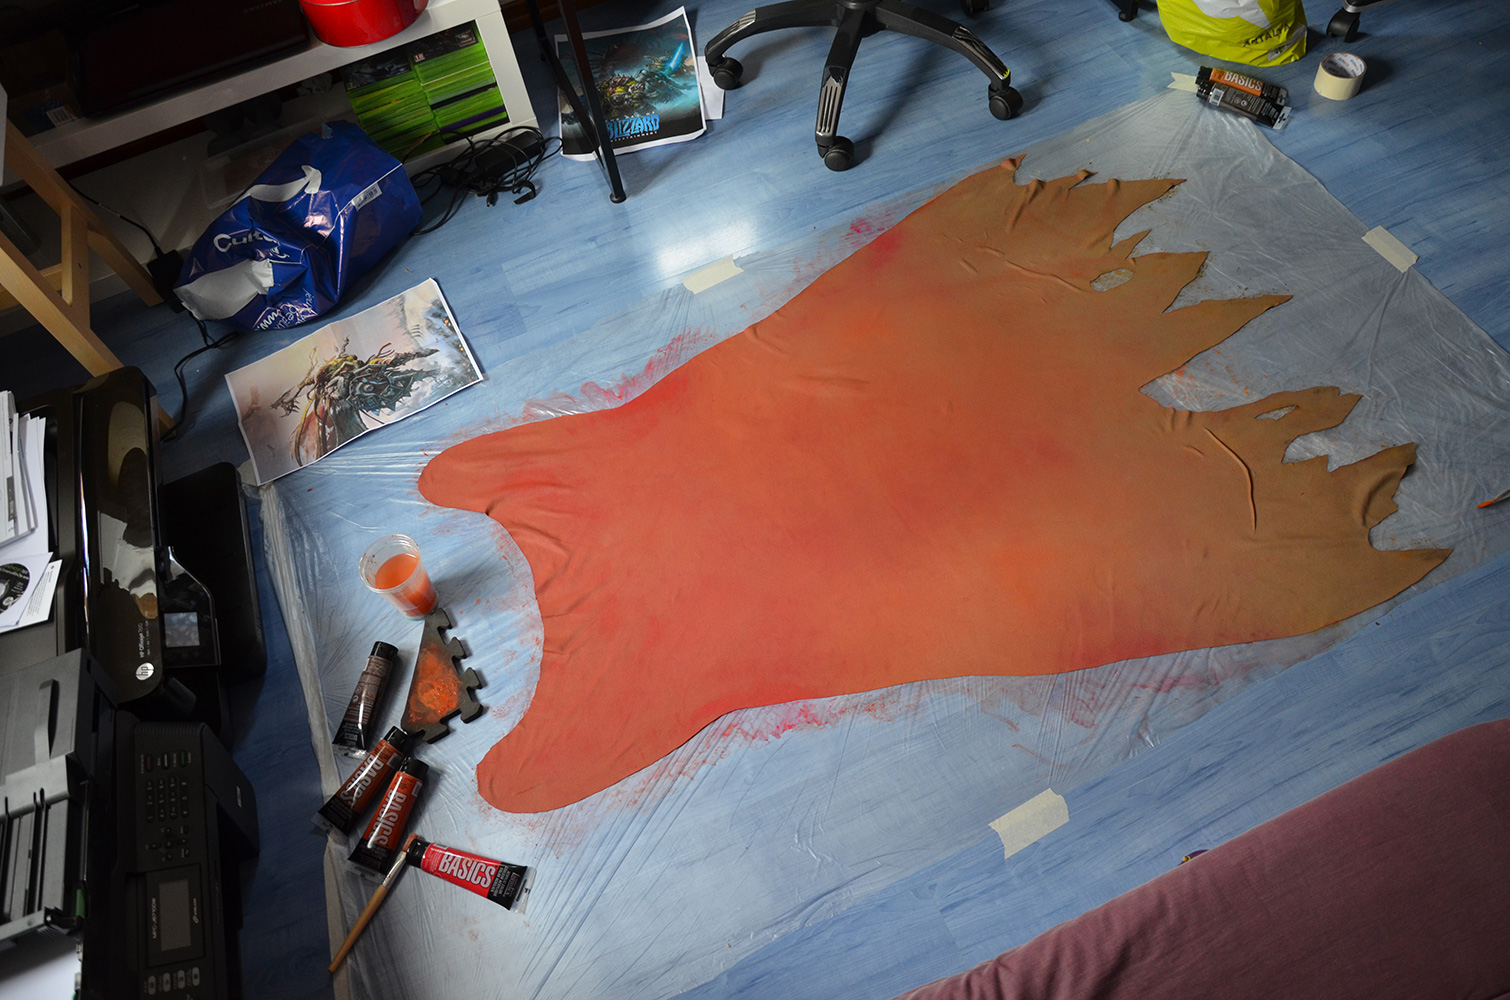
For the cloak, we can speak of a total improvisation… I cut the shape directly from my fabric (fake leather on the inside, I don’t know for the other face but it is quite soft).
Then comes the dyeing… I laid my damp cloak flat on a tarp at the ground. I randomly put some paint everywhere, spreaded it with my hands and poured some water over it. Firstly, brownish tints to give it a dirty look, and then some red-ochre-brownish mixes, increasingly red as I went to the top of the cloak, giving a nice gradient.
First dyeing Painting mix Making the gradient Waiting for it to dry…
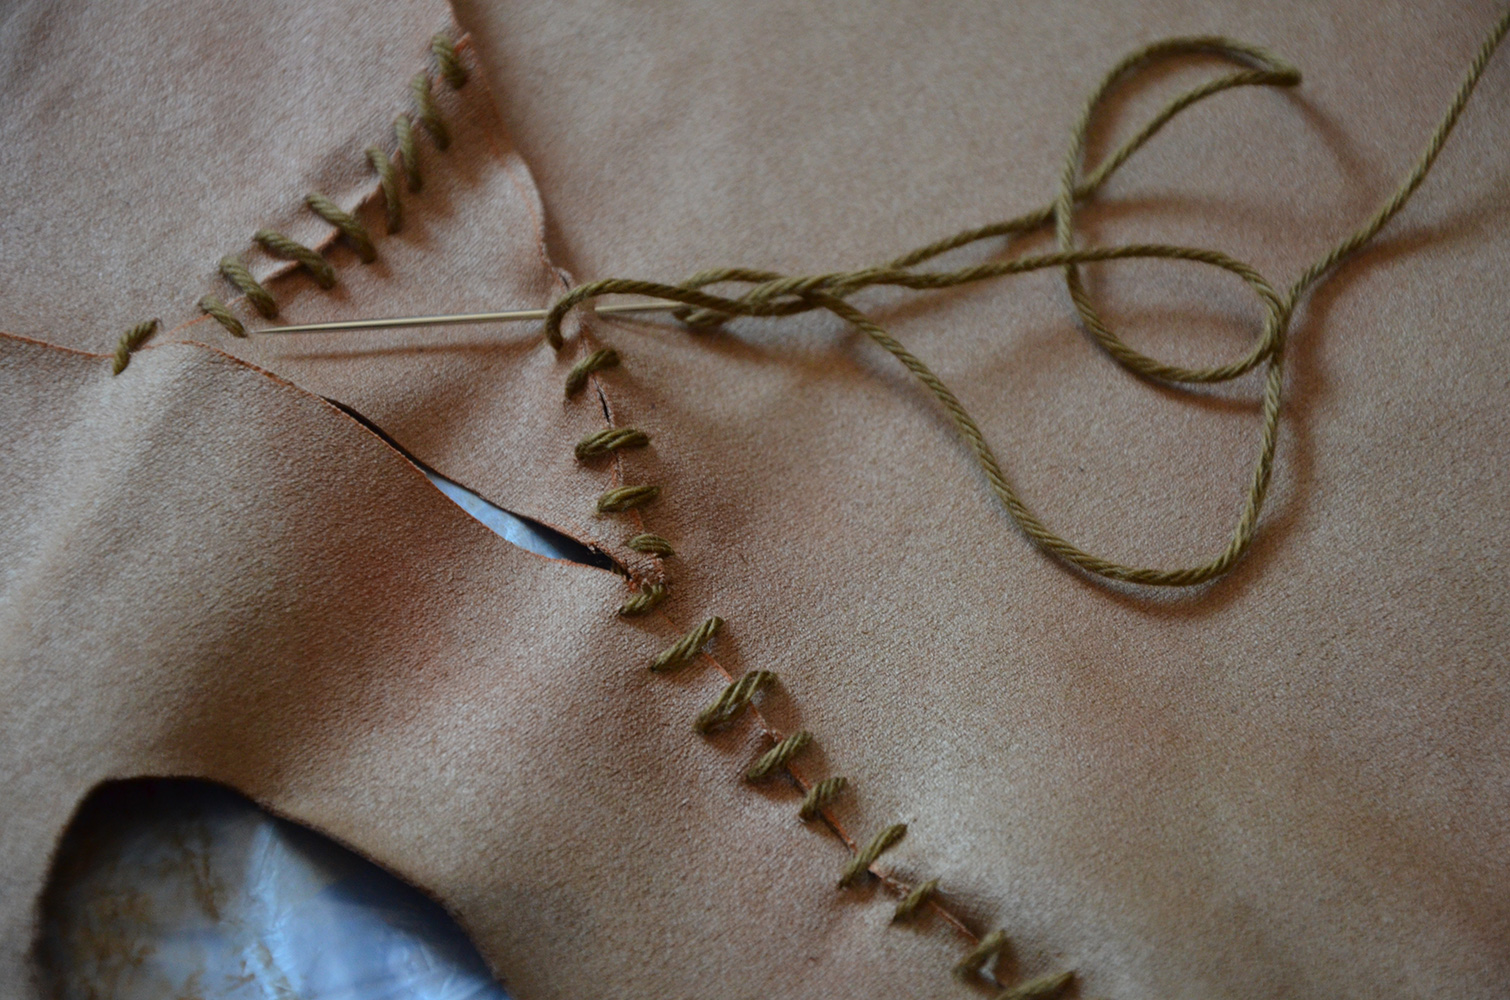
2. Sewing
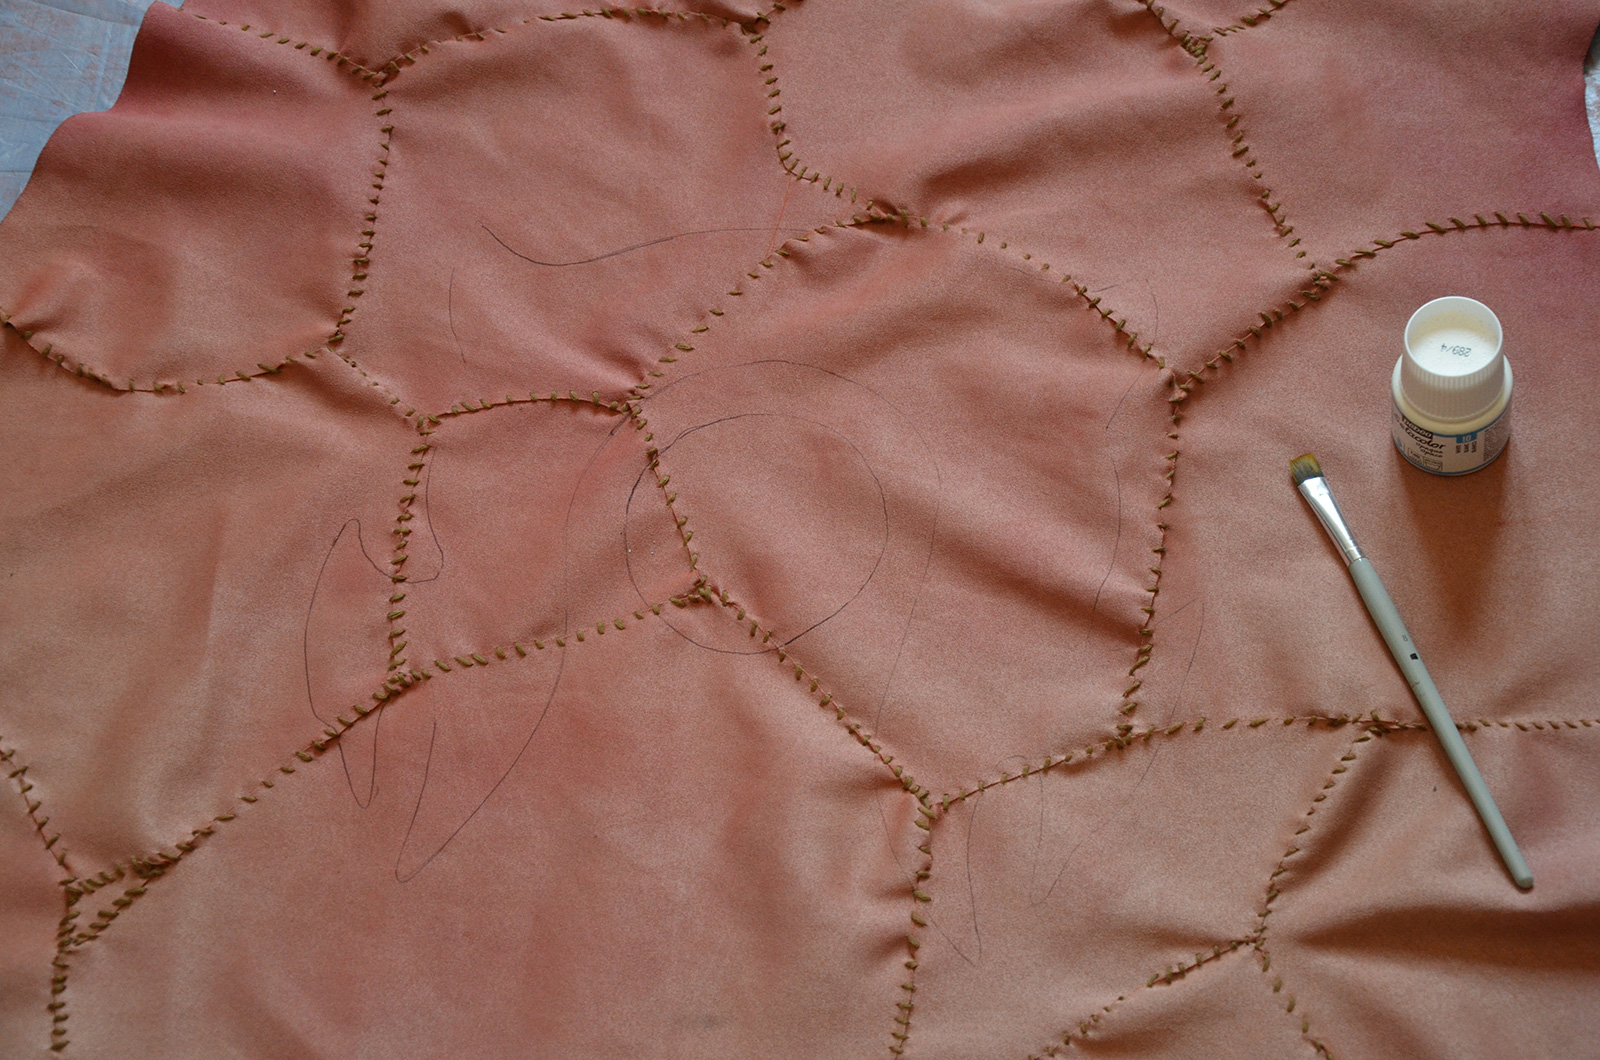
Once dry, I cut my cloak and re-sewed it with a big ochre embroidery thread to give it a stitched look as on the original artwork.
Stitching with embroidery thread 
Basis is done

3. Finishes
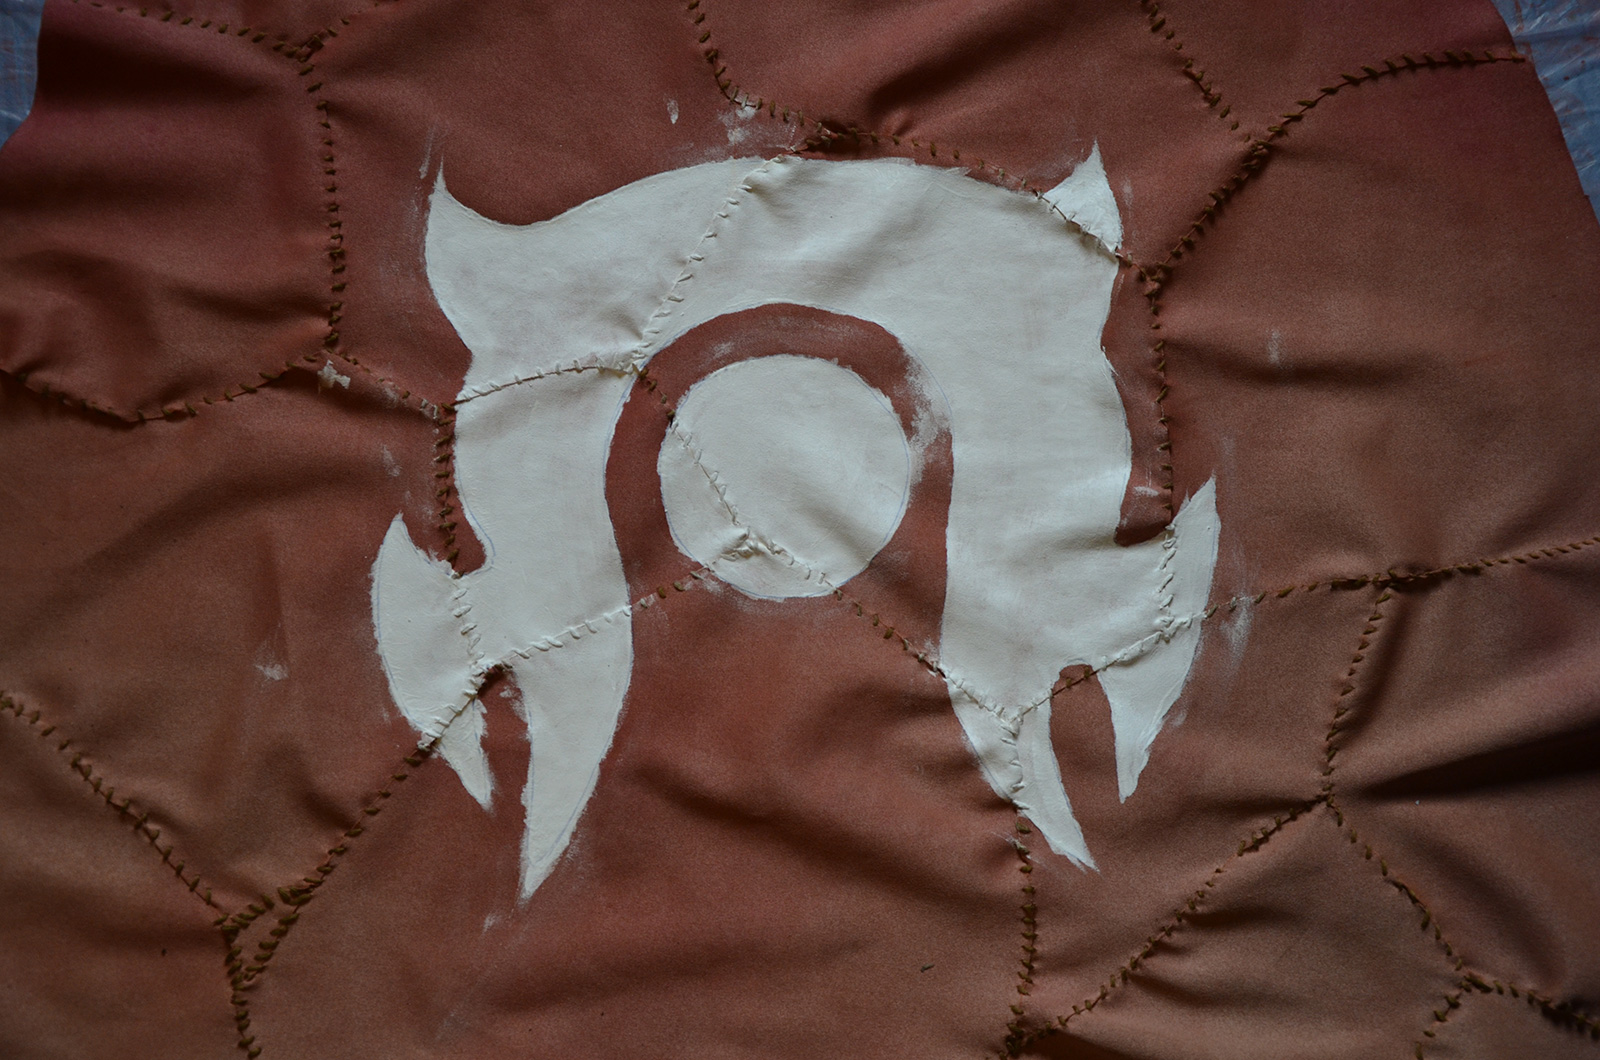
After that, I painted the… horde logo ? with white textile paint. I am rather a newbie on World of Warcraft, so if an expert could explain the origin of this symbol, I would be glad to read it 😉
Logo drawing using a pen White textile paint
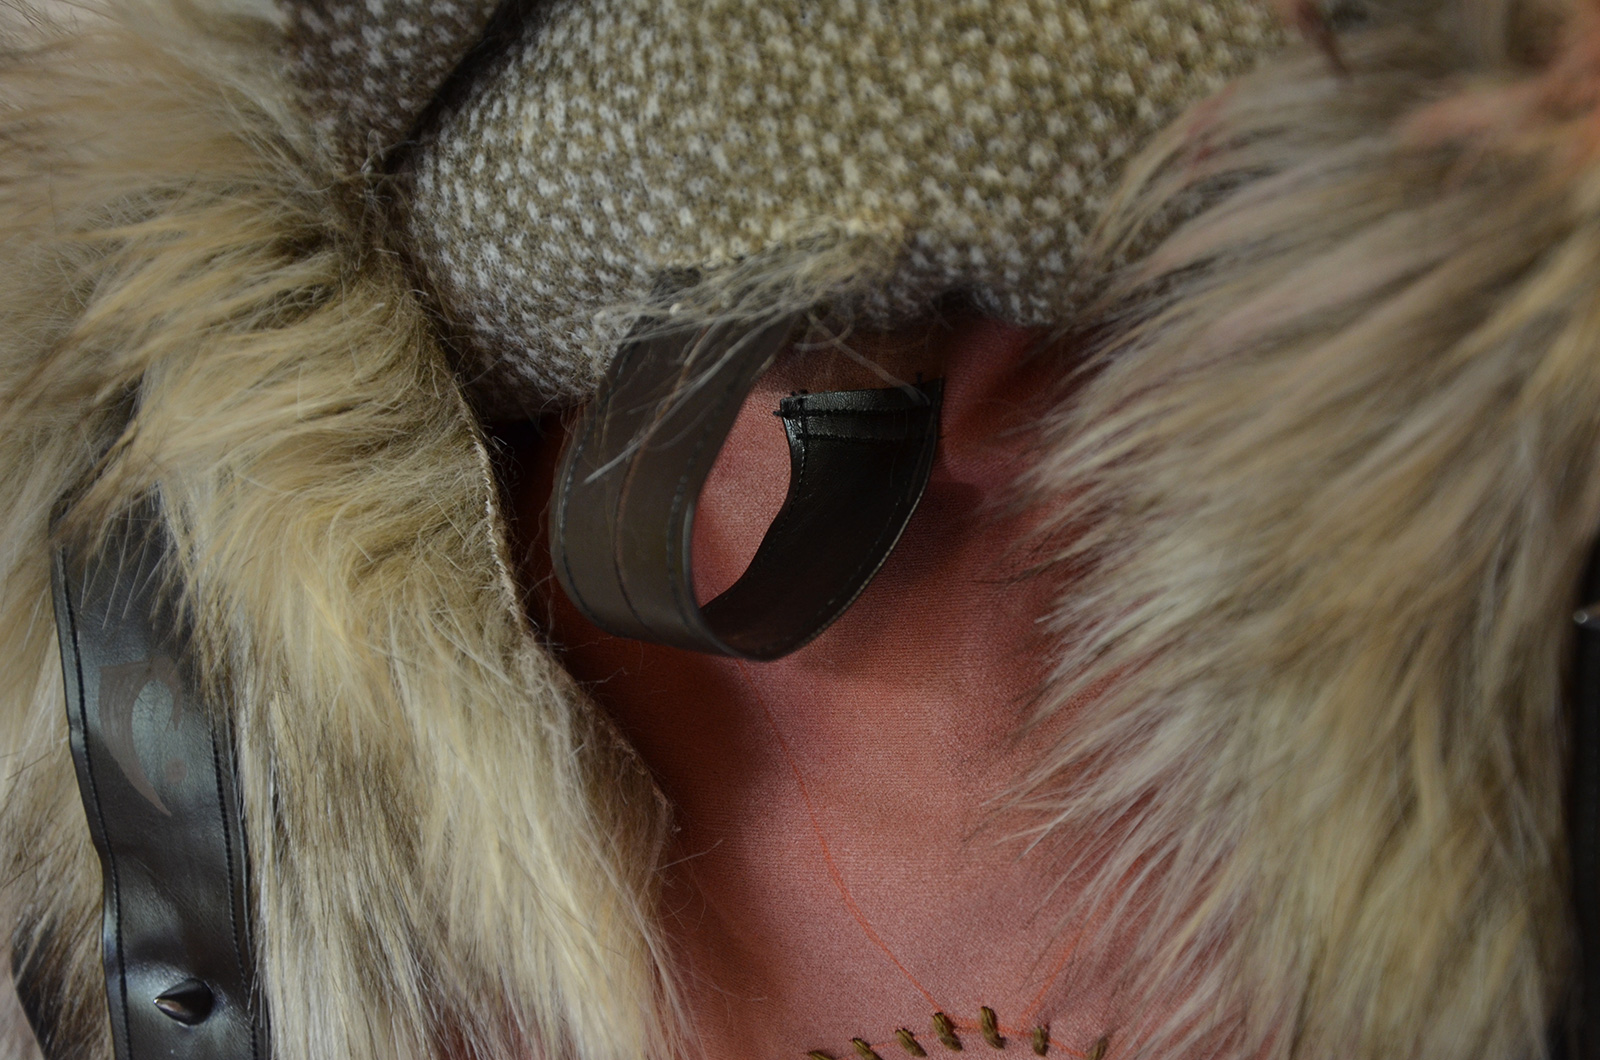
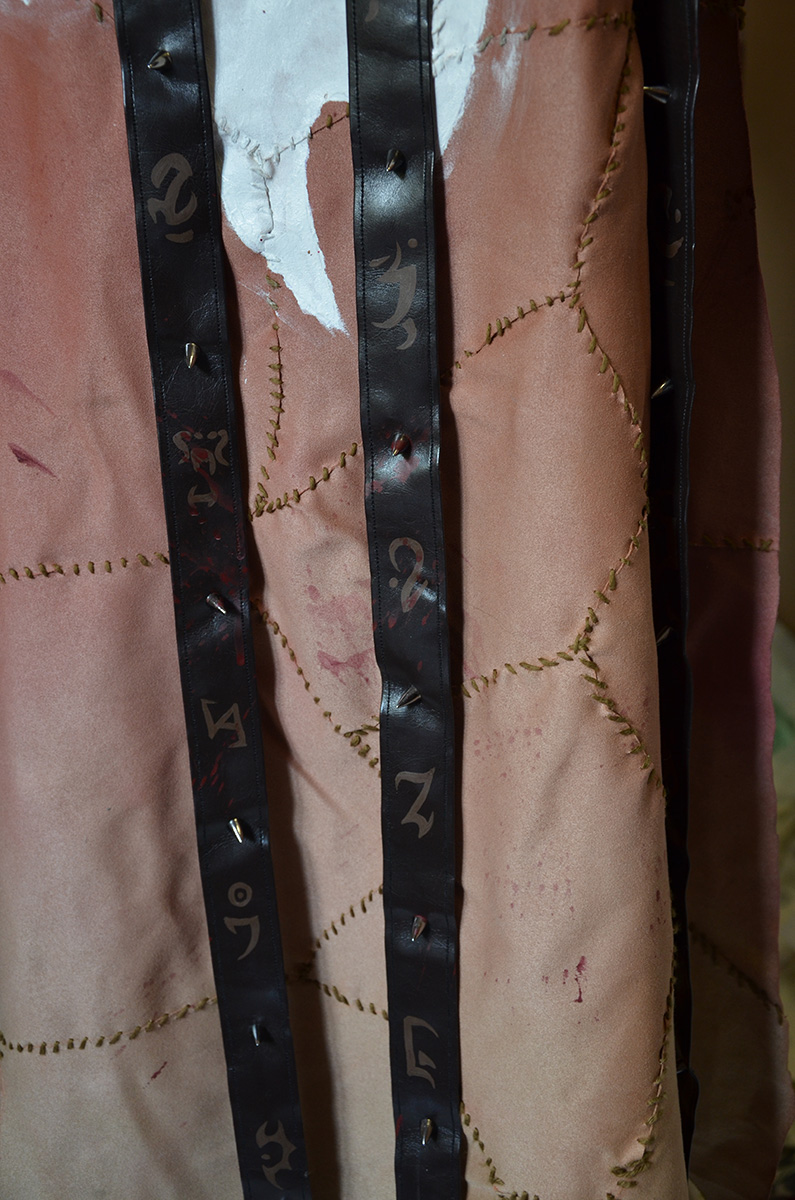
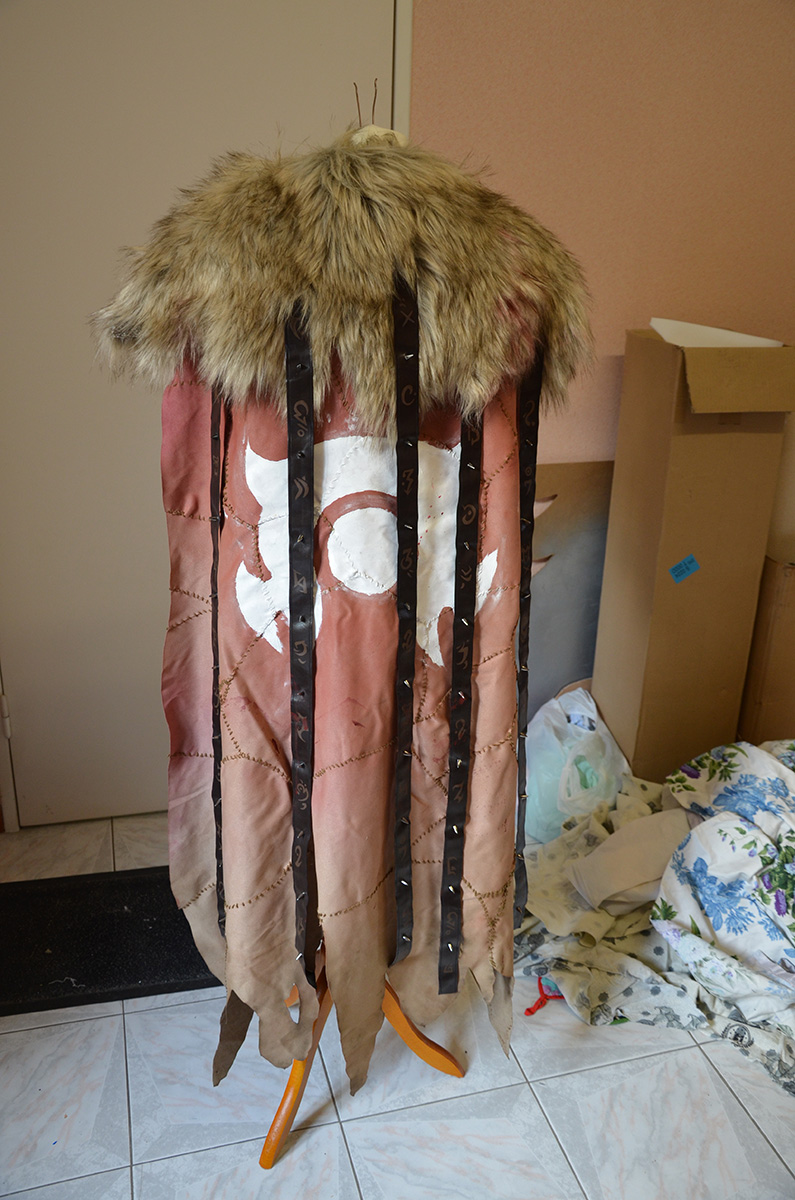
I then sewed fake leather straps on the top of my cloak, as well as faux fur, in which I cut holes to pass the straps through.
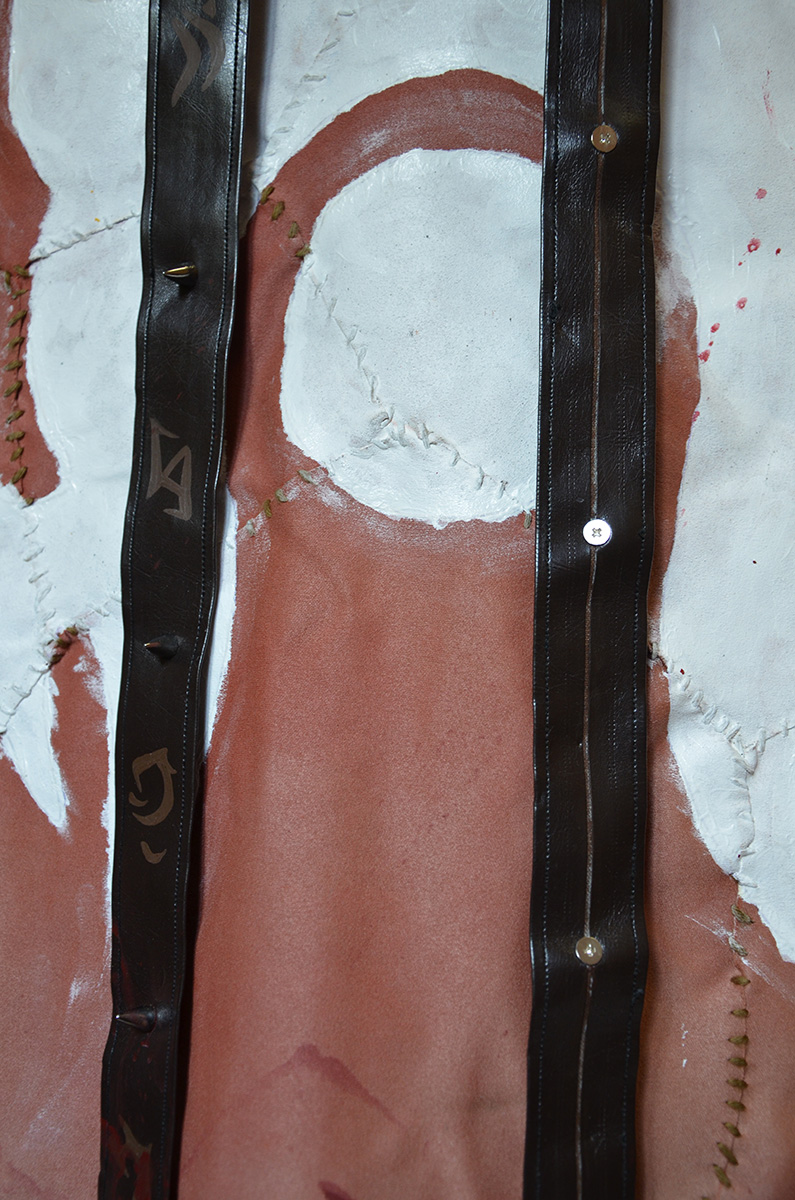
After Joris studded the straps, I painted symbols with ochre textile paint. Once again, we don’t clearly see these symbols on the original artwork… so I took «The Art of Blizzard» and copied all the symbols I could find (matching to the character) and drew them randomly on the straps.
Strap fixation on the cloak Hole in the faux-fur 
Studded straps Textile painted symbols Finished cloak

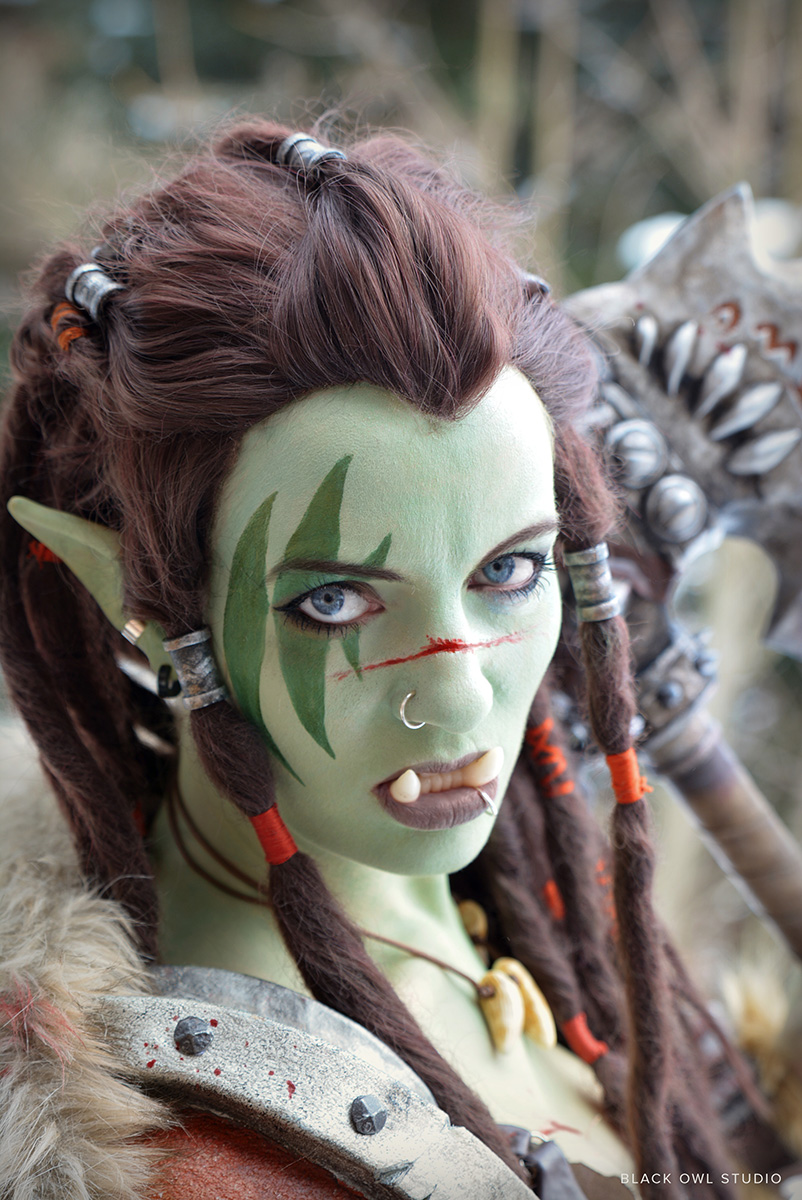
Prosthetics and makeup
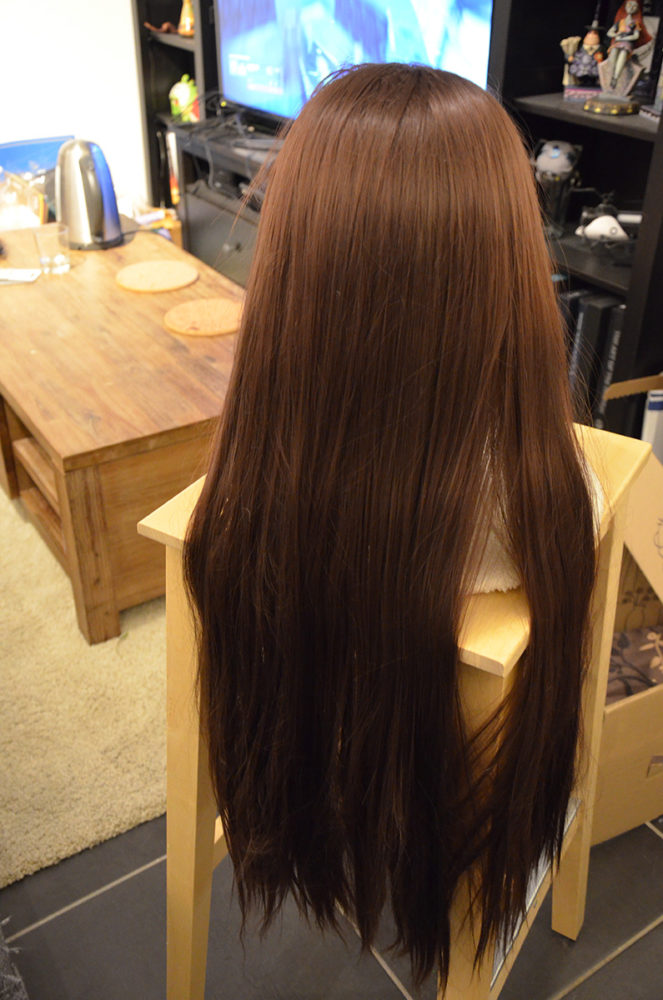
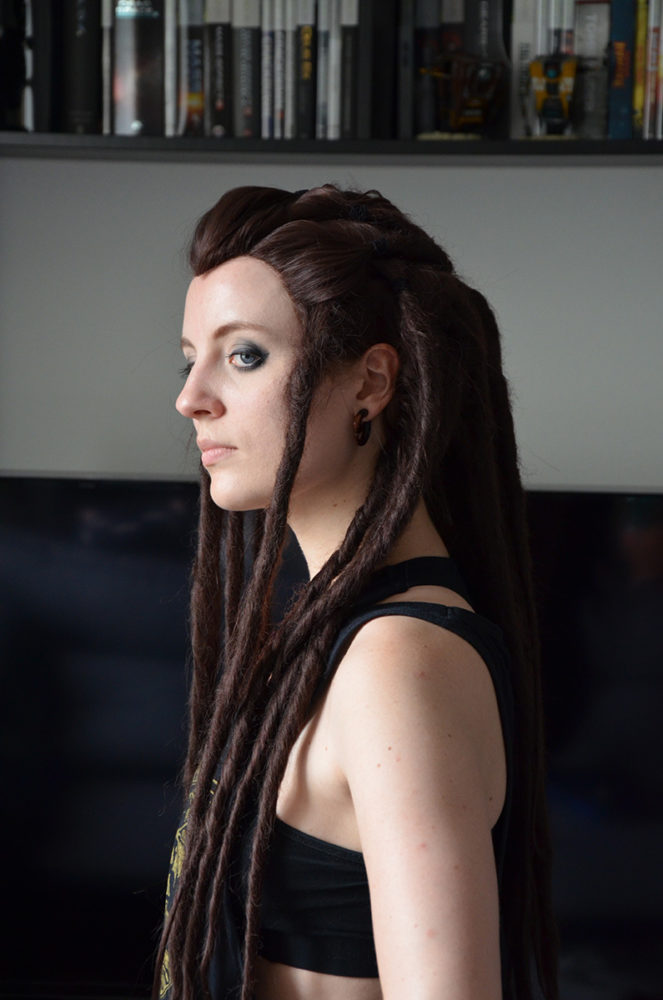
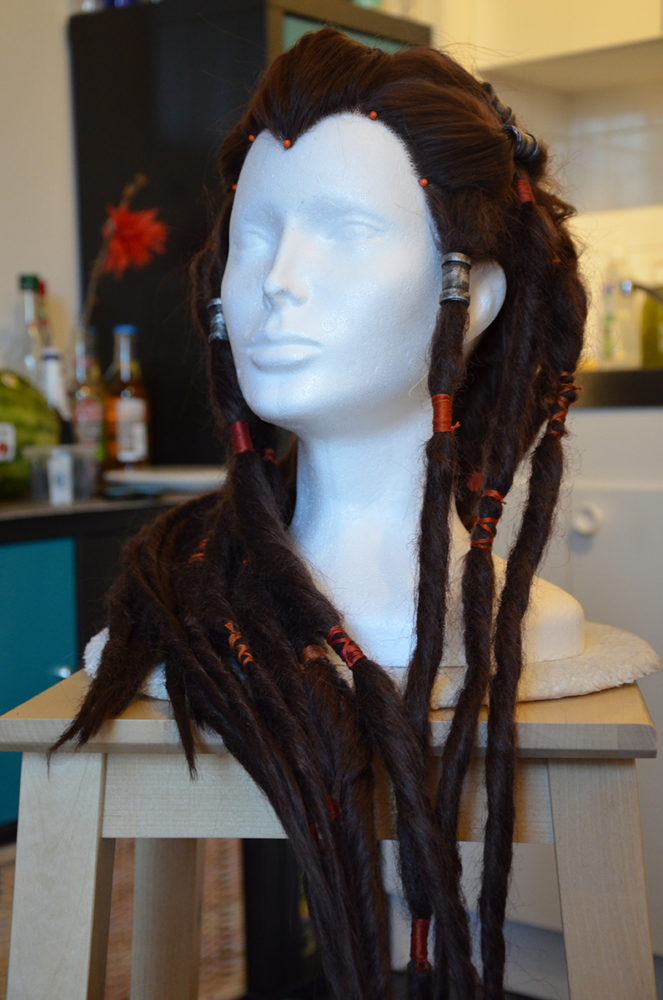
1. Wig
If you want to see how I made the dreadlocks on my wig, you can read this tutorial (https://www.blackowlstudio.com/en/tutorial-dreadlocks-wig/)
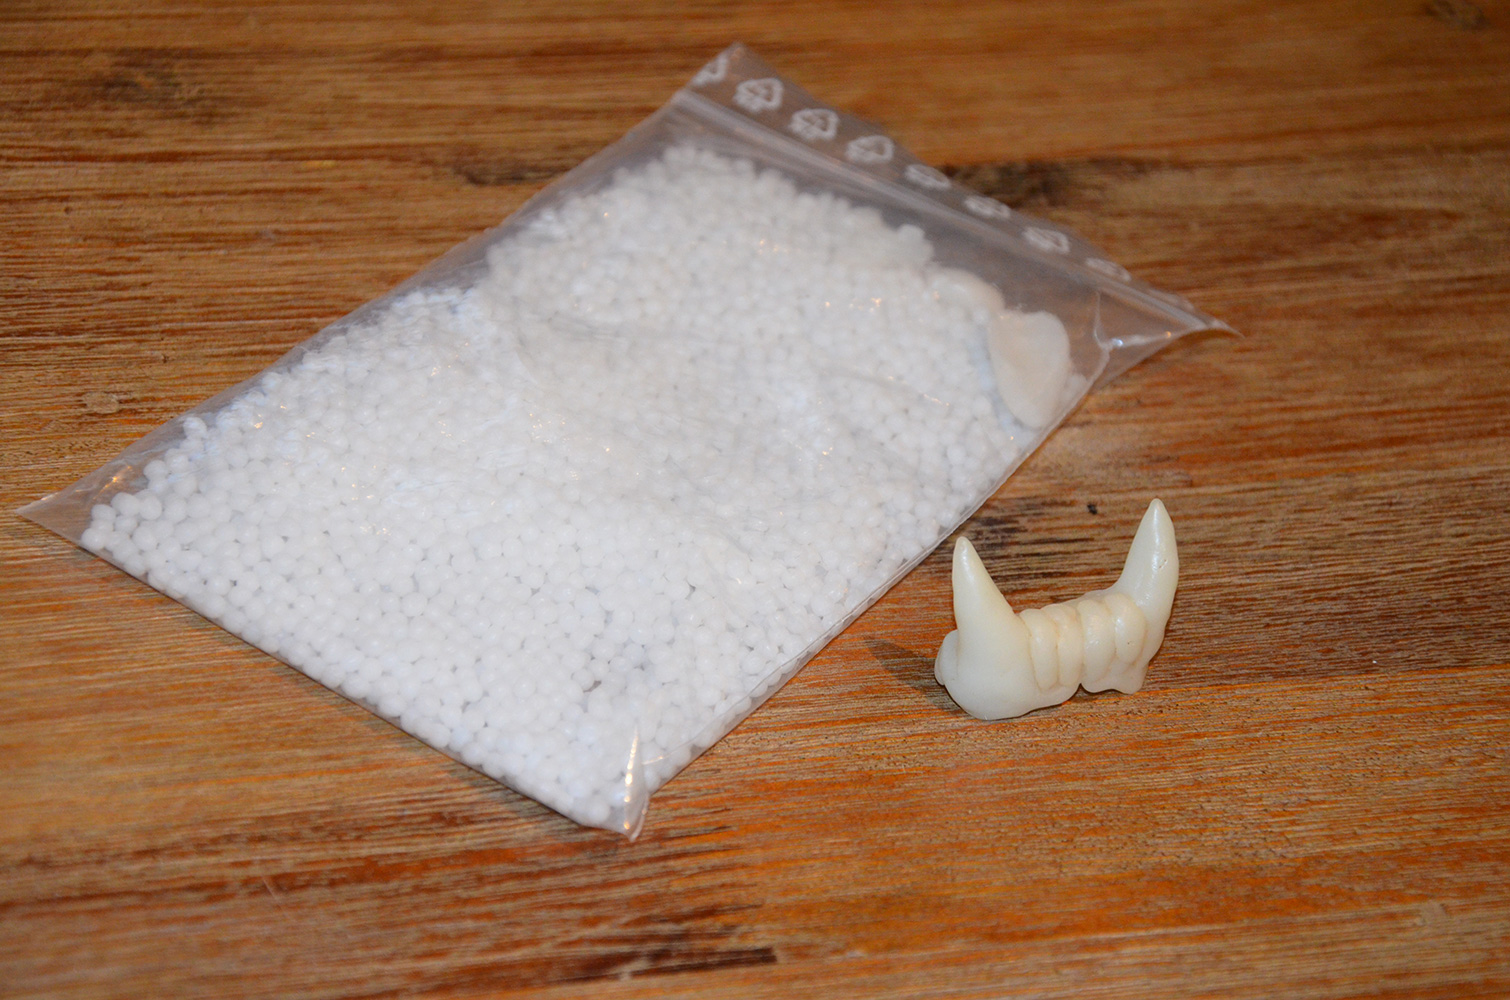
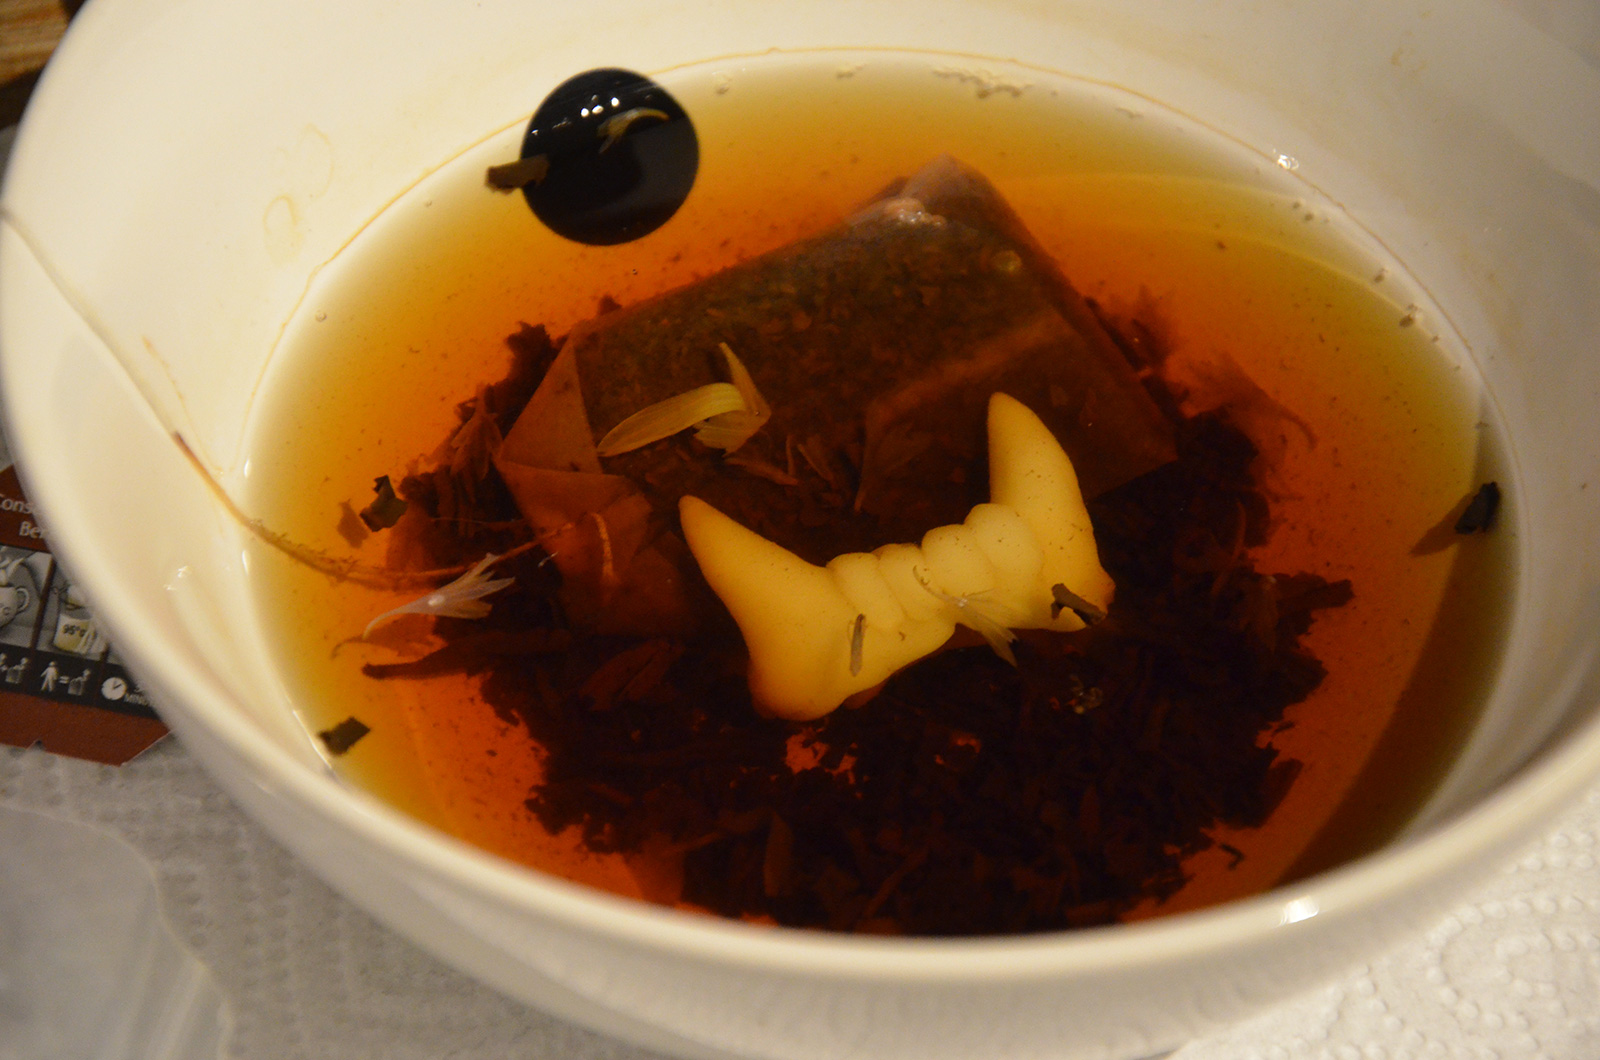
2. Teeth
I made my orc fangs with Worbla’s Deco Art, to have a prostethic that fits to my own jaw.
You can find the full tutorial there : Tutorial : Crafting fake teeth
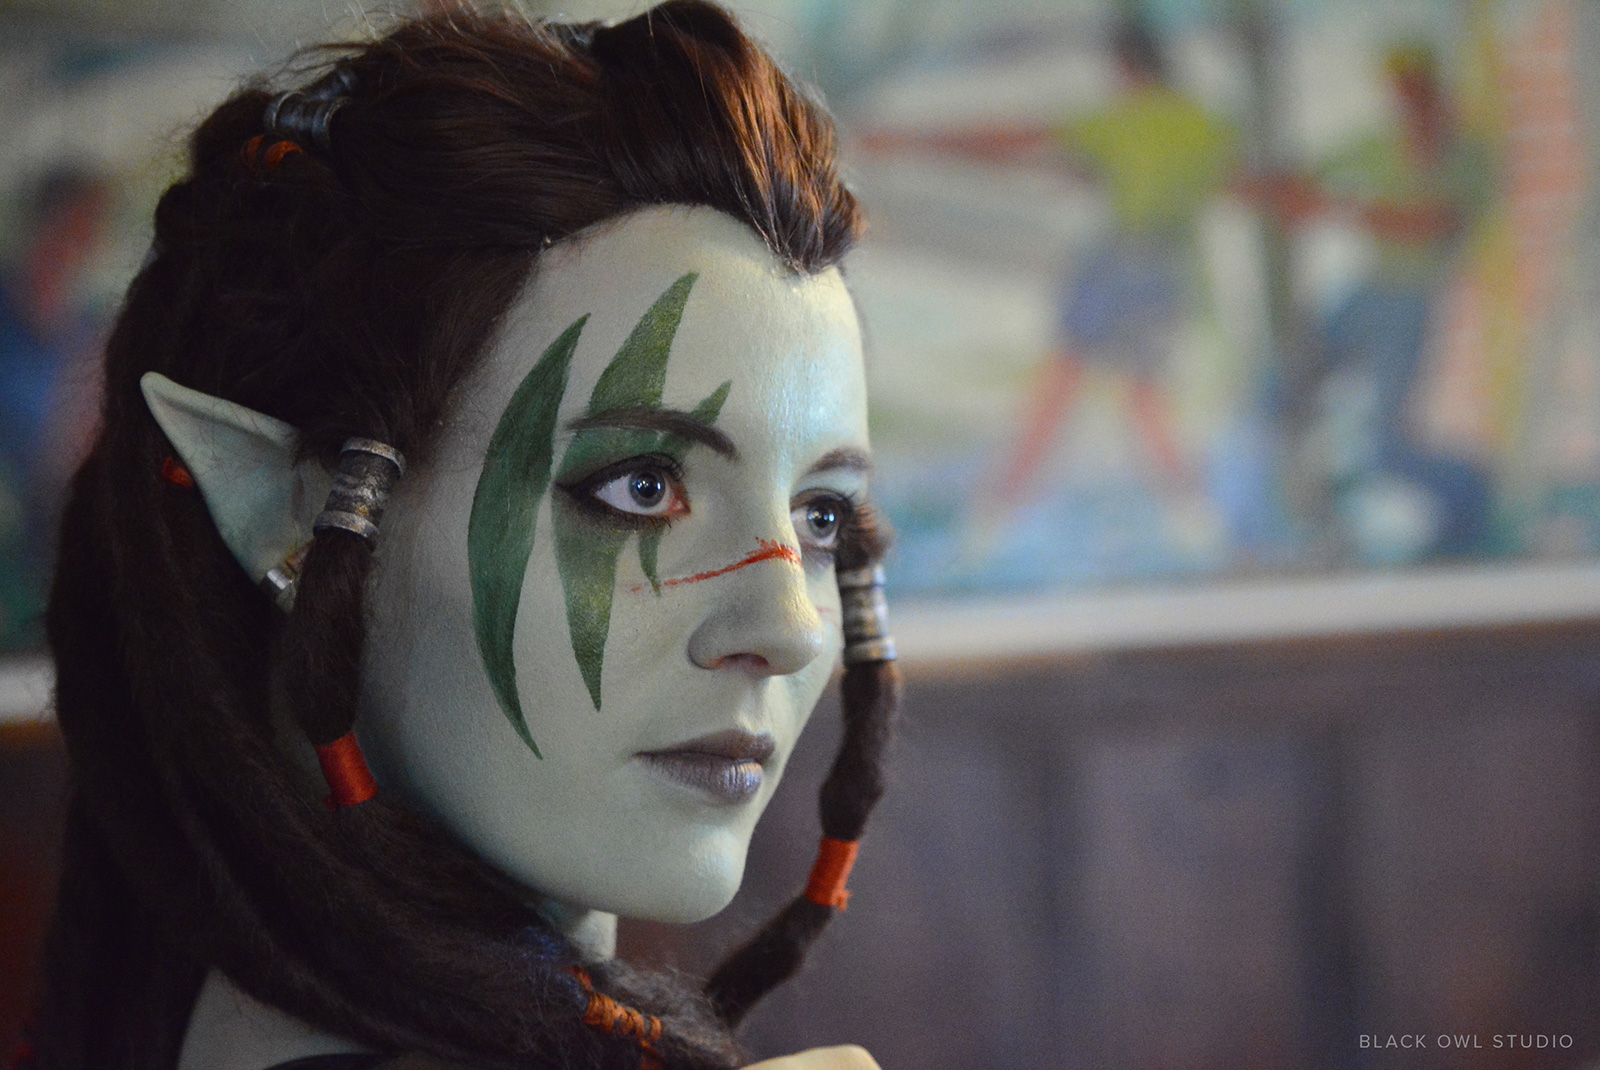
3. Makeup
I prefered to buy ears from Aradani Costumes to save some time.
For the makeup, I chose a light green from Kryolan aquacolor line. And for the darker stripes, I used an old Snazaroo metallic green paint I already had in the back of my drawer (it comes from the time when I painted child faces at school fairs).
I applied collodion to dig some scars, and added fake blood.
We also put some Kryolan fixing spray for the makeup to hold.
Problem with it is that even after 3 showers, you still have some green that stay… –’
Weapons
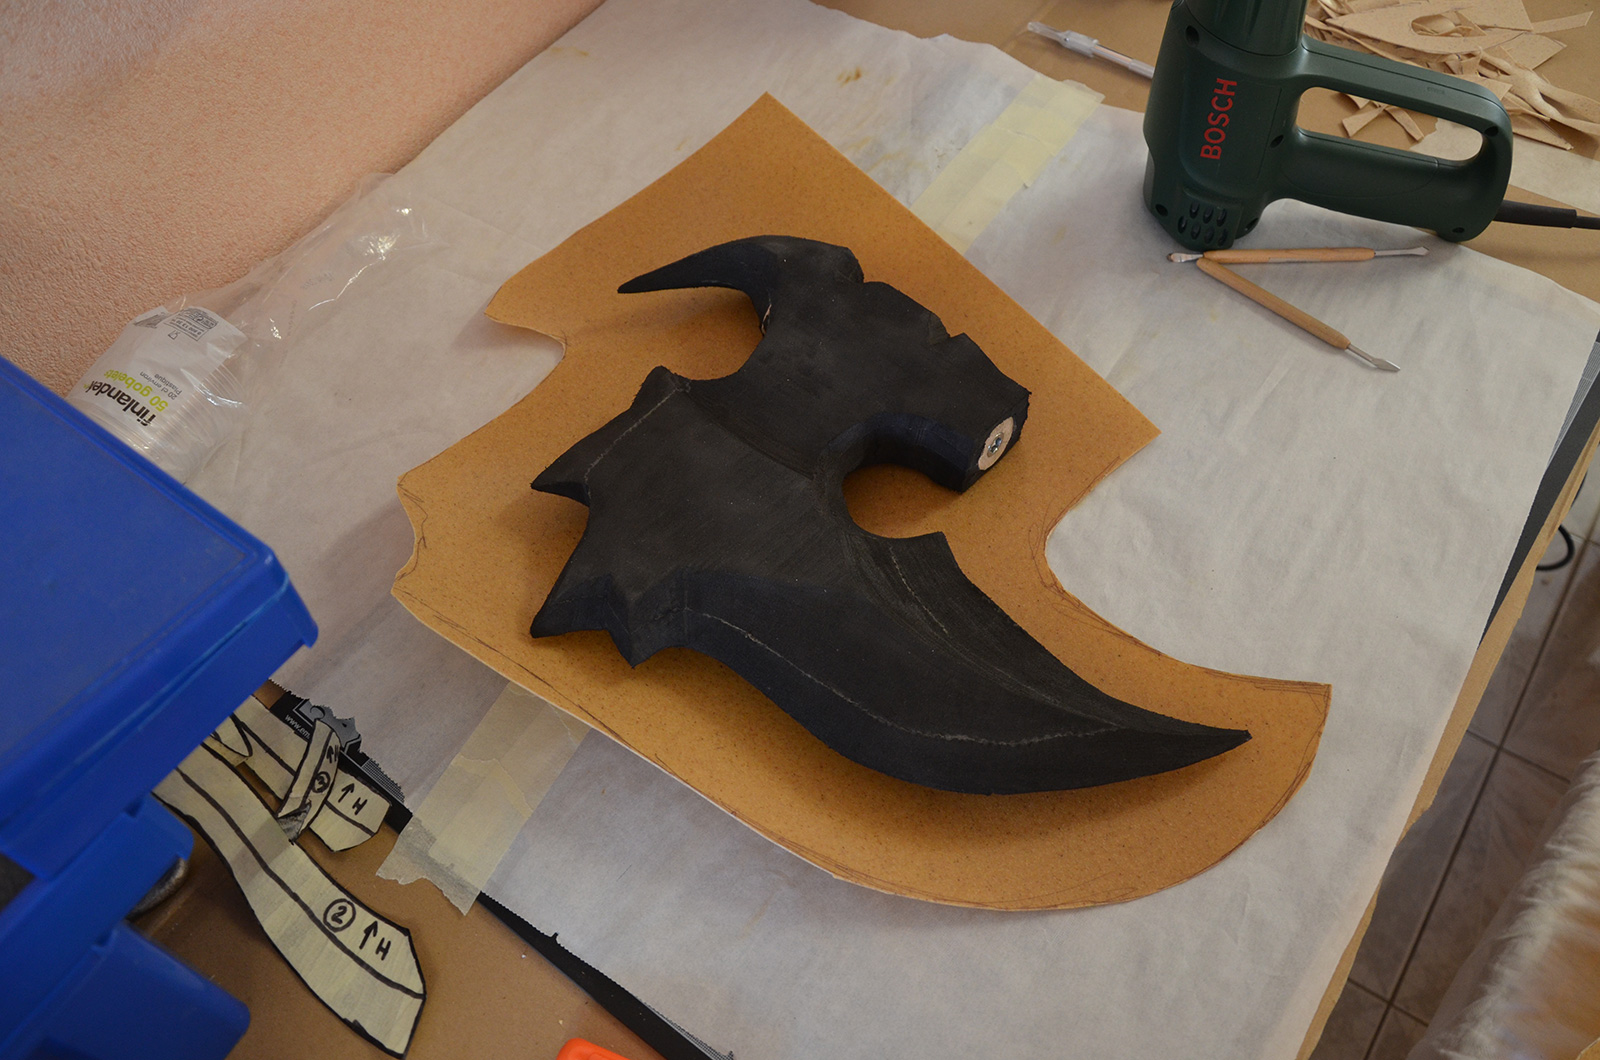
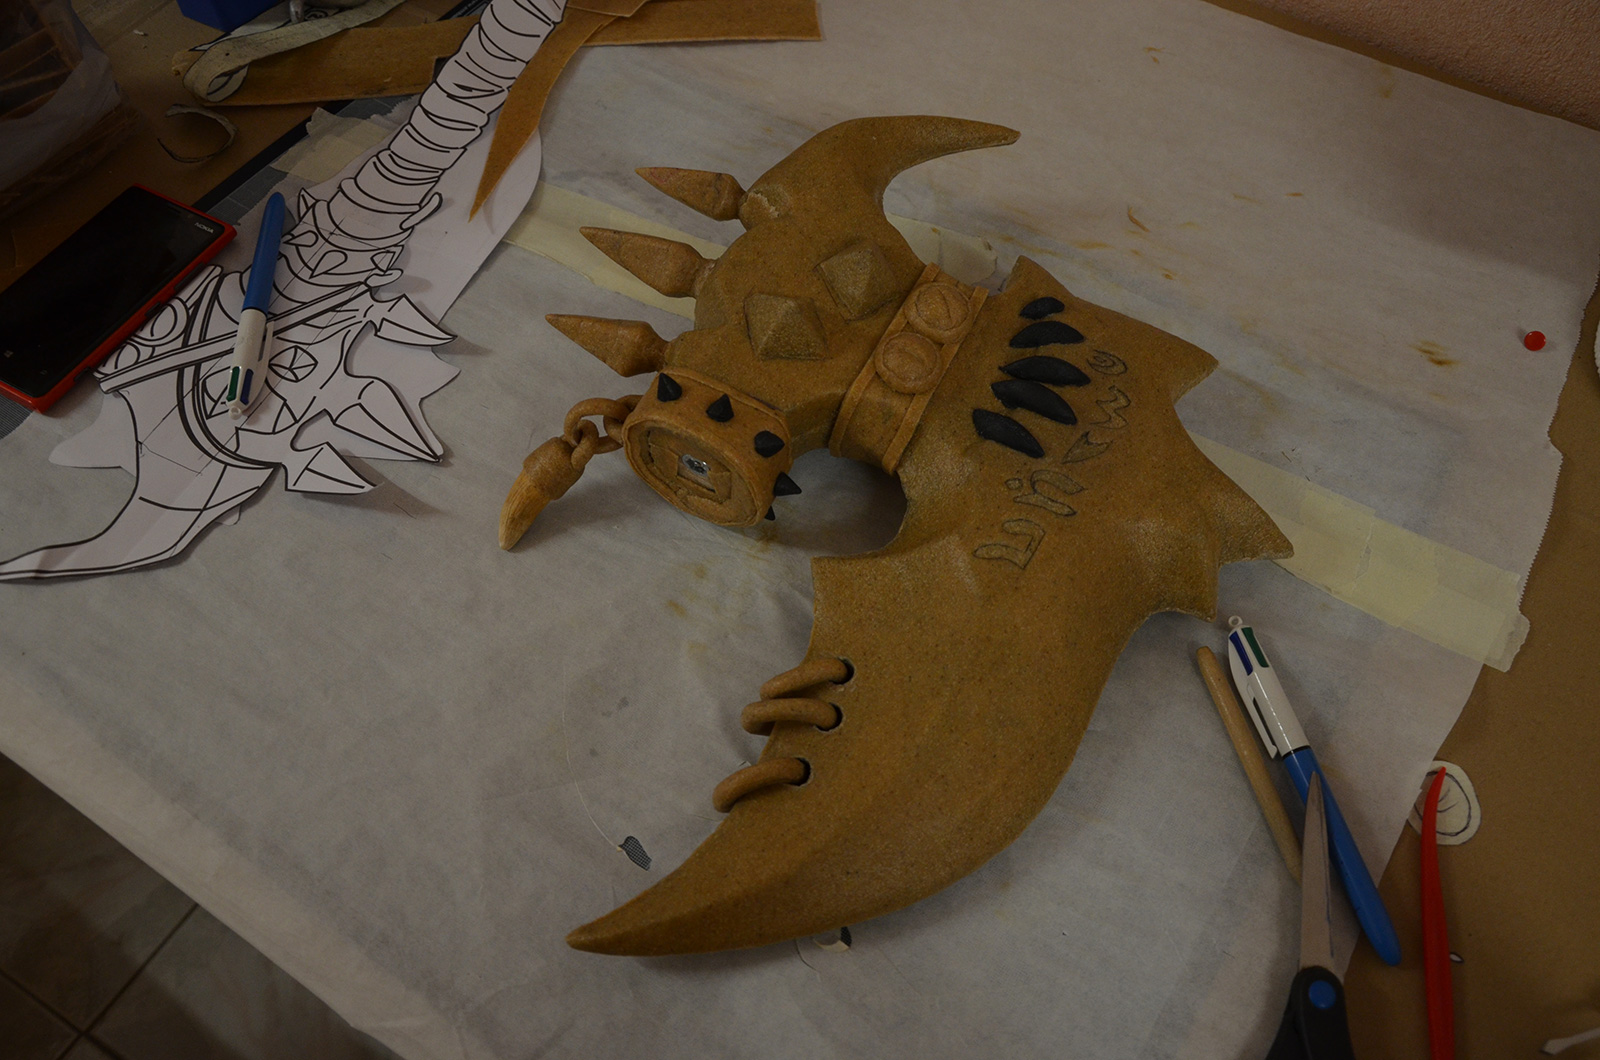
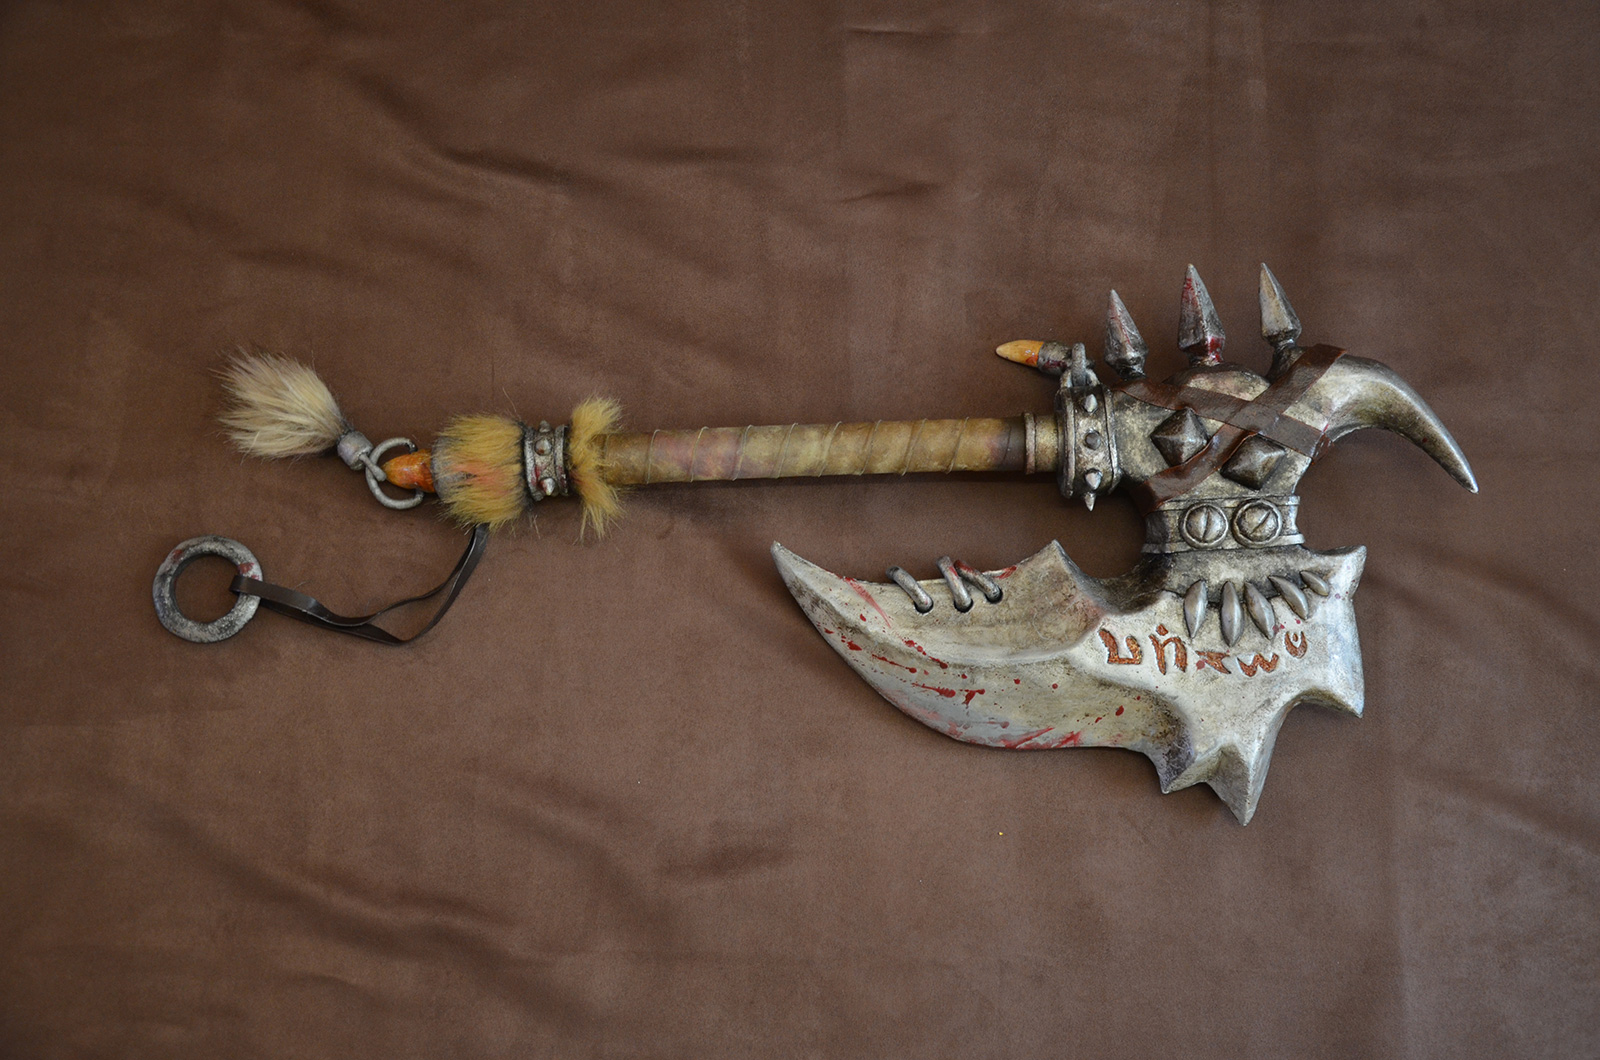
1. Axe
To avoid this article from being to long, the axe making-of is available in this post.

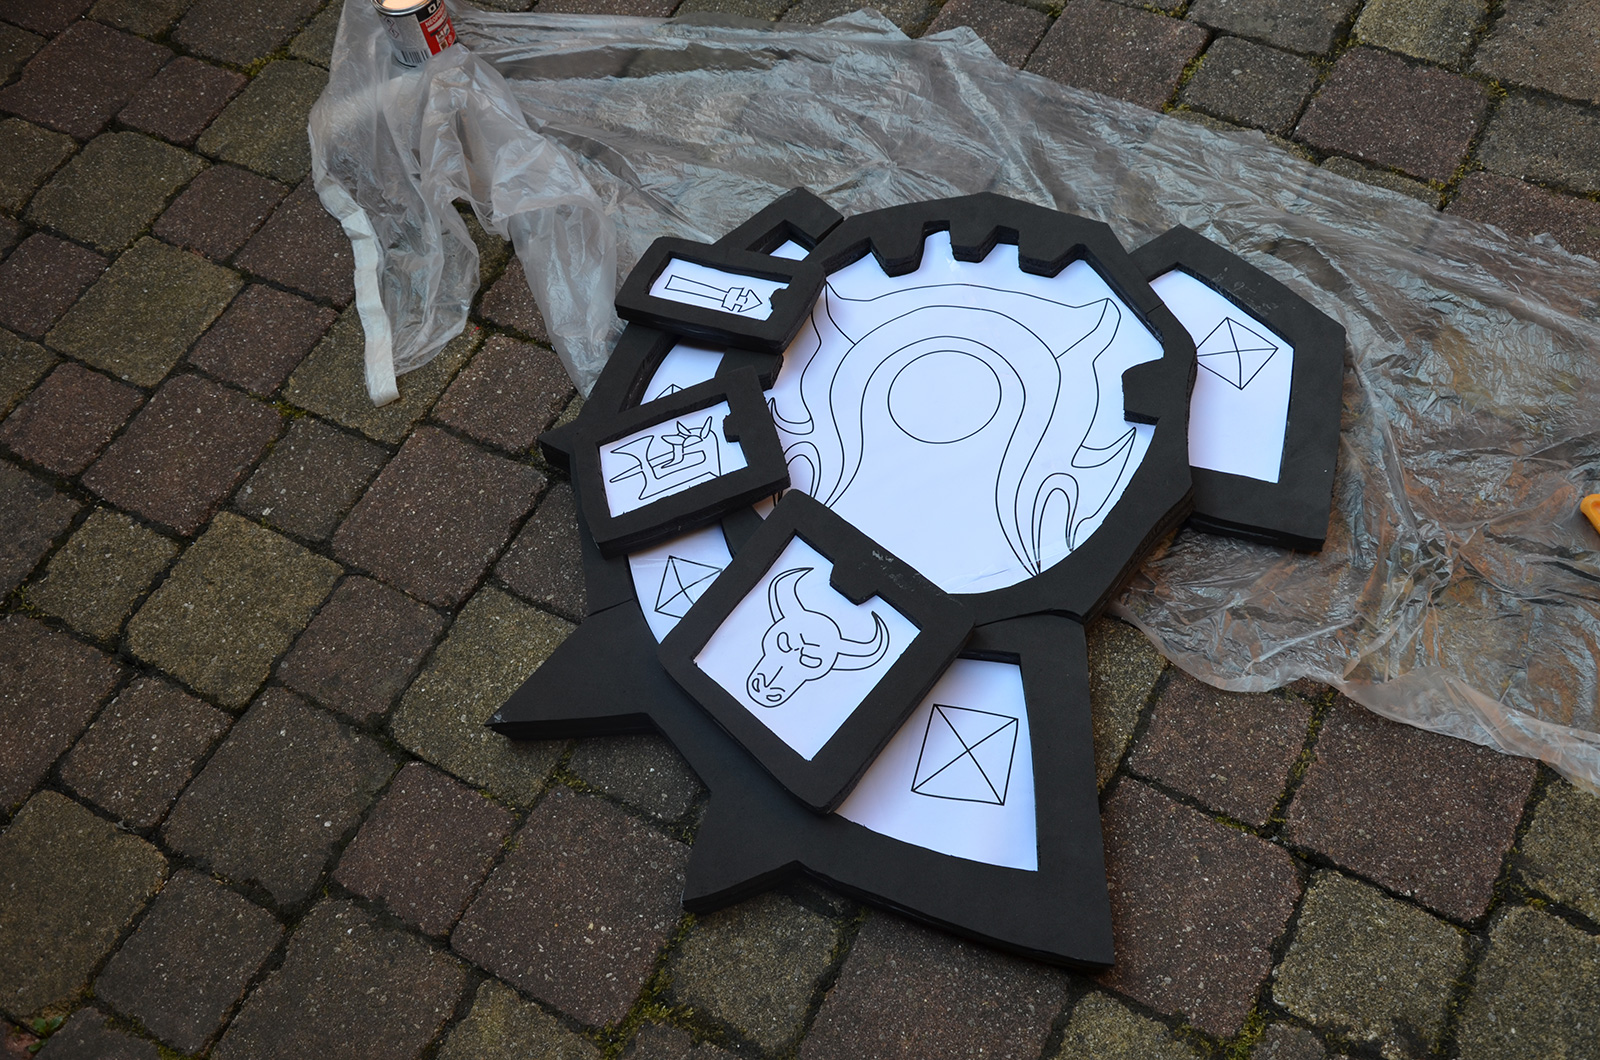
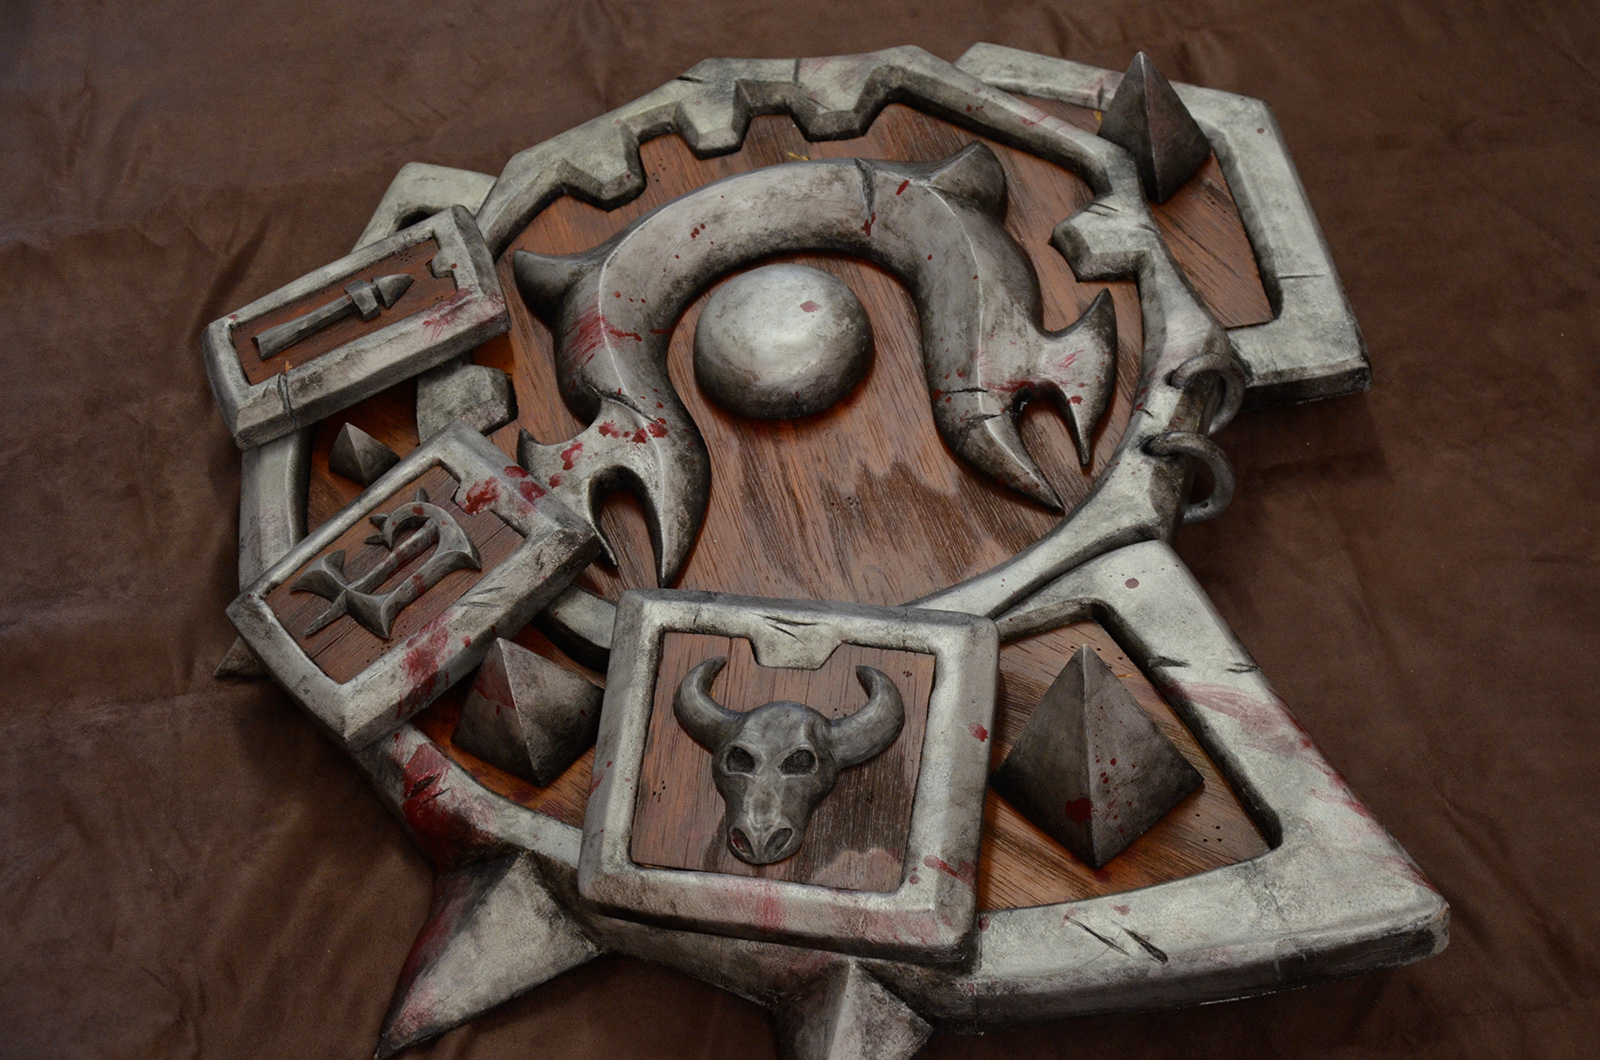
2. Shield
The same for the shield : see the making-of here.

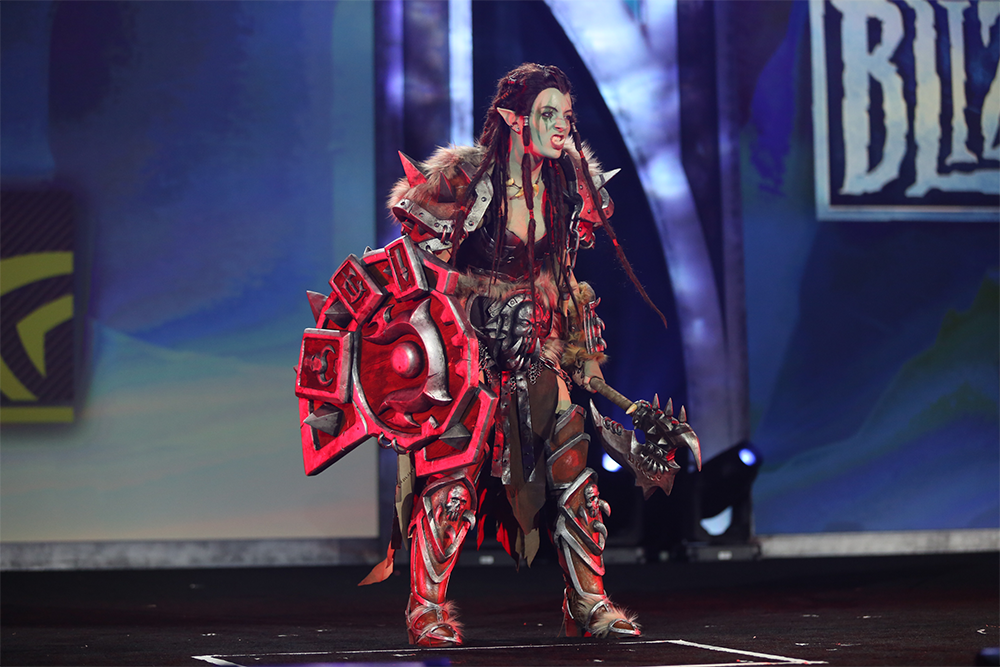
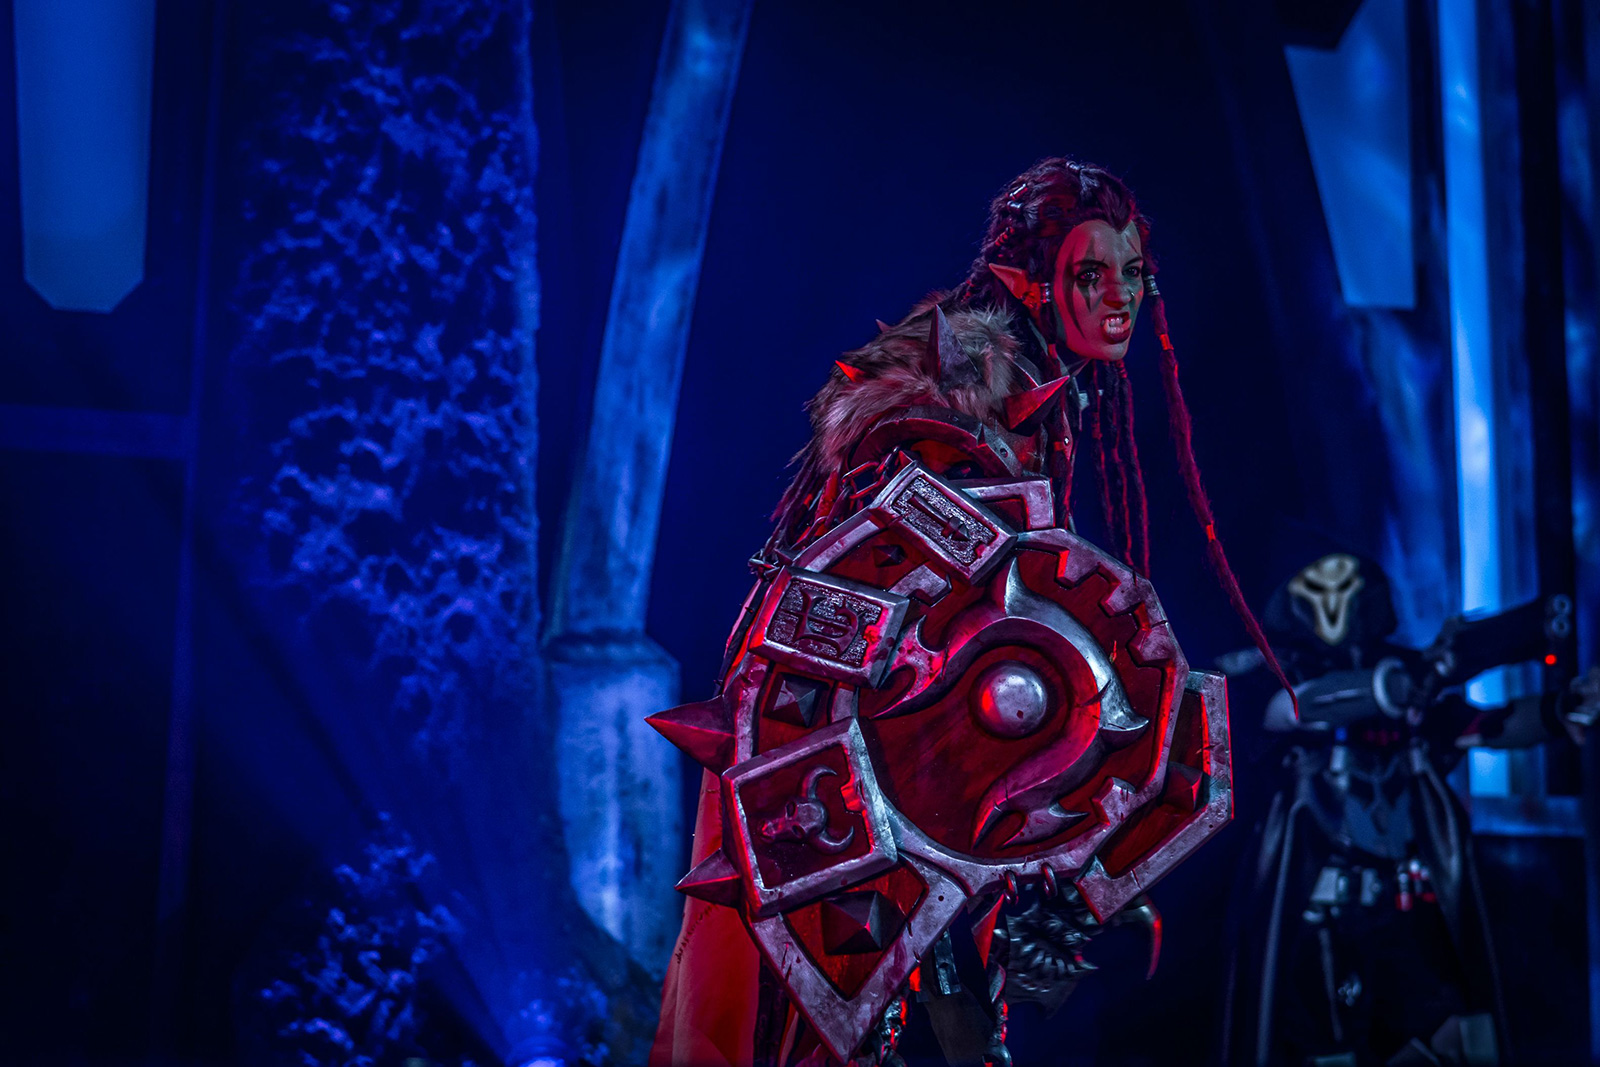
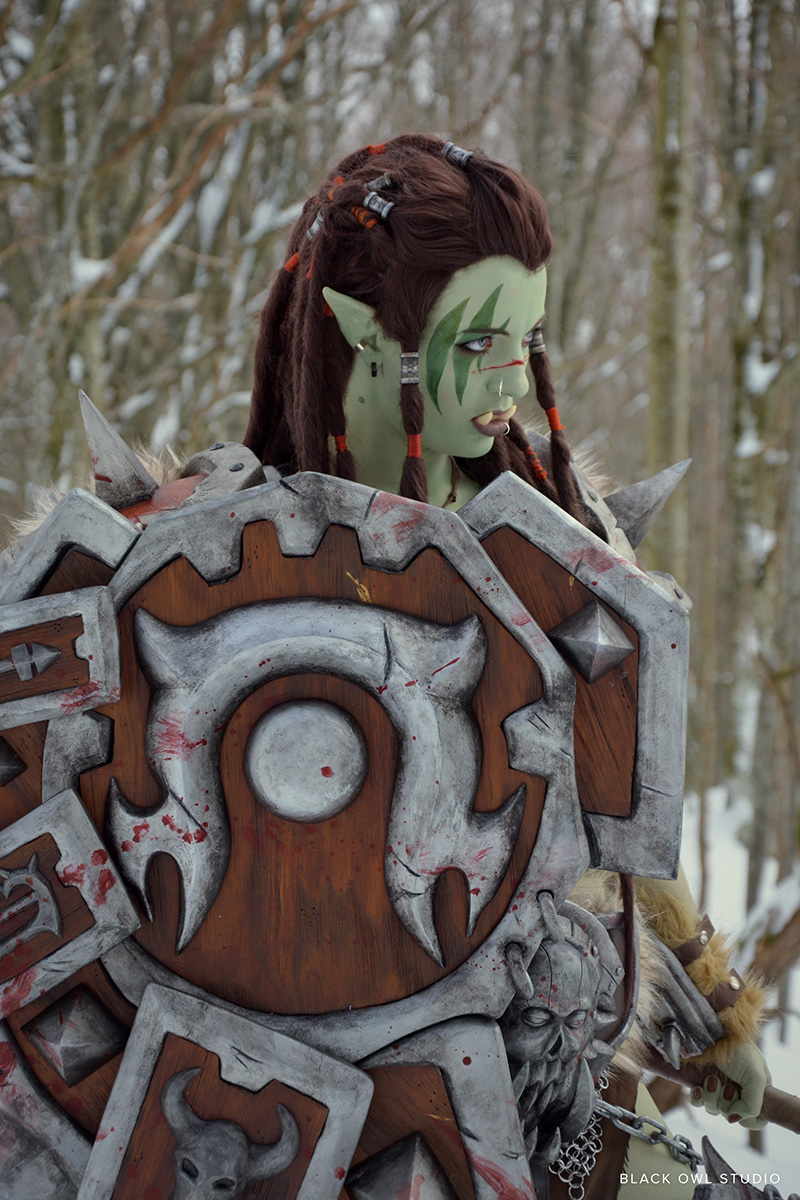
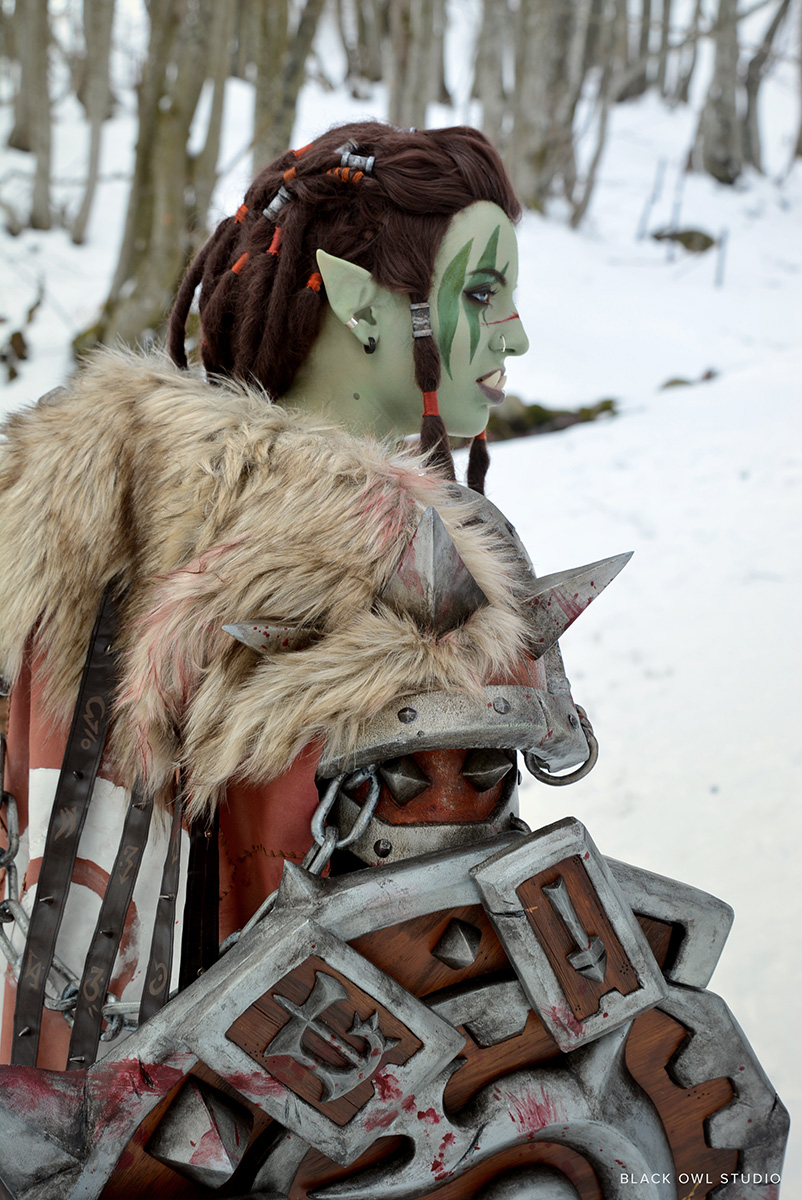
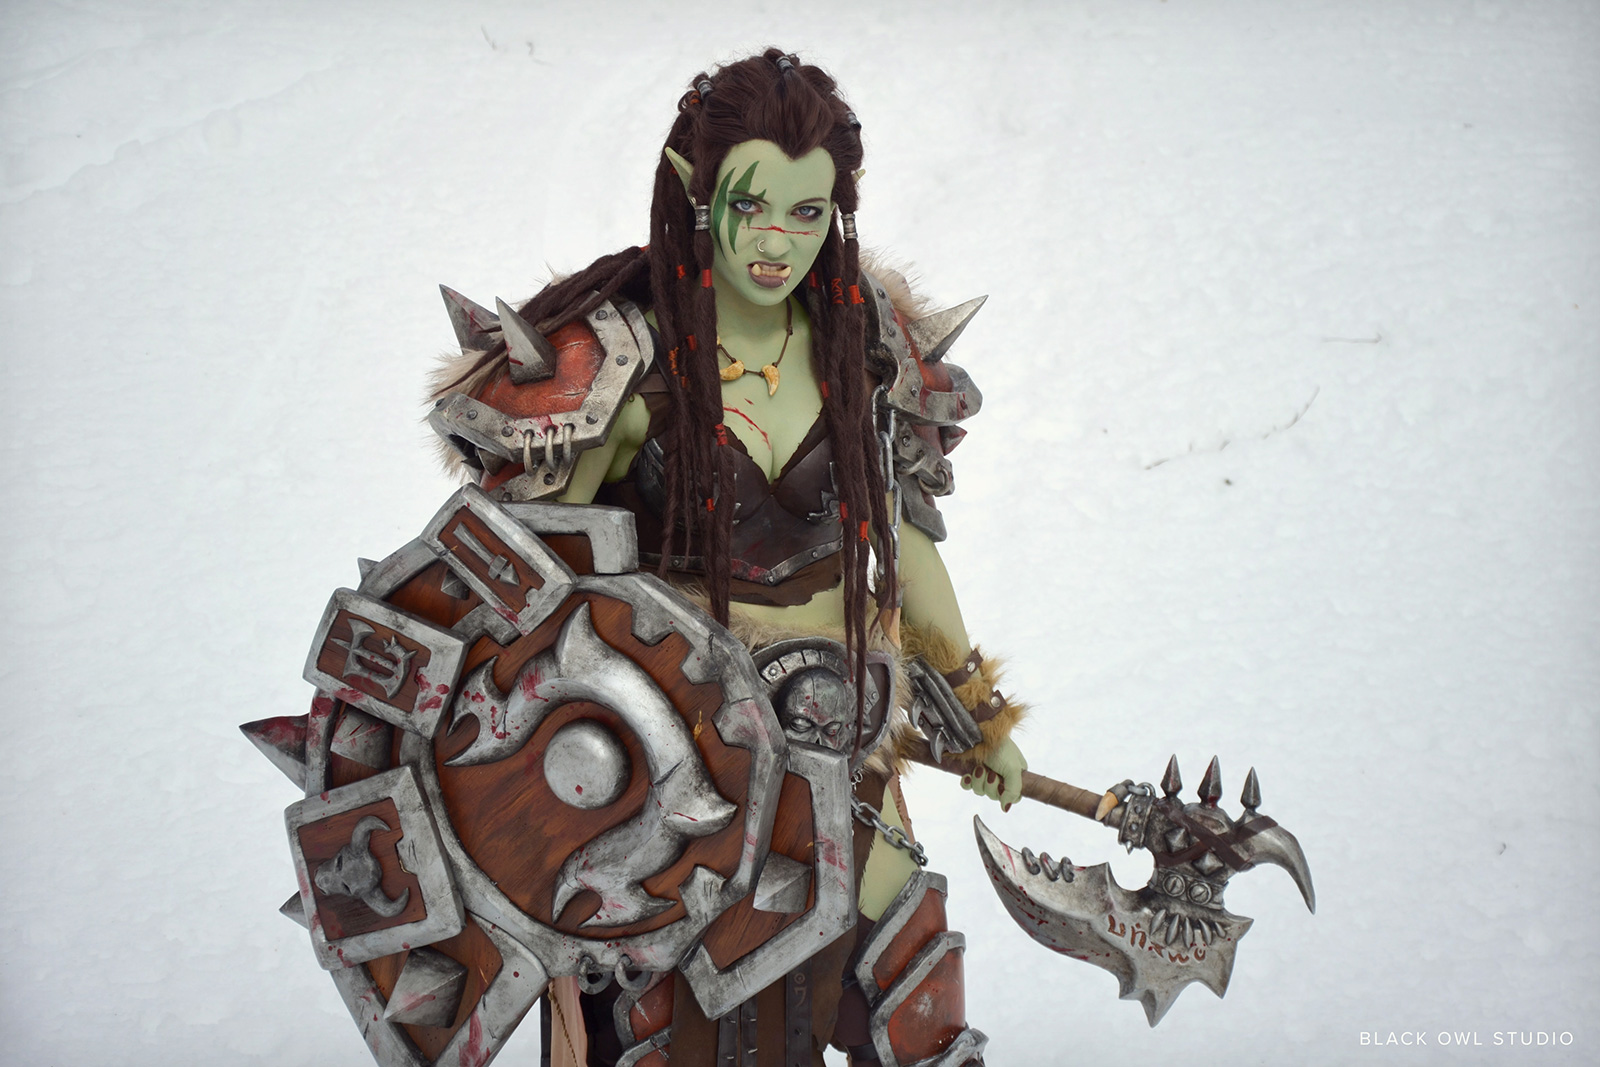
Complete costume
At Blizzcon:

Photo: Blizzard 
Photo: unknown 
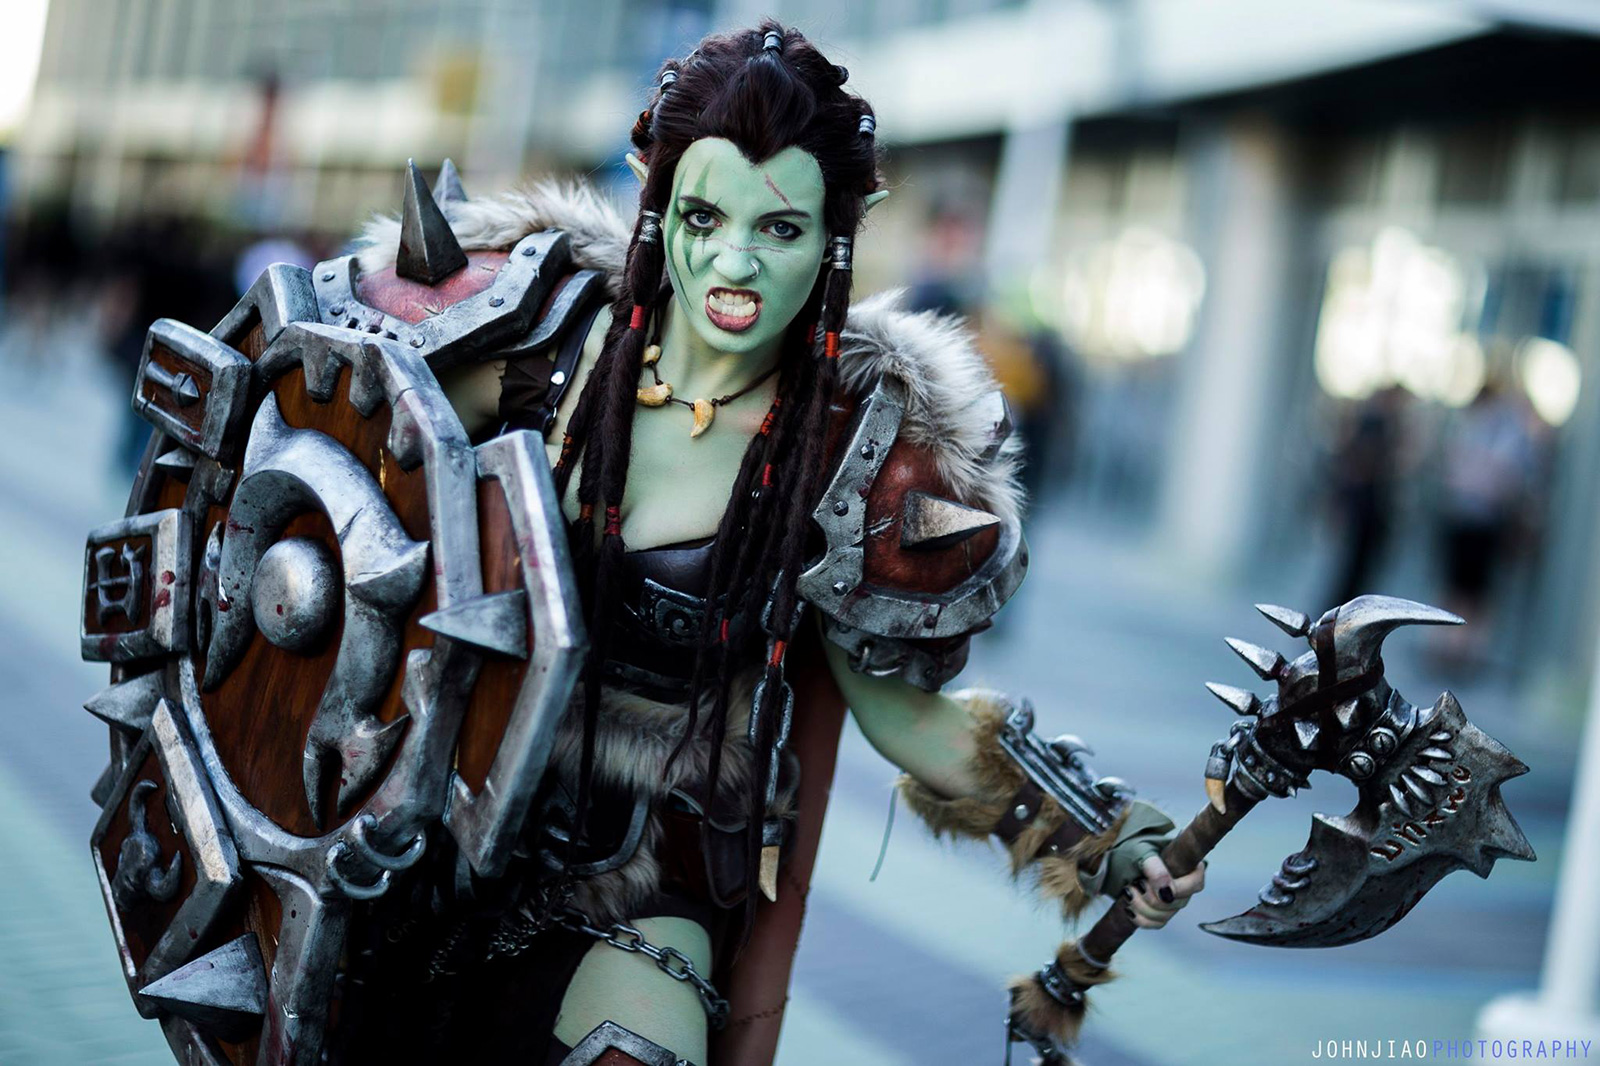
Photo: John Jiao 
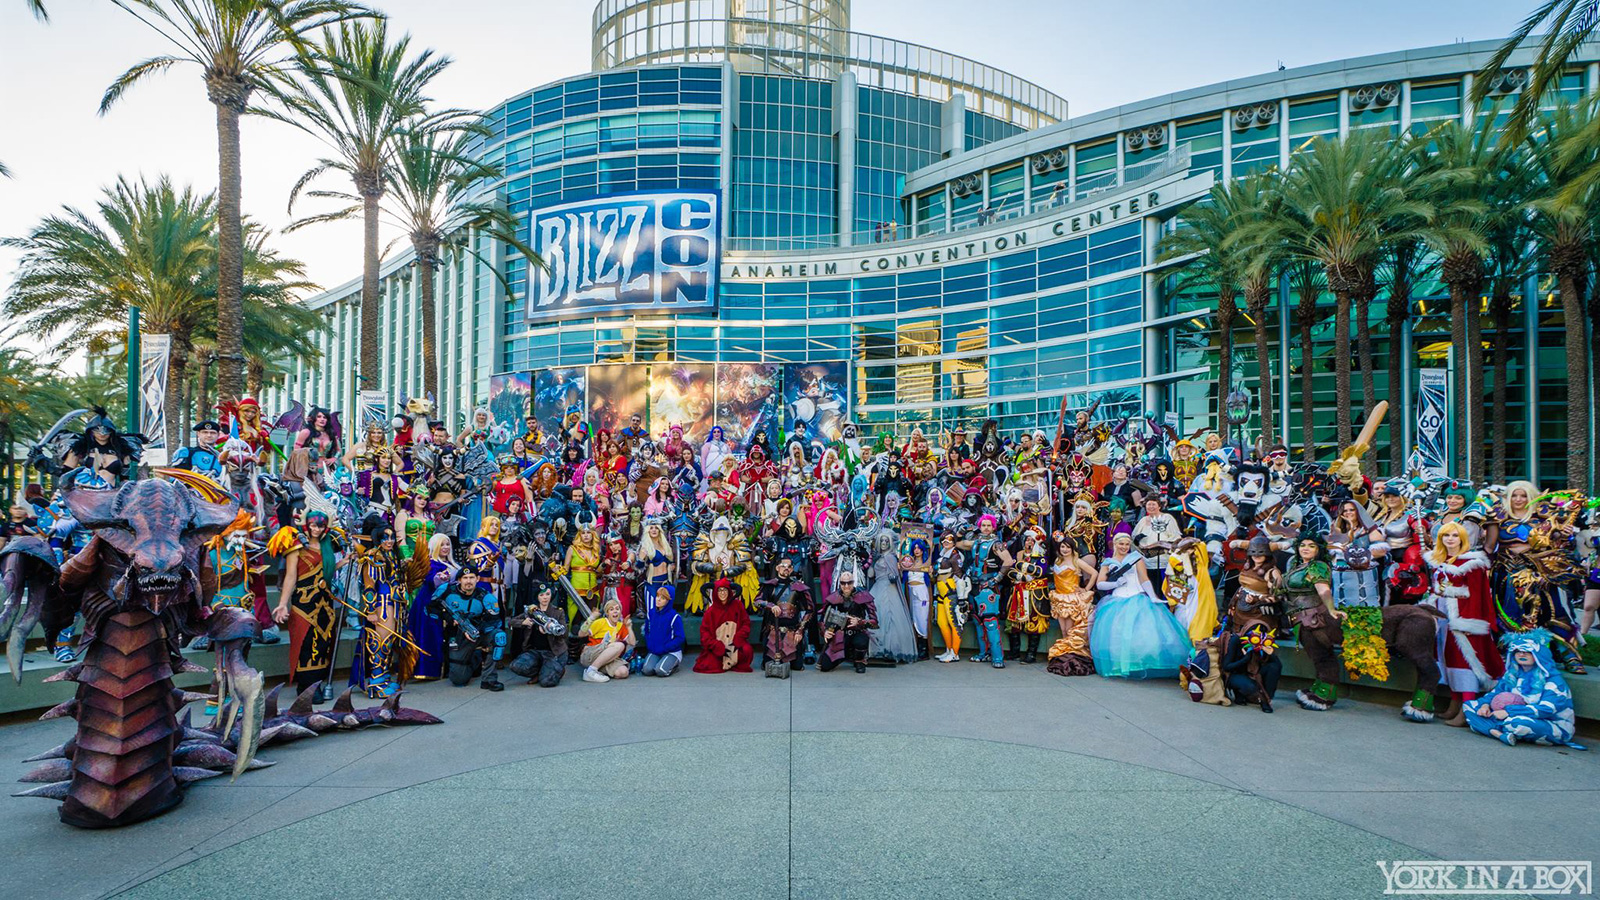
Let’s play «Where’s WaldoWarsong Commander?»… Photo: York in A Box
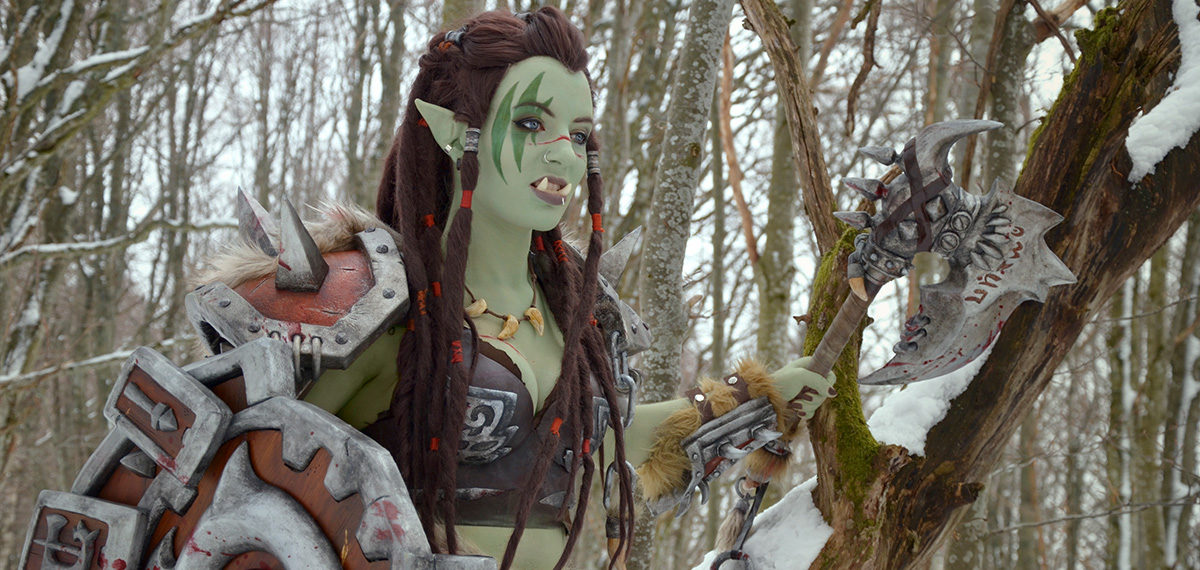
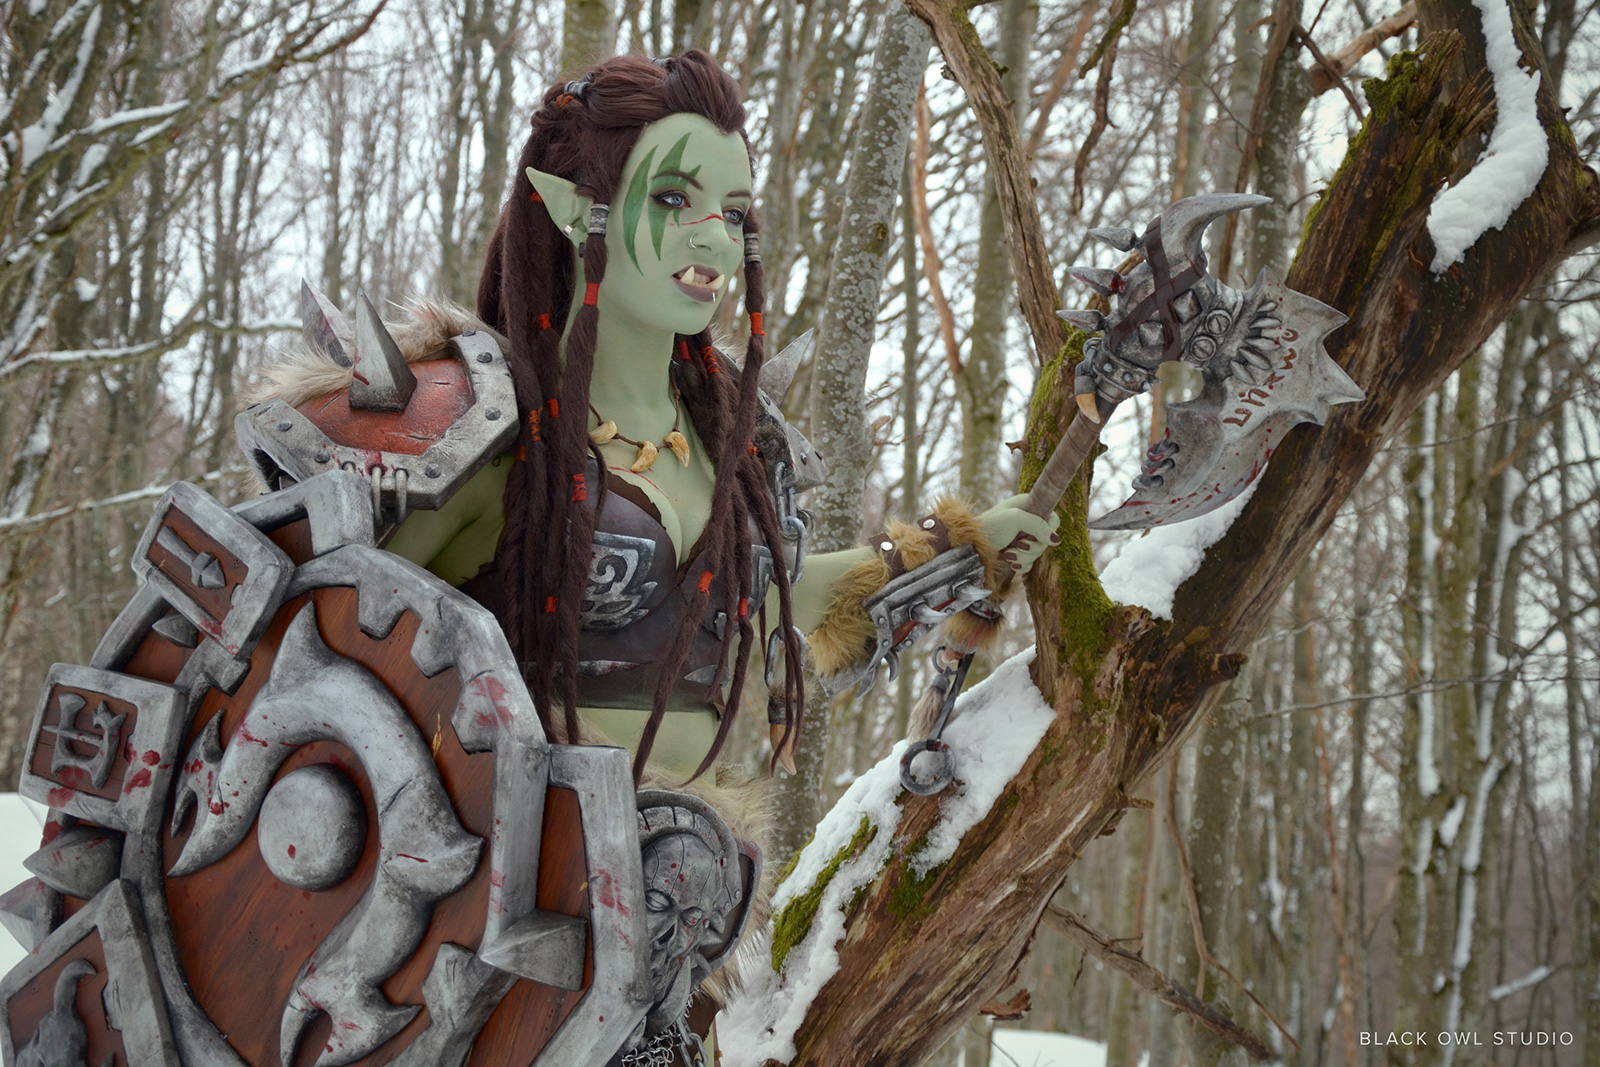
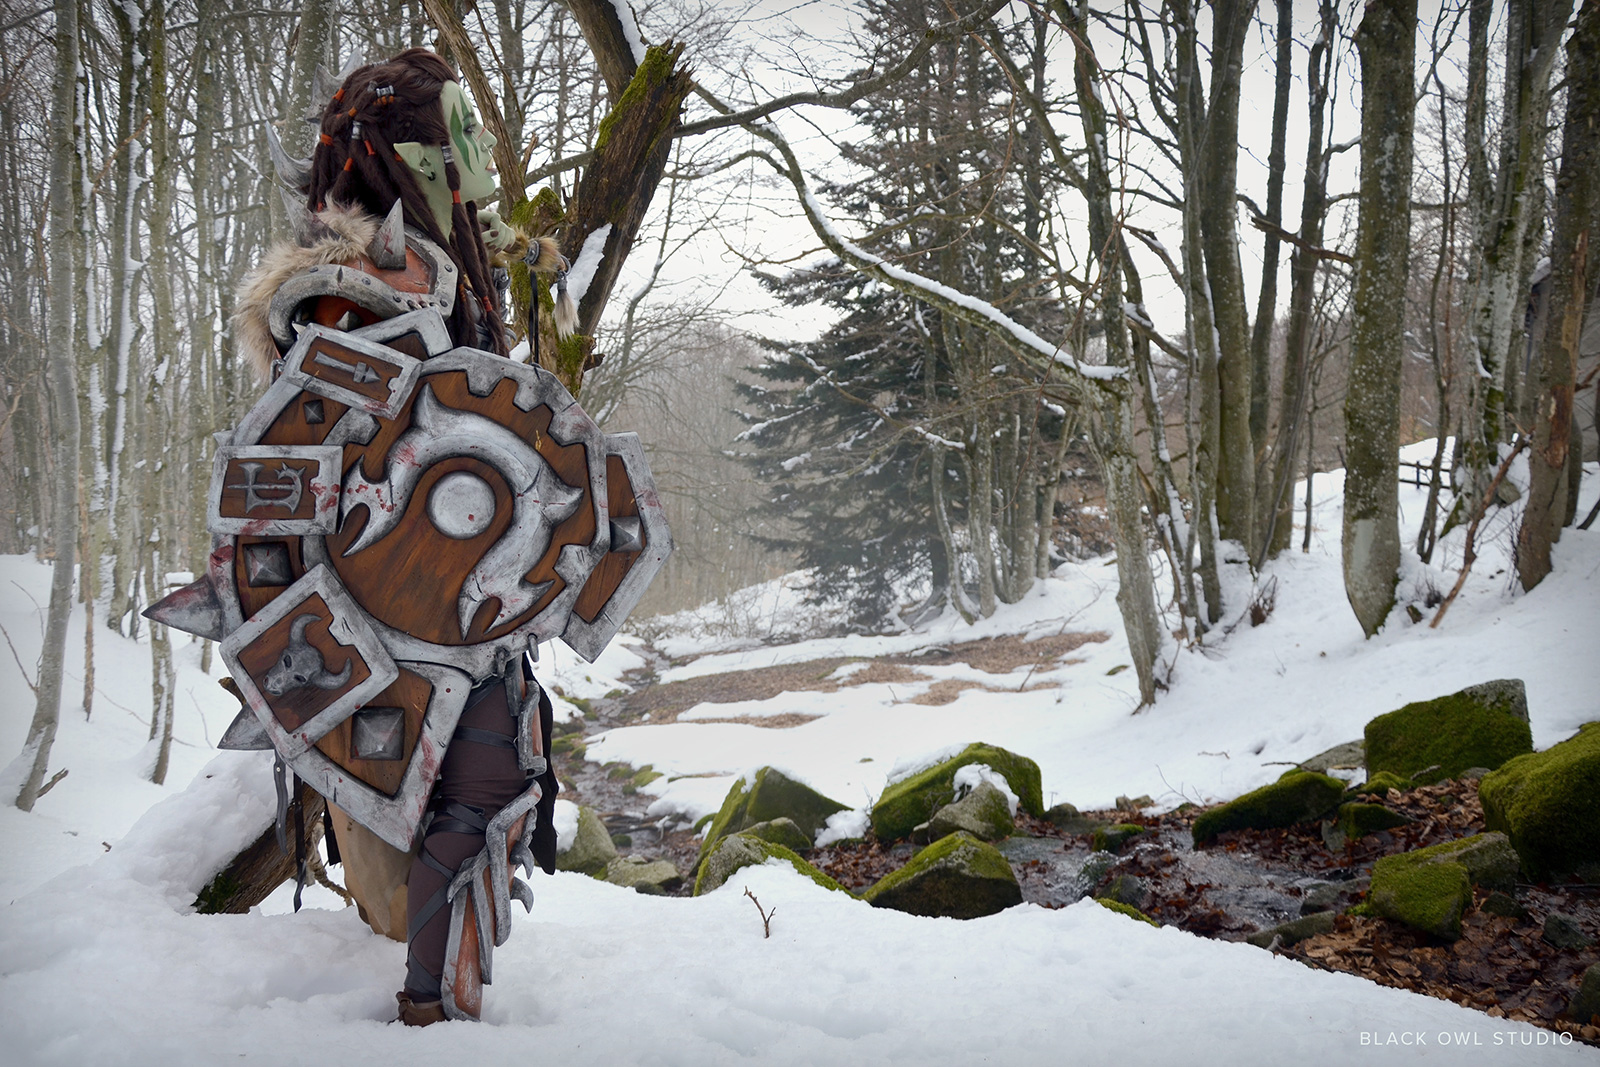
2. Winter Photo Shoot
(Photos by Black Owl Studio)
Comments (0)